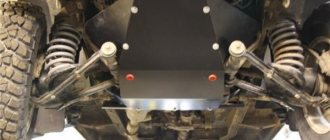
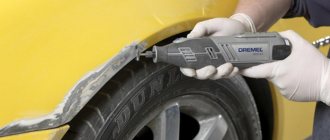
The wheel arches of a car are risk elements. This is due to the fact that they are constantly exposed to atmospheric factors: rain, snow, moisture, chemically active components that are often present on the highway. And also crushed stones and small stones flying from under the wheels of cars. IN As a result, pockets of corrosion arise that lead to the destruction of this part of the car.. The rear arches of the car, consisting of an inner part and an outer wing, are especially affected in this regard.
If we are talking about minor defects, you can get by with cosmetic repairs. If we are dealing with very pronounced foci of corrosion, we will need serious repairs or even replacement of the car's wheel arches . To do this, you can seek help from a car service station or do all the work yourself.
Replacing the rear arch and wing of the car
Self-repair of the rear arches of a car can be performed using 2 methods:
- puttying;
- welding
The first method is used when the wing is not rotten to the point of holes, and we are able to obtain a solid surface by removing all the rust. If the destruction led to the formation of holes, it is obvious that puttying is not enough - you will have to take the welding machine out of the cabinet.
Types, features and stages of repair of the rear wing and arch
Difficulty level 1: polishing scratches and removing dents without painting
Repairing small scratches on a fender or rear fender arch without deep damage to the paintwork takes 30 to 40 minutes. It does not require painting work, so it can be done in the presence of the Customer and can be eliminated by local polishing.
Repairing dents, if the paintwork is not damaged, can take from 20 minutes to 3-4 hours. The time depends on the size of the dent and its location. But most importantly, as a result, the dent on the rear wing and arch is removed without painting.
Stages of work and their cost:
- car wash;
- pulling out dents without painting: from 1000 rubles;
- local polishing of scratches: from 700 rub. up to 1200 rub. per detail;
- quality control of work performed.
Difficulty level 2: local repairs
Deep scratches, chips and dents with damage to the paintwork require more complex repairs to the rear wing and arch. If the damage area is small, then only local repairs will be carried out with maximum preservation of the factory paintwork. The work will take about 4-6 hours.
Stages of work:
- car wash;
- removing the old paint layer;
- restoration of geometry (if necessary);
- applying primer;
- color selection;
- local painting;
- polishing;
- quality control of work performed.
AutoTOTEMM technical centers are focused on minimizing the repair area. Our specialists masterfully work with color, so after restoration and polishing you will not find the boundaries of the treated surface.
Difficulty level 3: a violation of the geometry, which can be corrected using a contact welding machine (spotter) and hydraulic stretchers.
Complex level repairs can take from one to five days. Calculation of the type of work, time and cost is made individually and only in the center when inspecting the car.
Before starting direct repairs, the car is prepared:
- washing;
- dismantling the trunk trim, rear light, fender liner and bumper;
- The entire vehicle, with the exception of the area being repaired, is protected with a special film.
In the most difficult cases, the rear windshield and side window are removed. This is done to ensure that the painting technology is as close as possible to the factory one. Then specialists carry out the following types of work:
- removing the old paint layer;
- restoration of the rear wing geometry using a spotter;
- checking the integrity of factory seams and sealing them if necessary;
- applying primer;
- color selection;
- painting;
- collection of dismantled parts;
- final polishing;
- quality control of work performed.
If necessary, it is possible to restore and paint the internal openings of the rear door, lamp support and bumper, as well as anti-corrosion treatment of parts.
What should a high-quality anticorrosive agent look like?
How to repair car thresholds without welding with your own hands
Until recently, the choice of a motorist in terms of protective auto chemicals was limited to Movil, gun lard and two or three types of liquid mastics. Today the market offers dozens of options for processing body parts. Despite this diversity, they are divided into anti-corrosion agents intended for treating hidden and external surfaces.
The first ones meet the following requirements:
- high adhesive ability to smooth surfaces;
- the ability to create an elastic film after drying;
- chemical neutrality to metal, plastic and paint coatings;
- possibility of introduction into the metal structure;
- fluidity sufficient to fill the slightest cracks;
- homogeneous structure;
- ability to displace moisture and electrolytes from the surface.
Oil compositions fully meet these conditions. They have excellent penetrating ability and remain in a liquid state for a long time, but due to their low strength they are not suitable for outdoor use. In addition, the retail chain also offers products with a wax base. Like oil anticorrosive for cars, they are applied using a spray gun, but they penetrate much less into the steel structure. The advantages of paraffin compositions lie elsewhere. They adhere equally well to paint and rusty metal, forming a protective film through which neither moisture nor chemicals penetrate.
A number of the requirements discussed above are supplemented with several more points if materials for anti-corrosion treatment of the car are used externally:
- Mechanical strength sufficient to withstand the impacts of gravel flying out from under the wheels and the abrasive effects of dust and sand;
- The ability not to peel off or crack under alternating loads and mechanical deformations of the body.
Modern anticorrosive agents extend the service life of body parts and increase acoustic comfort in the cabin. At the same time, they will be able to fully express themselves only when the application technology specified by the manufacturer is followed.
Safety measures during work
The main danger during work is the contact of chemicals with human skin. Epoxy resin and hardeners can cause severe skin irritation. Also, resins and hardeners can cause allergic reactions. When grinding, dust may enter the respiratory tract. During the repair process, evaporation of resin, hardener and sanding dust can cause eye irritation.
How to restore a car body using fiberglass is shown in detail in the video.
Wheel arch repair methods
DIY car repair
When doing DIY repairs, two main methods are usually used:
- Putty;
- Welding.
You can putty only when the arch is not completely rotten. In this situation, you can simply remove the rust and clean the area with putty. However, this cannot always be done. If you have holes as a result of rust, simple putty will not help. In this situation, it will not be possible to cope without a welding machine.
Puttying
So, you can putty only if there is minor damage to the wheel arch.
To putty, you must perform the following algorithm of actions:
- We wash and dry the car;
- We remove all rust from clean metal, only after that we grind the metal;
- We treat the surface of the cleaned metal using a special solution. Reactive primer can be used as a solution. After application, allow the surface to dry completely;
- Acrylic filler is applied to the dried surface. The putty cannot be applied to acidic soil;
- After all the acrylic has dried, it is necessary to apply putty in an even layer. The putty must dry completely;
- After the putty has completely dried, it must be thoroughly sanded. This is necessary so that the surface of the wheel arch looks smooth, which will definitely not be noticeable;
- Areas that need to be repaired must be painted over. This will not only help hide the damage, but also prevent new damage from occurring.
Welding
Welding should be resorted to only when it is no longer possible to cope with conventional putty. Most often this happens when more than simple damage appears in the wheel arch, but holes form. Of course, you can guess that for such a method you must have a welding machine with you; you definitely won’t be able to cope without it.
So, to repair a wheel arch using the welding method, you need to perform the following algorithm of actions:
- First, thoroughly wash and dry the damaged area;
- We remove the affected areas using a grinder;
- Align and clean the edges of the arch;
- We align the patches and create the required shape from them;
- We prepare patches for the inner and outer parts of the arch;
- It is necessary to weld the inner part first, and then only the outer part;
- We grind the weld seams;
- We derive the geometry using putty;
- We sand the dried putty;
- Apply acrylic primer;
- Let's paint it over.
Rules for performing work
To obtain high-quality fiberglass products, the following must be taken into account when performing work:
- the surfaces of the matrix and containers for preparing polymer resin must be clean;
- air bubbles that could not be squeezed out with a roller must be removed by cutting with a blade;
- the tools used (rollers, brushes), as well as containers for mixing components, must be washed with acetone immediately after use to remove residual resin;
- the temperature in the working room should not be lower than 20 degrees to comply with the correct technology for the resin polymerization process;
- polymer components may have toxic fumes, so work must be done in a well-ventilated area;
- Gloves should be used to protect hands;
- Smoking and using open flame sources is prohibited in the premises.
The video below explains well how to make fiberglass with your own hands. As an example, the author of the video makes “eyelashes” for car headlights.
https://youtube.com/watch?v=OaOCk52nhD8
Replacing a car wheel arch with your own hands
DIY leather car seat repair
Let's consider step by step how to replace the wheel arches of a car with your own hands:
- We order the production of a new arch from any turner. The material you can choose is some light alloy like aluminum.
Replacing a car arch with your own hands
We use a jack to lift the car from the side where we plan to work. We remove the wheel so that there is no interference. We disconnect the arch from the suspension, floor, partition and trunk. We clean the surface from the paint layer to bare metal. We try on a new product and make a mark along which we will cut off the one that requires replacement. After the cut, we install a new product, securing it by welding. We start cooking in the center, then move to the edges. It is important to pay attention to the fastening in the threshold area, where the main loads will occur. We grind the welding seams and apply a special primer. After priming, use putty to level all surfaces. We sand the putty and apply acrylic primer. At the end we paint the installed product.
At this point we can consider the work completed if you have the skills to operate a welding machine. It won't cause you any particular difficulties.
The arch is welded over the wing with an overlap
Types of fiberglass fillers
DIY bumper repair
The term “fiberglass” is derived from the English. “FiberGlass” literally means “fiberglass”.
However, everyday speech has transformed this term as the name of glass-filled plastics, in which various glass fiber materials serve as fillers.
By analogy with reinforced concrete, glass fibers act as reinforcement, ensuring the rigidity of the structure and the strength of the SPM, and synthetic resins bind the filler threads into a single matrix, creating a monolithic structure.
The raw material for the production of glass fibers is glass scrap (cullet), the sources for which are:
- broken window glass and glass containers;
- rejected or broken products created under production conditions.
Glass waste is 100% recyclable, which proves the priority of recycling cullet to save primary raw materials and maintain a clean environment.
Broken glass does not fall into the soil and does not pollute landfills.
Virgin glass fiber is formed into a continuous glass filament by drawing elementary fibers called filaments from molten recycled glass raw material.
After further processing, semi-finished products are formed from the filaments:
- complex threads;
- glass rovings are strands of untwisted fibers (analogue of roving).
In this form, glass fiber is practically not used as a filler.
The resulting semi-finished products are subjected to textile processing to create products that will be directly used as a filler in the molding of fiberglass products.
The main types of fiberglass filler are:
- twisted products - cords, plaits, twines;
- woven mesh and special structure;
- fabrics – ribbons, mats, canvases.
Rivets
This method not only repairs large holes in the car body, but also replaces parts (fenders, aprons) without welding. In terms of reliability, it is not inferior to welding. It is recommended to install rivets in an inconspicuous place. Since there is no splash of molten metal during operation, like welding, it is often used to repair car floors.
The riveter required for the job can be bought in a store (costs approximately 500 rubles). The technology is simple:
- The patch is cut so that it overlaps 2 cm around the edges of the hole.
- By attaching it to the body, it is given the desired shape.
- The locations of the holes for the rivets are marked.
- After drilling the patch with a drill according to the diameter of the rivets (4 - 6 mm), it is advisable to countersink the edges of the holes so that it fits more tightly to the surface of the car body.
- Having applied the patch again, the center of the first hole is marked and drilled.
- After riveting it and leveling it, the patches are tapped and the remaining holes are drilled in place.
- To ensure a tight fit of the patch to the car body, rivets are fastened from the center to the edges.
- To prevent moisture from getting inside, the joint around the perimeter and rivets is coated with sealant.
Fiberglass patch
You can also repair a hole in a car body using fiberglass and epoxy glue. Professionals recommend following the following sequence of repair work:
- Clean the edges of the hole using a grinder or a suitable tool.
- Treat the cleaned areas with an anti-corrosion agent or a rust converter.
- Cut 2-3 patches from fiberglass. It should be noted that the dimensions of each patch should be 30-40 mm larger than the dimensions of the hole and the previous patch.
- Saturate the surface of each patch with epoxy glue. Thanks to this, it will be possible to glue them tightly, preventing the possibility of liquid and moisture leaking from the outside.
- Glued patches are attached from the inside of the body using epoxy glue.
- After the glue has completely dried, cover the surface of the patches with primer or putty.
- At the last stage of repair work, the primer (putty) must be carefully cleaned with sandpaper.
By using one of these methods, you can get rid of holes in the body quickly and inexpensively.
Welding method
If the surface is so corroded that puttying is not possible, you will need welding. Obviously, to carry out work of this kind with your own hands, you must have a welding machine and have the appropriate skills in handling it. So, repair by welding looks like this:
Carefully wash and dry the car. Using a grinder, we cut off all the affected areas of the wheel arches. Align and clean the edges (for making patches, it’s good to get arches that have been used and are no longer in use). We cut out suitable patches and bring them to the shape we need in order to obtain the correct wing configuration.
Rear arch repair using welding
We prepare such patches for the inner and outer parts of the arch. We spot weld the inner patch first, then the outer one. It should be recessed compared to the rest of the surface. Carefully sand the weld seams. Using putty we derive the geometry. We sand the putty on top. Apply a layer of acrylic primer. We paint the repaired area of the car.
Types of fenders
Wheel arch extensions are presented on the modern market in several variations:
- universal. These are rubber pads sold in rolls. The use of such parts has no restrictions on the make or model of the vehicle - when installed, they can easily be adjusted to any arches. But despite the excellent protective properties, universal arch extensions do not have an elegant design and significantly worsen the appearance of the car, which is why they are most often purchased by SUV owners;
- plastic. They are attractive, but are produced for a specific model. Fixation to the body is carried out using self-tapping screws. A significant disadvantage of plastic wheel arch extensions is the low level of protection and fragility, so they are most often used for beauty;
- fiberglass. The pads are quite durable and look like plastic ones. Most often they are made by hand or made to order;
- fiberglass. They are characterized by excellent appearance, as well as good protective qualities. They are quite expensive. In addition, the installation of these elements is a labor-intensive and complex process. To install such a wheel arch extension, you must first clean its surface and apply a layer of putty. After this, the trim is aligned with the car body, secured with self-tapping screws and painted with the appropriate shade of paint.
Wheel arch extensions are presented on the modern market in several variations
Puttying
So, if we are talking about minor damage, the putty method is used. Step by step it looks like this:
- It is necessary to thoroughly wash and dry the car.
- Remove all bare metal rust from the damaged areas and sand them thoroughly.
- Treat areas with reactive primer and allow the surface to dry.
- Place acrylic filler on top of the reactive layer - under no circumstances should putty be applied to acidic primer.
- After the acrylic has dried, apply putty and wait for it to dry.
- Thoroughly sand the dried putty, gradually reducing the grain size of the abrasive. Thus, level the surface, preparing it for painting.
- Paint those areas of the car that have been repaired.
Popular manufacturers
Foreign and Russian companies are engaged in the production of specialized car fender flares. The most famous and reputable manufacturer is Bushwacker (USA). The plant produces a wide variety of additional accessories for cars. Bushwacker products are of high quality and resist the destructive effects of salts and acids, as well as ultraviolet rays. A distinctive point: the company includes fastening elements with its products.
How to restore a rotten arch
Before working with the welding machine, you need to disconnect the power supply, that is, the battery. The problem we have is this: we need to heal the corroded arch.
First of all, we clean everything with an emery machine and cut out the damaged area with a grinder.
After we cut out the damaged area, we treat everything with acid so that there is no more corrosion. We make blanks, cut out patches. Made from food grade stainless steel 0.8 thickness.
If it is not convenient or difficult for you to make a patch according to the diameter, you can use cardboard for this. Apply and press along the perimeter of the cutout. You will be left with a mark, cut it out and apply it to the metal to cut out a patch according to your cardboard model. For in-depth processing, you will also need a Movil, a hose with a spray nozzle in all directions.
After all the processing, take the first patch and insert its hole where the cutout was. In order to be able to safely operate the patch, it is necessary to weld an unnecessary screwdriver or a metal rod.
Thanks to the fact that you weld it to the patch, you will have the advantage of not only adjusting it, but also pressing it tightly to the metal. And so we weld all the patches.
Then it is necessary to clean everything so that the surface is even and when painting everything does not stick out. We clean it with an angle grinder and then go through it with a special iron brush for an angle grinder.
We clean everything inside the seams with a brush so that there are no deposits and in the future it does not oxidize or become covered with rust. And just to be sure, we go through the Circoram again. Next you need to take 120 sandpaper and apply marks. After applying the marks, everything must be degreased.
After it dries, cover it with baxite primer. Once the primer has dried well, re-apply the marks with 120-grit sandpaper. Then apply a thick layer of putty.
We apply the putty, pushing it tightly under the seam, and tightly without air. Afterwards we sand it with a die so that it is smooth and without holes.
We apply universal putty and smooth out the marks from 120-grit sandpaper and the remaining unfinished parts, pores, and edges.
We wait for the putty to dry and begin sanding. We sand it with 240 sandpaper. At the end, if there are any pores left, we go through it again with putty and sand it.
Then we apply several layers of primer, letting it dry for 5 minutes between coats.
The end we will have is painting, paint it according to color, and your arch is ready.
voice
Article rating
Roving spraying
The process is technologically advanced and cannot be carried out without special tools. The essence of the method is that glass thread (roving) is crushed, mixed with resin and applied to the surface. The grinding gun prepares the composition and delivers it under pressure in the form of a finely dispersed substance. But after application, rolling with a roller is required, which ensures the removal of air bubbles.
Useful to know > Basic principles of working with polyester resin, its features
The simplicity of the technology is visible only theoretically. Only “on paper” the essence of the method was contained in a couple of lines. In fact, the method has not become widespread, and the point is not in the presence of a special tool. The reason lies in the excessive consumption of epoxy resin. The product itself becomes massive, and in the absence of interlacing of fibers, the strength of the layer leaves much to be desired.
Subaru Impreza 1999, 125 l. With. — body repair
Subaru Impreza, 2005
I have blog posts on this car about the life of the repaired arches. The biggest problem is to properly sandblast the inside. When sandblasting, the person did not remove the wheels in order to crawl up properly, so he could not process the arches properly. the second reason is the wrong soil. I was told epoxy. in fact, there was some kind of simple problem (I already found out about this later when, a few weeks later, I came to the painters and drove the car in wet weather with the arches primed). third - the arches were not completely processed. in places where the molding was not sandblasted. therefore, after a year, dots (small) appeared in places where they had not sandblasted from below near the moldings. and after 2 years a bubble appeared in the sandblasted area. Every year a little swelling was added around the holes. As far as I know, the next owner opened the arches last summer because he was welding the rear side members and took the arches for company because they had lost their presentation.
How to properly replace and repair wheel arches with your own hands?
The wheel arches of a car are risk elements. This is due to the fact that they are constantly exposed to atmospheric factors: rain, snow, moisture, chemically active components that are often present on the highway. And also crushed stones and small stones flying from under the wheels of cars. As a result, pockets of corrosion appear that lead to the destruction of this part of the car. The rear arches of the car, consisting of an inner part and an outer wing, are especially affected in this regard.
If we are talking about minor defects, you can get by with cosmetic repairs. If we are dealing with severe pockets of corrosion, we will need serious repairs or even replacement of the car’s wheel arches. To do this, you can seek help from a car service station or do all the work yourself.
Replacing the rear arch and wing of the car
Self-repair of the rear arches of a car can be performed using 2 methods:
- puttying;
- welding
Puttying
So, if we are talking about minor damage, the putty method is used. Step by step it looks like this:
- It is necessary to thoroughly wash and dry the car.
- Remove all bare metal rust from the damaged areas and sand them thoroughly.
- Treat areas with reactive primer and allow the surface to dry.
Car rear arch putty - Place acrylic filler on top of the reactive layer - under no circumstances should putty be applied to acidic primer.
- After the acrylic has dried, apply putty and wait for it to dry.
- Thoroughly sand the dried putty, gradually reducing the grain size of the abrasive. Thus, level the surface, preparing it for painting.
- Paint those areas of the car that have been repaired.
Welding method
If the surface is so corroded that puttying is not possible, you will need welding. Obviously, to carry out work of this kind with your own hands, you must have a welding machine and have the appropriate skills in handling it. So, repair by welding looks like this:
Replacing a car wheel arch with your own hands
Let's consider step by step how to replace the wheel arches of a car with your own hands:
We order the production of a new arch from any turner. The material you can choose is some light alloy like aluminum. Replacing a car arch with your own hands
We use a jack to lift the car from the side where we plan to work. We remove the wheel so that there is no interference. We disconnect the arch from the suspension, floor, partition and trunk. We clean the surface from the paint layer to bare metal. We try on a new product and make a mark along which we will cut off the one that requires replacement. After the cut, we install a new product, securing it by welding
We start cooking in the center, then move to the edges. It is important to pay attention to the fastening in the area of the threshold, where the main loads will occur. We grind the welding seams and apply a special primer. After priming, use putty to level all surfaces. We sand the putty and apply acrylic primer. At the end we paint the installed product
At this point we can consider the work completed if you have the skills to operate a welding machine. It won't cause you any particular difficulties.
Conclusion
The situation can be corrected by various types of repairs, as well as by replacing the arches if repair is no longer possible. To cope on your own, you will need certain skills in using an angle grinder, a welding machine, a grinder and a spray gun. In this case, you can easily cope with the task and fix the problem.
Higher education: Chita State University, Institute of Technological and Transport Systems, specialty - cars and automotive industry. Repair of passenger cars of domestic and foreign origin. Chassis repair,…
okuzove.ru
Which is better: liquid or plastic fender liners
“Liquid fender liner” is a coating of the wheel arch with a special composition. After treating the surface with a locker, the protective layer is up to 2 mm thick (depending on how many times the product is sprayed). Main advantages:
- in the form of an aerosol or mastic, the “liquid fender liner” penetrates into all hidden cavities of the wheel arch;
- preserves a possible source of corrosion;
- forms a sufficiently strong film to protect the body from stones and gravel.
The plastic fender liner is a removable part that is installed in the arch, attached to the body with self-tapping screws or glued. Advantages of plastic:
- not subject to corrosion;
- low cost;
- large assortment for all models.
The disadvantages of plastic elements are not the characteristics of the material, but the fact that under the fender liner the body can still begin to rot if the adjacent parts are not completely anti-corrosion treated. In this case, the plastic is not treated with anticorrosive.
Varieties
The following materials are used for the production of mudguards:
- plastic. But according to experienced drivers, this material is not strong enough. Plastic wheel arch extensions perform a decorative rather than a protective function;
- fiberglass. It has great strength, but the cost is usually high. They are quite difficult to install;
- fiberglass. It is distinguished by its high elasticity and resilience; this material is often used to make do-it-yourself overlays;
- rubber - recently it was the only material for the production of fenders. It is characterized by elasticity and practicality, thanks to this it does not lose popularity even now. Rubber wheel arch extensions are universal and suitable for any car model. Their only downside is that rubber fenders do not have an elegant design;
- cable plastic is an economical option with excellent characteristics, and it is also easy to install;
- Duraflex is the best material for the production of expanders. It is elastic, resistant to the aggressive effects of natural factors, does not deteriorate under the influence of ultraviolet rays, and adheres well to the surface.
Rubber wheel arch extensions are the most common because they are practical and easy to install.
How to choose materials for proper car sound insulation
Due to the huge range of insulating materials, it is difficult to make the right choice. When selecting a product, the car owner must take into account the following parameters:
- Specific gravity (not in all cases should be large). Some modern materials are able to dampen vibration due to their technical characteristics, for example, due to the plasticity and internal design features of the fibers. However, formulations that are too light should not be purchased, as their effectiveness will be low. It is better to take vibration-proofing material with an aluminum (reinforced) layer with a thickness of 0.1 mm. If the thickness is very large, then efficiency will not increase much, while installation will become more complicated and the price will increase.
- MLC, or mechanical loss coefficient, measured as a percentage. It is believed that the higher this indicator, the better (the norm is from 10 to 50%). The sound loss coefficient (SLC) characterizes the absorption of sound waves. The higher the indicator, the better (the norm is from 10 to 50%).
These two parameters are the main ones, in most cases decisive when choosing. But in addition to these, additional factors should be taken into account:
Plastic. Affects the tightness of contact with the surface of the car body.
Ease of installation. You need to choose noise and vibration insulation materials either separately or one universal one
It is important to choose the right additional tools: a hair dryer, a roller, etc. Easy installation helps save money, as it allows you to do the work yourself, without turning to specialists
Long service life
The higher the number, the better. Information about the warranty period can be found in the instructions. Experienced car enthusiasts will say a lot about the durability of a particular brand of vibroplast (and which car sound insulation to choose), based on personal experience.
Resistance to mechanical stress. Throughout the entire service life, materials should not change their characteristics and shape. But, as a rule, sound insulation is installed in areas where it, in principle, cannot be deformed.
The thickness parameter affects the choice of areas that will be glued (from large areas to small joints of plastic parts).
Qualitative characteristics of mastic. Not only vibration isolation or noise insulation properties are important. It happens that when heated, inexpensive mastic of poor quality during the installation process for soundproofing a car becomes liquid, begins to flow out of the sheet and spread over the entire area of the surface being treated. Therefore, it is better to beware of purchasing such a product.
Matching quality and cost
It is important to adhere to this rule in the same way as when choosing any other product. You shouldn’t throw money away buying expensive insulation to treat a cheap domestic car.
It is better to purchase expensive and high-quality material for the purpose of installation on a foreign car from the middle price range.
Of great importance is the adhesion indicator, that is, the level of adhesion of different-sized surfaces of solid and/or liquid substances. Fastening requires a certain amount of force from the insulating material to adhere to the surface being treated. As a rule, the manufacturer prescribes this parameter. But some unscrupulous manufacturers provide false information, thereby misleading car owners. The optimal adhesion index is 5–6 N per 1 cm². We can talk about a marketing move in the event of a large increase in this value specified in the instructions. As practice shows, the above adhesion value is quite sufficient for the material to adhere well to the surface.
Of course, the choice largely depends on the name of the trading company (brand) that produces soundproofing products. The most famous and recognized manufacturers, whose products are widely distributed in Russian markets: Dynamat, STP, Kics, Shumoff, etc. Each of the above companies has several product lines in their arsenal.
Puttying
So, if we are talking about minor damage, the putty method is used. Step by step it looks like this:
- It is necessary to thoroughly wash and dry the car.
- Remove all bare metal rust from the damaged areas and sand them thoroughly.
- Treat areas with reactive primer and allow the surface to dry.
Car rear arch putty
- Place acrylic filler on top of the reactive layer - under no circumstances should putty be applied to acidic primer.
- After the acrylic has dried, apply putty and wait for it to dry.
- Thoroughly sand the dried putty, gradually reducing the grain size of the abrasive. Thus, level the surface, preparing it for painting.
- Paint those areas of the car that have been repaired.