Parktronic (parking radar) is a convenient and practical solution that greatly facilitates the operation of the car. Parking sensors are especially necessary in a metropolitan area, where parking a car is frequent and can be very difficult.
It would seem that rear view cameras should have forced all types of parking sensors out of the market, but this did not happen. First, a high-quality camera is noticeably more expensive and also gets dirty. Secondly, the camera requires a separate display or a radio with a monitor, which complicates the installation itself and requires more work.
At the same time, unlike the rear view camera, the parking sensors allow you to navigate well in the dark and capture even small objects that may not be visible in the mirrors or on the camera. Also, parking sensors can be used in conjunction with a camera. Next, we will look at how to install parking sensors on a car with your own hands.
Operating principle and types of parking sensors
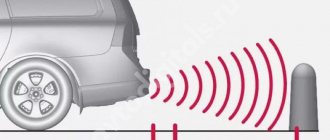
The principle of operation of the parking sensors is that the electronic unit processes signals received from wireless transceiver sensors installed on the car’s bumper and presents them on the display in a form convenient for the driver.
In the simplest parking sensors, the information is an intermittent sound signal, the frequency of which increases as the vehicle approaches an obstacle.
In the most common parking sensors, information with an audible signal is supplemented by a monitor or display, on which the distance to the obstacle in meters is displayed in graphical or graphical and digital form. You can see the structural wiring diagram of such a radar in the photograph. Expensive models of parking sensors additionally have a video camera, the lens of which has to be constantly wiped clean of dirt, which in practice negates all its advantages.
Distance measurement sensors in parking sensors are used in two types - tape and ultrasonic. Tape sensors are a metal strip attached to the inside of the bumper; they detect an obstacle only at a distance of less than 30 cm and do not work well in a wet environment, so they are practically not used.
There are types of wireless parking radars in which the signal from the electronic unit to the monitor is transmitted using a radio signal. The price of such parking sensors is an order of magnitude higher, and the apparent ease of installation is deceptive, since it is still necessary to supply the supply voltage to the devices using wires, which practically negates the advertised advantage. In addition, such a system is susceptible to radio interference, which reduces the stability of the forging radar as a whole. I immediately refused to buy such parking sensors.
Design and principle of operation of an ultrasonic parking sensor
Ultrasonic parking sensors are unpretentious and can confidently detect any obstacle located at a distance from the car closer than 2 meters. The ultrasonic sensor is similar to a telephone headset, only the speaker and microphone are installed in the same housing.
The sensor works as follows. A burst of pulses with a frequency of 40 kHz is periodically supplied from the electronic unit to the sensor emitter. If an obstacle is encountered along the path of the pulse, it is reflected and picked up by the microphone. It is then transmitted to an electronic signal processing unit, which measures the time interval between the moment the pulse is emitted and the time it returns from the obstacle. The further away the obstacle is, the longer it takes for the signal to return to the sensor. The distance is determined in this simple way. The electronic unit can only convert the travel time of the pulse into meters and display the information on the display.
The distance at which the parking sensor can detect an obstacle depends on the power of the emitted pulse and the sensitivity of the microphone.
The angle of radiation of the pulses is limited, therefore, to completely cover the blind spot, at least four ultrasonic sensors must be installed on the bumper.
How to connect the device
To connect parking sensors to 4 sensors, you need to route the cables from the ultrasonic elements to the control controller, and then connect the information display. The control unit requires power supply only when reverse gear is activated. Installation of equipment for 8 sensors differs in the installation of an additional cable braid from the sensors located in the front bumper. The controller is attached to the wall of the luggage compartment using screws or plastic clamps; the device can be mounted under decorative trims.
For example, the schematic diagram for connecting the SPARK-4F assistant controller provides for the input of cables from the sensors; a positive power signal is supplied from the reverse gear lamp. This technique ensures that the equipment operates only when the vehicle is in reverse. The negative wire is attached to special bolts welded to the body. The control unit has a block for switching direction indicator lamps; the signals are used to enter the programming mode and switch menu sections.
The parking sensor circuit involves activating a quiet mode, which allows you to determine the distance to cars standing behind or in front. The controller is additionally connected to a limit switch located in the brake pedal. It is allowed to supply power from the brake lamps located in the rear lights. When you press the pedal and the gear selector is in neutral, the display shows the distance to obstacles. The display design includes a button to force the display to turn off.
Some assistants support the function of warning the driver about cars in blind spots. The sensors turn on when a warning signal is given by the turn signal; when a car or motorcycle is detected, the warning LED on the pillar trim turns on, and the signal is duplicated on the display. It is possible to permanently or temporarily disable the function by sending a signal to a separate contact (performed with a toggle switch or by pressing the brake pedal).
Selecting parking sensors
Heated mirrors: benefits, design and installation yourself
When choosing and purchasing an ultrasonic parking sensor, you must pay attention to the instructions. The presence of a translation into the language of the country in which the device is sold is a kind of guarantee of its quality
It is also necessary to ensure that the warranty is properly issued. At the same time, you need to keep in mind that the warranty is only valid if the device is professionally installed.
Self-installation requires a detailed study of the technical features of parking sensors: installation height, sensitivity and range of sensors. In addition, for adequate operation of ultrasonic sensors, parking sensors must be connected to the on-board computer strictly according to the diagram. The control unit of the device is located in a convenient place, for example, in the trunk. At the same time, the main thing is to ensure normal access to it and the impossibility of mechanical damage.
Installation of parking sensors
To install the system yourself, you will need the following tools and materials:
- drill with a drill or cutter of the required diameter;
- screwdriver;
- key;
- roulette;
- marker or pencil;
- insulating tape;
- double-sided adhesive tape (scotch tape);
- solvent.
Let's look at the installation process using the example of installing a classic device consisting of 6 sensors (2 on the front and 4 on the rear bumper). Taking into account the required installation height, the locations for placing the sensors in the bumper are marked. It is advisable to remove the bumper itself in order to see its design from the reverse side. Using a tape measure, the length of the bumper is measured and markings for future sensors are placed at an equal distance from the corners.
Places for installing sensors are drilled with a milling cutter. The sensors themselves must be installed without any deviations to the sides, otherwise the parking sensors will give unreliable signals.
On the inside of the bumper, the sensors are fixed using specially designed rings. The wires are secured with electrical tape to other electrical wires located in the bumper. After this, the bumper is installed in place and secured accordingly. The procedure for installing sensors on the front bumper is similar to that described above.
Observing the polarity, the control unit must be connected to the wires of the reversing lamps. The placement of the device display in the cabin depends on the driver’s preferences. To install it, you can use double-sided tape. The control unit can be secured in the same way. Before installation, it is advisable to degrease the selected area with a solvent. All wires in the cabin must be routed under the floor mats to avoid damage.
First of all, you need to check the range of the sensors, as well as their response to various obstacles.
The parking sensors are not working, what should I do?
There are many reasons why parking sensors may fail or not work after installation. Therefore, we will consider two cases:
New parking sensor doesn't work
At the beginning of the article, we recommended checking the functionality of the device before installing it on the car. If it worked before installation, you should check the connections of all main components. All components must be connected according to the instructions that come with the kit. Check whether you are properly powered by the reverse or ignition lamp. Also, do not exclude the possibility of a manufacturing defect.
The parking sensors worked, but something went wrong
The fastest and most reliable way to find out the cause of a breakdown is computer diagnostics. Nowadays, many auto repair shops provide this service. If you decide to find the cause of the breakdown yourself, we will try to help you. Sensors are often the cause of all problems, and they are the ones you should pay attention to first. One of the most common problems is a constant signal. The reason for this may be a foreign body that “sticks” to the sensor, as well as oxidation of the contacts and short circuit.
The sensors are also sensitive to water and may give false signals during rain or after washing. In this case, drying, for example with compressed air, will help. At sub-zero temperatures, especially in severe frost, the sensors may also lose sensitivity. But this does not affect their further performance.
Finally, before heading out on the road, you should test the parking sensors with different obstacles and in different modes. This will allow you to understand in which situations the system can give a false signal and in which it is real.
Assembling parking sensors at home
Useful tips for car enthusiasts How to choose the right parking sensors for a car
1. Glue the Arduino board to the bottom of the box using glue or silicone and connect power to the controller.
2. Connect the 5V ultrasonic sensor power supply.
3. Connect the output of the ultrasonic sensor “SIG” to the PWM pin of the Arduino (this is necessary so that we can send pulses to the sensor and then read their return). Use, for example, pin 7.
4. Before connecting a three-color LED, determine which “legs” are responsible for which color. Connect red, green and blue to pins 11, 12 and 13 of the Arduino, respectively.
5. Now it’s up to the program. After testing the software, if everything works fine, then mount the sensor on the wall of your garage, and place the LED in a place convenient for you.
Components for assembling a homemade parking sensor
DIY car blanket dimensions, materials and sewing method
Using the example of the experience of one of the Kulibins, we will show what is needed to assemble a homemade parking sensor. More detailed parking sensor diagrams can be found on the corresponding radio-electronic network resources. So, a set of homemade parking sensors:
— The Arduino Duemilanove controller is that hardware computing platform, in fact, the brain of your homemade parking sensors.
— Ultrasonic distance sonars (sensors): Ultrasonic Range Finder.
— Plastic case (boxing).
- Bread board.
— LED, preferably three-color.
— Wires corresponding to the length of the gasket.
— Power source – 9V battery.
How to properly install parking sensors on a car
1. Preparation of the event.
Before starting the process, plating demons are produced. Much depends on the model, but most often the trunk sound insulation is attached to pistons, some of which are removed carefully when prying with a sharp object, and some require additional manipulations (for example, pressing the lock).
Clean and wash the inner trunk compartment and the lower part of the bumper surface.
3. Drawing control points when installing parking sensors.
The instructions are a guide for the entire algorithm of actions. It shows the main characteristics of the sensors: range, viewing angle, etc., and a layout diagram is attached.
The extreme points of the layout are, as a rule, the radial centers of the rear part of the bumper. A horizontal line is drawn through them and divided in such a way that all sensors are located on the same axis and at an equal distance from each other. The height from the ground is 50 cm (the exact value is indicated in the specifications).
3. Drilling holes for sensors.
Metal processing of the grooves takes place using an electric drill and a cutter included in the delivery set. Sensors are attached in place. For greater reliability, it is recommended to “plant” them with adhesive-sealant.
4. Installation of the parking sensor regulator.
The most suitable place for mounting the device is under the rear window near one of the brake lights. The light signaling device is dismantled. The sonar regulator cables are routed into the factory openings.
A separate hole is drilled for the connector and a balancer is installed. After installation is completed, the sound volume is set using a signaling device.
5. The final stage of installing parking sensors on the car.
The ECU is installed in the selected location of the luggage compartment by attaching it to the brackets. It is recommended to lay flexible material between the walls of the device and the casing to dampen vibration and noise.
The cables of the unit are connected to a group of electrical wires. So that the new gasket does not interfere, they are attached to the existing units with plastic clamps. All structures that were removed during preparation are returned to their place.
6. Carrying out tests.
After completing the work cycle, the correct installation of the parking sensors must be tested. To do this, choose a safe, quiet place. In a real situation (or with the help of obstacles artificially installed at different heights), the device is tested.
This is where the description of the algorithm for how to independently install parking sensors on a car ends.
Do-it-yourself parking sensor installation
The instructions for installing parking sensors in full simply and clearly explain how to connect the parking sensors. We are talking about the instructions that are included in the kit.
If there isn’t one, or it hasn’t been translated, then don’t even look at this device, no matter how attractive its price. You will just buy yourself a flashing toy, and there is no guarantee that it will work.
The parking sensor connection diagram is, in principle, the same for all types of devices. The correct manufacturer's kit, as a rule, already contains a cutter sized to fit the sensors for making holes in the car's bumper. Therefore, the question of how to install parking sensors is not worth it.
Installing parking sensors on your car will require a small arsenal of tools and materials for proper installation yourself. When preparing for work, you need to arm yourself with a simple set of familiar tools, from screwdrivers to wrenches. You will also need an electric drill or cordless screwdriver, a tape measure and a marker. Additional materials you should buy include masking and insulating tape, as well as silicone sealant or glue.
You can start work in any order. For example, first find and make room in the trunk for installing an electronic unit. It can be mounted using a standard bracket or glued using double-sided tape, sealant, etc.
The most important and difficult stage of installing parking sensors will be the introduction of foreign bodies such as sensors into the bumper. That is why the kit should include a special attachment for an electric drill or screwdriver, the diameter of which matches the size of the sensors. To do this work as carefully as possible, it is better to dismantle the bumper and clean it of dirt.
To accurately install the sensors, you need to make markings using a tape measure and a marker pencil. It is best to stick masking tape on the surface of the bumper, and then apply the necessary marks on it.
First, marks are made in the curves of the bumper (dimensional points). After this, the distance between these two points is divided into three equal parts. Two more marks are made at the interface. As a result, we get markings for 4 sensors. When marking, it is necessary to take into account such an important parameter as the height of the sensor from the ground.
The optimal distance should be found in the instructions, but usually it is 0.5 m. The marking should also take into account the fact that the position of the sensors on the car when the bumper is finally installed in place must be strictly horizontal.
Now you have to equip a drill or screwdriver with a cutter and start drilling holes for the sensors. Work must be carried out at low speeds of the power tool.
After preliminary fitting, the sensors are installed in the holes; a layer of sealant or glue is first applied to the mounting sockets. It is necessary to mark the sensors in order to correctly connect them to the control unit in the future.
When the installation of the sensors inside the bumper is completed, the wires are assembled into one bundle and tied with electrical tape. After this, the bumper is returned to the car, and the wiring is pulled into the luggage compartment.
The installation of sensors in the front bumper is carried out in a similar way. Only the wires need to be routed through the engine compartment and into the trunk. When the wire from each sensor is connected to the corresponding ECU socket, all that remains is to connect the monitor to the control unit. The display itself is attached to the windshield or instrument panel using double-sided tape. It is usually located on the supporting part of the screen.
The installation of parking sensors can be considered complete only after testing the device in the yard. When the driver understands at what distance to the obstacle a particular signal is given, you can safely hit the road.
It should be noted that installing parking sensors yourself is not done only for the sake of saving money. When the car owner independently installs and tests the device, he will understand all its signals and will also receive real pleasure from the work done. Now he will become almost an expert in this matter and will be able to give advice to his friends or acquaintances.
Required Tools
To install the equipment on the car, you will need the following tools:
- a special cutter for plastic (the diameter must correspond to the size of the sensor body);
- electric drill or cordless screwdriver;
- set of wrenches;
- screwdrivers with flat and Phillips blades;
- a set of keys with Torx-type heads (required for European-made machines);
- test device;
- masking tape;
- tape measure and level;
- pencil or marker.
Installation process
Specifically, before installing parking sensors, you should wash the car. Next you need to find places that are more suitable for installing sensors. For example, in an SUV, the spare wheel mount, which can fit on the rear door, is the last dimensional point.
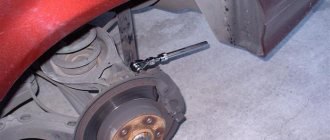
The next step requires removing the car bumper. During the dismantling process, you should be careful not to confuse the fasteners for the front and rear bumpers. Then you need to make markings and drill holes for the parking sensors (Fig. 1). Installing parking sensors with your own How to install Sensors are installed with. But you don’t have to remove the bumper - you can drill holes anyway, only then you will need some skill and patience to route the wires into the car’s interior. To get a taste and start enjoying watching group sex, you just need to try it - and everything will work out. You will immediately have a desire to watch FF porn https://gangbang.com/jmj via a direct link around the clock, enjoying fucking several girls at once. The girls were ready to do anything for the sake of popularity, including being on several dicks at the same time, and also in front of the cameras.
When marking locations for sensors, it is important to be as careful as possible: it will be impossible to remove excess drilled holes. To better navigate when parking in the future, parking sensors are located at a similar distance from each other.
The next step is laying the wires (Fig. 2) and connecting the device’s sensors to the car’s electronic circuit. Engine ZMZ 402 repair How to install correctly How to put rings on. Before connecting the sensors and parking sensors, it is necessary to de-energize the vehicle's electronic circuit. It is necessary to lay the wires from the sensors to the parking sensors panel very carefully. Rear bumper sensors can be connected to the power supply for the reversing lights. Thus, the parking sensors will only work when you have reverse gear engaged. This is comfortable - once again there will be no squeaking in the car when, for example, in a traffic jam someone comes close from behind.
Next, the display is installed (Fig. 3) and all sensors are connected. How to properly install parking sensors. The location of the parking sensors display should be extremely favorable for the driver: he should see the readings of the display without changing the position of his head.
That's all! The whole procedure takes 2-3 hours - it’s not that long, but at the same time it’s educational. Below we offer you to watch the whole process in the video.
Material for assembling parking sensors yourself
Diagram of a conventional parking sensor:
-Embedded sensor – from 2 to 8. Naturally, the more sensors, the greater the area captured.
— Distance indicator: with one scale, LCD indicator, with 2 scales, etc. Right before the video signal is output to the windshield. Progress – it moves inexorably forward.
— Electrical control unit for this entire system.
If we are talking about the simplest device, which your homemade parking sensors can become, then 2-3 sensors are completely sufficient for the parking sensors circuit. If you are going to make parking sensors with your own hands, you must realize that all components for it must be only of the highest quality and properties. And the parking sensor circuit is assembled perfectly.
Even the most advanced parking sensors fail or malfunction, but this fact in no way relieves the driver of responsibility in the event of an accident.
Full video report on installing parking sensors
I hope this story will be useful to Duster owners.
PS About 3 years after installing the parking sensors, for unknown reasons, water got into the control unit and it failed. I couldn’t find a similar one, so I had to buy a new set (now wired), but I didn’t change the old sensors, I only replaced the unit and the monitor. So far everything is working fine.
More articles about Renault Duster:
- Renault Duster: photos of how to prepare for winter
- Renault Duster video - Duster test drives
- Photos of Renault Duster
- News
- Useful
- Do it yourself
- Adviсe
- Reviews
- All articles
- Contacts
- Advice from a car lawyer
- Advice from a car lawyer. Part 2
- Terms of use
- Privacy Policy
- Auto lawyer online for free
- List of official Renault dealers
- Competitions
- Terms of advertising on the DusterAuto.ru project
- Form of car purchase and sale agreement
2019 All about Renault Duster: photo and video reviews from Renault Duster owners
Best driving instructors:
Driving instructor Elena Automatic transmission: Chevrolet LacettiTeaches in the Southern Administrative District, South-Eastern Administrative District, Vidnoye, Domodedovo REVIEWS
Driving instructor Marina Automatic transmission: Kia Cerato Manual transmission: Chevrolet LanosTeaches in the Northern Administrative Okrug, Dolgoprudny REVIEWS
Automotive instructor Irina Automatic transmission: Kia Cerato Trains in SZAO, JSC REVIEWS
Driving instructor Natalya Automatic transmission: Kia Spectra Teaches in the Eastern Administrative District, Balashikha, Reutov REVIEWS
Driving instructor Oleg Automatic transmission: Chevrolet Lacetti Manual transmission: Chevrolet LanosTeaches in the Northern Administrative District, Dolgoprudny REVIEWS
Automotive instructor Nadezhda Automatic transmission: Hyundai Accent Teaches in the Eastern Administrative District, Balashikha, Reutov, Zheleznodorozhny REVIEWS
Driving instructor Yana Automatic transmission: Kia Spectra Teaches in the Northern Administrative Okrug, Dolgoprudny REVIEWS
Driving instructor Yulia Automatic transmission: Chevrolet Lacetti Manual transmission: Chevrolet LanosTrains in the Eastern Administrative District, South-Eastern Administrative District, Lyubertsy, Reutov, Zheleznodorozhny REVIEWS
Automotive instructor Svetlana Automatic transmission: Chevrolet Lacetti Trains at Northwestern Administrative Okrug REVIEWS
Driving instructor Tatyana Manual transmission: Chevrolet Lanos Automatic transmission: Kia SpectrTeaches in Krasnogorsk REVIEWS
Driving instructor Peter Manual: Daewoo Nexia Trains at Northwestern Administrative Okrug REVIEWS
Automotive instructor Oksana Automatic transmission: Hyundai Accent Teaches in North-Eastern Administrative District, Mytishchi, Korolev, Pushkin REVIEWS
Driving instructor Dmitry Automatic transmission: Volkswagen Golf Manual transmission: Chevrolet Lanos Trains in North-East Administrative District, Northern Administrative District, North-Western Administrative District, Dolgoprudny REVIEWS
Driving instructor Oksana Automatic transmission: Kia Spectra Manual transmission: Chevrolet Lanos Trains in the Southern Administrative District, South-Western Administrative District, Vidnoye, Podolsk REVIEWS
Automotive instructor Dmitry Manual transmission: Lada Granta Teaches in the South-East Administrative District, Lyubertsy REVIEWS
Choosing a location for installing the monitor and electronic parking sensors
When parking in reverse, the driver usually looks at the side mirrors and rearview mirror. Taking the parking sensor monitor in my hands and sitting in the driver’s seat of the car, I began to look for the most rational place to install it. As a result, taking into account the need to lay wires to the electronic unit, it was decided to mount the monitor on top of the rear view mirror.
Ultrasonic parking sensors are installed in the rear bumper, and the supply voltage is most easily supplied from the reversing light, since the parking sensors should only work when reverse gear is engaged. Therefore, it was decided to install the electronic unit in close proximity to the sensors - in the luggage compartment.
As a result, the wiring diagram of the ultrasonic parking radar shown in the photograph was created. Now all the questions regarding the installation of parking sensors have been worked out and you can begin installing it in the car.
Each ultrasonic parking sensor, depending on its installation location on the bumper, must be connected to its own connector on the electronic unit. Therefore, the connectors must be marked in advance in accordance with the inscriptions on the body of the electronic unit.
Connection to first gear
Everything is more complicated here, but not much. For this implementation, you will need a first gear engagement sensor. It could be an ordinary button. You also need to make a suitable holder or bracket to mount this button. When the gear is engaged, the gearshift lever will activate the button, and it, in turn, will turn on the parking system.
The front parking sensors are connected from first speed as follows. First, disassemble the gearbox selector housing. There is a lot of free space here. You can also find fastening elements there. On an individual basis, you need to make a special holder for the fasteners. It is better to choose a button that has a click - this is very useful in some situations. The button is then inserted into the holder. The system is checked on the car. If necessary, the design is adjusted.
Installing parking sensors yourself
Parktronic is a device designed to facilitate the parking process for a novice motorist. You can install parking sensors at numerous car dealerships or do it yourself. We will consider the last option, when there is no desire or opportunity to go to a car service center.
First you need to decide on the choice of device. At the moment, stores offer an unlimited number of different models and modifications. In fact, there are not enough differences among this huge number. The main differences lie in the appearance of the monitor, and the properties of the sensors themselves are no different. A different number of sensors can be installed on car bumpers. Typically, car owners install 4 on each bumper, and some car owners only install them on the rear bumper. Parking sensors on tinted cars are especially important when, in conditions of limited visibility, you have to back out into the darkness.
Checking the parking sensors before installing them in the car
Before installing parking sensors in a car, to avoid surprises, it is necessary to check its functionality. To do this, you need, in accordance with the above block diagram, to connect all sensors and a display to the electronic control unit and apply +12 VDC supply voltage to it, observing the polarity, from a power supply designed for a current of at least 0.3 A or a battery. It is impossible to make a mistake here, since all the connectors are different, with the exception of the connectors for connecting parking sensors. But when checking, the order in which the sensors are connected does not matter, since they are interchangeable.
If the sensors are left lying on the table, then it will be impossible to check the parking sensors in operation. Therefore, you need to simulate their installation on a car bumper. To do this, you need to drill four holes in a sheet of corrugated cardboard or any other sheet material using the cutter from the kit and install ultrasonic sensors in them, as shown in the photo. The distance between the holes should be more than 10 cm.
Next, direct the sheet with sensors into a space two meters free from obstacles and turn on the parking sensors. All that remains to check is to walk in front of the sensors and see what is displayed on the monitor. If everything works, then you can begin installing the radar in the car body.
For interest and to evaluate the quality of the parking sensors, I opened the control unit, its printed circuit board is in the photo. The presence of markings of elements, neat installation, high quality soldering and voltage reserve of electrolytic capacitors pleased us.
Typical breakdowns
Many parking sensors are connected in such a way that when reverse gear is engaged, sensors and cameras are activated, displaying a picture on the screen inside the cabin. They are connected to a regular multimedia system. That is, you don’t even need a button to turn on the parking sensors.
But sometimes the video does not show, or strange signals are issued, and some kind of bacchanalia occurs with the parking sensors. Everything is clear, something is wrong with him. And what?
There are several typical faults. In some cases, simple simple repairs are needed, and sometimes replacement of elements is required.
Let's look at a few common situations.
- The danger signal is constantly on. Here we are talking about a short circuit in the system or the sensor being blocked by some object. For example, a piece of dirt, a leaf or snow has stuck to it. Even if water gets on the sensor, it begins to produce incorrect information and makes the driver panic. First, check the device for foreign objects. If they are not there, you will have to do the wiring. How to check its integrity? Take a multimeter and measure the parameters. Most often, it is the wiring that causes all the problems.
- Doesn't signal obstacles, although they exist. Here the sensor or several parking devices at once have broken down. The test is simple - cover each sensor with your hand in turn and listen to which one does not react. So solve problems with it by completely changing it or carrying out repairs.
- Overreacting to minor obstacles. You park on the grass, where there is nothing in the way, but the parking sensors are screaming. Why? It probably has increased sensitivity, so for the device even a blade of grass is an object of danger. The sensitivity can be adjusted, so there is nothing complicated here.
- Mechanical damage. They are not difficult to check visually. But the problem with such problems is that in most cases you have to change the sensors. Repairs are not enough here.
If your parking sensors start acting up, be sure to check the wiring first. It sometimes breaks, the integrity of the insulating shell is damaged, and the contacts come loose. Otherwise, some are already buying new sensors, although in fact they just needed to tighten the wiring fasteners a little tighter with a screwdriver. Don't spend extra money or jump to conclusions until you've checked all potential problems.
The most unpleasant breakdown is the failure of the control unit of your parking sensors. It is the most expensive to change. But let's hope this doesn't happen.
Share your impressions of the material, tell your stories related to parking sensors or ask questions.
Possible causes of malfunctions
Taking into account everything discussed earlier, we can say that parking sensors are inherently a fairly simple device. It consists of a minimum set of components. Hence the corresponding number of malfunctions.
Their appearance does not depend on the car itself. Someone was lucky to receive the radar as a complete set. Others customize their cars themselves. Parking sensors are often found on a wide variety of cars. Especially on things like:
- Lada Priora;
- Toyota Rav 4;
- Kia Sorento;
- Lada Largus;
- Hyundai ix35;
- Lada Vesta;
- Volkswagen Passat;
- UAZ Patriot;
- Chevrolet Captiva;
- Chevrolet Cruze;
- Kia Sportage 3;
- Skoda Octavia;
- Mercedes;
- Hyundai Solaris, etc.
The list could go on forever. But something else is much more important here.
There are several main reasons why the parking sensors suddenly stopped working, or began to display incorrect information, or send alerts prematurely or late.
If you notice problems with your car, then the reason probably lies in one of the following factors.
Damage to wiring. Systems can be wired or wireless. When using wiring, it is not so difficult to damage and compress it; Incorrect installation of sensors
Here it is important to understand how to find out which sensor is not working. Check their fastening and degree of immobility
If the element wobbles and does not hold well, this is the reason; Manufacturing defects. This cannot be ruled out. Especially when buying cheap kits from dubious manufacturers. Therefore, it is better not to save money, but also to order installation at a certified car service center; Dirt and moisture. If the system was functioning normally, and then problems appeared, the reason may be trivial. The sensors are dirty or wet. This is a pressing problem for most parking sensors that require periodic maintenance; Short circuit in the control unit. Even with a wireless system, the radar's electronic brain can short out. Again due to dirt, moisture, dust or high temperature.
All of the above reasons can objectively be considered banal, obvious and probable. But no one says that parking sensors are an incredibly complex system, in order to find the causes of malfunctions of which you must be a master of computer diagnostics.
Checking the sensors
If your system was working normally, but suddenly problems arose, be sure to start checking by cleaning the sensors from dirt.
Moreover, it is important to perform cleaning not only on the surface of the sensor, but also in the mounting area. At each check, do not forget to make sure that the fixation remains normal, the sensors do not wobble or move from their seats
If cleaning does not produce any results, you will have to check the devices for their functioning. To do this, start the engine at idle, and then you put your finger on each sensor. If the sensor is not working, it will crackle or vibrate.
If there is no response, we can say that the sensor has failed. Next, act according to the situation, repairing or changing the device.
Metallized tape
If you use electromagnetic parking sensors, then a special tape will be used instead of sensors.
Its diagnosis is even simpler than in the situation with sensors. The tape device is elementary. It may not work if some mechanical damage has been caused. Therefore, the check comes down to making sure that there are no or no deep scratches, cracks or other defects.
If everything is fine with the tape, there is no visible damage, then the electronic control unit is checked.
Installing front parking sensors
Installing the front sensors is no different from the procedure performed for the rear axle. The difference will be in the power connection. Since the installation of additional devices is largely a creative process, there are several options for how to connect the front parking sensors to the on-board network. The simplest of them is power from the ignition switch. The front parking sensors will turn on after turning the ignition key to position 3 (On). This feeding method is one of the simplest.
You just need to find a wire near the mounting block that will receive power when the ignition is turned on. This can be determined using a special test. Since the system will always be on, in winter, when snow and a dense layer of dirt accumulate, a false signal may be given about approaching an obstacle. This will cause significant inconvenience. We invite you to watch the video of the installation process.
Inconsistent nutrition
- Power supply from the brake pedal. Power to the brake switch is also supplied only when the ignition is on. But the system will only work when the brake pedal is pressed. Since the limit switches react to even the slightest touch of the pedal, you can activate the front parking sensors by lightly touching the brakes. The connection method will remain the same. You just need to find the positive wire that will come from the end switch;
- from turning on the first speed. A rather extraordinary method, the essence of which is to install a button in the place where the manual transmission knob is in the extreme position when engaging first speed. You will have to build a bracket by calculating the position of the lever. In order to avoid having to constantly hold the lever pressed against the button, the system must be equipped with a time relay. After pressing the button once, the sensors will be powered for the programmed period. You can build such a relay with your own hands;
- output to a separate button, pressing which will trigger the supply of power to the sensors. Plus, in this case, you can take it from any convenient source that has voltage after turning on the ignition. The button can also be installed in any place convenient for you.
How to setup
Installed parking sensors and a control controller require programming. To enter the setup mode, you must turn on the ignition and then activate reverse gear, which supplies power to the control unit. The further algorithm depends on the parking assistant model. For example, to enter the programming mode of the SPARK-4F product, you will need to press the turn direction indicator lever 6 times. The display of the control device will show PI, allowing you to begin adjustment.
Before programming begins, the gearbox lever is placed in the neutral position and the brake pedal is held depressed. The transition between menu sections is made by single pressing the direction indicator lever (forward and backward). Entering and exiting the settings section is done by turning the reverse gear on and off.
To adjust the sensitivity of the rear sensors in the car, you need to park the car on a level surface with no obstacles behind it. Ultrasonic sensors scan the area behind the machine for 6-8 seconds, then a sound signal is given, accompanied by the inclusion of an indication on the control device. Some assistants are equipped with a display that can be installed in different positions. The screen orientation is selected in the corresponding menu section.
You can select the duration of the beeps that sound when an obstacle is detected. Some devices take into account a tow hook or spare tire located at the rear of the car. The controller remembers the departure of such elements and takes it into account when operating the sensors. Some products provide a mode for amplifying the signal coming from the sensors. The owner empirically selects the required value and then re-adjusts the sensitivity of the elements.
- How to remove the parking sensor from the bumper
- How to paint parking sensors with your own hands
- How to check parking sensor
- Why does the rear view camera show backwards?
Rear parking sensors
Let's look at the installation process for the rear of the car in more detail. In order to install it yourself, you will need:
- screwdriver;
- a cutter (crown) of a suitable diameter, if the purchased set of sensors does not come with one;
- a little sandpaper to remove burrs after drilling the rear bumper;
- wire for pulling wires in hard-to-reach places;
- clamps or electrical tape for fixing the harnesses;
- a degreaser to enhance the adhesion of the place to which the parking sensor control unit will be attached;
- masking tape. It makes it easier to mark installation points. But the main reason for use is additional protection of the paintwork along the drilling contour with a crown;
- hot glue and a gun for sealing the junction of the wires into the car body.
Installation process
- Apply masking tape and mark the drilling points;
- fasten the wires with electrical tape, and best of all, place them in a special corrugation. Bring them to the technological hole in the car body. There is usually a rubber plug there that you can drill through. The area around the wires can be sealed with hot glue;
- clean the dirt and degrease the area where the parking sensor control unit will be attached. Secure the unit in a place where it will be protected from the risk of mechanical damage;
- connect ground. Often there are enough bolts in the rear of the car to secure the terminal. Power the positive terminal from the reverse light bulb. Accordingly, the sensors will be powered only when reverse speed is engaged. You can determine the corresponding wire using a tester. With the ignition on and the gear in gear, determine which connector is +. Connect to it using the latch described above;
- Run the wires from the stern to the location where you intend to install the display. Most drivers mount it on the rearview mirror or on the dashboard;
- connect the connectors to the control unit. Don't forget about the order in which the sensors are installed.
For greater clarity, we attach a video of the installation yourself.
Diagnostics and repair options
The system must respond to emerging obstacles. If this does not happen, then the first thing to do is to clean the sensors or tape from dirt and moisture. They very often cause malfunctions of the device. You also need to clean the places where they are located. That is, the inside of the bumper under the tape and the sockets in which the sensors are installed. It doesn’t help - we inspect the transceiver devices.
If there is no damage on the metallized tape, then the cause of the malfunction of the parking sensor tape is in other parts of the device.
To determine whether the sensor is working properly, you need to touch it with your finger. A working sensor vibrates slightly. When touched, a slight cracking sound is heard. The check is carried out with the vehicle engine running.
When you determine that the sensor is not working, you should first dry it, perhaps moisture just got into it. If so, then after drying it will begin to work normally, if not, we will open it, it is possible that the membrane is damaged, it can be replaced. But it is better to entrust the replacement of the membrane to a specialist, since such work requires skills.
A malfunction of the parking sensor control unit is probably the biggest problem with this device. You can only visually inspect the device yourself and check for a short circuit. To inspect the device's printed circuit board, you need to remove the cover.
It is possible that during the inspection the cause of the malfunction will be determined, for example, a coating of dirt or dust, or scale. Scale may indicate that radio components, such as capacitors, have become unusable.
It's easy to check for a short circuit. You need to take a simple ohmmeter and touch the ends of the probe to the terminals of the block; if there is a break in the device or it is shorted, then the ohmmeter will show either zero or infinity. In this case, the intervention of a qualified specialist is required. You should only undertake repairs to the control unit yourself if you have experience working with various types of electronic circuits.
The most common malfunctions and how to fix them
- Reverse gear is engaged, but the parking sensors do not give a signal. It is possible that the control unit is not connected to power or is not installed correctly, or the wiring is broken. In this case, we change the connection diagram and restore the integrity of the wiring. Be sure to check whether the grounding of the unit is reliable.
- The distance to the obstacle is determined incorrectly. It is possible that the sensors are dirty. The sensors need to be cleaned.
- The device often triggers on non-existent obstacles. It is possible that the parking sensors are set to high sensitivity or the sensors are dirty. It is necessary to reconfigure the control unit or clean the sensors.
- Parktronic does not detect any interference at all. It is possible that the device is set to low sensitivity, again the sensors are dirty, or the interference is in the so-called dead zone of the parking sensors. It is necessary to either increase the sensitivity of the device, or clean the sensors, rebuild the sensor installation circuit, or add, for example, a few more pieces to the existing circuit.
- The strip parking sensors experience the same malfunctions as parking sensors with sensors. The parking sensor tape may be damaged. Malfunctions can also occur if the location of the tape is dirty. There are malfunctions of the connecting wires and the parking sensor control unit. The steps for diagnosing the device and repairing it are, in fact, the same as when working with other types of parking sensors.
If you cannot independently determine the cause of the malfunction, then, naturally, you need to contact a specialist. You can remove the parking sensors and take it to a car repair shop, you can drive the equipment there with the device installed - test the parking sensors on a stand, check the settings, etc.