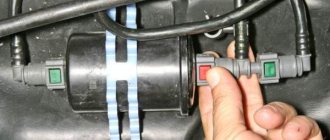
Diagnostics
Here are the cases when it is necessary to repair the fuel unit:
- Unstable pressure in the fuel system (3.45 kgf/cm2 is considered the norm)
- Engine
- The car is reluctant to accelerate
- Significant excess fuel consumption is observed
Please note that replacing the Kia Rio 3 fuel filter is a priority maintenance checklist. Therefore, if it is suspected that the fuel plug has been thrown out, it should be checked and, if necessary, repaired immediately.
Materials and tools
- A set of sockets (in particular, you will need 12 and
- Screwdriver set (requires a small flat-head screwdriver)
- Coarse filter (mesh)
- Fine filter
- Pliers
- Knife
- Sealant (for installing the filter block cover)
Please note that filter elements are replaced in pairs (both coarse and fine).
Some technicians repeatedly use the Kia Rio fuel filter for rough cleaning. Just blow air through the mesh and it's good as new. But it's not so aesthetically pleasing. Moreover, it costs only 3-4 dollars; for such a responsible business it is quite possible to buy a new one.
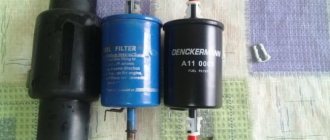
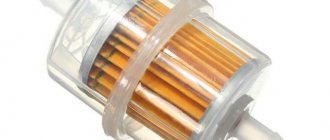
As for the choice of filter elements, it is better to purchase an original set of filters. For rough cleaning, a filter with article number: 31090-1G000 is used. For fine cleaning, a filter is used: 31112-1G000.
How often to change the fuel filter on a KIA Rio
KIA cars are sensitive to fuel quality. Recommendations for filter replacement frequency are provided by the manufacturer. The instructions for KIA Rio 2014, 2013, 2012, 2011, 2010 and others indicate that a new filter unit must be installed after a mileage of 60 thousand km. However, this regulation does not work for us.
Low-quality fuel is sold at many gas stations in Russia. Therefore, it is necessary to change the element after 35-40 thousand kilometers. It is these figures that owners of KIA Rio with gasoline engines should rely on. The situation with diesel cars of this brand is different: the unit must be replaced after 15 thousand km.
In winter, it is recommended to install a new filter for diesel engines every 10 thousand km. The viscosity of the fuel at low temperatures increases, and the flow rate of the filtration system after this run decreases.
However, these numbers are not the ultimate truth. The car will tell you when to change the fuel filter on the KIA Rio 3. The driver will feel changes in the car's performance.
Replacing the filter at a service station
To avoid taking on this Kia Rio maintenance work, you can turn to the experts. Pros will quickly deal with this problem. Work and an original filter for Kia Rio 2012 from the manufacturer will cost about 1.5 thousand rubles.
If your Kia Rio 2012 is under warranty, then you cannot qualify for a free filter replacement, due to the fact that these car parts are parts that are especially susceptible to natural wear and tear, along with lamps, brake pads and discs, fuses, etc.
You should keep documentation of any Kia Rio repairs, maintenance, or record it in your service record. Replacing the Kia Rio fuel filter yourself is not such a labor-intensive task and you do not need to have any supernatural skills. You need to at least keep your own records of exactly when and what was done, taking into account the mileage of the Kia Rio at the same time.
Experienced car enthusiasts who are familiar with the Kia Rio 2012 look at the 5-year warranty with great skepticism. Replacing the Kia Rio fuel filter. Particularly because there is a long list of exceptions. Kia Rio 3 how to remove the interior lamp. And they advise you to cancel the warranty after one year of operation of the Kia Rio 2012.
Take timely and regular care of your Kia Rio 2012 - and it will delight you with excellent trouble-free operation, economical fuel consumption, smooth ride, and comfort while driving.
Fuel filter value
As technology has advanced, car design has improved and become more complex. In the fuel systems of modern foreign cars, a filter is almost always installed that performs coarse and fine cleaning. This is not just a whim of engineers, but a real necessity. Fuel always contains a certain amount of impurities. When they enter the engine, they form carbon deposits on the spark plugs and directly in the combustion chamber. This threatens to completely coke the engine and require major repairs.
If we talk about domestic gasoline, the level of impurities it contains is even higher than in European fuel, so the filter is subjected to greater loads, and it quickly becomes unusable. The efficient operation of the fuel filter allows you to remove water, small particles of dirt and dust from gasoline, which, of course, will prevent the development of corrosion of the internal components of the fuel system and engine. Dirty fuel can damage the injectors and cause increased injector wear. The cost of these components significantly exceeds the cost of a new filter.
Filter selection
When performing repairs and replacing the filter device, you must select the correct part for installation.
When purchasing, you should be guided by the catalog numbers of fuel purifiers:
- the device for fine cleaning has article number 31112-1G000;
- fuel coarse cleaning element - number 31090-1G000;
- rubberized sealing ring for the pumping device - 31118-3J300;
- sealing rubber directly for the filter - 31115-1 G000.
If you can’t buy original parts for Kia, you can opt for analogues.
This is interesting: What is the best oil to pour into the engine of a Kia Sportage
Replacing the Kia Rio fuel filter: how to do it?
To get started, prepare the necessary tools and materials:
- 8 and 12 heads with extension;
- flat and figured screwdrivers;
- pliers;
- knife;
- sealant.
Let's take a step-by-step look at how to replace the Kia Rio 3 fuel filter. It works best in a lit garage. No pit or lift is needed.
- Using a 12-gauge socket and extension, remove the bolt holding the rear seat trim.
- The seat itself is also held in place by latches. We're filming.
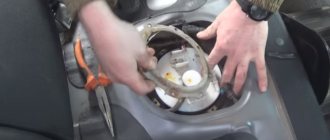
- There is a plastic hatch under the seat that covers the fuel pump. It is held in place by a sealant that must be removed with a knife or flat-head screwdriver.
- You will see the fuel supply module cover; it is fixed with self-tapping screws. Hoses and wiring fit into it.
- To relieve pressure, you need to turn off the chip and start the car without it.
When the engine runs out of fuel in the system and it stops, start it 2-3 more times with the starter. That's it, the pressure is relieved. Using pliers, tighten the supply tube clamp and disconnect it.
The second tube connects to the “quick connectors”. Squeeze the chip and carefully pull it out.
Clean the fuel module cover from dust to prevent debris from getting into the tank during disassembly. Remove the screws that secure it using an octagonal socket or Phillips screwdriver.
Remove the clamping ring, then carefully remove the fuel cell. It is recommended to keep a rag handy as gasoline may spill.
Do not hit the fuel level sensor with the float on the edge of the tank, otherwise it will be damaged.
Next you need to remove the rubber o-ring. Now be sure to disconnect the sensor connectors and release the guides to remove the cover. This is best done with a flathead screwdriver.
Carefully remove all fuel line holders. Remove the end of the hose from the outlet fitting, then remove the rubber O-ring. We do the same with the inlet fitting.
The cup body has guides for closing. They need to be removed with a flathead screwdriver to free the guide rods.
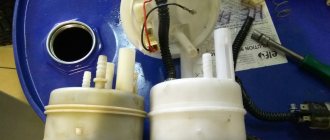
Separate the cup from the lid. Then unfasten your shoes. Now you can remove the filter element from the housing along with the pump, as well as the coarse filter.
Using a flat-head screwdriver, press out the 2 clamps and remove the pump itself.
The coarse filter is held in place by a lock washer. You will have to disassemble it with a flat screwdriver. Now this mesh needs to be removed.
There is a rubber O-ring at the end of the exhaust pipe that needs to be removed. Then disconnect the ground wire.
Press tab 2 with a flat screwdriver and remove it. Then we remove the fuel pressure regulator, which pressed the latch. Remove the fuel drain hose.
Use a flathead screwdriver to remove the rubber gasket you see in the photo. You will have a fine filter in your hands.
Replace it with a new one. Then put everything back together in reverse order.
We are replacing
The following symptoms may be prerequisites for replacing the Kia Rio fuel purifier:
- high noise during operation of the fuel pump;
- At high speeds jerks appear, which gradually become more frequent, and also appear at low speeds.
What will you need?
- new fuel barrier;
- Phillips screwdriver;
- flat screwdriver;
- pliers;
- a set of keys;
- sealant;
- carburetor cleaning spray.
Steps
The designs of the Kia Rio fuel system of 2012 and 2013 are very similar, therefore the replacement process is almost identical.
- We remove the rear seat of the Kia Rio - to do this you need to unscrew the bolts with a 12mm wrench.
- We remove the plastic protection - it usually sits on the sealant and to remove it, you need to pry it off with a screwdriver.
There is access to a small hatch secured with self-tapping screws. - The fuel system is under pressure, so for further work it must be relieved. We start the engine and use the latch to disconnect the pump power supply.
- We wipe the lid from debris and sand, but it is better to use a vacuum cleaner.
- We remove the fuel supply hoses, while pre-clamping the clamps with pliers. There should always be a rag nearby, because a small amount of gasoline may leak from the hose.
- Using a Phillips screwdriver, unscrew the bolts securing the pump.
- We remove the ring and slowly pull out the filter element from the glass, being careful not to spill the gasoline that remains in the pump glass.
- We fix the position of the fuel level float.
- Using a flat-head screwdriver, pry up the clamps and disconnect the tubes.
- We remove the connectors.
- Slowly remove the plastic latch, and at the same time release the guides so that we can remove them with the lid. We remove the fuel cleaning element together with the pump from the glass.
- We disconnect the negative contact, while the screwdriver remains between the fuel purifier ring and the motor latches - this will make it possible to disconnect it.
- We remove the metal valve.
- We remove the rubber O-rings from the old fuel filter.
- We install a new valve in the new cleaning barrier.
- Loosen the latches, remove the plastic part, then the O-rings.
- We put it on a new filter barrier.
- We begin the assembly by installing the motor on the new filter and securing the pipes with latches.
- Place the fuel filter in a glass.
- We put the hatch in place, secure it with bolts and connect the chip.
- We place the assembled pump in the tank.
- Lubricate the edges of the protective cover with sealant and put it in place.
Problems that may arise after replacement and methods for eliminating them
After changing the cleaning barrier, many often encounter the same problem - the car does not want to start or starts very poorly.
First you need to check the removed fuel filter - it is likely that you forgot the o-ring on it. In this case, the fuel flows back and the pump needs to re-pump it, which causes complications with starting the engine. If the old filter element remains and the ring is on it, then you will need to disassemble everything again in order to put the ring in place. If the seal is damaged or missing, you need to buy a new one.
A few tips for car enthusiasts
The quality of the fuel being used has a huge impact on the time it takes to replace the fuel filter. If you often fill with low-quality contaminated fuel with a significant proportion of various impurities, the filter will become clogged much earlier.
Engines running on diesel fuel require filter replacement much more often than those running on gasoline.
Loading …
Which fuel filter to install on Kia Rio 3
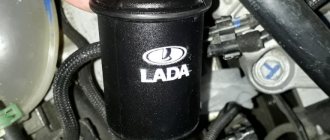
The official dealership will give you a clear answer that you only need to install original spare parts. They will be absolutely right. Brand fuel filters are created specifically for this foreign car and take into account all design features. If you agree with this opinion, look for the Hyundai / Kia fine filter 311121ROOO. Its cost varies from 1000 to 1200 rubles. You will also need an original coarse filter (Hyundai / Kia 311841ROOO), the cost of which does not exceed 550 rubles.
However, it is not always possible to find original spare parts and some motorists complain about the high cost. There are a number of compatible components on the market. Some of them are cheaper than the original, others, on the contrary, are more expensive. The quality of such filters is a controversial issue, so drivers have to personally test the products and draw conclusions for themselves. Alternatively you can order:
- NIPPARTS filter with catalog number N1330330 - price 600-700 rubles;
- Italian-made ASHIK filter, article number 300KK21 - one of the high-quality models at a price of 1000 rubles;
- BLUE PRINT of English production, article ADG02404, price from 1100 rubles;
- product from the Korean brand NSP, catalog number NSP02311121R000, price from 400 rubles
If we talk about coarse (mesh) filters, you can buy cheap models from KROSS, KM7901114 or better MOBIS, number 311841R000. Unfortunately, it is not possible to visually determine the effectiveness of the filter. The main thing is to inspect it for external damage and defects.
Signs of a worn fuel filter
It is not rational to disassemble the Kia Rio-3 fuel filter just to check its condition, so more experienced drivers can tell by certain behavioral characteristics that something is wrong with the car. Symptoms of a bad filter include:
- noticeable drop in power;
- increased fuel consumption regardless of driving style;
- the engine does not idle or stops completely, there are interruptions in the operation of the unit;
- contractions appear at high speed;
- the car responds late or very slowly to pressing the accelerator pedal;
- deterioration in dynamics.
There is too much air and too little fuel in the mixture. This negatively affects the life of the engine, especially valves and cylinders. Of course, these signs could indicate another problem, but the fuel filter itself should always be a suspect.
A little monitoring of the fuel system pressure will help you be more accurate. If it is not large enough, then with almost 100% probability we can talk about a problem with the fuel filter. Each driver can check this independently. You will need a small hose, a tee and a pressure gauge with a measuring range of 5 kgf/cm2. Once you have all this ready, follow these steps:
- First of all, of course, make sure there are no leaks. Inspect fuel lines for leaks. To do this, it will be more convenient to put the car on a lift or use a pit.
- Check the contacts on the fuel system devices; if they are coated, clean them.
- Turn on the ignition and listen, the fuel pump should turn on, but only if the engine has not been running 1-2 hours earlier. If the engine has been started recently, the pump will be quiet. This is normal and the unit maintains the required pressure for a short period of time after the engine is stopped.
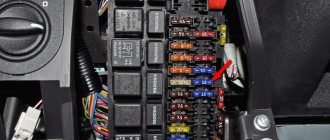
- The next step is to relieve the pressure. To do this, find the relay block in the engine compartment and pull out the one on the left.
- It is necessary to install a tee and a pressure gauge between the entrance to the ramp and the fuel line.
- Start the engine and read the pressure gauge. If it is less than 3.45 kgf/cm2, the pressure is too low and, most likely, it is due to a clogged filter, although the pump does not need to be repaired.
After the measurement, do not forget to disassemble the pressure gauge and replace the relay. As you can see, this is a quick and simple diagnostic method that can be carried out even in the garage.
What is the point of regular replacement?
Be sure to observe the frequency of replacing the fuel filter. This will reduce the load on the engine and reduce the likelihood of carbon buildup inside the powertrain. The car will become safer when accelerating. Regular replacement of the unit will also save fuel.
You can increase the resource of the cleaning system using 3 tips:
- Refueling is needed only at proven gas stations operating under the brands of large companies.
- Do not store fuel in old rusty cans.
- Do not go to a gas station immediately after refueling from a tanker.
We must not forget about the need to change the filter. This is fraught with damage. In addition, the car can “stop” right on the highway, far from civilization.
How to replace this consumable yourself
If you have an idea and will do it yourself to replace the fuel filter, this will allow you to save on service costs. In this article we will tell you how to change the filter, as well as where it is located, but before you start, you will need to purchase a new consumable, for this you only need to know its catalog number.
To successfully implement the process you will need to use the following tool:
- screwdrivers with slotted and Phillips profiles;
- keys and pliers.
Have you decided to seek the help of experts? For this procedure you can fork out 1.5 thousand rubles. taking into account the price of the part. Even if it is under warranty service, your Kia Rio 3 cannot count on replacing the filter without payment, since this element is positioned as a part subject to natural wear and tear. This also applies to brake pads and discs, lamps, fuses, etc.
Consequence: some Kia Rio 3 owners tend to refuse warranty service a year after the start of operation.
If you don't change, what will happen?
If the component is not replaced in time, this will put a lot of stress on the pump, which will have difficulty pushing fuel through the system because the fuel pump screen is already clogged. The car will pick up speed worse, the power will decrease and the original dynamics will disappear. Sometimes you may notice a drop in power when the internal combustion engine is running. This is especially noticeable when driving uphill.
The engine will start worse every day, up to complete failure. And this happens sometimes.
Fuel consumption will increase due to problems with the filter. For example, if previously a car consumed 9-10 liters per 100 km, then if the filter is clogged, this figure can increase to 11-12 liters. Drops will appear when you press the accelerator pedal. This can lead to an accident when overtaking on a country road when you need to accelerate sharply.
When you are at a traffic light, the engine idle speed can fluctuate to such an extent that the internal combustion engine freezes up. You will remain standing at the crossroads - this is not very pleasant.
The process of replacing a part on the Rio model is presented in this video:
Part selection
The fuel filter is one of those parts of the car that has many analogues and you can find a simple one that suits you. So, Kia Rio has a number of analogues of the original part.
Original
Approximate prices for a filter for a Kia Rio car will please you with its affordable price.
- Coarse fuel filter 31090-1G000. Average cost 600 rub.
- Fine fuel filter 31112-1G000. The average cost is 1200 rubles.
Analogs
Now let's look at the list of analogues with catalog numbers and prices:
| Manufacturer name | Catalog number | Price in rubles per piece |
| Nipparts | N1330325 | 750 |
| Toko | T1304028P | 800 |
| SCT | ST 6516 | 1000 |
| Benefit | 1535-0014 | 1000 |
| Planimetry | ADG02376 | 1000 |
| Corestar | KFFH-053 | 1000 |
| Master sport | 300-KF-PCS-MS | 1200 |
| Parts of Japan | FC-K22S | 1500 |
| Patron | PF3258 | 1500 |
| Alco | FF-076 | 1700 |
DIY replacement process
Replacing the filter device is one of the simplest tasks when repairing a car. To perform it, you don’t have to contact specialists; you can do everything yourself.
Tools and materials
What you will need to replace the part:
- new filter element;
- two screwdrivers - with a Phillips and a flat tip;
- pliers;
- set of wrenches;
- sealed glue;
- stationery knife;
- special product for cleaning carburetors.
User Andrey Totem shot and published a video in which he showed how to replace the fuel filter in a Kia Rio.
Stages of work
How to replace the filter device in Kia Rio cars:
- First, the rear seat in the car is dismantled. To remove the chair, unscrew the screws located between the bottom and top of the seats using a 12mm wrench.
- Lift the lower part of the chair and remove the brackets securing it from the fastenings. Dismantle the pillow.
- In the space under the chair you can see a plastic hatch. This is protection for the fuel pump; it is usually fixed with sealant adhesive. To remove the protection, use a utility knife or a flat-head screwdriver.
- This will give you access to another hatch, which is fixed to the car body with self-tapping screws. The fuel pump is hidden behind it. The hatch screws are unscrewed with a Phillips head screwdriver.
- Before carrying out any dismantling work, relieve the pressure in the fuel line. To do this, start the car engine and disconnect the connector with wires from the plug installed on the pump itself. When the pressure in the fuel system is released, the engine will randomly stall. You won't be able to start it again.
- Before removing the cover, be sure to wipe it with a cloth to remove dirt and prevent it from entering the pump. Otherwise, it will negatively affect its functionality as a whole. If possible, you can use a vacuum cleaner for cleaning.
- Disconnect the fuel supply pipes connected to the device by clamping the fastenings of the lines with pliers. Do not remove the rag too far, as some of the fuel will come out of the hose when removed.
- Use a Phillips screwdriver to unscrew the screws securing the pump device. Move the ring aside and slowly remove the filter part from its seat. When dismantling, be careful not to spill fuel.
- Fix the position of the float used to control the level of gasoline in the system.
- Use a flat-tip screwdriver to pry up the fasteners and disconnect the connected pipes. Disconnect the connectors and move them to the side.
- Carefully remove the retainer from the plastic and release the guides to remove them along with the cover. Now you can remove the part from the so-called glass to clean the fuel.
- Disconnect the ground wire. Use a screwdriver to pry up the ring of the filter element and the latches of the electric motor, and disconnect it.
- Remove the metal valve. Pull the rubber seal out of the filter device.
- Install a new valve into the filter. Loosen the clamps and remove the plastic part along with the seals.
- Install the new filter into the seat. The assembly procedure begins with installing the electric motor on a new filter device and fixing the fastenings of the fuel lines.
- The new filter is mounted in the fuel pump glass. The hatch is installed in place and secured with screws. The connector with wiring is connected. The protective plastic cover under the rear seat of the car is treated around the perimeter with airtight glue and mounted in place.
A Hyundai Solaris / Kia Rio user presented a video that describes in detail instructions for changing the fuel cleaning device.
Price issue
The cost of an original filter for cleaning fuel in a Kia Rio is about 1000-1500 rubles on average. To save money, you can buy an analogue, its price varies around 400-800 rubles.
When does the fuel filter of a Kia Rio 2 need to be replaced and why?
For some reason, many people believe that the fence is designed for its entire service life, but this is not so. The manufacturer recommends changing the gasoline filter product no later than 60,000 km. However, judging by the reviews of car owners, even on the new KIA model they prefer to change the part after 30-35 thousand kilometers. There is only one explanation for this action: the low quality of fuel at some unscrupulous gas stations.
The time frame for replacing a faulty Kia Rio 2 fuel filter can be determined by the degree of efficiency of the internal combustion engine, its dynamic and speed characteristics:
- Unstable operation of the power unit.
- Increased fuel consumption.
- Loss of power.
At an early stage, all these problems are difficult to identify, but as the situation worsens, they become more pronounced. At the last degree of contamination, the car simply does not start. Unfortunately, in the latter case, major repairs are often required with significant financial costs.
Signs indicating the need to replace the fuel filter
The filter is clogged with foreign bodies. This reduces the efficiency of the unit, which manifests itself in a change in the quality of operation of the power plant. The fuel filter on a KIA Rio 3 should be replaced when the following symptoms appear:
- “Jerks” of the car when speed increases;
- loss of stability of the internal combustion engine at idle;
- pressure drop in the engine;
- the occurrence of unusual noises;
- problems with the speed range when driving, loss of power;
- increased fuel consumption.
These signs go unnoticed at first. They get worse over time. If the driver ignores these signals, problems will arise with starting the internal combustion engine. It is best to replace the fuel filter on KIA Rio 2, 3 and 4 before the part runs out.
Which filter to choose
When choosing a part, it is necessary to take into account the type of internal combustion engine. Officially, KIA Rio 3 with diesel power units was not supplied to the Russian market. There are only a few such machines in Russia. Finding an original fuel filter for such cars is very difficult. It is best to purchase an analogue from Bosch.
There is no point in buying cheap Chinese filtration systems. Their prices are lower, but the quality of the filters themselves leaves much to be desired. They purify diesel fuel worse. The risk of power plant failure increases.
It is easier to purchase a filtration system for KIA RIO 3 with a gasoline engine. The volume of the power plant does not affect the selection of parts. Engines with a volume of 1.4 and 1.6 liters use the same filtration system. Moreover, a similar unit is used on KIA Sportage, Sorento and some Hyundai cars (Accent and Elantra).
It is best to search for an original filter in stores by its article number - 31112-1R000. Analogues from AMD, Finwhale and Nipparts are also suitable. Factory part numbers for these parts are AMD.FF45, PF731 and N1330330, respectively.
Replacing the fuel filter on KIA Rio 2015, 2016 and earlier years of production is best combined with installing a new filter mesh. It is used as a preliminary filtration system and prevents massive foreign particles contained in gasoline from entering the filter. Mesh article number – 31184-1R000. As an alternative, it is better to use a mesh from the Cross company with article number KM79-01114.
Possible problems and methods for eliminating them
Unsuccessful repairs often result in problems with starting the internal combustion engine. The car starts after using the starter for 3-5 seconds or does not start at all. As a rule, the reason lies in the o-rings, which are forgotten to be installed during assembly. It happens that the ring does not fit in its usual place, after which it ceases to perform its functions.
For the reasons described, gasoline will return to the tank and the pump will have to pump it again. It is this factor that becomes the culprit for prolonged engine starting. In any case, disassemble the assembly again and install or replace the O-ring.
Sources
- https://remontautomobilya.ru/kak-zamenit-toplivnyj-filtr-na-kia-rio-3.html
- https://to-club.ru/kia/kia-rio/to-obsluzhivanie-kia-rio.html
- https://gyroscooter-izhevsk.ru/transmissiya/toplivnyj-filtr-kia-rio-3.html
- https://kia-bash.ru/kia/zamena-toplivnogo-filtra-kia-rio-3.html
- https://myducato.ru/kia/zamena-toplivnogo-filtra-kia-rio-3.html
- https://rulikoleso.ru/to-kia/zamena-toplivnogo-filtra-v-kia-rio-3
- https://FokSevmash.ru/elektronika/toplivnyj-filtr-kia-rio-3.html
- https://TrueScooters.ru/motor-avto/zamena-toplivnogo-filtra-kia-rio-3.html
- https://FanKia.ru/zamena-toplivnogo-filtra-kia-rio-3/
- https://i-love-mycar.com/kak-pomenjat-toplivnyj-filtr-na-kia-rio-3-tehnologija-i-vybor-luchshego/
- https://r-min.ru/menyaem-toplivnyy-filtr-v-kia-rio-2012-i-2013-poshagovaya/
- https://delis-avto.ru/pro-dvigatel/toplivnyj-filtr-kia.html
Reasons for lack of fuel in the engine
A common and simple reason is that the tank has run out of fuel. The indicator does not correctly display the amount of fluid in the tank, and it will run out unexpectedly while driving.
A clogged injection system is considered the next reason. Injectors and fuel mixture filtration parts purify gasoline before it enters the mechanism. Otherwise, the channels become clogged and fluid does not flow.
Pay attention to the thickness of the channels, because they are very thin and clog with any debris. Therefore, the developers came up with three types of fuel filters.
