The cleanliness and timeliness of oxygen entering the fuel equipment is extremely important to ensure the performance of the vehicle and the power unit as a whole. The completeness of combustion of the fuel mixture determines throttle response, acceleration dynamics, and power indicators. Lack of air leads to depletion of the combustible mixture, engine detonation, and reduced power.
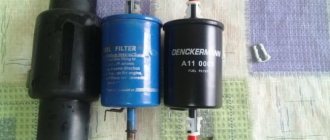
Kia Rio cars are equipped with two fuel filters: coarse filter (mesh filter - a mesh bag) and fine filter (plastic block with a filter element inside). Both filters are components of the fuel module located in the fuel tank.
Technical regulations for replacement
In order to maintain the functionality of the technical product, the manufacturer recommends replacing the Kia Rio fuel filter every 30,000 km. mileage In this case, maintenance is carried out every 15,000 km. In practice, this interval is not maintained. Car enthusiasts who care about their vehicles update cleaning elements every 10,000 km.
The replacement process is not at all complicated; every car owner can do it. Specialists are rarely called to the workshop in case of detection of a large-scale breakdown or other malfunction that requires prompt intervention by a professional.
Summary
All components and mechanisms of a car are considered important units, but there are some that are especially significant. If one of these systems is broken, then the car simply won’t go anywhere. These include fuel, because if fuel does not enter the combustion chambers, then the car will not be able to move.
There are several reasons, but the most common on cars with sufficient mileage is that the fuel filters become clogged. Each car has two or three filter devices; on more expensive cars, of course, there are more, but in any case, parts need to be changed with particular frequency. Otherwise, the car will absorb more fuel, but lose power.
Reduced fuel pressure Kia Rio
In operating condition, the fuel pressure in the system is significantly higher than atmospheric pressure. To prevent uncontrolled spills of gasoline, all work related to depressurization of the system is carried out with the pressure released. To relieve pressure, first turn off the fuel pump by removing the fuel module power connector or removing the fuse. Then the engine is started and the remaining fuel is exhausted. Without additional actions, the pressure drops on its own 2–3 hours after the ignition is turned off.
To work, you will need a flathead and Phillips screwdriver. The procedure for releasing pressure is as follows.
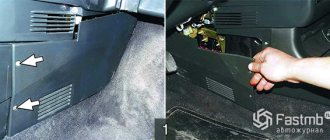
- Remove (if necessary, pry up with a screwdriver) the plastic cover of the fuse box located to the left of the steering column.
- In operating condition, the fuel pressure in the system is significantly higher than atmospheric pressure. To prevent uncontrolled spills of gasoline, all work related to depressurization of the system is carried out with the pressure released. To relieve pressure, first turn off the fuel pump by removing the fuel module power connector or removing the fuse. Then the engine is started and the remaining fuel is exhausted. Without additional actions, the pressure drops on its own 2–3 hours after the ignition is turned off.
- To work, you will need a flathead and Phillips screwdriver. The procedure for releasing pressure is as follows.
- Remove (if necessary, pry up with a screwdriver) the plastic cover of the fuse box located to the left of the steering column.
- To remove the fuel module (instead of removing the fuse), lift the rear seat and trim flaps underneath, unscrew the mounting screws, remove the hatch cover and disconnect the module's power connector.
- Start the engine and wait for it to stop spontaneously.
- Use the starter to turn the crankshaft several times.
If you don't change, what will happen?
If the component is not replaced in time, this will put a lot of stress on the pump, which will have difficulty pushing fuel through the system because the fuel pump screen is already clogged. The car will pick up speed worse, the power will decrease and the original dynamics will disappear. Sometimes you may notice a drop in power when the internal combustion engine is running. This is especially noticeable when driving uphill.
The engine will start worse every day, up to complete failure. And this happens sometimes.
Fuel consumption will increase due to problems with the filter. For example, if previously a car consumed 9-10 liters per 100 km, then if the filter is clogged, this figure can increase to 11-12 liters. Drops will appear when you press the accelerator pedal. This can lead to an accident when overtaking on a country road when you need to accelerate sharply.
When you are at a traffic light, the engine idle speed can fluctuate to such an extent that the internal combustion engine freezes up. You will remain standing at the crossroads - this is not very pleasant.
The process of replacing a part on the Rio model is presented in this video:
How to replace the fuel filter on a Kia Rio - step-by-step instructions
In order to replace the fuel filter on Kia Rio cars, you must perform the following steps:
- The fuel module is located in the fuel tank located under the rear passenger seat.
- Lift the seat cushion and remove the fastening brackets from the holders.
- Remove the rear seat cushion completely. Under the seat there is an access hatch to the fuel module. To open it, use a knife, because... it is glued with sealant (although self-tapping screws would be quite suitable for fixing it).
- Disconnect the fuel module power supply (ignition must be turned off).
- Using pliers, remove the fuel vapor supply hose to the adsorber. Remove the fuel supply pipe.
- Remove the tube holder from the mount on the fuel module cover. Using a socket wrench 8, unscrew the bolts securing the fuel module cover plate.
- Open the rear doors of the car to ventilate fuel vapors. Remove the fuel module from the fuel tank (be careful not to damage the float).
- Now, to get to the fine and coarse filters, you have to disassemble the fuel module. First remove the fuel level sensor. To do this, disconnect the sensor connector from the module cover.
- Remove the wires from the holders. Use a screwdriver to pry the sensor retainer and slide it down.
- Next, disconnect the fuel pump power plug. Disconnect the tube that supplies fuel to the fine filter. To do this, use a screwdriver to pull out the lock.
- Separate the cover and the fuel module glass. Now you should remove the fine filter with the fuel pump built into it from the glass.
- To remove the fuel pump from the filter housing, press the clamps. Disconnect the fuel coarse filter from the fuel pump.
- When disassembling the fine filter, disconnect the O-ring and the remaining wire. Disconnect the pressure regulator and the remaining fuel drain pipe.
- The fuel filter has been removed. That's it, now you should assemble the fuel module with new filters in reverse order.
Car enthusiasts recommend carrying out preventive maintenance followed by replacement every 10,000 km. In this case, you can count on the longevity of the technical device. Premature replacement of the cleaning element is also justified in the case of systematic filling of the tank by 40 - 60%. The likelihood of sediment formation increases several times.
Which filter should you choose?
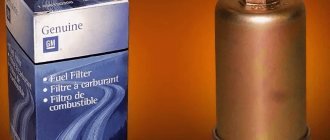
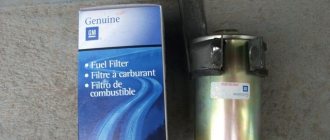
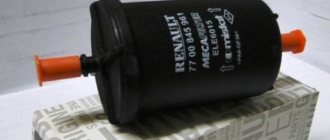
When choosing a filter element, you must rely on the recommendations of the manufacturer or official dealers. Only an original part can ensure ideal cleaning of the fuel mixture and uninterrupted engine operation.
Not only its service life, but also the degree of fuel purification depends on the quality, and this affects the power of the machine, the behavior of the engine, and the wear rate of its parts. It is a plastic case, inside of which there are 2 filters - coarse and fine, as well as a mesh. You can purchase a suitable element in the online store.
Kia Rio 4 maintenance cost
| Kia Rio 4 maintenance cost | |||
| Maintenance number | Catalog number of spare parts | *Price, rub.) | |
| Consumables costs | Cost of work at a service station | ||
| TO 1 | engine oil - 550046777 oil filter - 26300-02502 cabin filter - 971332E210 drain plug o-ring - 21513-23001 | 3310 | 1850 |
| TO 2 | All consumables for the first maintenance, as well as: brake fluid - 0110000110 | 5410 | 3050 |
| TO 3 | Repeat first maintenance air filter - 314532D530 | 4060 | 2300 |
| TO 4 | All work provided for in TO-1 and TO-2 plus additionally: fuel filter - 31112-F9000 fuel tank filter - 31453-H5000 spark plugs, depending on the engine model 18855-10061 or 18844-10060 | (G4FC) - 10720 (G4FA) - 12360 | 7050 |
| TO 6 | All work provided for in TO-1 and TO-2 and if there is an automatic transmission, then: ATF automatic transmission - 0450000115 automatic transmission filter - 46321-2F000 | 13310 | 5050 |
| TO 8 | All work provided for in TO-4, if a manual transmission is installed, then: manual transmission oil - 04300-00110 | (G4FC) - 11960 (G4FA) - 13600 | 8250 |
| TO 10 | All work provided for in TO-2 | 5410 | 3050 |
| TO 14 | All work provided for in TO-2 and the first replacement of coolant - 07100-00400 | 10410 | 4250 |
| Consumables that change without reference to mileage | |||
| Replacing the Hinge Belt | 25212-2B000 | 1500 | 1800 |
| Replacing timing chain + guides | 24321-2B200 24431-2B000 24420-2B000 24410-25001 | 7050 | 8000 |
*The average cost is indicated as of prices for the summer of 2022 for Moscow and the region.
Possible problems and methods for eliminating them
Unsuccessful repairs often result in problems with starting the internal combustion engine. The car starts after using the starter for 3-5 seconds or does not start at all. As a rule, the reason lies in the o-rings, which are forgotten to be installed during assembly. It happens that the ring does not fit in its usual place, after which it ceases to perform its functions.
For the reasons described, gasoline will return to the tank and the pump will have to pump it again. It is this factor that becomes the culprit for prolonged engine starting. In any case, disassemble the assembly again and install or replace the O-ring.
Sources
- https://remontautomobilya.ru/kak-zamenit-toplivnyj-filtr-na-kia-rio-3.html
- https://to-club.ru/kia/kia-rio/to-obsluzhivanie-kia-rio.html
- https://gyroscooter-izhevsk.ru/transmissiya/toplivnyj-filtr-kia-rio-3.html
- https://kia-bash.ru/kia/zamena-toplivnogo-filtra-kia-rio-3.html
- https://myducato.ru/kia/zamena-toplivnogo-filtra-kia-rio-3.html
- https://rulikoleso.ru/to-kia/zamena-toplivnogo-filtra-v-kia-rio-3
- https://FokSevmash.ru/elektronika/toplivnyj-filtr-kia-rio-3.html
- https://TrueScooters.ru/motor-avto/zamena-toplivnogo-filtra-kia-rio-3.html
- https://FanKia.ru/zamena-toplivnogo-filtra-kia-rio-3/
- https://i-love-mycar.com/kak-pomenjat-toplivnyj-filtr-na-kia-rio-3-tehnologija-i-vybor-luchshego/
- https://r-min.ru/menyaem-toplivnyy-filtr-v-kia-rio-2012-i-2013-poshagovaya/
- https://delis-avto.ru/pro-dvigatel/toplivnyj-filtr-kia.html
List of works for a mileage of 120,000 km
Carry out all the work that is supposed to be done every 60 thousand km ( TO 4 ). And:
Changing the oil in the manual transmission. The lubricant must comply with SAE 70W API-GL 4 HK MTF 70 W, SPIRAX S6 GHME 70 W, GS MTF HD 70 W. According to the technical documentation, Shell Spirax 75w90 GL 4/5 . Product code 550027967, price 780 rubles per liter. When changing oil, it is better to use semi-synthetic transmission semi-synthetic “MTF 75W-85” , produced by Hyundai/Kia. 1 liter bottle - 04300-00110, price 620 rubles.