03/02/2022 2,634 Alarms
Author: Victor
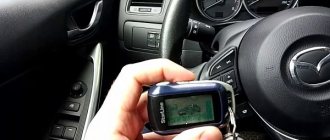
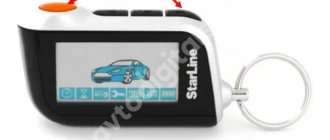
According to the user manual, to program the Starline A93 alarm, you must use the main control key fob. If it breaks or is lost, you can use an additional remote control. The functions performed when setting up the Starline A93 key fob are shown on the screen and sounded by a melodic signal and vibration. Each of the security system operating modes is indicated by an icon that lights up when it is turned on and goes out when deactivated.
[Hide]
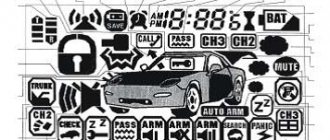
Starline A93 key fobs: buttons and pictograms
Icons on the remote control display
Icon designations on the screen of the Starline A93 security complex:
- The automatic engine start mode based on a preset alarm is activated.
- The algorithm for working with a manual transmission has been selected.
- The indicator of the warm-up process, carried out according to the timer, is turned on.
- Temperature-based automatic start mode has been activated.
- The service alarm mode is enabled (when the vehicle is transferred to third parties for technical inspection).
- Turbo timer mode is active.
- Remote alarm deactivation is enabled.
- The button lock is activated, preventing involuntary presses.
- The control key fob performs the function of an immobilizer.
- Information is provided about the temperature under the hood of the vehicle.
- Battery status is displayed. One division indicates the imminent failure of the battery.
- Information is provided from the limit switches about the opening of the doors, hood and trunk lid of the vehicle.
- The Anti-Robbery function is activated.
- The engine is running.
- The connection of any of the StarLine GSM modules is displayed.
- Bypass of both sensors is indicated.
- The first level of sensors is indicated.
- The ignition is on.
- A numeric user interface is displayed.
- The shock sensors were activated.
- The timer is displayed.
- The alarm clock is set.
- The key fob receives information from the security system.
- The door locks are activated.
- The locking mechanism is being opened.
- The sound alarm mode has been activated (when the sensors are triggered, light and sound signals are given).
- The siren is deactivated (an alarm is indicated only by flashing of the emergency system).
- The parking brake was not applied (or the foot brake was pressed).
- A 1-, 2-, or 3-digit personal unlock code (PIN) is programmed.
Main and spare key fobs for Starline A93 alarm system
You can operate the key fob buttons of the security complex as follows:
- quick “click” on one or two keys in 0.5 seconds;
- long press several buttons until the sound signal turns on;
- double “click” on one key within a second;
- sequential pressing of a pair of buttons, the first for a long time, and the second for a short period of time.
Basic key fob key combinations and associated functions:
| Action | Push-button combinations of the main key fob | Push-button combinations of an additional key fob | Ignition | Note |
| Activate the system (with sound signal) | Button 1 (short) | Button 1d (short) | Disabled | Not available in service mode |
| Turn off the system (with sound signal) | Button 2 (short) | Button 2d (short) | Disabled | Likewise |
| Activate the system (no beep) | Button 1 + Button 1 (sequentially) | Button 1d (twice) | Disabled | — |
| Turn off the system (no beep) | Button 2 + Button 2 (sequentially) | Button 2d (twice) | Disabled | — |
| Silent security mode | Button 1 + Button 2 (sequentially) | No combination | Disabled | — |
| Abort alarm | Button 2 (short) | Button 2d (short) | Disabled | — |
| Activate anti-robbery mode | Button 1 + Button 3 (long until beep) | Button 1d + Button 2d (long until sound signal) | Included | — |
| Deactivate anti-robbery mode | Button 1 + Button 3 (long until beep) | Button 1d + Button 2d (long until sound signal) | Does not depend | — |
| Shock sensor control | Button 1 (twice) | Button 2d + Button 1d (sequentially) | Disabled | — |
| Additional shock sensor control | Button 2 (twice) | Button 2d + Button 2d (sequentially) | Disabled | — |
| Turning the tilt sensor on/off | Button 3 (twice) | No combination | Disabled | — |
| Activating Panic mode | Button 1 + Button 3 (long until beep) | Button 1d + Button 2d (long until sound signal) | Disabled | — |
| Starting the engine and increasing the time by five minutes | Button 1 (long until beep) | Button 1d + Button 2d (long until sound signal) | Disabled | — |
| Stopping the engine | Button 2 + Button 4 (sequentially) | Button 1d + Button 2d (sequentially) | Disabled | — |
| Additional channel 1 control | Button 2 + Button 1 (sequentially) | 3D button (twice) | Does not depend | In any mode |
| Additional channel 2 control | Button 3 + Button 1 (sequentially) | Button 3d + Button 2d (sequentially) | Does not depend | Likewise |
| Additional channel 4 control | Button 2 + Button 3 (sequentially) | No combination | Does not depend | — |
| Additional channel 5 control | Button 3 + Button 2 (sequentially) | No combination | Does not depend | — |
| Additional channel 6 control | Button 4 + Button 2 (sequentially) | No combination | Does not depend | — |
| Adjusting the sensitivity of the shock sensor | Button 3 + Button 3 (sequentially) | No combination | Does not depend | — |
| Adjusting the tilt sensor sensitivity | Button 4 + Button 4 (sequentially) | No combination | Does not depend | — |
| Checking parameters (voltage, temperature) | Button 3 (short) | No combination | Does not depend | — |
| Search for a car | Button 4 (twice) | Button 3D (short) | Does not depend | — |
| Closing the locks | Button 1 (short) | Button 1d (short) | Included | — |
| Opening locks | Button 2 (short) | Button 2d (short) | Included | — |
| Activating the cursor | Button 2 or Button 3 until double signal | No combination | Does not depend | — |
| Entering the programming menu | Button 4 to double beep | No combination | Does not depend | — |
| Enabling key fob button locking | Button 2 + Button 4 (simultaneously) | Button 1d + Button 3d (simultaneously) | Does not depend | — |
| Disabling key fob button locking | Button 1 + Button 4 (simultaneously) | Button 2d + Button 3d (simultaneously) | Does not depend | — |
Programmable Features
Programmable security and service functionality of the Starline A93 signaling system:
- duration of door lock control pulses;
- automatic control of door locks when activating and deactivating the ignition;
- bypassing the door zone and delaying the start of sensor operation when security is on;
- automatic activation of security mode;
- selection of the sequence for processing additional sensor signals;
- remote activation of car alarms without user intervention;
- changing the operating order of the siren control output;
- authorization of the owner in the process of remote or automatic start of the internal combustion engine (ICE);
- algorithm of operation of the blocking output when the “Anti-robbery” function is activated;
- setting a custom emergency code to deactivate the security option;
- activation of engine blocking output;
- algorithm of operation of additional channels;
- automatic control of the communication channel;
- selection of door input polarity;
- operating mode with GSM devices;
- two-step engine blocking shutdown;
- selection of an additional alarm channel that will be activated using a mobile application;
- car alarm operating mode;
- event of starting the authorization procedure.
Starting functions that can be programmed from the key fob:
- stopping the engine when the security option is turned off;
- duration of operation of the internal combustion engine after automatic or remote start;
- algorithm for triggering shock, tilt and additional sensors when the engine is running and the security mode is on;
- automatic shutdown of the internal combustion engine when it warms up to 50 degrees Celsius;
- engine start mode;
- light signals when the internal combustion engine is running after a successful automatic or remote start;
- automatic control of door locks when the engine is activated and the security mode is on;
- algorithm for operating the output of the power launch module;
- duration of starter cranking;
- method of monitoring the operation of the internal combustion engine;
- option for activating ignition support (when turning on the turbo timer mode or when performing the “soft neutral” procedure on cars with a manual gearbox);
- method of operation of the control output of the standard immobilizer bypass module;
- engine start mode;
- selection of the type of gearbox and the implementation (completion) of “soft neutral”;
- algorithm for the operation of the power module output when starting a car engine remotely.
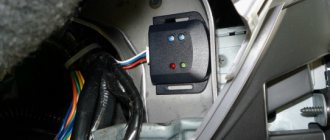
Alarm Installation Instructions
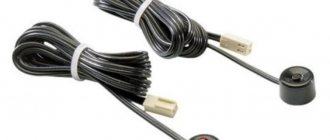
This security system is very complex in its design, because it interacts with many car parts (starter, temperature sensors, etc.). Therefore, its installation is carried out via the 2Can2Lin bus and has a lot of features. It is best to carry out this procedure in service centers, where a master specialist can carry out a competent installation.
Some car owners are put off by the relatively high cost of such work. According to 2017 data, it was 6-8 thousand rubles. Many drivers try to carry out the installation themselves. This can be done, but it will require:
- a set of tools including side cutters, screwdrivers, knives and a soldering iron;
- drill with drills;
- an industrial hair dryer capable of heating temperatures up to 400 degrees Celsius;
- tester for checking quality connections to the Can or Lin bus;
- set of heat shrink tubes.
Below is a detailed video on how to do it yourself.
How do I adjust the sensitivity of the shock or tilt sensor?
The process of adjusting the sensitivity of the sensors is carried out after installing the security system on the vehicle or during its operation. When adjusting the sensor sensitivity threshold, it is necessary to adjust the alarm level so that it does not exceed the warning level.
Setting up the shock sensor
Shock sensor setup sequence:
- Deactivate the security system and ignition.
- Press K3 until the sound signal sounds, and then briefly “click” again. Make sure that you have entered the setup mode and the sensor indicator turns on. The factory setting is 10, the minimum level is 01, and the maximum is 14. With a value of 00, the first (warning) degree of sensor sensitivity is deactivated.
- Using K2 and K3, set the required level (short presses).
- Press K3 twice: long and short, this will allow you to proceed to setting the second (alarm) degree of sensitivity of the sensor. By default, the value of level 2 is set to 05. The remaining indicators are similar to the settings of the first degree of sensitivity.
- Select the appropriate sensitivity by briefly pressing K2 and K3.
- End the programming mode by long and short presses on K3. The car will give three consecutive signals with a light alarm and two with a siren, and a short melody will play on the key fob.
- Activate the “signaling” and check its sensitivity by applying light physical pressure to the vehicle body. The security system should be triggered by a slight tap on the car. If the sensitivity level is incorrect (excessive or insufficient), you should repeat the programming cycle again, making the necessary changes.
Setting up the tilt sensor
In order to program the tilt sensor settings, you must:
- Turn off the security mode and deactivate the ignition, and then press K4 for a long time (until a sound signal is played) and briefly “click” again. The key fob display will show the preset sensitivity level of the sensor (default is 10).
- By pressing the K2 and K3 keys, set the appropriate value. When level 0 is selected, the sensor is deactivated.
- Exit programming mode by long and then short press on K4. The vehicle will flash three hazard warning flashes, the siren will emit two signals, and the key fob buzzer will play a short melody.
After entering the sensor setup mode, you must start programming no later than 15 seconds, otherwise the system will interrupt the adjustment process. Exit from the sensor debugging menu will be indicated by short signals from the key fob and the car light alarm blinking four times.
Linking the new key fobs is shown in the video from the AutoAudioCenter channel.
How to disable the shock sensor?
It is possible to configure the Starline A93 key fob to temporarily disable the shock sensor, which can be implemented in several steps:
- Activate security mode.
- To turn off the warning level of the shock sensor, briefly click the K1 key twice. After this, the buzzer will play a melody and an indicator will appear on the display.
- Double-click on K1 again, this will deactivate the alarm level, completely turning off the sensor. The key fob will emit three short beeps, which will be accompanied by the appearance of a corresponding display block on the screen.
- Double-clicking the K1 key again activates the shock sensor.
The additional shock sensor of the Starline A93 “signal” is disabled according to a scheme similar to deactivating the main sensor, but using the K2 button.
Contents of delivery
StarLine alarms, with the exception of those with the ECO prefix, come with two key fobs: the main one with an LCD display and an additional one, which has three keys. Moreover, unlike most alarms, the additional one works with feedback, which is due to the very essence of the dialogue protocol: when an alarm is triggered, the alarm first transmits information to the main key fob, and not finding it, communicates with the additional one, and it sounds an alarm sound.
The batteries in them are different: the most energy-intensive and frequently used main key fob uses a standard “pinky” AAA battery, which lasts for a month. This is due to the fact that the alarm regularly tries to communicate with the key fob, even if nothing happens - and these regular reception and transmission sessions reduce the battery life. Therefore, when purchasing a StarLine alarm, buy a pair of nickel batteries with a charger: these costs will be recouped by not having to regularly buy batteries.
How to program the key fob?
You can configure the Starline A93 key fob:
- cursor method;
- adjusting the functions of the main unit using tables;
- detailed configuration of the CAN bus.
When programming additional channels of the Starline A93 alarm system, flexible settings are implemented, with the help of which their activation and deactivation is linked to specific events. You can programmatically configure the alarm system response delay time. In addition, you can adjust the duration and number of pulses supplied when the channel is activated.
Configuration using the cursor method
When debugging the operation of the key fob using the cursor method, you need:
- Press and hold the K2 or K3 button until a double melodic signal is played. The lower left icon on the display will light up and flash.
- Select the required mode by pressing the K1 key. The cursor is moved to the left using the K2 button, to the right - K3/K4.
Setting up by tables
To configure the key fob using the tabular method you need:
- Deactivate the ignition.
- Quickly press the setting key five times in a row.
- Turn on the ignition. The siren of the security complex will emit five short signals, and a melody will be played in the control unit.
- By pressing the K2 and K3 keys, select the “AF” item in the key fob menu and turn it on with a long and then a short “click” on the K3 button. The display will show function 1, the key fob will emit a short melody.
- Using the K2 and K3 keys, program the required values according to the table located in the user manual.
- Quickly press the K1-K4 keys to set the required function value.
- Turn off the ignition.
Setting up the CAN bus
Using the key fob you can only enter the CAN bus setup mode. The further programming process is carried out through combinations of presses on the service button, which is installed inside the car.
To enter the CAN interface setup mode you need to:
- Remove the power cable from the unit.
- Press and hold the setting key.
- Activate power. After five consecutive beeps sound, remove your finger from the button.
- Entering the CAN interface programming mode will be accompanied by siren sounds, which will be repeated four times.
- You can start setting up the bus using the service button according to the instructions.
Programming table
Starline A93 alarm programming tables using a key fob:
Table No. 1
Table No. 2
Why is it not registered?
If a new device for alarm control is not registered in the memory of the processor unit, then it is necessary to check the charge level and the state of the contacts of the current source. There should be no traces of corrosion on the metal elements; sandpaper is used for cleaning. A failed battery must be replaced, and a new device must be installed with correct polarity. After completing the manipulations, you need to try to program the key fob again.
When you try to record the fifth Starline A91 alarm key fob, the first device is automatically deleted from the memory. The owner needs to select 4 necessary devices and flash the products again. If problems recur, it is recommended to contact a service equipped with equipment to check the functionality of security system components. If the processor unit or antenna module is irreversibly damaged, a new alarm system is purchased and installed.
Modern car alarms perform not only the functions of security systems. The owner of a car equipped with a Starline A91 alarm system has the opportunity to start the engine remotely using the remote control, set the necessary requirements for warming up the car (by clock, alarm clock or temperature) by pressing certain buttons, and also configure the turbo timer parameters. This article is devoted to the features of setting up the Starline key fob, and also contains a detailed video with instructions.
How to set up autorun?
The Starline A93 security system allows you to remotely start an internal combustion engine in the following ways:
- by signal from the key fob;
- according to information from the temperature sensor located under the hood;
- by time or by a series of repeating launches at user-set time intervals.
Before setting up remote automatic engine start-up, it is necessary to program the options for turning off the engine after deactivating the security mode using a table method. You should also make sure that all circuits responsible for the process of activation and operation of the internal combustion engine without a key in the ignition switch are connected correctly.
Conditions for autorun
In order to set up autostart of the internal combustion engine, the car owner must provide the following conditions:
- turn off the ignition;
- close all doors, hood and trunk lids (to close the limit switches);
- put the car on the parking brake;
- carry out the procedure for setting the “neutral” (on a manual transmission) or move the automatic transmission lever (automatic transmission) to the “P” mode.
Starting and stopping the engine from the key fob
Starting the internal combustion engine using the control key fob:
- Press the K1 key and hold it until the buzzer sounds twice.
- After this, the text message “ZPUS” will appear on the key fob display, next to which numbers indicating the operating time will be displayed.
- Then the vehicle's emergency system will blink once, the siren will make a short sound, and all locks will be locked.
You can remotely start the engine four times in a row. In case of failure, the message “OST” will be displayed on the screen.
Remote stopping of the internal combustion engine using a key fob is carried out as follows:
- You must long press the K1 key.
- Make a short “click” on K4.
A melodious beep will sound. The icon symbolizing the running engine will disappear from the display.
You can delay stopping the operation of the internal combustion engine for 5 minutes by initially holding down the K1 button for a long time until the buzzer sound is repeated twice. Each subsequent press will extend the engine shutdown delay by the same time period, but the maximum duration of the increase in time is no more than 30 minutes.
How to set up autorun by time?
Delayed autostart of the vehicle’s internal combustion engine is performed according to a preset start time on the alarm clock. It is also possible to set a timer to count down before remotely activating the engine.
The procedure for setting the alarm clock and timer for autorun:
- Hold down the K4 button until one long and two short beeps from the key fob buzzer.
- The numbers on the display will begin to flash, indicating the current time. It is necessary to check its correctness; if it is incorrect, adjust the hours using the K2 and K3 keys, briefly “click” K4 and set the minute value using the same buttons.
- Quickly press K4 again. The program proceeds to setting the alarm time, which is performed in the same way.
- Then, with a short “click” on K4, the menu for turning it on opens. K2 activates the alarm, K3 deactivates it.
- A subsequent quick press of the K4 button allows you to proceed to setting the timer, performed according to the same algorithm.
- Programming will end automatically and save the changes made after 8 seconds have elapsed since the last button press.
- Then you should move on to the cursor method of setting up the key fob.
- Place the cursor on icon 1 on the display and briefly press the K1 key.
- Wait until the beep sounds and the display shows the remaining time until autostart.
- Icons 1 and 22 will light up on the screen.
With interval autostart, the internal combustion engine is cyclically activated and deactivated in the interval from 2 to 24 hours in 2-hour increments. The warm-up time is 10 minutes by default.
Programming periodic autostart of the engine:
- It is necessary to switch to the cursor method of controlling the key fob.
- Move the cursor to icon 3 and click on the K1 key.
- After the sound signal, the repetition frequency will appear on the display (for example, 3H - warming up every three hours).
- Use the K1 key to set the desired repetition interval.
- Confirm your choice by long pressing the K1 button, after which the key fob signal will sound twice and icon 3 will appear on the screen.
Trigger by temperature
Programming autostart of internal combustion engines based on temperature indicators:
- Activate the cursor method of controlling the key fob.
- Move the cursor to icon 4 on the display and briefly press the K1 key. The vehicle's hazard warning lights will blink once, and the temperature threshold value will be displayed on the key fob screen. The control unit buzzer will emit a short signal.
- By quick “clicks” on the K1 button, set the required response temperature value (from –27 to –3 degrees Celsius with an adjustment step of 3 units).
- Save the settings by long pressing the K1 key or wait for autosave, which will occur after 4 seconds of user inactivity. The entry of the set value into the device’s memory will be indicated by two short beeps from the key fob and the display of icon 4.
How to disable autorun?
Autorun by time and temperature can be deactivated while setting these parameters using the cursor method. After turning off the automatic activation of the internal combustion engine, a sound signal is played and the icon corresponding to the type of engine start turns off on the key fob screen.
Transfer to service mode
How to switch the alarm system to service mode without the Valet button? To do this, use the on-screen menu of the main key fob:
- Briefly pressing button 4 of the main key fob, move the cursor to the “Wrench” icon.
- Briefly press button 3 - the alarm control LED will start to light constantly, the “Wrench” icon on the screen will do the same.
The service mode is turned off in the same way - move the cursor to the icon, but press button 2 to clear the icon.
If your StarLine alarm system has telematic capabilities, then everything is even simpler. With standard control icon settings, slide your finger to the left the main set (engine start/security status/car search) to see the second set: anti-robbery/service mode/call. By pressing and holding the central icon, you activate the service mode, which will be reflected both in the application and on the screen of the main key fob.
On older alarm models, where the main key fob has three buttons, entering the on-screen menu of the key fob is done in a different way:
- Long press button 3 until you hear two beeps (first long, then short).
- By pressing button 3 briefly, move the flashing cursor to the “Wrench” icon.
- Activate the service mode by pressing 1.
It turns off the same way - by pressing 1 when the cursor is hovering over the icon of the active service mode, you will turn it off.
Something else useful for you:
Setting the volume of siren confirmation signals
You can program the desired siren sound volume level as follows:
- Activate the ignition system.
- Using the control key fob, go to the main programming menu and select the “SOUN” item.
- Press the K3 button for a long time, then briefly. The display will show the default volume value of two.
- Using the K2 and K3 keys, you should set the adjustable parameter within the range from 1 to 9. It is impossible to turn off the siren signal in this menu section.
- Exit the volume adjustment mode by pressing the K3 button once for a long time, then briefly.
- Deactivate the ignition system.
- The main key fob setup menu will close automatically after some inactivity.
When using a self-powered siren in the Starline A93 security complex, changing the volume via the control key fob is impossible.
How to reset?
To troubleshoot problems during the operation of the security system and correct multiple errors in its debugging, reset the alarm parameters to factory settings:
- Activate the vehicle ignition.
- “Click” on the setting button nine times to reset the settings according to the 1st programming table, and ten times to reset the programmed values according to the second. To return to factory settings, you need to carry out the procedure twice.
- Then, when the reset mode is activated, short beeps will be played according to the number of times the button is pressed.
- After this, click on the service button again, and the siren will sound a single sound.
- Press K1 on the key fob, the auto siren will sound briefly once, which confirms a successful factory reset.
- Deactivate the ignition or wait 15 seconds for automatic exit. The completion of the reset mode will be confirmed by the vehicle's hazard lights flashing three times.
Video
The video presents the main functions of the A63 alarm key fob, which are identical to the A93 options. Provided by the channel "AutoAudioCenter".
Do you have any questions? Specialists and readers of the AUTODVIG website will help you ask a question
Was this article helpful?
Thank you for your opinion!
The article was useful. Please share the information with your friends.
Yes (75.00%)
No (25.00%)
X
Please write what is wrong and leave recommendations on the article
Cancel reply
Rate this article: ( 4 votes, average: 4.75 out of 5)
Discuss the article: