Damage to the VAZ 2109 speedometer, standard VAZ speedometer
In a VAZ 2109, the speedometer needle jumps - this is a very unpleasant phenomenon, which means that problems are occurring, as well as the danger of exceeding the permissible speed; a fine is not the worst thing here. As soon as you see that the speedometer needle is twitching on your VAZ 2109, you should seek help from specialists as soon as possible, or deal with it yourself. If you found this article, it means you want to figure it out yourself, and you’re doing the right thing.
Peculiarities
The speed counting system of the 09–99 family has several design features. They are connected to the dashboard of these cars. Over the years, manufacturers equipped these models with 3 types of panels. It is especially important to understand their nuances. The choice of components when replacing faulty parts depends on them.
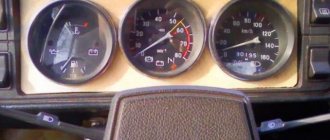
Low
This dashboard was the first modification. One of its features is the absence of a tachometer. As for the speedometer, its system is completely mechanical. It works due to transmission rotation from a mechanical drive, through a flexible shaft to the speedometer itself.
Cars with a low panel were equipped with flexible shafts (cables) 80 centimeters long. The drive gear is also different. It has 8 teeth, which is 4 less than the tall panels. The correct calculation of the speed of movement depends on the number of teeth on the gear.
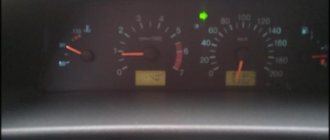
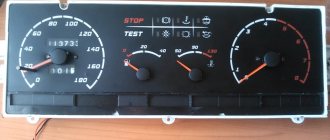
High
The high panel replaced the low one. The main difference is the absence of a voltmeter and the presence of a tachometer.
The speedometer system remains the same - mechanical. The difference from cars with a low panel is the length of the speedometer cable, it is 1 meter. It also uses a longer drive rod and changes the number of teeth from 8 to 12. This is a significant difference.
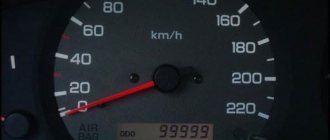
Europanel
This panel is already equipped with injection models of the VAZ-2109. Its peculiarity is the complete absence of mechanical drives. The speedometer system is also modernized. Now the mechanical drive has been replaced by a magnetic sensor, a flexible shaft, electrical wires, and the drive of the speedometer itself has become electronic. Complete difference from carburetor models. The work is carried out without gear rotations, which has significantly reduced the percentage of errors in calculations.
Before you figure out why the speedometer does not work, you need to understand the principle of its operation on cars with different layouts.
Principle of operation
The operation of the speedometer system on carburetor and injection models is radically different. Let's describe the main differences.
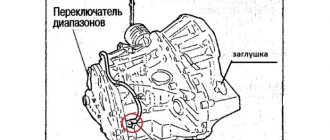
Carburetor models are equipped with a fully mechanical filling. The speedometer drive is installed on the gearbox. The drive has a rod with a gear, which rotates by working together with the manual transmission transmission shaft. This rotation is transmitted to a flexible cable, which rotates the drive on the speedometer itself. There are some errors in this system. Correct counting may be affected by stretching or snagging of the cable.
Injection models are not equipped with a mechanical drive. They have a magnetic drive. Also installed on the gearbox. It works on the principle of a Hall sensor. During the rotation of the secondary shaft in the gearbox, energy is transferred to the sensor, inside of which the rod rotates. The rod rotates the contactor, which converts the rotational energy into electrical impulses. These impulses pass through wires to the on-board computer and, after recalculation, enter the electronic speedometer drive.
Each type of speed calculation has a number of its own malfunctions and symptoms that precede them. Each problem will be described in detail below.
Where is the VAZ-2109 speed sensor located and faulty?
Why do we need a speed sensor on the VAZ-2109? Let's figure it out. This device is responsible for the correct display of data on our speedometer and tachometer. He does this by transmitting electronic impulses to the electrical control unit. But due to long-term operation and significant load on the speed sensor itself of the VAZ-2109 car (more than 6 thousand pulses are transmitted to the control unit per 1 km), an error occurs during data transfer. Then car owners have questions: how to check the speed sensor? How to change it correctly?
Mechanical speedometer
There are significantly fewer problems with this system and the methods for eliminating them are simpler. Symptoms of problems are as follows:
- The arrow works with jitter, jumps or does not work at all.
- The noise of a flexible shaft can be heard in the cabin.
- The arrow does not rise above a certain level.
All these symptoms require a thorough check.
Examination
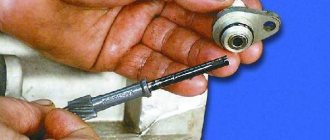
It is easiest to start diagnosing the mechanical system of the VAZ-2109 speedometer with the drive. To do this you need:
- Unscrew the drive from the manual transmission housing.
- Inspect the gear on the rod. If its teeth are broken or worn out, the drive will have to be replaced with an analogue.
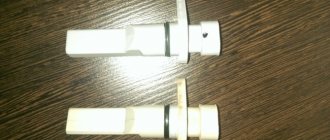
- If the teeth are in order, then you need to unscrew the nut holding the cable. Next, the tip of the flexible shaft and its seat in the drive are visually inspected. The tip should be square, as should the drive recess. If worn edges of the cable or drive are noticeable, the parts require replacement.
- The absence of wear on the cable and the deepening of the drive will require checking the integrity of the flexible shaft. To do this, you need to pull it using pliers. If the cable comes out of the guide casing, it means that it is broken and requires replacement. An intact cable can also cause a malfunction. Its steel wires break off and cling to the walls of the casing. The presence of such damage is also considered a reason for replacement.
The absence of a cable break will indicate a malfunction in the instrument panel itself. It will have to be dismantled in order to check the sections of the flexible shaft and its seat.
A common cause of intermittent failure is the cable getting stuck in the casing. It's all due to the hardening of the lubricant. Before installing a new cable, it must be lubricated with a compound with a solidification temperature threshold of at least −20 degrees. The lubricant also hardens due to prolonged vehicle inactivity. Dust and dirt mix with the lubricant, which leads to disruption of its composition.
Replacement
Replacing the VAZ-2109 thermostat is very simple. To do this you need:
- Allow the engine to cool completely.
- Drain the antifreeze through the drain window at the bottom of the radiator.
- Using a screwdriver, loosen all 4 clamps holding the pipes.
- Remove the thermostat.
- Install the new part by securing all 4 clamps and adding coolant to the radiator.
READ Management change at Marelli Signal Boost in electrification, ADAS businesses
After adding fluid, you must start the engine without closing the cap of the expansion tank. This will allow all the air to leave the cooling system.
There are many types of thermostats on the market. The most suitable for the VAZ-2109 is the thermostat from 2110 with an 8-valve engine. It is slightly smaller than the original “nine”, it can be disassembled and only the valve mechanism can be replaced. This unit will not require any modifications or corrections. The thermostat from the VAZ-2110 is more reliable and practical. After installing it, the car interior heats up faster, and general engine warm-up is carried out in a shorter period of time.
Electronic speedometer
The reasons why the speedometer of a VAZ-21099 or “09” with an injection power unit does not work differ from mechanical models. The symptoms are as follows:
- Partial or complete failure of the arrow.
- Loss of power, dynamics, stable engine speed.
- Poor engine performance at start and idle.
- Increased fuel consumption.
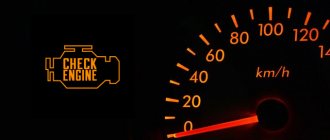
- Error “24” or “Check Engine” icon alert.
The entire list of symptoms directly indicates a lack of consistency in the operation of the speedometer and the engine control unit. Such problems require checking all components of the speed calculation system.
Examination
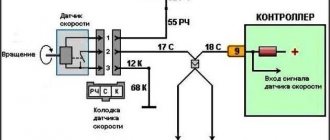
Diagnostics of the electronic speedometer will require a tester and wires 2 meters long. To check you need:
- Disconnect the speed sensor power connector.
- Turn on the ignition.
- Set the tester to DC voltage measurement mode up to 20 volts.
- Connect the red measuring probe to pin “1” on the plug.
- Connect the black measuring cord to pin “3” of the plug.
In this position, the tester should show a voltage of 12 volts or equal to the battery charge. If there is no voltage, then you will have to check the wiring for breaks, short circuits, or oxidation. All connections must be cleaned with solvent, the damaged shell must be insulated, and broken plugs must be replaced with new ones. It is forbidden to directly connect wires without a plug using ordinary twisting. Such connections must be soldered or mounted with special connecting terminals.
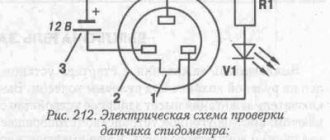
Next, the speedometer itself is checked. To do this you need:
- Connect the control wire to the “+” terminal of the battery.
- Lightly touch terminal “2” on the speed sensor plug leading to the control unit several times with the other end of the wire. If the wiring is intact, the speedometer should respond to the supply of voltage by moving the needle. This test simulates the supply of impulses from the sensor to the speedometer through the ECU.
Failure to respond will indicate damage to the electronic speedometer drive.
The VAZ-2109 speedometer often does not work due to a breakdown of the electronic drive. Before checking, you need to disconnect the connector from it and clean the contacts on both sides. Next you will need:
- Raise the front wheels of the car on a jack.
- Connect the control wire from the “+” terminal of the battery to the “1” terminal.
- Connect the control wire from the machine ground to the “3” terminal.
- Switch the tester to DC voltage measurement mode up to 12 volts.
- Connect the red measuring probe to terminal “2” on the sensor connector.
- Connect the black test probe to the vehicle ground.
- Have an assistant turn the raised wheel.
Depending on the speed of rotation of the wheel, the tester should produce values from 0.6 to 12 volts. If the measurement does not show results, then the sensor will have to be replaced with an analogue one.
If voltage values are normal, it is worth continuing testing the speedometer elements. If a previously conducted test of the arrow drive itself did not show any deviations, it is necessary to dismantle the instrument panel. Dismantling is carried out without completely removing the panel. It is enough to unscrew the 2 mounting bolts from below and above the glass. Next, you need to remove the speedometer itself and unscrew the 2 mounting screws from the mount. The initial check is carried out visually. A common problem is burnout or breakage of the electrical tracks of the drive. All faults found must be soldered and oxidation cleaned.
Fuse
The factory does not provide a separate fuse to protect the speedometer. The fuse is located in cell "F1". It is responsible for powering the entire dashboard. A malfunction will be indicated by the complete absence of instrument lighting. To check, you need to remove and visually inspect the fuse. The presence of a broken jumper will indicate its burnout. The test can also be performed using a tester set to dialing mode. Both measuring probes must be connected to the contacts of the protective element. If there is no signal from the multimeter, replace the part with a 10 ampere analogue.
It is also worth checking that there is power at the fuse terminal. To do this you need:
- Set the multimeter to DC voltage measurement mode.
- Connect the red test lead to the fuse contact.
- Connect the black measuring probe to the machine ground.
- Turn on the ignition.
The presence of a voltage equal to the battery charge will indicate the health of the electrical circuit.
How to remove the instrument panel
It's okay if the testing mode does not produce results. On some cars it is not there at all, and therefore there are other ways to repair the speed sensor. Here's one of them: drive the car into the garage, set it to the parking brake. After opening the hood of the car, disconnect the battery from the wire with the minus sign. This will allow you to avoid short-circuiting the on-board network. Now you need to pull out the instrument panel. Remove the trim, and then carefully unscrew the steering wheel. After this, you need to remove the switches that are located under the steering control. Having done the above, you need to unscrew all the self-tapping bolts that hold the instrument panel in place.
Having completed all the above steps, you can remove the dashboard on which the instrument panel is mounted. To do this, you need to grab it by the edges and then pull it slightly in your direction. Now disconnect all the wires attached to the dashboard. But before you disconnect them, label each wire. This is necessary in order to avoid mistakes when putting the entire structure back together. After disconnecting the wires, pull out the dashboard.
The instrument panel is attached to the dashboard with several bolts. Unscrew them to disconnect it. Now you need to remove the glass, which is held in place with glue-sealant. The place that connects the glass and plastic needs to be heated with a hair dryer. After completing these steps, you can easily detach the glass.