A speedometer is a device that shows the speed of a car at a given time. Regardless of the device, its appearance is expressed in the form of a dial indicator, although there are cars where the speed limit is reflected in numbers on the LCD screen. Malfunctions of this device can manifest themselves in different ways. They have one thing in common: it is impossible to travel on such transport. You can only get to the garage or the nearest service station to find out why the speedometer is not working.
Speed sensor wear
In modern cars, there is some kind of speed sensor called a paddle system at the output of the transmission of older cars.
This sensor allows the speedometer to work by measuring the speed of a car's wheel or the output speed of the transmission. When the sensor fails, your car's speedometer stops working.
Mechanics
The following diagram shows exactly how the speed sensor is designed.
Speed sensor for VAZ-2112
- 2110-3843010-13 – sensor;
- 2110-3843010-18 – sensor;
- 2108-3802820-10 – speedometer drive;
- 2101-3802718 - pad;
- 2108-3802822 – drive housing;
- 2108-3802830 - sealing ring;
- 2108-3802834-20 – driven gear;
- 2108-3802833-20 – drive gear;
- 2101-3802717 - washer;
- 15896211 – M6 nut;
- 12601271 – wavy washer;
- 11500121 – pin M6x14.
Elements 1 and 2 are interchangeable.
Dismantling
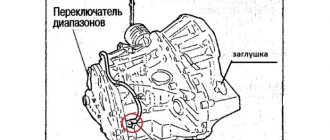
To remove the sensor from the car, you need to disconnect its connector. The sensor housing is fixed near the CV joint - the desired point is shown by an arrow.
First step in dismantling
When the connector is disconnected, take a flat key “22” and unscrew the plastic nut. Then you can change the sensor or repair it.
What you need here is a flat key
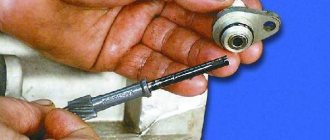
To replace the sensor drive, use a “10” key to unscrew the M6 nut and remove it together with the washer. The drive housing is rocked from side to side - you need a 14mm spanner.
Installation requirements: on the one hand, it is necessary to obtain a tight seal, on the other hand, the plastic must not be broken.
Signal wire break
This is a kind of cable between the speed sensor and your car's speedometer, that is, the dial. The most common reason why the speedometer does not work is a broken kilometer wire.
If your car's speedometer is not working, the first thing you should check is the wire.
How to determine the cause
To determine the cause of the speedometer failure, a step-by-step diagnosis of all components should be carried out:
- replacing fuse F19. Before replacing, the cause of its combustion should be determined. Perhaps it lies in a short circuit in the electrical wiring system;
- Check the contacts for signs of oxidation. If necessary, remove plaque and dirt;
- test the wires using a multimeter;
- replace the sensor or indicator;
- replace the device or dashboard with a known good one.
Does the speedometer show incorrect data?
Speedometers on road vehicles usually show higher readings than the speed, and careful drivers can easily recognize this error from smartphones or vehicle navigation systems.
- The fact that speed values measured by GPS, i.e. satellite, are lower than the car shows, creates confusion for many drivers. We will try to explain the reasons for this.
- Speed indicators that were used in the past had a function that we can call mechanical. It required constant adjustment.
- Today, accelerometers now operate entirely electronically, and many people do not expect these errors, which range from 2% to 10% depending on the make and model, to occur in an electronic assembly.
While the speedometer shows 100 km/h, the car may be traveling at 95 km/h or less. However, this situation stands out as one that is directly related to the reasons we will point out below.
Lowering car speedometer speed
Using the application, which is used in most European countries, it seems that the speed on the scoreboard is higher than the real one. In fact, this is not an application applied by car manufacturers and we can say that it is an obligation set by states.
Although it varies by country, these laws require automakers to have a margin of error, which is typically between 2% and 10%.
- As a result of this application, a vehicle moving at 100 km/h actually means that it is moving at 90-98 km/h.
- Even a driver who knows that this is the case is psychologically advised to drive at a lower speed.
However, nowadays, as a result of the development of GPS-enabled vehicles and their easy availability in all types of devices, many drivers drive according to the speed displayed on the GPS device rather than the speedometer of the car.
In other words, the practice may become dysfunctional in the medium term as people become aware of the situation.
Tire pressure
Tire pressure should be adjusted according to the number of people in the vehicle and the load it is carrying. This is quite important from the point of view of driving safety and tire durability.
Therefore, manufacturers specify what pressure should be applied to which tire on the fuel cap or inside the door for different conditions. You can see this clearly in the picture above.
- On the other hand, tire pressure affects the car's speedometer readings.
- The speedometer measures the tire at its ideal pressure. Changing tire pressure will cause the speedometer to display different, often incorrect, data.
- Because a tire with higher pressure will increase in diameter, the speedometer will show a lower value than the driving speed.
- The speedometer will show a higher value than the speed traveled because the diameter of the tire with full travel at low pressure will decrease.
Additionally, if the vehicle is loaded with a certain amount of cargo or is driven in close quarters, the sidewalls of the tire will flex slightly, as if the pressure is low. This causes the tire diameter to decrease and the speedometer to display a higher value than the speed traveled.
Functionality check
There are several options for diagnosing DS.
The first way to check is with a multimeter:
- First you need to dismantle the DS.
- Then, using a tester, you should determine what each contact on the connector is responsible for; you need to find exactly the pulse one.
- After this, the positive probe of the tester must be connected to this contact, and the negative probe to the power unit or car body.
- Next, you should install a piece of tube on the controller axis and start rotating it at low speed. At the same time, monitor the controller readings - the higher the rotation speed of the DS tube, the higher the values on the tester display and the voltage parameter will be (the author of the video is the REMONTYCA channel).
Second method, without removing the controller:
- Using a jack, you will need to lift the front wheel of the car. Which one - right or left - does not matter.
- Then the tester should be connected to the DC wiring.
- After this, you begin to rotate the car wheel with your hands and monitor the readings on the tester display. If there are impulses, then this indicates that the DS is operating in normal mode.
If you don’t have a multimeter, you can diagnose the DC using a test light or any other 12-volt lamp.
The verification procedure is similar to the method described above:
- First, you need to disconnect the pulse cable from the DC.
- With the ignition on, using a tester, you need to find the positive and negative contacts.
- Then the front wheel of the car is raised on a jack.
- Next, the control must be connected to the signal wire. The wheel must be rotated - if at this moment the minus light on the control panel lights up, this indicates that the DS is working (the author of the video is the PivovarovNikolay channel).
As for a 12-volt light bulb, it must be connected to a battery, as well as a signal contact. If a working DS is used, the light source will blink. If the diagnostics showed that the DS is working, then it is necessary to check the functionality of its drive. To do this, jack up the front wheel, feel for the DS drive, then rotate the suspended wheel with your foot and control with your hand whether the device rotates or not.
Tire wear
Automakers adjust their speedometers based on the unused tires on the vehicle.
- A tire that has not yet been worn out can have a tread depth of up to 10 mm, depending on the brand and type of tire.
- For this reason, the tire wears out as soon as the car starts moving, and this value decreases by 1-1.5 mm depending on use every 10,000 km. As a result, the diameter of the car tire decreases slightly.
However, this difference between a completely worn tire and a new tire can cause a noticeable deviation in the speedometer reading. Generally, a vehicle with a speed deviation of 3-4% may have a speed lower than the speedometer reading within 3.5-5% of the speed of a completely worn tire.
Electrical diagram
The sensor itself is powered by a voltage of 12 Volts (pink-black cord), and another pin is connected to ground. The gray wire is the sensor output. It is connected to the voltage source through a resistor (see figure).
Typical connection diagram for DS on a VAZ-2112
The diagram shows that the output is connected to the ECU terminal. Terminal number:
- 9 – block January 5.1, also BOSCH M1.5.4N (engine 21120, 1.5 l);
- 59 – BOSCH M7.9.7 module (ICE 21124, 1.6 l).
Another gray cord goes to the “red” block on the dashboard, where it connects to terminal 9.
As you can see, everything is elementary.
Influence of weather conditions
A decrease in air temperature can also cause a decrease in tire pressure. Pressure may drop 3 to 4 psi, especially in very cold temperatures.
- A decrease in pressure can also be recorded in tires that have been standing motionless for a long time from night to morning.
- Low tire pressure causes the tread to bleed and, as a result, reduce the tire diameter.
- For this reason, the vehicle speed may be lower than the value displayed on the speedometer.
However, when the tires warm up, the pressure returns to normal and thus the tire diameter returns to its previous condition.

