Review of typical car radio malfunctions
On specialized forums, motorists write that the radios either do not turn on, or do not turn off, or do not play.
First on our list of typical faults is such a nuisance as the inability to read music CDs. Or the discs play, but with interruptions and failures. Here the problem is most often hidden in the drive mechanism. The drive has a huge number of different parts, which means they are all subject to wear. Since the radio in the car is used regularly, this is not a problem, but even a pattern.
Reason #2
Another very popular reason why the radio in a car refuses to “move the drive” is that the device is quite dirty. After all, this device is often used in difficult conditions. Here, dust on optical and mechanical parts is common. Usually, if the mechanical insides are dusty, the driver will notice failures when playing discs, freezes, and the inability to read the disc at all.
This disease can be cured. This is done in the same way as in the case of home appliances. It is necessary to disassemble the drive and then clean the lens. In most cases, this is enough to listen to your favorite music on the road again.
Basic radio settings
Before tuning the radio to the radio, you need to make sure that the antenna is installed on the car. Your choice depends on the admission conditions. In large cities where powerful transmitters or repeaters are present, a cheap and simple whip antenna can be installed.
If the radio mast is located at a distance of 20-70 km from the receiving location, it is necessary to install an active antenna with an amplifier in the cabin to improve radio reception. Japanese radio tape recorders receive stations in the range of 76-90 MHz. Before connecting the radio tape recorder to such a device, a converter is installed. The accessories included with Pioneer radios help you set up and connect the device to any vehicle.
To auto-tune most radios, press the “right” button. The tuner will scan the band until it finds a station with a strong signal. All radios have memory cells into which you can save your favorite radio stations. To do this, press and hold one of the buttons on the front panel with numbers from 1 to 6. The display will show the number of the saved radio station.
If the radio signal strength is not strong enough to find the desired station during automatic search, you can use manual tuning. In some radios it is activated through the settings menu, in others - by pressing and releasing the “left” or “right” button. You can determine which stations will be well received in the car, at home, or in the stereo. You can also perform an automatic memory search. On a Pioneer player, to perform this procedure, press the Func button until BSM is selected. Then press the up or right key.
In this case, the tuner will scan the entire range in search of stations with a strong signal. Each of them will be written to its own memory cell, starting from the first. On many radios, stations found in this mode are played for 2 seconds, after which scanning will continue until the end of the range.
Proper nutrition
Car enthusiasts often write that the radio in their car does not turn on or, conversely, does not turn off. There are problems with power supply chains here. The reason is an incorrect connection, power surges in the network.
The radio may indeed not turn on or turn on, but some of its functionality will be unavailable. For example, there may be no display backlight, operation in player mode, or no sound.
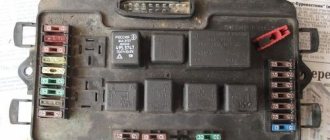
In these cases, it is usually recommended to carefully check the functionality of the protective fuse, as well as the protective diode. It would also be a good idea to inspect the printed circuit boards. There you need to look for “burnt” tracks or swollen capacitors and damaged microcircuits.
As for the power supply issue, if the connection is incorrect, the poles of the wires may be accidentally reversed. Also, the contacts may simply wear out or short to the housing.
What to check first:
- The first thing you need to do is check whether the information from the flash drive is readable on another device - another radio, computer, laptop, etc. If the computer does not see it, then the problem is clearly not in the car's stereo.
- Check the socket - USB input where the data drive is inserted. This can be done by inserting other flash devices. If the stereo system does not read these devices, then there may be a bad contact in the connector itself, but if the information is read, then the problem is probably not a broken connector.
In the case where these mechanical damages are absent, it is worth paying attention to some other aspects.
Understanding nutrition
So, the radio does not turn on. The first thing that could be is the fuse. Any device is always equipped with a fuse in the positive network. Often the rating of such a fuse is 10 A. It is the one that burns out first. You just need to replace it and everything will work again.
If you replace that fuse and it blows again, then things aren't that simple. You will have to use a soldering iron or take the device to a service center if you do not have basic knowledge of electronics.
So, first the “music box” needs to be disassembled. This must be done from the board side. So, you need to inspect everything carefully. Some car enthusiasts connect the device directly without a fuse. This will sooner or later lead to the radio in the car burning out.
If burnt tracks on the board are visible, they can be restored. Swollen capacitors can be replaced. And then again enjoy music in the interior of your car.
Working with the power connector
Using this connector, the device can be connected to power and an antenna. Of the 8 contacts on the block, only 4 are actually used.
For example, A4 is the power supply for volatile memory cells. When disconnected, the device returns to factory settings. A red wire is usually supplied here, which is connected to the battery through a fuse.
The antenna is connected to A5. Here's the blue wire. The current at this output is small, but if it is accidentally exceeded, then everything will burn out.
A7 is the yellow wire. It allows you to ensure that the entire sound system is turned on. Connects through a fuse to the ignition terminals.
Spontaneous shutdown
Reading the forums showed that this is a popular problem. For example, many people turn off the radio in their car when listening to music at a volume close to maximum.
Here, car enthusiasts with experience suggest that these are problems with the connection and the battery. If the battery is not charged to 100, then you just need to connect the radio directly from the battery through the fuse. And then everything will be very good.
So, sometimes when driving on our roads the device may also turn off. These are definitely contacts.
Motorists also write that the radio in the car turns off every half hour when the engine is not running. And the answer here is simple. This is not a problem, but an advantage. And this is normal operation of absolutely all devices to save battery.
This is not all that can be. However, here are the main problems that people complain about on car forums. Perhaps this article will be of help to someone and help solve problems with music.
Kia Rio G4FA or still G4FC?
Hello everyone, my dear readers, there are more than 1500 of you, I am very pleased that I bring some benefit *probably*. So today we will talk about a non-standard, but quite interesting situation with a Kia Rio car with a 1.6 engine. An acquaintance of an acquaintance bought a car for restoration, as indicated above, a 2013 Kia Rio with a seized engine. Well, it seems like an everyday matter, well, I caught the wedge, we’ll fix it. We disassembled the engine, checked the condition of the crankshaft, connecting rods, pistons, block, and so on, the condition, as they say, is not standing. The diagnosis needs to be changed. He went to a good office, they twisted his knee and said the patient was more likely dead than alive. Well, what problem do you have with the crankshaft, he asked, of course there is, the master answered, and he asked the client from my car, of course from yours, I’m not a fool, the master answered. This is how this interesting story began. We ordered using the VIN number of the connecting rods and piston. And we started assembling the motor. The car was ready and running quietly and amazingly, but there was just one problem. Power. The car did not drive either from the bottom or from the top. These are the situations, of course, but then they started replacing a bunch of sensors, removing catalysts and similar actions that did not lead to any result. This Epic lasted for a year. A friend calls and says: There is an interesting case. I always like interesting cases and he tells me everything that was described above, I’m a little in a stupor, but I really want to make such a car. Upon arrival at the car, as always, I turn on the diagnostics and quickly examine the errors and parameters in real time:
Revolutions - 750 revolutions;
Short-term balancing - 1%;
Long-term balancing - 0%
Pulse to injectors - 2.3 m.s.
MAP (intake pressure sensor) - 60 Kpa
Lambda. What. I don’t understand 60Kpa. Once again I run 60Kpa again. There is a clue as to where this pressure in the intake comes from. I turn on the ignition 99Kpa, theoretically the sensor is working, and it’s already new here. I take about 3 devices and they all show the same thing. I think, well, how to measure compression, the car works smoothly. Let's go climb with the magnificent Postalovsky, I bow my head to its developers and creators. First I take an oscillogram of the crankshaft and camshaft, everything is fine.
I tighten the pressure sensor and do a sprint RX. And I start to think, why the hell is the compression ratio so low?
Okay, I’ll look at it on a working car since I save all the tests for myself. And everything is fine there. Here are two tests: on the right is a working motor, on the left is mine.
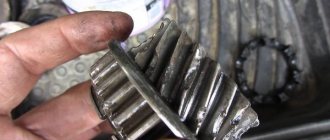
I couldn't believe my eyes. If the compression ratio is so low, what kind of compression is there? I pick up a compression meter. 6 points on all cylinders. Damn it, something like that. The car has been driven for a year with this compression, it starts up perfectly, runs smoothly, but does not drive. I catch myself thinking, maybe while I was driving, I was twisting the film, but no, adding oil, the compression did not increase. What could this mean? The parts seller says that the connecting rods and pistons are correct. The crankshaft seller says that the crank is exactly 1.6. I believe the numbers. We remove the engine and, lo and behold, the knee is not the same.
Let's summarize: The g4fa motor has a displacement of 1.4 and a short crank with a piston diameter of 73 mm and long connecting rods, and our g4fc motor of a displacement of 1.6 has a long crank with short connecting rods and a piston diameter of 73 mm. The G4FC engine belongs to the Gamma series and differs from the G4FA only in the crankshaft with an increased piston stroke from 75 mm to 85.4 mm, otherwise the engines are like two peas in a pod, still the same phase change system. Yes, I didn’t look, and I made a mistake, but remember, always check the spare parts. Have a nice day everyone and less breakdowns. Dimon Diagnost was with you until we meet again.
The car radio does not turn on, the fuse is blown
It is not uncommon that owners of car radios and CD/MP3 receivers are faced with cases of breakdown of their devices.
The reason for damage to an expensive device may be a simple reversal of the polarity of the car radio power wires when connected, short-term voltage surges in the vehicle's on-board electrical network, or wear and short circuits to the body of the wires and cables.
Here we will talk about repairing the car CD/MP3 player Mystery MCD-795MPU . This instruction will help with self-repair of car radios: cassette, disk (CD/MP3), diskless (with USB). Basic knowledge of electronics will be enough for even a novice radio amateur to make this repair.
Manifestation of malfunction
The car radio does not turn on, the fuse in the power circuit has blown.
As a rule, all car radios are equipped with a fuse in the positive 12V power supply circuit. Fuse rating is 10A. It is this fuse that burns out if an error is made when connecting the power wires of the car radio to the vehicle's on-board network (+ and - are mixed up).
It is worth remembering one simple rule. If the fuse has burned out, then you should not rush to install a replacement or a “bug” (an ordinary piece of copper wire). The fact is that in most cases the fuse blows after any element of the circuit has failed.
First you need to understand the reason for the blown fuse. But if you install a new fuse, then there is a risk of “burning out” the car radio.
A fuse is the last line of defense when something has already “burned out” and is consuming huge current. It serves only to prevent overheating and fire of connecting wires and cables.
So, let’s look at the repair of the Mystery MCD-795 MPU . The first step is to open the metal cover on the printed circuit board side. Next, we inspect the printed circuit board for the presence of charred tracks and burnt parts. Sometimes burnt out tracks cannot be detected during a quick inspection. For example, a break may be hidden under the main connector. This can happen if the printed circuit board is double-sided.
The photo shows where the printed track on the board burned out.
Most likely, the owner of the device decided not to “sweat” and connected the power directly, without a fuse, or installed a “bug” in an attempt to bring the car radio to life. This led to the fact that the printed track served as a kind of fuse and burned out as soon as a short circuit current passed through it. In some cases, the entire thing burns, both the fuse and the printed circuits on the board.
Restoring a burnt out print track.
To get to the radio components, open the top metal cover and unscrew the 4 bolts securing the CD/MP3 deck.
We take out the disk deck, not forgetting to unfasten the 2 cables connected to the main board. Typically, cables and connectors are disconnected quite easily; no additional tools are required.
Next, we find the protective diode on the board. It is usually located closer to the power supply circuits and the main connector.
It is necessary to unsolder it and check for breakdown. For “breakdown” - this means measuring its resistance in forward and reverse connection. The diode has one-way conductivity. If it “rings” like a regular copper wire, then it has been broken. I talked about testing semiconductor diodes with a digital multimeter here.
Since the diode is “clamped” by the filter choke, we had to unsolder it first.
We check the protective diode
Swap the multimeter probes as shown in the photo.
As you can see, in both directions the multimeter shows zero resistance - the diode is broken.
We look at the diode brand - 1N5401 . It is necessary to find an analogue for it and replace it with a working one. Diodes of the 1N5400-1N5408 series are designed for an average forward current of 3 amperes. Any rectifier diode of this series or any other with a current of 3 amperes will be suitable. Full documentation (datasheet) for diodes of the 1N5400-1N5408 series can be viewed on the website www.alldatasheet.com or searched through search engines on the Internet.
Backlight repair
This method is suitable if the radio display is blinking or the backlight has stopped working altogether.
Keys for removing the radio
To solve the problem with our own hands, we will need to resort to the method described in the list below:
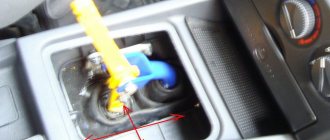
- First, let's take a special tool for dismantling the radio to pull it out of the panel. You can also use knitting needles or something with similar characteristics.
- We take out the radio and take the ammeter in our hands. We check that all wires are in good condition (the voltage on them should be about 6V). If you notice a strong voltage fluctuation on one or more wires, then we already know where the problem lies.
- We replace the defective wire and check the operation. If nothing has changed, then we follow the list further.
- We disassemble the front part to get to the diode that blinks. Next, we dismantle it and replace it with a new one.
- Next we need a soldering iron. You will need it to desolder the standard backlight of the device, since the problem lies there if you have reached this stage.
- From the new lamp we will need to get one resistor and two LEDs.
- The next step is to grind, as we need them to fit into the required holes. After they are placed in their inputs, we insert them and connect the diode to the resistor.
Unraveling the radio
Important: make sure that you maintain the polarity to avoid malfunctions. Connect where the lamp was installed.
Now we have to put everything back together the way it was originally. At the end we connect the power and admire it.
Now you know how to repair a flashing radio that constantly distracts you from the road or listening to music. Or you just don't want the problem to go any further. I hope the article was useful to you and answered all your questions. If your JVC, Kenwood, Sony or any other radio is blinking, the detailed instructions in the article should have solved the problem.
In simple words about repairing TVs and home appliances with your own hands
Hello, friends!
This article is devoted to car radios, or more precisely, to the diagnosis of typical malfunctions of these devices.
The car radio is subject to constant vibrations while the car is moving, which only contributes to its rapid failure.
Typical car radio malfunctions include:
The car radio does not turn on at all. The reason for this may be lack of power. You can check the power yourself or by contacting a service center with an auto electrician. If the reason does not lie in the diet and everything is fine with it, it is necessary to carry out a diagnosis.
Lack or loss of control panel backlight. Reason: This malfunction may indicate that the light sources (LEDs or bulbs) or the power circuit of the control panel are not in order.
The car radio does not read at all (NO DISK or ERROR appears) or reads CDs or DVDs poorly. The cause of this malfunction may lie in the laser head, the motor that rotates the disk, or the main control board.
When the car shakes while driving (on a dirt road, for example), disk reading gets lost. Reason: this defect may be associated with a breakdown of the shock absorbers of the radio or laser head. The malfunction can be eliminated by carrying out repairs in a workshop.
The car radio is working properly, but there is no sound on one or all channels. It is necessary to check the performance of the speakers in a hospital service center. If everything is in order with the speaker, then the malfunction may be associated with a failure of the power circuits or the pre-amplifier of the car radio, as well as its output stage.
The message “Please code” appears. This means that the problem lies in the settings reset. To eliminate this, you need to enter the code for the head unit. Contact the service center.
CD/DVD car radios do not load or unload the disc. The cause of the breakdown may lie in the disk loading motor, its control, power supply, or in the pressure roller. As a result, the disc may slip and fail to grip. It's also worth checking the disc sensors.
Many car enthusiasts do not pay enough attention to cleaning the car radio dashboard from dirt and dust. Severe contamination of this device can also cause frequent and unexpected breakdowns. Dust and dirt clog the holes and outputs of the car radio, so inevitable contamination of the optics and mechanics occurs. “Symptoms” in this case will be frequent freezes, playback failures and failure to load the disk or USB flash drive. You can fix the breakdown yourself: disassemble and clean the laser reader lens.
Failures associated with the supply circuits can lead to the fact that the device will not turn on at all or there will be no functioning of any modes (no display backlight or no sound or CD mode). The absence of sound may indicate that the UMZCH has burned out. In such cases, check the protective fuse, inspect the printed circuit board, inspect the microcircuits for damage to the housing (deformation, chips or cracks). The electrolytic capacitors may be swollen or the traces may be burnt out.
If nothing is found visually, then it is better to contact a specialist, since attempts to fix the problem yourself can lead to even bigger problems.
I wish you success!
Turns off during operation
It happens that the radio turns off during operation. This problem can be caused by a poor or unreliable connection in the power circuit, which occasionally becomes loose when driving fast on rough roads, resulting in an unexpected shutdown. To fix the problem, you need to connect the power cables of the car radio more securely. Connecting the negative wire of the car radio to the car body is carried out as follows:
- Find the stud closest to the radio
- Clean it from dirt and paint.
- Take a piece of wire with a terminal that has a hole of a suitable diameter.
- Connect one end to the negative terminal of the radio
- Place the terminal onto the stud and screw it securely.
Unreliable mounting of the car radio on the dashboard also leads to malfunctions, including shutdown. Another reason for sudden shutdown is the protective timer built into the radio. It is used to avoid draining the car's battery if the device is accidentally left on without pressing any buttons for a specified period of time. To deal with this problem, you just need to turn on the radio again.