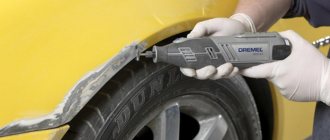
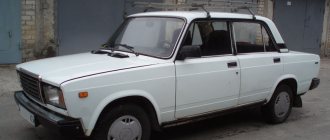
Auto putty A very important and long process, the shape of the body and the quality of the paint layer depend on this stage of body repair. If you have been in a minor accident where you received dents with damage to the paint layer, holes appeared in the body, or rust simply appeared, then knowledge of how to properly putty the car body may be needed if you are planning to fix the defect yourself.
From this manual you will learn:
- What types of putty are there?.
- How to mix putty correctly.
- How to apply putty on a car.
- How to rub and sand putty on a car body.
Before buying putty, you need to decide not only on the material of the surface to be treated, but also on the area of the car body. Each type of putty has its own characteristics required for the body surface being treated.
Features of car body removal
Beginners who encounter the puttying procedure for the first time are very surprised that it is not as easy as it looks in the video.
It’s really not difficult to remove a small dent on a flat area by spreading putty like butter on bread. But, as practice shows, not everyone succeeds in drawing edges, cheekbones, ribs and other curved profiles. Let's move on to specifics. It should be noted that there are no tools or devices that help restore complex shapes with putty. There is only a spatula, hands and head. Each time the master must think through a strategy for developing the form, which depends on the complexity of the latter.
Beginners starting to work with putty should make their motto the phrase: if you suffer for a long time, something will work out. The putty can be processed, so everything that is superfluous can always be removed, and what is missing can be added. By and large, you can learn to work on one detail, if you gradually bring it to the ideal.
The main mistake beginners make when putting putty is applying too thick a layer. Once hardened, the material is quite difficult to grind. Of course, you can use a sander, but it’s more rational to simply avoid a large amount of excess. To do this, it is better to apply the mass in thin layers and control its height after hardening.
The most difficult situations that put novice craftsmen in a difficult position are associated with the design of various grooves or edges. For example, the task is to putty a part of the hood after straightening, which has extruded longitudinal strips. One of these strips runs right along the damaged area. In this case, first mark the path of the groove with a strip of masking tape, which is removed after applying the putty, leaving the intended path.
The tape mark serves as a guide for further actions. You need to let the putty dry and then you can form a groove with sandpaper. You may have to putty this place more than once. Professionals often select grooves with their fingers during repeated applications.
Putty is closely related to sanding. Applying the mass is only half the battle. The master spends the longest time working not with a spatula, but with an emery block. To speed up sanding, use a pneumatic or electric sander.
Some craftsmen work only with their hands, because they cannot accurately remove surfaces with a grinder. However, it is better for beginners to immediately begin mastering mechanized processing methods, which allow them to spend much less time on grinding. Not everything can be done with a sander, but a lot can be done!
The putty can be sanded either dry or wet. If you work by hand, the wet method is more convenient because it does not produce dust and provides the smoothest surface. However, it also has a disadvantage: water can reach the metal, which can subsequently lead to corrosion. If you use a sander with dust extraction, then water becomes unnecessary.
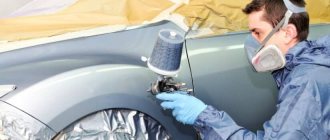
All novice craftsmen should be warned: the dust generated when sanding putty is very harmful to the respiratory system. Dust from fiberglass putty is especially dangerous. If sanding is done dry, then you need to wear a dust mask!
Interesting video: how to properly putty car body parts with your own hands
- Basic rules for puttying car body parts
- How to avoid defects when puttying cars
- How to properly paint a car under the hood
Filling lightweight
Filling lightweight putties are the most popular. All modern car putties have this composition. They are at least a third lighter than conventional ones and are needed when it is necessary to level the surface, but adding extra weight to a part of the car is absolutely prohibited. This includes, for example, cases when the hood can be lifted with difficulty due to increased weight. Light weight, strength, and elasticity are achieved through microscopic hollow glass or plastic balls. It is much easier to work with such a mixture, it is easy to grind - instead of pulling fibers out of the coating, which usually happens with denser compositions, here, when leveling, fragile glass beads simply crumble. The coating made from this putty does not harden and is easy to work with even after a long time. It is these compounds that are used to coat panels from cars, trucks, and minibuses before painting. If desired, you can add fiberglass as a filler.
Manufacturers
Do-it-yourself car body repair
Many manufacturers make putties for plastics. Among them:
Otrix. A series of putties for automotive parts made of plastic from a Polish manufacturer. Almost the most affordable product in the segment.
Otrix finishing putty Finish 1.0kg
SolidFlex. Allows you to putty the car surface in one approach, filling microcracks in the plastic. The composition hardens well on the surface, which reduces the percentage of adhesion of abrasive particles, and also reduces “springing” during further grinding. A precisely selected amount of fillers ensures the easiest sanding process. The composition is presented in gray color. It begins to harden at room temperature after just 5 minutes and dries in up to half an hour. Used to correct imperfections in areas of soldering or gluing of plastic components.
Plastic putty Solid Flex, 0.21 kg
APP Flex Poly-Plast. This two-component mixture contains polyester, due to which it is characterized by high elasticity and mechanical strength. Bonds well to the surface of standard plastics used in car construction. Protects the body from the effects of solvents, acids or alkaline solutions.
Plastic putty APP FLEX POLY-PLAST, 1.8 kg
MasticPlast. Apply a thin layer as a finishing putty. It is made on the basis of polyester resin and has a dark gray color. The kit includes RVO hardener. When you need to provide special protection and durability, it is better to apply the product over an epoxy primer. Do not use putty on thermoplastic or wash primer.
Plastic putty ROBERLO MasticPlast (1kg) elastic
Chamaeleon. The putty from this company is flexible enough for application to plastic and further sanding. Suitable for use on polyurethane, polypropylene, RA, PVC, acrylonitrile. Environmentally friendly. Up to 3% hardener is added to the composition and mixed. Then the mixture is applied to the plastic within a few minutes and dried for 20-30 minutes.
Plastic putty Chamaleon 507 Spachtel Super Flex, 1kg
Sprint. Products from this company are applied to any type of plastic, except polyethylene. They have low density. Thus, the final weight of car parts practically does not increase.
Putty for plastic Sprint, 0.7 kg
What does putty consist of, types
There are several types of putties on the modern market. Each of them meets a number of criteria and is used in individual cases.
Firstly , it must have high-quality connecting characteristics with a properly processed area.
Secondly , the solution must be spread evenly on the surface of the machine.
Thirdly , the putty must have excellent shrinkage, and this is possible with high-quality material.
In this procedure, not only the material is important, but also the high-quality processing of the body. The mixture you choose must be compatible with the future paintwork.
There are these types of putties:
- Rough putties are applied only if serious defects form on the body - sweeps, cracks. Such material often contains some kind of filler, for example, shavings.
- This material has a number of features - easy grinding, can withstand high temperatures, and is very elastic, which allows you to level large surfaces.
- Fiberglass putties are very durable. When applied, the solution transforms into a layer of hard fiberglass, which is easily sanded. This material is ideal for covering holes caused by corrosion.
- Thin putties are used to repair minor damage, such as scratches. The final stage of puttying is carried out with this material. These include fine and nitro putties, which are then easily processed.
- Liquid materials are applied with a device - a gun, but this results in the most even layer possible. It only takes a few hours for it to dry.
- Universal putty is a replacement for the above options; you definitely can’t go wrong with it. At the same time, it is durable, has a uniform structure and is easy to process.
Owners of old cars often use thermoplastic acrylic varnish; it is not compatible with all putties; for this you need to read the instructions.
Some manufacturers are trying to produce paints and putties that are compatible with each other. Be sure to take into account the instructions, try to find out these acts in advance, which will save time and money.
The putty also varies depending on the type of base:
Nitrocellulose putties , where most are dry substances, are therefore used to eliminate minor defects. Such a base can dry in a few hours at room temperature. Since the composition contains solvents, they are toxic. Polyester putties are the best option for eliminating defects in the car body. They are easily leveled and can dry within an hour only at room temperature.
Acrylic putties are created taking into account the latest technologies, therefore they are environmentally friendly. There are no solvents in the content, the material dries instantly. Used to eliminate deep pores.
It is important to use and combine mixtures correctly. For example, if you combine them with a hardener, the coating will be damaged and work will have to start from the very beginning.
Therefore, it is difficult to say exactly which putty is best suited; all circumstances must be taken into account. How the putty dries directly depends on its composition.
For example, if you add a hardener to a two-component putty, it will dry faster - in half an hour, and the work will have to be done faster.
Epoxy putties will dry within 24 hours at room temperature.
To reduce drying time, many people use hot drying. But this procedure must be carried out carefully, maintaining the putty coating at room temperature.
To carry out all the work, you must stock up on a mask, goggles, and special clothing. This material is safe, only dust that can get into the lungs during grinding is harmful, so it’s worth considering protective equipment.
Necessary materials
Removing rust from a car body with your own hands
In addition to equipment and tools, materials are needed.
- Putty. You will need a universal and finishing one. The first one struggles with deep scratches and failures. The finishing agent removes paint smudges and defects from previous work.
- Abrasive materials. This includes sandpaper, sandpaper for a plane, and wheels for a sander.
- Priming. It is necessary for application before painting.
- Polishing pastes
- Wipes for degreasing surfaces. Effectively removes grease and anti-silicone.
- Mattifying paste. Necessary to detect defects remaining after sanding the putty
- Masking tape. Helps protect body parts from staining
- Dye
- Varnish
A few additional tips
Finally, I would like to say a few more tips that will help you when sanding before painting:
- The primer is sanded dry because it is porous and will absorb water. Paint and hard-to-reach places are sanded with water, but then the surface should be dried very thoroughly (alternatively, infrared equipment should be used);
- When processing paintwork, it is better to turn on medium speed. A soft backing will also come in handy to help make sanding more even;
- For hard-to-reach places and edges, you can use a special Scotch-Brite abrasive. Along with it, you should resort to matting paste. These elements do not remove defects, but only increase the dullness of the surface;
- before starting work, it is important to clean the body from dust and dirt;
- Don't forget to prepare a sanding block. Its role can be played by a block of rubber, as well as a foam squeegee. If you hold the sandpaper in your hands, the marks will be uneven;
- When using water, do not resort to soap. Otherwise, it may be absorbed into the soil, causing the subsequent layer of paint to be uneven.
Preparation for putty
How to soundproof a car with your own hands
First, the surface must be thoroughly cleaned. To do this, the area being repaired must be washed to remove dirt. Then you need to wipe it with a solvent. After this, it will be clear where to putty, where there are large and small defects. This way you can clearly determine where and how to apply putty on the car, and see the boundaries of the defective area. All sharp areas and cracks must be cleaned with coarse sandpaper. You also need to get rid of traces of rust. All these procedures are preparation for painting the car.
First layer of putty
Putty can be rough and finishing, as well as universal. The first layer is applied with rough putty, that is, rough putty. Puttying the car is done with a rubber spatula. The first layer is applied with the addition of a hardener. While it dries, you need to watch for the appearance of irregularities. All noticeable dents need to be touched up. And obvious bulges and bumps need to be cut off with a knife.
Now that the surface is leveled, it needs to be sanded. It is better to use fine-grained sandpaper; it removes a smaller layer and cleans more smoothly. Rough areas can be sanded with medium-grain, but then be sure to smooth out with fine-grain. Sanding will level the area. If during the process you can see that the putty is coming off, you should touch up the paint.
Finishing
Only after making sure that the desired area of the body is leveled should you prepare the final layer. It is usually made without a hardener. Putty is applied only to a well-dried surface. A rubber spatula is also used for this.
The main mistake made by car enthusiasts is to putty a car with their own hands without preparing the surface, without first sanding the rough layer. Trying to do everything in a hurry will also not be successful. If the first coat does not set properly, do not apply a second coat.
Also, during the process of sanding the first layer, you need to ensure that the putty layer is on the entire area, and no iron should be visible. Such small areas can only be touched up. If, during sanding, unpainted areas begin to appear, thin layers of putty become noticeable, you need to apply a small new layer of rough putty with a hardener.
Main mistakes in surface preparation and their consequences
If the area was not well prepared before applying the rough putty, then there is no point in applying the putty. It will begin to fill in all the large gaps, then this will lead to a contrast in the layers. When dry, such places begin to bulge. As a result, it is difficult to achieve a smooth surface.
When the putty dries, all the bumps will clearly appear. This can only be corrected with sandpaper. From the experience of motorists who do not know how to putty a car, and in order to save money they try to do everything themselves, we can say that it is impossible to smooth out the resulting irregularities with sandpaper. Such a would-be car enthusiast simply gets tired of sanding the body all day long. In the end, he just quits and drives the way it happened.
The best option, if there is no experience and knowledge, is to take the car to a car repair shop. The specialists there know how to putty a car so that the surface of the body is smooth. Spending a small amount for the work will save a lot of nerves when trying to correct your own mistakes that occurred during putty.
To eliminate body defects, it is not always necessary to putty and paint the body; for example, removing scratches on a car with your own hands can be done in simpler ways.
Most popular sizes
When answering how to clean putty on a machine, you should also worry about choosing an abrasive with suitable parameters. Among the most common options it is worth highlighting:
- P36-P60. Suitable for preparatory work. With the help of these grinding wheels, you can quickly remove a large ball of putty, including putty with fiberglass. They can also be used to remove areas of corrosion and seams that occur after welding. But here you need to act very carefully so as not to remove excess;
- P80-P100. Medium abrasive is used to smooth out rough scratches and level the surface. Grinding wheels of this type are often used to prepare the surface for applying putty;
- P100-P120. Suitable for removing scratches from coarser abrasives;
- P120-P180. Designed to prepare the surface for priming;
- P180-P220. Suitable for cleaning the finishing putty before painting a car;
- P220-P320. A very delicate abrasive. It can be used by hand, without a sander. The goal is to achieve an almost perfectly flat surface;
- P400-P800. Final preparation of the surface before painting;
- Suitable for wet sanding of paintwork before painting;
- P1200-P1500. The material is used for sanding paint to remove defects before polishing;
- R2000. Suitable for finishing work before polishing.
Primer is the final stage of car preparation
At this stage, the surface is once again wiped from dust, after which it is completely sanded with fine-grained sandpaper (1200) to a smooth matte state. To make sanding easier, the sanding cloth can be placed on a small wooden block.
Next, you need to make sure that the areas that are not to be painted are sealed, strictly taking into account all their boundaries and contours. The wheels of the car are also wrapped with film.
Video - how to properly prepare a car for painting:
After the next wiping, a primary layer of primer is applied to the entire surface of the car with a regular brush. If no defects appear on the body, then after 3-4 hours you can safely apply a secondary layer. If defects “surface” in some areas, then they need to be eliminated using the method described above.
The primer is the foundation for any paintwork, a kind of connecting link between it and the base metal of the body, and serves as additional anti-corrosion protection. Therefore, opinions such as “priming is not necessary” are erroneous and unfounded. The reliability and durability of the paintwork depends on the quality of the primer.
Do-it-yourself painting of car thresholds
We have reached the final stage of the work - painting. Please note: by the time of painting, the thresholds must be completely cleaned of the previous paint coating, rust, defects and irregularities must be completely eliminated with a grinding machine or sandpaper, and the surface must be treated with a primer. A layer of paint performs not only decorative functions, it is also an additional protective coating. Therefore, the choice of materials is approached scrupulously. In addition to the difference in the manufacturer and the quality of the composition, there is debate between using regular paint or anti-gravel.
Application of automotive putty
Before puttying, the dent must be straightened so that the thickness of the putty does not exceed 5–6 mm. Never putty on an unstraightened dent, as when the metal is recessed, the adjacent area will rise and after sanding the irregularities will remain.
To prepare for applying putty, you need to use sanding paper with a gradation of P80 - P120. You need to clean 2-3 cm beyond the repair area. The edges of the area where the putty will be applied must be smoothed. The area around the prepared area should be treated with P180-P220 abrasive.
It is better that the ambient temperature is 20–25 degrees Celsius. The metal on which the putty will be applied will always have a temperature lower by 10–15 degrees. If the metal is too cold, the putty will dry on the outside much faster. Thus, condensation and unevaporated solvent may remain under the putty, which will cause adhesion problems and bubbling. If it is not possible to heat the room well enough during the cold season, then it is better to heat the metal before applying putty. This will prevent the formation of condensation and allow the putty to dry normally, throughout its entire depth.
After opening a new jar, if resin is visible on top of it, then it must be mixed with all the putty. The putty and hardener must be mixed on a non-porous surface. The stirring sheet can be made of glass, plexiglass, or other smooth material. So, the remaining material will be easily cleaned off.
Usually the putty is mixed with 2% hardener. A narrow strip across it will be enough (see photo). At low temperatures, the amount of hardener can be increased, but up to a certain limit. Too much hardener can cause excessive offgassing of the reaction, which will cause porosity, increasing the risk of pigment from the hardener affecting the primer and paint applied over the surface. A large amount of hardener can cause the putty to become brittle and also complicate the sanding process.
It is better to stir with a spatula, without circular movements, periodically stretching the putty, simulating the application process. This will minimize the appearance of air bubbles in it.
Poor mixing can cause poor adhesion, too slow curing, stickiness after curing, porosity.
You can read more about applying putty to a car body here.
Time during which the putty must be applied after mixing with the hardener
Application times are based on the correct amount of hardener and may vary from manufacturer to manufacturer. It is advisable to apply most putties within 4-5 minutes after mixing with the hardener.
Recommendations
- Mix the putty and hardener thoroughly. A hardener that does not react with the putty will subsequently appear through the layers of the coating in the form of spots.
- In hot weather, the amount of hardener that needs to be added to the putty is approximately halved.
- In order to dilute the thick putty, you can add a little polymer from the fiberglass repair kit to it.
- The jar of putty must be tightly closed during storage to prevent the putty from drying out, otherwise it will lose its elasticity.
- The roof, hood, and doors are body elements that are affected by increased vibration. On these elements you need to use elastic putty to avoid cracks. Putty with aluminum powder and putty with carbon fiber are suitable.
Cleaning and polishing the surface
This is a rather labor-intensive process in which all geometric defects of the body and corrosion of the old paintwork are eliminated. Initially, you should straighten the body.
In order to level out small dents, you need to hit them from the inside with a rubber hammer (you can do this with a regular hammer, but with the obligatory use of wooden hammers).
Old paint in places of chips and cracks can be removed using a chisel, scraper or sharpened screwdriver, after which the damaged areas must be thoroughly cleaned with coarse-grained (80-120) sandpaper.
In this case, it is important to achieve the smoothest possible transitions between defective areas and the general plane. Any remaining rust should also be sanded down to a full shine.
During the cleaning process, dust is formed, which falls on the surface and hides the areas requiring treatment. Therefore, in order to promptly detect and eliminate all defects, it is necessary to periodically wipe the working surface with a rag soaked in white spirit.
If the car is quite old and has several layers of old paint, then the ideal option is to remove it completely (but this may take several days).
How to prepare a surface for puttying
Decide on the area to be painted and begin cleaning that surface. It is best to use a solvent that will help degrease body parts.
Remember, putty does not overlap the gloss, which is why cleaning work is so important. Many people use an orbital sander for this.
If the places are hard to reach, then you will have to get to them on your own; stock up on sandpaper. If you see the appearance of rust, then these places must be coated with a converter.
Only after this can you begin to create the basis of the machine; its appearance will depend on this. Dilute the rough putty with solvent, because it must be applied first.
There is no need to immediately begin eliminating the defect; it is better to apply the putty in several layers, waiting until the first one dries. The work must be done quickly and confidently, because the material begins to harden within 5-10 minutes.
If your putty begins to harden and you don’t like something, you shouldn’t level it, the situation will only get worse. Stop work, wait until it dries, and use a tool to remove the remaining putty.
If you haven't added enough mixture, it simply won't set in the right places, which will have a bad effect on the next surface sanding procedure.
You must understand that the evenness of the paintwork directly depends on the puttying work done. The better the material is fixed to the body, the longer the subsequent layer applied to it, namely the paint, will last.
The thickness of the layer depends on the recommendations of the manufacturer; try to follow the instructions. Some recommend applying a layer of 1 mm, and others 3 mm or higher, it all depends on the composition and level of damage.
For example, when applying liquid putty, a layer of 100-500 microns is formed. This issue must be approached individually.
Many craftsmen can afford to apply a larger layer of material when they see that it is necessary. This can often be done, the main thing is that it does not affect the strength of the repair.
Violation of recommendations in this matter may lead in the near future to its detachment from the body. The cause of detachment can also be a violation of the temperature regime.
According to the recommendations of many manufacturers, work must be carried out in a temperature range of up to +50°C. The better your work on applying putty, the less time you will have to spend on the sanding procedure.
Preparation for puttying
Instructions on how to properly putty a car so that the paint on it does not crack include the following preparatory measures:
Car washing is carried out using water and regular car shampoo. During washing, all contaminants are thoroughly washed off from the damaged surface.
Wash your car thoroughly before applying putty.
- Before you putty the car yourself, treat it with a degreaser. As a rule, when washing and wiping you will be able to assess the scope of work and identify other minor defects in the body.
- Proceed with grinding, the purpose of which is to level the surface and remove excess paint and rust from it. Cleaning the desired area is done with a grinder or sandpaper. To begin with, the car is treated with coarse-grained sandpaper, and then with fine-grained sandpaper. A car surface prepared in this way serves as an excellent base for applying primer and paint. Although the desired area will need to be sanded down to bare metal, don't go overboard trying to achieve a shiny surface - it won't be needed at this stage.
Preparatory measures ensure more than 50% success when working with putty. In turn, applying the composition with your own hands, according to technology, on a maximally sanded and degreased body, regardless of the quality of the primer or paint, can provide them with more durable adhesion.
Tips on how to putty a car
When performing work to remove all defects before applying a layer of putty, be careful. After all, this is your car, and the more carefully you treat all the cracks and chips, the better the primer will be applied. A technological approach is half the success when repairing a body.
When puttingtying your car, follow these tips:
- allow more time for each layer to dry. You cannot guarantee that the air humidity will be low and the temperature level will be high. It's better to be safe than to redo everything.
- remember that the mixture (cement-sand) always shrinks;
- If a lot of hardener is added to the mixture or the mixture is poorly mixed, stains may appear on the metal of the machine; they can be seen after the mixture has dried. This defect is clearly visible;
- therefore, observe the proportions and technology of applying layers . If stains do appear, then you need to clean off all the putty and repair the damaged part again;
- the appearance of pores. There are several reasons for this: the mixture was poorly mixed or moisture got into the layer during work. Applying a thick layer also causes the putty to become porous;
- Proper kneading using a pair of spatulas will help avoid this. The process forces out all excess air from the mixture;
- to grout each layer, use fine sandpaper, for example No. 400;
Sandpaper No. 400
- Other defects may appear due to the quality of the metal, or if the body has passed its service life. Sometimes you come across fakes, and it’s not easy to eliminate the defects.
Follow the technological process, then everything will be fine.
Leveling dents with putty
Before filling the damage, you need to thoroughly wipe the entire surface again, make sure there are no rusts or cracks in the old paint, and prime the areas of the proposed repair.
To level out body dents, it is necessary to use a finishing polyester synthetic putty. You can dilute the components on anything (sheet of plywood, metal, plastic, etc.), the main thing is to strictly follow the proportions indicated on the packaging.
Video about the nuances of using putty:
Any boxes or cut-off bottoms of plastic bottles are not suitable for mixing putty, as it is very inconvenient to draw the solution from them. The finished mixture hardens very quickly, after almost five minutes it becomes unusable, so you need to mix small portions and work as quickly as possible (but without unnecessary fuss).
Video - do-it-yourself car putty:
Apply the mixture to areas of damage and dents with a rubber or metal spatula. By leveling the putty with cross movements, it is necessary to achieve a flat and smooth surface, slightly protruding above the main plane.
All defective areas must be treated in a similar manner. If lumps form during work, this means that the putty is beginning to harden and its further use is unacceptable.
Treated areas should be left alone until completely hardened, which usually occurs in about 40 - 50 minutes at a temperature of 20°C. Next, the putty surfaces are sanded with sandpaper in several stages, progressively changing the grain size of the canvas from 120 to 600.
It may be necessary to apply a secondary layer of putty in some areas after sanding.
If the mixture sticks to the sandpaper during sanding, it means that it has not yet hardened enough and you need to postpone this process for some time. Another possible reason is that the proportions of the components are incorrect when mixed.
In any case, before you start puttingty, it is advisable to first practice on some separate tin sheet. To cover large areas, you may need several spatulas of different sizes.
Which putty to choose for a car
Which putty is best for a car? When choosing a putty mixture, you need to consider what it will be used for. The very concept of putty is a quickly hardening material, which comes in two types:
- pasty;
Pasty
- liquid.
It is diluted immediately before application. Do this in small portions so as not to throw away the leftovers. After all, it will not be possible to dilute the mixture again.
Putty material is needed to correct defects on the car body that are caused by impact or corrosion.
There are several main types of putty, and each has its own purpose.
- filling putty is used to strengthen the reinforcing mass of the car. It contains large grains, so after application pores may form in it;
Filling
- reinforcing putty contains a high percentage of fiberglass fillers. It is used when a large area needs to be treated on a car, many dents, deep scratches, and corrosion damage;
Reinforcing
- The finishing paste is applied last, after all protruding defects have been removed and the primer putty has been grouted. It contains small grains that seal all the pores of the base primer layer;
Finish
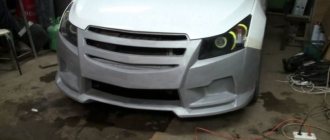
- there is a special plastic putty designed to work with car parts made of plastic;
Plastic
- liquid spray putty is used to correct defects over a large area . It is specially sprayed from spray guns in several layers;
Liquid spray
- acrylic putty is used for minor damage to the car body. It is applied in a thin layer.
Acrylic
Therefore, before buying an acrylic mixture to seal cracks in your car, decide which one you need.
Features of selection, preparation and application, how to dilute paint for painting a car
Paint performs both aesthetic and protective functions. When choosing it, you should be guided by the following criteria:
The gloss level must be at least 60%. In this case, the painted car will have an attractive appearance.
The paint must be resistant to temperature changes, exposure to sunlight and precipitation.
If to obtain a certain shade it is necessary to mix two components, then in no case should you use coloring compounds from different manufacturers (often their chemical compositions differ, which can significantly affect the physical and quality properties of the coating).
To paint a car yourself, only enamel is suitable, which dries naturally without heat treatment.
Before starting work, the paint must be diluted with a special solvent to the desired consistency, which is easy to determine visually. To do this, momentarily immerse a metal rod with a diameter of 1-2 mm into the solution. If, after removing it, the liquid drains at a speed of 3-4 drops per second, then you can start painting. If the drop frequency is significantly lower, more solvent should be added.
Video - how to paint a car with your own hands, three-layer:
The finished solution is filtered through a nylon stocking, after which it is poured into the spray gun tank with a nozzle size of 1.4 mm. The optimal operating air pressure should be within 2.5-3 Atm.
Painting usually starts from the roof, gradually moving to the lower part of the body. All movements must be smooth and uniform; the dispersing flow cannot be held in one place for a long time. The gun must be kept at a distance of 20 -25 cm from the surface.
After 15-20 minutes after applying the first layer, the second should be applied. Moreover, the viscosity of the solution for secondary spraying should be slightly lower than for the primary one. The next layer is applied in a similar way.
The number of paintings depends on the requirements of the car owner. Some people stop after applying the second layer and are satisfied with the result of their work, while others think four times is not enough.
The best option is three-layer painting. This amount is quite enough to provide a bright shine and reliable anti-corrosion protection.
After complete drying, which usually occurs after 24-36 hours at an air temperature of 20°C, all attachments are mounted back on the vehicle.
Preparatory procedures and the painting itself should be carried out in strict compliance with all safety measures for working with flammable and harmful substances. The compressor must be located outside the work area.
Video lesson (practical tips) on how to properly paint a car with your own hands in a regular garage:
May be of interest:
Scanner for self-diagnosis of a car
How to quickly get rid of scratches on a car body
How to check a used car before buying
How to apply for an MTPL policy online in 7 minutes
Quality of final work
Quality depends:
- depends on what putty you choose. They are divided into many types, and prices vary accordingly;
- from preparatory work. Be aware that even the most expensive and high-quality putty will begin to crack if the surface of the body is poorly cleaned before applying a layer of the finishing mixture.
You can putty your car either yourself or entrust the work to professionals. True, not all car repair shops are conscientious about their work, and they also bill you for removing small scratches, as if they had completely restored the car.
Therefore, motorists are increasingly repairing small cracks and dents themselves. The main question that interests all novice repairmen is how long does it take for car putty to dry? If you have little experience, we recommend following step-by-step instructions that will help you achieve high-quality results.
Requirements for putty
Considering that the market for materials for body work is currently saturated, and many manufacturers offer leveling mixtures, it would be useful to know what properties a high-quality putty should have:
- Ideal connection with the surface to which the composition is applied. Of course, proper preparation of the application site is of great importance, but when choosing a mixture you should trust trusted manufacturers who have good reviews from other car owners.
- Minimal shrinkage during hardening. It happens that the putty hardens and decreases in physical size, which causes cracks to appear, especially at the boundary of the applied composition and the workpiece. It happens that a piece of hardened putty simply falls out.
- Possibility of processing, including grinding, of hardened putty without causing damage to it. That is, even in a frozen form, the putty must have a certain plasticity; increased fragility is unacceptable. Otherwise, the paint layer will lie unevenly, negating all the efforts of the car owner who works with his own hands.
Puttying a car
How to apply liquid putty on a car
The type of machine depends on the adhesion of the composition. For liquid mixtures it is the highest. Moreover, it applies to both metal and plastic coatings, and this composition is correctly applied using a spray gun. It will have to be purchased if necessary. It is most convenient to apply liquid putty in this way. And it will be nice to look at the car after repairs - the surface will be smooth, and the appearance of the car matters to the owners, especially if the repair procedures are done with their own hands. I would like to achieve a better result so that I am not ashamed of the car.
Rules for using putty for cars
Before you start filling, you need to familiarize yourself with the material and some of the subtleties of the work. Inept and incorrect treatment of the body will only lead to a deterioration in the appearance of the car. Especially for this, we have prepared a list of features of the entire puttying process:
- Before applying putty to the body, it is necessary to thoroughly degrease the surface. This material is very sensitive to fat, particles of which can form bumps on the flat surface of the future coating.
- Before applying the material, do not forget to clean the surface with sandpaper. Most often, models from P60 to P180 are used for this. When cleaning large areas (the entire car body), you can use more convenient means, for example, a grinder with a grinding wheel.
- You should decide in advance on the quality of the putty and its types. Most likely, you may need help from different brands of putties. Such cases are not uncommon.
- During operation, it is necessary to mix the composition as often as possible. This is due to the fact that it tends to settle very, very quickly.
- A very important condition is the competent selection of the vessel in which the mixture is prepared. Its volume must correspond to the amount of material you purchased. If you use too large a container, you can easily render important putty residues unusable.
- Before adding a hardener to the composition, you must carefully read all the manufacturer's instructions. An incorrectly selected ratio will seriously disrupt all the properties of the putty.
- The solution should be prepared only in small quantities. After about 10 minutes it will definitely harden. Try to work as quickly as possible.
- For ease of use, it is recommended to prepare several spatulas in advance. This advice is due to the fact that the putty residues harden and make the working part uneven. When working quickly, there is no time to clean the surface with a tool, so an additional one always comes to the rescue. Also try to hold the spatula at an angle of 60 degrees.
- Many car enthusiasts mistakenly use water when working with putty. Under no circumstances should this be done. The presence of moisture in the material is unacceptable.