Print this article Font size 16
Considering the current opportunities in terms of purchasing spare parts, materials, tools, as well as the relative simplicity of the design of the VAZ 2109 car, doing body repairs yourself is far from the most difficult task. Many perform body work on their own, not inferior in quality to specialized workshops.
The task is to return quality
Weak spots
What weak points does the body of the domestic nine have? Let's try to find out.
If rotten or deformed elements of the car body are detected, they must be removed and appropriate measures taken to restore the integrity of these areas.
The most vulnerable areas of the VAZ 2109 body include:
- Front floor, reinforced sills, doors, fenders and rear underbody;
- The hood has relative endurance, but over time it begins to lose its former properties. The area above the battery is especially affected. This is where Nine owners most often notice the formation of rust;
- A noticeable problem that many drivers face is the fuel tank floor;
- Optics reflectors and a muffler also cannot boast of a long life without the appearance of signs of rust.
Corrosion is obvious
Corrosion is the main enemy of almost all domestic cars. Although anti-corrosion coatings are done quite well, time, weather conditions and the characteristics of our roads kill everything, rust actively begins to eat the metal and this problem must be dealt with.
Dealing with problems in general terms
To get rid of the problem of rust formation on the body, you need to do some work. On your own or with the help of specialists, decide for yourself.
- Disassemble the engine compartment, drain the coolant and remove the radiator.
- Remove all doors.
- If there is an amplifier (TV) in front, then it will also have to be disassembled.
- Using a grinder, all damaged areas are cut off;
- If the wings or panels are rusty, they will have to be cut off.
- If holes or holes have formed due to corrosion, they can be welded or patches can be used.
- It is recommended to additionally cover areas that are not highly resistant to corrosion with metal inserts.
- Experts advise strengthening mudguards with additional inserts and then securing them with spot welding.
- New body parts that are installed in place of rusted ones must be adjusted in accordance with the standards.
- After processing, the wings and sills are secured with screws, bolts and welding.
- Restoring the geometry of the body is a mandatory activity, on which most of the time is spent. To do this, you will need a bench machine on which the machine is fixed and adjusted in accordance with the norms of the control points.
- The next stage is welding a new floor, if required as a result of assessing the condition of the body. When restoring the floor, patches, connectors and amplifiers are used. At the final stage, the floor is covered with anti-corrosion compounds.
- It is easier to purchase new arches than to try to restore old ones. They can be coated with resin and waste oil mixed together. This mixture is excellent at resisting rust. Just do not use this composition to treat the bottom under any circumstances.
During body repairs, it is often necessary to jack up the car. If the jacking areas are rusty, use a support beam to lift the car.
Holes, rust
Often, the body is repaired independently if small areas are damaged, dents or holes are formed due to the effects of rust. In addition to correcting the geometry, painting and polishing are performed.
More serious deformations and damage caused by collisions and road accidents necessarily require contacting specialized workshops. Here, focusing on control points and using professional equipment, you can restore the body as correctly as possible without disturbing its geometry, maintaining rigidity and other factory parameters. Sometimes they can even be improved.
3) High fuel consumption
When the engine is running efficiently, it burns fuel at a rate that helps in fuel efficiency (fuel economy). However, some parts of the fuel system, such as fuel filters, air filters, mass air flow sensor and oxygen sensors (lamb probe), become dirty and wear out over time.
If they are not replaced, this will cause the engine to use more fuel than usual. Again, a proactive attitude towards regular car maintenance will save you from the headaches caused by increased fuel consumption due to improper engine operation.
Checkpoints
Measuring the distances between body control points is the most common way to check the condition of a car. After taking measurements, you need to check them with the passport data.
The check is performed as follows:
- Dimensions are checked diagonally;
- The current condition of the machine racks is checked;
- The roof is examined visually, the dimensions of the diagonals of the roof itself and the door frame are checked;
- Increased attention is paid to measurements of the rear and front window frames;
- A visual inspection of the entire body is carried out from various angles in order to determine the presence of gaps and bulges that differ from the required parameters.
| Check Point | Passport sizes | Tolerance (+/-) |
| Diagonal of the front doorway from the edge of the lower threshold to the middle of the roof | 1345 millimeters | 5 millimeters |
| Diagonal of the front door opening from the lowest point of the windshield to the middle of the lower threshold | 1000 millimeters | 5 millimeters |
| Distance between front door hinges and pillar in a straight line | 963 millimeters | 5 millimeters |
| Diagonal of the rear door opening from the point where the lower sill joins the central door pillar to the roof | 1112 millimeters | 5 millimeters |
| Diagonal of the rear door opening from the top of the B-pillar to the lower threshold | 860 millimeters | 5 millimeters |
| Long diagonal rear side window frame | 706 millimeters | 3 millimeters |
| Short diagonal rear side window frame | 383 millimeters | 3 millimeters |
| Hood diagonal | 1610 millimeters | 5 millimeters |
| Distance from the middle of the windshield to the middle of the hood | 712 millimeters | 5 millimeters |
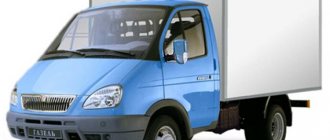
Brief history of the VAZ 2108
The model began its history back in 1971, long before production began. For a long time, workers at the Volzhsky plant created only prototypes, until the technical specifications were approved by the government in 1978. Despite this, the model itself went into production only in 1984 and did not leave the assembly line until 2003.
The special features of the VAZ 2108 include one type of body – a 3-door hatchback. The front-wheel drive car could be equipped with one of 5 types of engines ranging from 1.1 to 1.5 liters. As for the gearbox, the car was equipped with either a 4- or 5-speed gearbox.
For the VAZ 2108 model, the repair manual was created so simple that each owner could independently diagnose many breakdowns and fix them without outside help.
Bumpers
It is sometimes necessary to remove the front and rear bumpers to replace them or repair other body elements. Dismantling does not require special skills, so even a beginner can cope with this task
The only difference when removing the front bumper compared to the rear one is that the plastic fender liners will need to be additionally removed in front.
Otherwise, the dismantling and repair procedure is performed as follows:
- There are nuts on the side that hold the bumper to the body. They need to be unscrewed. Mostly on most VAZ 2109 there are 2 of these fasteners on each side;
- Now find the front bumper mounting nuts and remove them;
- When unscrewing the front fasteners, be sure to hold the bumper, otherwise it may fall and be damaged;
- If you remove the front bumper, then remove the fender liners. All removal work is completed;
Dismantling process
- Carefully examine the condition of the bumpers visually. If there are deformations or damage, these areas can be straightened;
- Old peeling paint and traces of rust can be easily cleaned using 200-400 grit sandpaper;
- If the bumper is made of plastic, all damage is repaired using special putty;
- The holes on the plastic bumper are covered with plastic elements from old bumpers or other elements that have suitable dimensions, thickness, and strength;
- Using a soldering iron with a power of 40-60 W, you can weld plastic elements.
Failure to maintain clearances
Connection of bumper elements
To fasten the elements of a damaged plastic bumper, you can use four methods.
- Melt the plastic of the bumper and additional inserts. The seam width should be about 15 millimeters. And the depth of the soldering depends on the thickness of the body element.
- Parallel seams. Wire or nails without heads can help here. These fasteners are soldered on the reverse side. A fairly reliable connection option.
- Flexible copper wire. A more complex, but also more effective method. The connection is made according to the principle of the second method, then the wire is soldered from the inside with a snake or zigzag. Some people also solder it from the front side.
- Lattice. The most reliable and durable option. Using a mesh or a piece of decorative radiator grille, the elements of the plastic body are fastened together.
Body repair is a rather complex and sometimes labor-intensive process. Based on video lessons and instructions, you can complete a number of tasks. But for complex damage, it is better to turn to professionals.
Engine overhaul
Extraneous noise, knocking, increased fuel consumption, and decreased power indicate the need for a major engine overhaul. On a VAZ 21099, engine overhaul means restoring its technical parameters, as indicated in the operating instructions. The VAZ 21099 engine is overhauled after removing the device from the car and disassembling it.
Removing the engine
- The battery is removed from the car.
- Oil and coolant are drained.
- The protection installed on the engine crankcase is removed.
- The exhaust pipe is disconnected from the muffler.
- The air filter is removed.
- The vacuum hose, which serves for the brake booster, is disconnected from the engine intake pipe.
- The ground wire from the clutch housing is disconnected.
- The hoses are disconnected from the thermostat.
- The high-voltage wire is released from the distributor cover.
- The low-voltage wires located in the block are disconnected.
- The hose supplying fuel from the fuel pump is removed.
- The cable tip mounted on the drive lever to disengage the clutch is removed.
- The block with the wire is disconnected from the starter relay for traction.
- The generator output is disconnected.
- Wire from carburetor valve.
- The hose is released from the carburetor for return drainage.
- The choke linkage and the control lever are separated.
- The cable for driving the air damper is removed.
- The latch installed on the damper drive sector, which holds the accelerator drive cable, is removed.
- The cable is removed from the throttle valve drive sector.
- The bracket on which the accelerator drive cables are attached is removed.
- The oil pressure and coolant temperature sensors are turned off.
- The heater hoses are disconnected.
- The gear shift rod and the joint tip are separated.
- The speedometer turns off.
- The car's reverse light switches are turned off on the gearbox.
- To make it easier to remove the engine, the extensions on both sides are retracted to the sides.
What affects wear
The active destruction of the external and internal parts of car boxes is caused by a combination of poor-quality anti-corrosion treatment coupled with urban operating conditions in winter:
- reagents;
- constant exposure to water;
- temperature changes;
- high humidity.
Most believe that the thresholds on the 2109 were made very poorly. Let us list the main causes and consequences of rapid corrosion of VAZ cars:
- Poor quality factory painting of VAZ body elements. Moisture gets under the paint, quickly starting the corrosion process. In practice, box repairs are needed after 10 years of operation.
- Lack of modern anti-corrosion treatment technologies. A striking example of proper processing is the galvanized body of the Audi 80 from the late 80s and early 90s. Such cars are still in service today. Whereas VAZ 00-x is already rare.
- Poor waterproofing. Water quickly enters the internal threshold (connector) and remains there all year round. Salt from the city road “finishes off” the metal.
- Poor design of drainage holes for removing water from the body.
- Disadvantages of the interior heating system.
Recommendations for caring for equipment
Modern models from the brands Bernina, Veritas, Jaguar, Singer, etc. are equipped with great functionality. And during operation, do not neglect the instructions and maintenance of the unit. It is better to prevent any damage than to deal with it. In order for the equipment to serve for a long time, it is necessary to follow the manufacturers' recommendations.
- Do not store the unit in a room with high humidity, this will lead to rusting of individual parts.
- After each use, it is necessary to clean the unit from dust, fabric lint, thread fragments, etc.
- All moving parts should be lubricated at least once every three months.
- For oiling, only recommended grades of technical oil should be used. Expired formulations should not be used.
These simple recommendations will increase the life of your device and make working with it enjoyable.
Replacement
To carry out repair work, you need to prepare tools, materials, power tools:
- complete set of keys;
- locksmith - chisel, hammer;
- electric welding machine;
- electrodes dia. 2 mm;
- drill;
- drill dia. 5-6 mm;
- a grinder with a grinding wheel, have a metal disc in stock;
- primer;
- paint;
- solvent;
- aerosol can with anti-gravel composition in black Body 950;
- cotton gloves;
- canvas mittens;
- rags;
- fire extinguisher – you need to check the expiration date;
- plastic containers for 6-7 liters, they can be made from 10 liter canisters;
- safety glasses;
- tassels;
- moisture-resistant sandpaper.
Preparing the machine
Replacing the lower cross member of the VAZ 2109 radiator frame
Place the vehicle on a level surface:
- Open the hood.
- Open the expansion tank cap.
- Place a container under the cooling radiator and open the drain plug.
- Drain the antifreeze.
- Place the second prepared container under the engine and drain the antifreeze from it.
- After this, install and tighten the plugs.
- Disconnect both terminals from the battery.
- Remove the battery.
- Place wheel chocks under the rear wheels.
TIP: BEFORE LIFTING THE FRONT, IT IS ADVISIBLE TO REMOVE THE WHEELS. SINCE WHEN WELDING, A SPARK CAN ACHIEVE THE RUBBER CYLINDERS.
- Raise the front of the car with a jack.
- Install standard supports.
- Align the front part of the body level. You can apply a level.
- Remove the front decorative grille.
- Unscrew the headlight mounts from the engine compartment and disconnect the terminals.
- Take them out and put them on a rack in the garage.
- Unscrew the upper radiator mounting. First remove the electrical wiring terminals from the fan and remove the wires as far as possible from the intended work area. If possible, wrap the wires with tarpaulin.
- Tilt the radiator towards the engine and unscrew the clamps securing the pipes.
- Remove the pipes. Move them away from the front end.
- Remove the radiator and fan assembly.
- Remove the radiator inserts from the lower channel.
Preparing the frame
VAZ 2109 radiator frame panel
When carrying out work by one car enthusiast, it is necessary to prepare the purchased parts:
- Clean the frame parts from transport primer. Pay special attention to welding points and bends.
- Use welding to weld the joints.
- Clean with a grinder. If necessary, straighten.
- Apply a solvent with a brush to degrease the metal.
- It is necessary to prime the internal parts first, since after they are installed from the engine they become inaccessible.
- After checking these parts on site, mark them.
- Connect them together with clamps.
- Carry out welding work to connect them. Start welding parts from the top and gradually move to the bottom.
- Clean welded joints.
- Strip the front of the frame down to metal.
- Cover with primer, then paint with one coat of paint.
- The sealant is applied.
While the parts are drying, you need to cut off the old frame.
Removing the old frame
NOTE: BEFORE CUTTING, YOU MUST CHOOSE A SEVEN BLOCK OF WOODEN AND CUT TO THE SIZE OF THE SPACE FROM LEFT TO RIGHT. MAKE FRAME MARKS ON THE BAR, IN THE INSTALLATION POSITIONS AND IN THE MIDDLE OF THE FRAME. TO PREVENT SPARKS FROM WELDING ON IMPORTANT PARTS, PUT A SHEET OF METAL IN FRONT OF THE ENGINE AND COVER THE ENGINE WITH A TARP. AFTER THIS, PROCEED WITH CUTTING.
- Using an electric drill, drill out the spot welds at the fastening points. The outer part of the frame is welded to the side members (see Replacing the front side member on a VAZ on your own).
- Now use a chisel to cut off the remaining weld seams.
NOTE. IF IT DOESN’T FOLLOW POORLY, PUT A CUT-OFF DISC ON THE GRINDER. CAREFULLY, WITH GREAT CAUTION WHEN CUTTING, TRIM THE WELDING POINTS.
- Remove old frame.
After cutting the frame, inspect the internal surfaces of the engine compartment. If necessary, correct any detected defects. Apply primer and sealant.
Installing a new frame
- Try on the new painted frame.
NOTE. ON THE VAZ 2109 THE RADIATOR FRAME IS ALREADY PAINTED.
- Install the rail.
- If all the marks marked on the strip coincide with it, then you need to mark the welding places with a broker.
- If there is a discrepancy, the frame must be trimmed (adjusted). Try it on again.
- Only after making sure that the installation is correct, drill the holes.
- Make points in place by welding (bait).
Step aside and inspect the work being done. Since if the radiator frame is installed incorrectly, the structural operation of the lighting fixtures will be disrupted, the engine mounting location may be displaced. Consequently, the proper operation of the entire vehicle system will be disrupted.
- After inspection and testing, weld all joints.
- Lower the hood, check its closure, and, if necessary, make a small straightening.
- Wait until the parts to be welded have cooled down a bit.
- Using a grinder and sandpaper, clean the welded joints.
- Perform putty work on all welded joints.
NOTE: WHEN CLEANING, IT IS PREFERABLE TO WET THE METAL WITH WATER TO PREVENT ITS HEATING.
- Use primer to paint the front part of the radiator grille.
- Treat with aerosol sealants from a can.
- Paint the frame twice.
- Only after this can you begin assembly. Reassemble in reverse order.
Replace the radiator frame yourself. This should be done only after a complete, detailed study of the video or photo.
It is also necessary to read the instructions for carrying out the work. Take all precautions to avoid causing a fire or increasing the cost of repairs.
Attentive attention to welding activities and working with power tools is the key to safety. Correctly, technically competent repairs guarantee high-quality operation of the vehicle.
Now we are planning to replace the radiator frame. The reason for the replacement was a crack in the hole for the radiator on the right in the place of the front airbag (it was welded by someone), overcooked pieces of patches on the bottom in the area of the crab fastenings, and general rotting of the entire structure as a whole. The car received a blow in the area where the front engine mount was mounted, the right mudguard was displaced, and, it seems to me, there was a problem with the right front spar. All this needs to be considered in detail and a solution planned.
Replacing the front panel is one of the most important moments for us, on which the appearance of the car, the gaps and the correct fit of the main parts that assemble the entire front of the car will directly depend. These parts are: the face assembly itself (radiator frame + radiator frame panel), both headlights, two wings and a hood. And by the time welding begins, all these spare parts will need to be available.
There are a few additional important points: the problem of the front fascia fitting perfectly with the short-wing mudguards, which are shaped a little differently than the modern stock long-winging fascia. Also, the old fender mounting brackets do not line up with the holes in the long fenders themselves. There are also issues with the headlights. They measured the sports, they become bulging forward. Will need to be customized. At the beginning of the process of working on all this, we removed the wheels, both struts, rack, rods, i.e. Completely freed up the engine compartment. Thus, we plan to process, prime the engine compartment and the muzzle welded to it together, and paint it all at once.
Let's divide our work into several main stages: 1. Cutting the front panel 2. Preparing and welding the front panel into one piece 3. Preparing the engine compartment 4. Welding the front panel and fitting the external parts of the front end
Stage 1. Cutting the front panel
There was nothing particularly complicated or unusual about the front panel section. The main thing we wanted was to see if we could leave or change the lower panel fastenings to the mudguards. It turned out that it needed to be changed.
The VAZ-2109 is a car that is not distinguished by a strong body; iron quickly succumbs to corrosion, and almost all body parts rust. Replacing the front spar is required when its metal is rotten in different places; the part is also replaced if it is severely deformed after an impact (accident).