The LADA Kalina, which is produced by AvtoVAZ PJSC, has gained nationwide popularity in the Russian Federation. It has a large number of admirers, has its own club, and many forums on the Internet are dedicated to discussing this car. But some malfunctions are typical for Kalina, which is why repairing this car is a sore subject for many of its owners.
In fact, repairing a Lada Kalina car yourself is not so difficult. From this article you will learn about the most vulnerable parts of the car, the most common breakdowns and how to eliminate them.
Do-it-yourself troubleshooting
Repair work is carried out taking into account the design features of Kalina. VAZ models are equipped with 2 types of engines and various standardized units. Do-it-yourself repairs are carried out in accordance with labor safety instructions and relevant rules. At the same time, Kalina car owners use certified tools and various equipment, the functional characteristics of which correspond to those specified in the vehicle service manual.
If you follow the above recommendations, labor productivity will be high. The choice of repair instructions for the Lada Kalina depends on the location and nature of the breakdown. When troubleshooting problems related to starting the engine or replacing the fuel filter, exhaust gases must be extracted.
Oil or operating fluids can be replaced and topped up using only those materials that are specified in the appendix on their consumption rates. Otherwise, you will need to replace the cabin filter on the Lada Kalina. A similar result can be obtained if you add or replace coolants with liquids of different brands. Repairs and tuning of Kalina of any configuration should be carried out in a ventilated garage.
Basic information about LADA Kalina
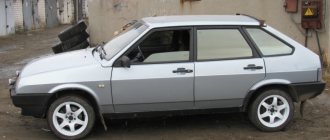
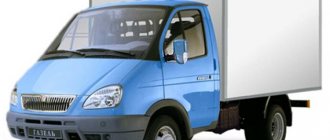
LADA Kalina has been produced since 2004; production of the popular second-generation car began in 2013. Kalina-1 is available in three body types: hatchback (model 1119), sedan (model 1118), station wagon (model 1117). There are cars available with petrol engines of three modifications: a 1.4-liter 16-valve engine with a power of 89 hp. s., 1.6-liter 8-valve engine producing 81 hp. s., 1.6-liter 16-valve engine producing 98 hp. With. The LADA Kalina-1 has only a manual transmission with five gears. The front axle has a classic MacPherson suspension, the rear axle has a beam with stabilizer, springs, and shock absorbers.
Typical faults of LADA Kalina-1
Significant malfunctions with Kalina rarely occur, but there are a lot of various undesirable trifles. The car’s clutch is not very reliable and has an impressive service life, regardless of the type of engine, so it can malfunction after 40-50 thousand kilometers. The main source of malfunction is a broken clutch disc.
You need to constantly monitor the oil level in the engine - sometimes it leaks through the gaskets or burns through the piston rings. On the instrument panel there is only an oil pressure warning light, but there is no dial indicator. If the indicator lights up all the time, there is a possibility that the crankshaft is knocking.
A common malfunction of VAZ gearboxes is increased noise. It is difficult to get rid of the humming of the gearbox; sometimes neither replacing the bearings nor refilling with first-class transmission oil comes to the rescue. The transmission is noisy even in new cars, because of this the Volzhsky Automobile Plant has repeatedly completed the transmission.
A problematic element since the days of the VAZ 2108 and VAZ 2109 has been the thermostat in the engine, moreover, the valve in the thermostat was capable of jamming in any position. It's annoying when the engine doesn't heat up to the required operating temperature, but if the engine overheats, it's more problematic.
Electrical problems on LADA Kalina appear mainly of three types:
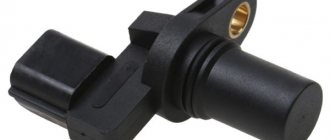
- the ignition module is often damaged;
- very soon the bearings and diode bridge “die”;
- The window lift cable on the driver's door breaks.
When the ignition coil sparks, the first and fourth cylinders or the second and third cylinders stop functioning. The ESP cable breaks when it falls off the guides.
The main source of cracking noise in outer CV joints is insufficient lubrication; At the factory, in order to save money, they put it in sparingly. The consequence of this is severe wear of the hinges, and as a result, the “grenade” needs to be replaced.
A broken timing belt is a very annoying problem. And if on the 8-valve engine 21114 it is possible to change the belt drive and move on, then on engines 11194 or 21126 the valves bend from the oncoming push from the pistons, repairs will be quite expensive. In addition, a break can occur through a jammed water pump, because of this, if the pump begins to make noise, it must be replaced immediately.
Replacing caliper pins and boots
I think there is no need to explain once again that due to poor lubrication of the caliper fingers, certain problems can arise, for example:
- uneven brake pad wear
- tight movement of the bracket and even wedging it
- wear of the fingers, which will lead to rattling and knocking of the caliper
If there is enough factory lubricant in the guide pins, it can last up to 100,000 km. But there are times when practically new cars find themselves without lubrication in these parts. That is why it is better to check everything yourself. Also, lubricant can “leave” through a torn finger boot, so their integrity must be constantly monitored.
If you decide to replace the guide pins, as well as the caliper boots on your Kalina, then for this small repair you will need the following tool:
- 13 and 17 mm wrench
- Flat blade screwdriver
- Lubricant for caliper pins
- Brake cleaner (if equipped)
Replacing guides and their lubrication
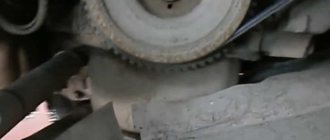
So, the first thing you need to do is remove the wheel bolts. Then lift the car with a jack, and finally unscrew the bolts and remove the front wheel. Then, using a flat-head screwdriver, bend the locking washers of the caliper bolts and unscrew the top bolt, as shown in the photo below.
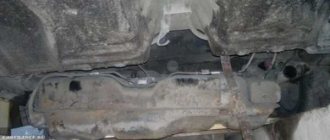
Replacing the stove on Kalina using the radiator reverse method
So, let's begin. We park the car so that on the left you can open the driver's door and carry out work in the area of the pedal assembly. Open the hood, remove the air filter and air duct .
It is recommended to plug the holes in the air filter and in the throttle with a clean cloth so that during operation dust, dirt and foreign objects that could further damage the engine do not get inside.
We remove the battery and the platform under it (keys 10, 13, ratchet wrench with a head 13).
To completely remove the platform, unscrew the hard-to-reach nut with a 10mm head, which secures two pipelines to the platform. These hoses have to be unscrewed every time you remove the platform under the battery, so I connected them together and don’t screw them to the platform anymore, because they won’t go anywhere anyway
Next we need to drain the antifreeze , but this can be done in at least two ways .
The design of this brake element
There are two types of disc calipers - front and rear, their design and repair method are slightly different, but their main elements are the same:
- The housing in which the piston (cylinder) is mounted.
- Bypass valve.
- Sealing ring.
- Piston (cylinder).
- Cylinder boot.
- Retaining ring.
- Frame.
- Pressure bar.
- Pads.
- Guide boot.
- Guides.
- 14. Fastening bolt.
- Brake hose.
The difference between the rear disc caliper is the presence of a parking brake.
Therefore, the piston (4) has a special thread through which it is screwed onto the parking brake rod (1). Thanks to this, it can operate under the influence of two drives - mechanical (parking) and hydraulic.
Lada Kalina: DIY repairs
The LADA Kalina, which is produced by AvtoVAZ PJSC, has gained nationwide popularity in the Russian Federation. It has a large number of admirers, has its own club, and many forums on the Internet are dedicated to discussing this car. But some malfunctions are typical for Kalina, which is why repairing this car is a sore subject for many of its owners.
In fact, repairing a Lada Kalina car yourself is not so difficult. From this article you will learn about the most vulnerable parts of the car, the most common breakdowns and how to eliminate them.
Approximate cost of repair work on the Kalina body at a service station
Body Kalina station wagon Lada
These are the prices offered today in various repair services.
| Replacement, removal and installation of body parts | Price, rubles |
| Hood replacement (removal/installation) | 1800 |
| Front fenders (removal/installation) | 1600 |
| Front doors (removal/installation) | 2200 |
| Rear doors (removal/installation) | 2000 |
| Bumpers (removal/installation) | 1800 |
| Sedan trunk lid (removal/installation) | 1900 |
| Replacement of load-bearing body elements | Price, rubles |
| Roof panel | 9000 |
| Wing | 14 000 |
| Spar | 11 000 |
| Door threshold | 9000 |
| Door pillar | 8000 |
| Slip works | Price, rubles |
| Installing the car on a slipway to remove reference points to check the geometry of the body | 4000 |
In principle, the prices are not that low. It would be better to learn how to replace (which is much easier) or repair it yourself. We are not talking about competently taking body dimensions to compare geometry. This, of course, should be done only with high-quality equipment, which is almost impossible to provide in a garage workshop.
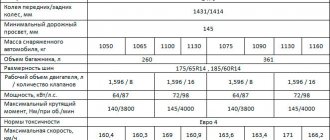
On the other hand, useful information about the geometric dimensions of Kalina’s bodies will be presented below, which will make it possible to remove them yourself using a regular tape measure.
Watch a video about problem areas of the Lada Kalina body
Description of the brake system repair process
It is necessary to jack up the car in order to be able to remove the necessary wheel. Next you need to inspect the pads, determining the level and uniformity of their wear. Then you should disconnect the caliper from the bracket and visually inspect the piston boot for damage. The piston should have an easy stroke when it is pressed into the body. It happens that even behind a seemingly intact boot there is hidden dirt and moisture, and therefore rust.
Therefore, it is worth looking under the boot, carefully using the tool. The piston surface must be clean and smooth. If any of these defects are detected, the caliper needs to be disassembled and restored using a repair kit. In addition, it is necessary to check the condition of the guides and the contact points of the pads for free movement.
Disassembling the brake caliper:
- Disconnect the brake hoses from the caliper. To prevent fluid loss, the hose should be squashed or the hole plugged.
- Remove the piston boot.
- Next, remove the piston from the caliper body.
- Removing the old cuff.
- Cleaning the boot seating area, as well as the cuff groove.
- Rinse the entire assembly as a whole and with clean hands
- Installing a cuff lubricated with brake fluid into the landing groove.
- Installing a cleaned or new piston. It is carried out vertically, using even hands.
- Putting on the boot in the middle of the piston path.
- After the piston enters the housing, it should be pushed out a little again, for example with air. This procedure will help ensure that the boot sits smoothly and is not damaged.
- The recessed piston can again be ready for the installation process.
It is also worth remembering to pump the circuit that has been subject to fluid leakage.
Do-it-yourself brake caliper repairs are easy to do with basic plumbing skills. The main thing is not to forget to be attentive and carefully carry out all the described nuances of the work. After all, the braking system is the key to the safe movement of a car.
Do-it-yourself car repairs
“Kalina” is a simple car, so the driver can eliminate most of the damage himself. For example, you can fix the following problems on your own:
- change the engine air filter;
- remove air from the cooling system;
- change the water pump;
- eliminate the rattling of the gear knob;
- change the ignition module;
- replace the generator diode bridge;
- install a brand new outer CV joint to replace the crackling old one.
Repairing the LADA Kalina car yourself must be carried out in accordance with the instructions, using only good car mechanic tools, if you need to use special equipment and pullers for repairs.
How to change a constant velocity joint?
You can replace the outer CV joint in a Lada Kalina car without using a lift or pit, but you will need to place the car on a flat surface. Replace in this way:
- first you need to loosen the hub nut and unscrew it, because after removing the wheel it will become difficult to move the nut;
- loosen the wheel nuts, then use a jack to remove the wheel. In order to prevent the car from rolling, it is necessary to place stops under the rear wheels, and in front near the jack, for the purpose of reinsurance, place a support under the threshold (you can use a wooden block);
- unscrew the ball joint bolts at the bottom (two bolts);
- pull the steering knuckle towards you, release the wheel drive;
- remove the clamps from the boot;
- move the boot towards the gearbox, knock out the outer CV joint through a bronze or copper drift;
- put the new device in place, fill the joint with grease, fix the boot on the CV joint with new clamps;
- complete installation of all parts.
Changing the air filter
To do this, the screws of the cover are unscrewed, the filter is removed, a new element is installed in its place, and the housing is screwed on. Experts advise performing such a replacement every thirty kilometers. And if the car drives on country roads, then it is best to change it more often.
Naturally, more serious problems associated, for example, with the engine or steering rack, should be solved with the help of specialists from auto repair shops.
Otherwise, we can confidently assume that repairing a Lada Viburnum on your own will be within the capabilities of any driver. You just need to study the operating instructions, consult with more experienced comrades, prepare the necessary tools and replacement spare parts.
What can you fix on your own?
An experienced driver is able to independently cope with the following problems:
- change the air filter;
- bleed the air plug from the cooling system;
- replace the water supply pump;
- eliminate the knocking of the gearshift knob;
- change the ignition system module;
- install a new generator diode bridge;
- replace the CV joint.
In any type of repair work, it is necessary to use good tools, special equipment, and follow the operating instructions for the vehicle.
Most often, the ignition system module, diode bridge, bearings fail, and the window lift cable on the driver's door breaks. When the ignition coils spark, two of the four cylinders stop working. A break in the glass lift cable is possible due to its interweaving with the guide elements. Cracking in CV joints appears due to poor lubrication; grenades have to be replaced as a result of their significant wear.
How to properly replace front pads
The replacement technology is not difficult. The task can be completed by a person with minimal technical knowledge and repair skills. After replacement, the system will operate normally.
Tools and accessories
At the initial stage, the tool is prepared. Replacing brake parts on Lada Kalina at service stations is carried out on a lift. In garage conditions, there is no need to use an inspection hole or overpass. The front part of the Lada Kalina is lifted with a jack.
Tools and accessories required for replacement:
- The wheel wrench is for removing wheels.
- Spanners. To speed up replacement, ratchet heads are used.
- Jack. The standard mechanism supplied by the manufacturer with the car will do.
- Lubricant for caliper guides. It is necessary to use a lubricant designed specifically for these purposes. This lubricant can withstand high temperatures, reducing the degree of friction between parts.
- Flathead screwdriver.
- Recoil devices.
- Stops that prevent the Kalina car from falling from the jack.
- A device for pressing the piston into the caliper. You can purchase a ready-made tool or make it yourself.
- Wire brush.
To remove small abrasive particles from the surfaces of components, use a jet of compressed air.
Replacing brake pads Kalina
Before starting work, place the vehicle on a level surface. To prevent the car from rolling spontaneously, anti-roll devices are installed under the rear wheels.
Replacement is carried out in the following sequence:
- Remove the wheel bolts before jacking them up. Failure to comply with this rule will result in the cylinder turning when trying to unscrew the bolts. If the work is done together, in order to immobilize the wheel, the partner must press the brake pedal.
- Jack up the front of the car. Raise both wheels or perform the procedure one by one for each mechanism.
- The fasteners securing the disc to the hub are unscrewed.
- Remove the wheel.
- Unscrew the lower caliper mounting bolt. If you remove the upper fastening element, you will not be able to move the bracket completely. Retraction will be obstructed by the brake hose.
- Repress the piston. A flathead screwdriver is inserted between the outer block and the bracket. After moving the piston, remove the caliper.
- Move the bracket by rotating it on the top guide.
- Remove worn front pads.
- Press the piston into the caliper using a tool.
- Inspect the guide and piston boots for damage. Cracked or cut elastic seals must be replaced. Abrasive particles can enter the surface of moving parts through cracks. This will lead to rapid wear of the elements.
- Apply specialized lubricant to the guides.
Pressing the piston into the caliper using a device. After disassembling, clean the inner surface of the caliper from dirt.
Abrasive particles are removed with a jet of compressed air. Assembly is carried out in reverse order. When installing, maintain the tightening torque of the threaded connections.
Replacing the water pump Lada Kalina
On an 8-valve VAZ-21114 engine, the average service life of the water pump is about 70-100 thousand km, and if it starts to make noise or leak, it must be replaced. It should be noted that on all models 2108-15, Lada Priora and Kalina with an 8-valve internal combustion engine, the pump is changed according to the same principle.
The water pump is replaced as follows:
- drain the antifreeze from the cooling system;
- remove the plastic timing belt cover;
- if the timing belt does not need to be changed, then we do not remove the crankshaft pulley; accordingly, there is no need to dismantle the right wheel;
- set a mark on the camshaft - it should coincide with the ebb on the rear timing case;
- loosen the tension roller, remove the belt from the camshaft;
- Unscrew the three pump mounting bolts with a hexagon and remove the pump;
- put the new pump in place, put on the belt, tighten it with a tension roller, check the alignment of the marks, on the crankshaft the mark is located on the flywheel, under the rubber plug of the gearbox housing;
- fill in antifreeze, start the engine, check if the antifreeze is leaking and if the pump is noisy. If everything is in order, put the timing case back in place.
We expel air from the cooling system
The cooling system can become airy for various reasons, and first of all, the heater in the cabin stops blowing warm air, the temperature rises, and the antifreeze boils. If you squeeze the upper and lower radiator hoses, you feel that they are empty, there is no coolant in them. Often, “airing” occurs after replacing the heater radiator, and it is sometimes very difficult to remove air from the system. Alternatively, you can install an additional tee on the lower heater pipe under the hood, and lead the new hose into the expansion tank from above; a plug should be placed in the lower pipe from the tank to the lower radiator pipe.
Causes of failure
The caliper as an element of disc brakes is subjected to significant temperature loads, as well as exposure to external adverse factors: dirt, dust, moisture, chemicals. All this happens due to the fact that his device does not allow him to be protected from these negative phenomena. If there is significant overheating, as well as if the boot ruptures, the lubrication of the guides may disappear.
Improper maintenance of the guides, in which some craftsmen manage to stuff inappropriate lubricant into their boots: graphite or similar, leads to their swelling and souring, after which they jam or knock when suddenly activated.
A rupture of the piston boot causes dirt and moisture to enter it. After which it stops working - it starts to jam or, conversely, knock.
Deformation of the sealing ring contributes to brake fluid leakage and oiling of the pads.
Replacing front wheel brake pads
The brake pads of the front wheels must be replaced only as a set - all four pads.
Replacing the pads of only one brake mechanism can lead to the car pulling to the side when braking.
If the fluid level in the brake hydraulic reservoir is at the MAX mark, then before installing new pads, use a syringe or a rubber bulb to pump out some of the liquid from the reservoir so that when the piston is recessed into the working cylinder of the brake mechanism, liquid does not flow out from under the reservoir cap.
Remove the front wheel.
1. Using pliers, bend the edges of the locking plate of the bolt securing the cylinder to the lower guide pin of the caliper.
2. Using a 13mm spanner, unscrew the bolt, holding the guide pin with a 17mm spanner.
3. Remove the bolt with the locking plate.
4. Raise the bracket
5. Remove the brake pads from their guide.
We clean the pad seats in the calipers and the pad guide from dirt and corrosion.
Before installing new pads, it is necessary to move the piston as much as possible inside the cylinder - this operation can be performed in different ways.
6. Using sliding pliers, press the piston into the cylinder.
7. With another method, we install the inner block in place and lower the bracket into the working position.
Inserting a screwdriver or mounting tool through the caliper hole and leaning it on the brake disc, we move the bracket, recessing the piston into the cylinder
After replacing the pads, press the brake pedal several times to set the gaps between the pads and discs.
Check the level in the tank.
Disassembling the steering rack and repairing it when jammed
Lada Priora hatchback Logbook Steering rack repair
If steering rack repair is required, it begins with disassembling it. During repairs, a steering rack repair kit is used. Disassembly is carried out in a certain order. First, the adjusting nut is unscrewed, which sometimes requires considerable effort. Then the thrust bushing is removed.
If it is difficult to remove, you can use a mallet to lightly hit the rack body. The side plugs and boot are removed after cutting off the plastic fasteners. For preventative purposes, it is recommended to replace the boot with a new one in any case. The shaft is removed from the rack housing by hitting the body with a mallet.
Steering rack parts: 1 – rack bushing ring; 2 – rack support sleeve; 3 – steering gear housing; 4 – roller bearing; 5 – drive gear; 6 – ball bearing; 7 – retaining ring; 8 – protective washer; 9 – sealing ring; 10 – bearing nut; 11 – lock washer; 12 – boot; 13 – rack; 14 – protective cap; 15 – rack stop; 16 – sealing ring; 17 – retaining ring; 18 – stop nut; 19 – clamp; 20 – protective cover; 21 – inner tie rod end; 22 – connecting plate; 23 – locking plate; 24 – bolt securing the rod to the rack; A - mark on the boot; B - mark on the crankcase
Inside the freed cavity of the housing, a plastic sleeve will become noticeable, which can be removed using a screwdriver. It must be replaced with a new one from the repair kit. All old grease is removed from the cavity of the steering rack housing; the surface is thoroughly cleaned, washed and blown.
New lubricant is applied both inside and outside the housing
Lithol is used for this purpose. Particular attention should be paid to lubricating the gearing areas. All rack parts are inspected and, if necessary, replaced with new ones from the repair kit. If the steering wheel is jammed, it must be removed
This operation for Lada Kalina is carried out as follows.
First, the airbags are disconnected from the battery, their locks and clamps are loosened. The cushions are released and moved to the side. The two horn wires are disconnected. On the steering wheel mounting shaft, in the place marked with an arrow, a mark is made on the location of the steering wheel before it is removed.
The steering wheel nut is loosened (but not completely unscrewed). When the steering wheel swings from side to side, it is tightened until it stops against the nut. Then you should align the car's wheels and ensure that the steering wheel is straight. The pin is removed and inserted into the switch block below the steering wheel.
Gearbox lever rattling
For LADA Kalina, a typical malfunction is rattling in the area of the gearshift lever, which mainly becomes noticeable when the engine is running at speeds of about 3000. The source of the side sound is the bushing, which is made a little thicker than necessary, and because of this, a gap appears in the mount. To resolve this problem you need to do the following:
- remove the handle cover, which is attached with latches;
- using two 13mm wrenches, unscrew the nut and bolt;
- remove washers and bushings;
- to eliminate rattling, the bushing in the middle needs to be slightly sharpened in width or the mount should be lubricated with sealant;
- Having done this, mount everything back. The sealant does not help out every time, but if you sharpen the bushing by 0.3 mm, the result is guaranteed.
It’s safe to say that repairing a Lada Kalina car yourself is not so scary. Every car enthusiast has the opportunity to eliminate minor malfunctions of this car. You just need to believe in yourself, follow our advice and everything will work out!
Design Features
Auto repair school Articles, tips and tricks on do-it-yourself car repair and maintenance
The steering system of the Lada Kalina includes an electric power steering and a steering column that is adjustable in height and tilt. The steering mechanism is a steering rack with a variable transmission ratio. The rack engages with the engine crankcase through a gear having helical teeth, the pitch of which varies along the length of the rack. The figure shows the design of the Kalina steering rack.
The steering rack on Kalina is pressed against the gear by a spring. Friction is reduced by a plastic insert. The spring pressure is changed with an adjusting nut (the factory-set gap between the rack and the shaft is 0.1 mm). The second end of the rail rests against a plastic sleeve. Adjusting the gap helps eliminate knocking noises.
The steering system shaft is installed in bearings (one in the column bracket, the other in the electric booster housing). The column bracket is attached to the pedal bracket (front) and to the body bracket. The column bracket with the pipe is connected in the form of a hinge of two plates, which allows you to change the position of the steering wheel, and the range of movement is limited by the slots in the plates.
To fix the position of the pipe, there is a lever connected to the adjusting sleeve. It is screwed into a coupling bolt located in the slots of the plates. When you turn the lever, the bushing rotates, loosening the fixation of the plate, which allows you to change the position of the steering wheel. Springs between the plates and the bracket pull the pipe up when the fastening is loosened.
The steering system of the Lada Kalina has two tie rods and swing arms. The rod consists of external and internal tips and an adjusting threaded sleeve, which, when rotated, changes the length of the rod. The required adjustment of the rods is fixed with bolts. The rod is connected to the swing arm using an external tip that has a ball-type joint.
Kalina's electric power steering reduces the force applied to the steering wheel. It is assembled on the basis of an electric motor with a gearbox located under the steering system casing. The amplifier is controlled by an electronic unit that receives signals from sensors of vehicle speed, shaft rotation and steering torque.
The principle of operation of the amplifier is based on the fact that when the car is stationary, the torque on the steering shaft is the greatest, and when moving, it decreases with increasing speed. There is a power steering indicator on the dashboard.
https://youtube.com/watch?v=13qasRZk8gA
Replacing the rear brake cylinder
If a red exclamation mark starts to light up on your car's dashboard and the brake fluid level is below the minimum mark, this indicates that the brake system may be leaking. The malfunction must be found and eliminated. The cause may be brake fluid leaking from the brake cylinder. In addition, the brake cylinder may jam, then, when checking the force of the braking system on the stand, the wheel will not brake, or will brake weakly - it will lag behind the second wheel of the same axle in terms of braking force. Replacing the rear brake cylinder on a VAZ will solve this problem. But how to replace the rear brake cylinder?
In order for the replacement of the rear brake cylinder on a viburnum to be successful, you need to jack up the side of the car that you are going to work on (it will be more convenient to work if you drive the car into a pit). The most convenient way, of course, is to use a lift. We remove the wheel. Then - the brake drum. Removing and replacing the brake drum is described in detail in the article “Replacing the rear brake pads and brake drum.”
We clamp the rubber brake fluid supply pipe so that it leaks out less and use a No. 8 wrench to unscrew the bleeder fitting on the brake cylinder. With a sharp movement we tear off the nut. There is a special wrench for VAZ cars that can easily unscrew these fasteners. If you don’t have such a key, use a regular one.
Using a special wrench for unscrewing brake pipes No. 10, unscrew the brake pipe fastening from the brake cylinder. If you don’t have such a key at hand, use a regular one.
But do this carefully so as not to damage the nut. When the tube is unscrewed, brake fluid will drip from it, so you should substitute a jar or a rag
Attention! Make sure that the nut on the brake pipe rotates. It can be pre-treated with WD 40, otherwise if the brake line breaks, it will also have to be replaced
Using a small #10 wrench, unscrew the 2 bolts securing the brake cylinder. We take it out, freeing it from the engagement of the brake pads and insert a new brake cylinder.
Thanks for subscribing!
Ready. We assemble the structure in reverse order:
- tighten the two bolts securing the brake cylinder;
- screw in the brake pipe;
- Replace the brake drum and install the wheel.
Attention! After replacing the brake cylinder, it is imperative to remove air from the brake system. While the brake fluid was leaking and you were driving, air could get from the rear circuit of the brake system to the front or opposite diagonal
Therefore, it is necessary to bleed air from all four brake cylinders. This operation is described in detail in the article “Bleeding the brake system”
While the brake fluid was leaking and you were driving, air could get from the rear circuit of the brake system to the front or the opposite diagonal circuit. Therefore, it is necessary to bleed air from all four brake cylinders. This operation is described in detail in the article “Bleeding the brake system.”
After bleeding the brakes, it is recommended to go to a brake tester to check the braking force reading.
You can learn how to extend the life of brake cylinders in the article “Prevention of rear brake cylinders.”
Installing an inverted stove radiator on Kalina
So, let's look at how to install the radiator upside down - with the pipes facing the driver rather than the engine:
If the fittings are not cut, then there is very little space left to fit the hoses. Theoretically, you can first put on the hoses and install the radiator already assembled with the hoses, but I took a different route. I had two tubular angles , I connected them to the hoses, then installed the radiator and finally connected the angles to the radiator. I cut the fittings on the radiator to a minimum, leaving 30 and 50 mm .
The length of 30 mm was chosen based on the fact that it will allow, if necessary, to install a second clamp on the upper fitting . By adding another 20 mm (hose diameter), I got the length of the lower fitting - 50 mm .
Now I checked - the antifreeze is not leaking, so the second clamp on each fitting is not needed. To install one clamp, you can reduce the length of the fittings by another 15 mm , therefore, I recommend that you, dear readers, in order to save space, limit the length of the fittings to 15 and 35 mm .
After installing the corners on the radiator, I ended up with something like this design.
Having installed the heater radiator into the mounting socket, I realized that along the length these corners fit end to end. Therefore, I once again recommend that you make the fittings 10-15 mm shorter.
I then left the clamps in place and the corners to make installation easier. Remembering the unsuccessful experience of installing a gazelle radiator, I decided to properly seal the radiator and covered it with foam rubber according to the following scheme.
The entire far wall is sealed with foam rubber , plus two 15x15 square strips are glued to the side of the fittings, top and bottom. Thanks to these two strips, there is no blowing from under the radiator at all, neither from above (cold air) nor from below (warm). Therefore, I recommend that you, dear readers, do the same, because thanks to the correct sealing, the flow from the fan will pass through the heater radiator , which means it will heat up better.
I did not glue thick foam rubber on the right and left so that it would not peel off during installation. It seemed to me that there would be enough foam rubber 5 mm thick, and I must say that the radiator fit into its niche quite tightly.
When the radiator is covered with foam rubber, we leave it to dry , and at this time we will install the hoses in their places . I had to modify the metal plate . Initially it looked like this:
The protruding wall had to be broken off, since it did not allow installing the radiator and hoses at the same time. After modification, the part acquired the following appearance:
Next we insert the hoses into the rubber seal . Hoses, especially those with a diameter of 20 mm, will sit quite tightly in the rubber band, so they should be inserted into the rubber band before the plate with the rubber band is installed on the body.
We install the metal plate and seal in their place. It should be emphasized that the presence of a standard seal has a positive effect on the tightness of the interior and sound insulation , so it is advisable to keep it.
Using a 10mm deep socket , not forgetting to install the washer, we pull the plate to the engine shield:
When rubber plate the hoses from the passenger compartment into the engine compartment and put them on the engine fittings. You shouldn't have any problems with this, because... you will use a hose with a diameter of 20 mm, but I had to make adapters from the 18th hose to the 20th using improvised materials.
I made some of the adapters on the engine side from a standard pipe from the Kalina stove, 20 mm in diameter, which I planned to use and therefore bought in the store, along with the radiator:
As adapters , I used tubes with a diameter of 18-20 mm, which I bought a long time ago at a GAZ auto parts store.
Now that the hoses were mounted in place, I installed the heater radiator in the niche, complete with seals:
After this, we insert the corners into the hoses, tighten the clamps, and remove the excess part of the hoses upward, behind the ventilation duct.
And the last step is to connect the corners to the radiator . I don't know if this makes any difference, but I connected the lower hose from the engine to the lower radiator fitting, and the upper hose to the upper one.
Then I put everything together, and I got this wonderful picture.
It would be nice to also fasten the radiator to the ventilation duct with three screws that are intended for this, but I have not done this yet, because... The radiator already sits very tightly, there is no blowing from under it anywhere, and there is no particular desire to tinker with the fastening while it’s winter)).
On the right there are traces of the installation of the gazelle stove - holes made with a soldering iron. The foam rubber sealed them tightly, but in the summer I plan to seal them with epoxy resin, so the seal will be fully restored. Now I know for sure that I wasted my time with the Gazelle stove in vain. You need to install a standard heater radiator from Kalina , period!
Now let's list in reverse order everything that needs to be returned to its place.
DIY repairs: common problems
So, you don’t need to have a mechanic’s education to do some simple work with your own hands.
It is important to follow safety regulations. Always (in the case of a new car) when purchasing a Lada Kalina, it comes with detailed instructions that help you understand the intricacies of the process
The following features of doing it yourself can be highlighted:
- It must be remembered that the Lada Kalina is available with two types of engines and standardized units, so when starting repairs, you need to be 100% sure of the modification.
- If repairs are carried out related to the fuel system or engine, it is necessary to extract the treated gases.
- Oil and other liquids are added only according to the standards specified in the instructions, otherwise the filter will need to be replaced.
If you are going to paint the body, remember that it is better to do it in a ventilated area. You also need to have a paint sprayer; other equipment is not suitable here. Parts that will not be painted, such as headlights, need to be covered with paper.
Front suspension device
The front suspension of the Lada Kalina is independent on MacPherson struts. This suspension is the most common in the automotive world for its price and acceptable characteristics for this price. Previously, Lada used this suspension, for example, in Lada Samara, but it was much poorer in equipment than MacPherson, although it was 90% similar to it.
So, the Lada Kalina suspension consists of the following components:
- Stabilization bar;
- Brackets for securing the stabilization rod;
- Cross arm mountings;
- Front suspension arm;
- SPU (anti-roll bar) bases;
- Telescopic front suspension strut;
- Ball-shaped supports;
- Kulaga;
- Longitudinal stretch;
- Stretch mounts.
Basic information about LADA Kalina
LADA Kalina has been produced since 2004; production of the popular second-generation car began in 2013. Kalina-1 is available in three body types: hatchback (model 1119), sedan (model 1118), station wagon (model 1117). There are cars available with petrol engines of three modifications: a 1.4-liter 16-valve engine with a power of 89 hp. s., 1.6-liter 8-valve engine producing 81 hp. s., 1.6-liter 16-valve engine producing 98 hp. With. The LADA Kalina-1 has only a manual transmission with five gears. The front axle has a classic MacPherson suspension, the rear axle has a beam with stabilizer, springs, and shock absorbers.
Typical faults of LADA Kalina-1
Significant malfunctions with Kalina rarely occur, but there are a lot of various undesirable trifles. The car’s clutch is not very reliable and has an impressive service life, regardless of the type of engine, so it can malfunction after 40-50 thousand kilometers. The main source of malfunction is a broken clutch disc.
You need to constantly monitor the oil level in the engine - sometimes it leaks through the gaskets or burns through the piston rings. On the instrument panel there is only an oil pressure warning light, but there is no dial indicator. If the indicator lights up all the time, there is a possibility that the crankshaft is knocking.
A common malfunction of VAZ gearboxes is increased noise. It is difficult to get rid of the humming of the gearbox; sometimes neither replacing the bearings nor refilling with first-class transmission oil comes to the rescue. The transmission is noisy even in new cars, because of this the Volzhsky Automobile Plant has repeatedly completed the transmission.
A problematic element since the days of the VAZ 2108 and VAZ 2109 has been the thermostat in the engine, moreover, the valve in the thermostat was capable of jamming in any position. It's annoying when the engine doesn't heat up to the required operating temperature, but if the engine overheats, it's more problematic.
Electrical problems on LADA Kalina appear mainly of three types:
- the ignition module is often damaged;
- very soon the bearings and diode bridge “die”;
- The window lift cable on the driver's door breaks.
When the ignition coil sparks, the first and fourth cylinders or the second and third cylinders stop functioning. The ESP cable breaks when it falls off the guides.
The main source of cracking noise in outer CV joints is insufficient lubrication; At the factory, in order to save money, they put it in sparingly. The consequence of this is severe wear of the hinges, and as a result, the “grenade” needs to be replaced.
A broken timing belt is a very annoying problem. And if on the 8-valve engine 21114 it is possible to change the belt drive and move on, then on engines 11194 or 21126 the valves bend from the oncoming push from the pistons, repairs will be quite expensive. In addition, a break can occur through a jammed water pump, because of this, if the pump begins to make noise, it must be replaced immediately.
Typical faults
Repairing a Lada Kalina is not a very difficult task, you just need to know the main “pain points”. Significant problems are rare, but minor malfunctions are quite common. The clutch cannot boast of a high level of reliability and sufficient power reserve, regardless of the type of engine; it begins to fail after about forty thousand runs. The main problem is with the disk.
It is recommended to monitor the oil level - it begins to leak through the gaskets or burns on the piston rings. The instrument panel is equipped only with an oil pressure warning lamp, there is no dial indicator. Constant lighting of the lamp warns that the crankshaft may knock. Increased noise is often heard at the gearbox. It is difficult to get rid of the humming noise; sometimes neither changing the bearings nor adding good quality oil will help. Noise can be present even in new cars. The engine thermostat is another problem. Its valve can jam at any moment.
Replacing the electric window
If the window lift cable on a Lada Kalina car has become unusable or the motor has burned out, the ESP must be changed. We carry out the replacement operation in the following order:
- dismantle the power window control unit;
- remove the door trim;
- to disconnect the window regulator from the glass, the latter must be raised all the way up;
- unscrew the four bolts that secure the glass to the ESP (two in the front and two in the back). The glass is held on by seals, but it can also be secured so that it does not fall down;
- unscrew the black metal strip (three screws);
- unscrew the eleven window regulator fasteners (10 bolts), disconnect the power plug from the electric motor;
- We begin to remove the power window from the rear, first removing one half of it;
- then we take out the front part along with the motor from the door cavity;
A burnt-out electric motor on a lift can be easily replaced. For this:
- unscrew the three studs on the mechanism body, then four more screws;
- dismantle the motor, holding the cable spool with your hand, install a new part;
- We install the window regulator in the door, connect it to the glass guides, and put the trim in place.
Adjusting the spring and power steering
Very often, the cause of a knocking sound when turning the steering wheel is a weakening of the pressure spring. It provides the required force for pressing the steering rack gear against the main shaft gear, which is set at the factory by adjusting and fixing the spring. As the vehicle is used, the spring loses its elasticity and relaxes.
In order to increase the pressing force of the spring, it is necessary to tighten it, which is done after disconnecting the steering mechanism, but without removing the steering rack. Repairing the steering rack in this case consists of setting the required gap between the rack and the shaft gear. The steering rack is installed in the middle position and is secured against movement.
The rubber plug is removed, and the indicator probe is placed in the hole of the stop adjusting nut so that it comes into contact with the rack stop. It is better to use a dial indicator. Then, turning the gear shaft that pushes the stop, the indicator measures the size of the stop's movement. The length of movement should not exceed 0.05 mm.
If this value is exceeded, it is eliminated by turning the adjusting nut. The steering rack is fixed in the position corresponding to the required clearance, and the ease of rotation of the pinion shaft is checked within the entire possible movement of the rack.
The adjustment nut is rotated using a special wrench for adjusting VAZ steering racks. It is not recommended to tighten the nut too much, which can have a negative effect when turning the steering wheel at maximum speed. If there is play when turning the steering wheel, the spring can be tightened by practically selecting the correct force.
In this case, initially the adjusting nut is turned by 20-25°, and the presence of knocking is checked when the rack is turned. If the noise is not eliminated, then tighten the nut again by 10-15°, and so on until the knocking noise is eliminated. If tightening the spring does not help, the steering rack needs to be repaired.
Adjusting Kalina's electric power steering is best done after removing the steering rack, but it can be done without dismantling with some inconvenience. The car is placed on the repair pit so that from below there is access to the mounting of the front part of the amplifier.
The clamping nut is tightened by turning clockwise from below, and when tightening the nut from above, respectively, counterclockwise. For the purpose of prevention, you should check the condition of the oil seal, since when the steering wheel is turned too much, the oil seals quickly wear out. At the same time, all elements are lubricated, especially the steering rod boots.
Do-it-yourself caliper repair - preliminary inspection
The return movement of the piston in this unit is ensured by a cuff. Firstly, it creates a tightness, and, secondly, it acts as a kind of spring. When the piston moves, it undergoes a slight deformation, but then returns to its previous state, slightly pressing it into the body. Determining the malfunction is quite simple - if you hang the wheel, it should rotate freely as soon as you press or release the brake pedal. There should be no signs of overheating on the discs themselves, otherwise you will need to repair the caliper yourself.
When conducting a visual inspection, we must make sure that there is no noticeable difference in the thickness of the outer and inner pads. The piston should move so that when pressed it easily sinks into its body. Its surface should not have noticeable traces of dirt or corrosion particles. You also need to conduct a superficial inspection of the boot and ensure its integrity.