Replacing the timing belt of Lada Granta 8 valves is required once every 75 thousand kilometers. If you ignore the scheduled replacement of the belt, tension roller and sometimes the pump (coolant pump), you may end up with serious repairs to the Lada Granta engine. After all, a broken timing belt almost always leads to damage to valves, valve seats and even pistons. Therefore, the timing drive must be treated very carefully. Every 15 thousand it is necessary to inspect the belt for breaks, cracks, peeling or oiling.
The advice applies to VAZ-11183, 11186 and 21116 engines. All of them are 8-valve and are installed in Grant cars. Let's consider replacement steps.
First, remember a simple rule: the 11183 engine cannot bend its valves, so you can rotate the crankshaft and camshaft pulley separately. For motors 11186 and 21116 this would be unacceptable!
List of new parts and required tools
The gas distribution mechanism is one of the most important parts of the engine and the long, trouble-free life of its parts depends on their quality; for this reason, the automaker strongly recommends that when replacing the timing belt on a Lada Granta, you purchase only original spare parts or their certified analogues.
To perform the repair you will need:
- timing belt (art. Repair kit 174 rui);
- drive generator belt (art. 11180 – 1041020 – 13);
- timing belt tensioner pulley (art. Repair kit 174 rui);
- cooling system water pump (art. 21116 – 1307010 – 75);
The work of replacing the timing belt on an 8-valve Lada Granta is carried out using a standard tool and one specialized wrench, namely:
- open-end spanner wrenches in a set from 10 to 19 mm;
- socket wrenches from 10 to 19 mm;
- small mount;
- Screwdriver Set;
- a specialized key for adjusting the timing belt tensioner force;
- protective gloves for hand safety.
If you have this tool and new spare parts, you can begin to fix the problem as in VAZ-licensed car services, where the price for replacing a Lada Granta timing belt is about 5 - 7 thousand rubles in the fall of 2022. Small private workshops charge from 2 to 3 thousand for this, and if the car owner wants to save money, then you can carry out all the repairs yourself, for which you need to study the instructions below, or carefully read the video on replacing the Lada Granta timing belt, the link to which is posted at the end of the article.
Features of self-checking the serviceability of the timing belt on Priora
If you are thinking about the need to replace a rubber product on a Priora, then it won’t hurt to initially check the belt drive. The inspection will reveal signs of wear and the presence of places where the product is deformed. To carry out the check, you will need to use a hex wrench set to “5” or a T-30 star-shaped bit (depending on the year of manufacture of the Priora).
The procedure for checking the belt drive is as follows:
- Use a hexagon to unscrew 5 mounting bolts, with which the front upper timing drive cover is secured.
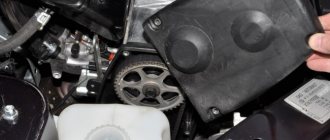
Removing the timing cover
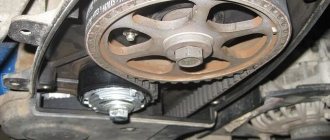
Marks on the tensioner pulley
This is interesting! The timing belt for the VAZ-2170 on the outer rim has the following information: engine type (21126 or 21127), number of teeth - 137, as well as marking with a product width of 22 mm.
Stages of self-repair
We begin independent work on replacing the timing belt on a Lada Granta by placing the car in a spacious room. Having carefully studied the instructions on how to repair the car, we perform the following steps:
- We turn off the on-board power supply by removing the terminals from the battery
- Using a jack, lift the front right wheel, remove it and also dismantle the plastic fender liner
- We find the crankshaft sensor (DPKV) located at the bottom of the engine crankcase, unfasten the connector from it and unscrew the fastening bolt, carefully remove it (this will help avoid accidental damage to it).
- We begin to remove the old generator drive belt, for which we loosen the fastening of the tension bar and use a pry bar to move the generator to the engine crankcase, after which the belt can be freely removed.
- We remove the protective plastic casing of the gas distribution system by unscrewing the four screws that secure it located on the sides and set the marks on the upper and lower gears until they completely coincide with the marks on the motor housing.
- Having set the marks, we use a screwdriver to fix the correct position of the crankshaft, this is done through a special hole on the engine flywheel housing after removing the plug, and then unscrew the 17 mm front pulley. key.
- Using a 15 mm spanner, loosen the central bolt of the tensioning mechanism, remove the old timing belt, unscrew all the roller mounting bolts and remove it.
- We begin to dismantle the old water pump (this process does not need to be carried out, but experts recommend replacing the pump along with the gear drive in order to avoid its early failure), for which we unscrew the three mounting bolts with a 13 mm wrench.
- Instead of the old tensioner roller and pump, we install new parts, then check the previously set marks on the crankshaft and camshaft gears, which may have shifted slightly during the dismantling process, and put a new gear drive on them.
- We put on a new belt. We take out the screwdriver that fixes the crankshaft from the flywheel housing, and slightly turn the lower gear clockwise (about 2 - 3 mm), thereby removing the tension slack. Next, using a specialized wrench, we bring the tension roller to the required position, otherwise the gas distribution mechanism drive may be over-tightened, which will lead to its rapid breakage.
- At the last stage, we assemble all the components in the reverse order, pour antifreeze into the engine, remove the car from the jack and start it, listening to the engine, which should run smoothly and not make any extraneous noise.
Also watch the video, which shows in more detail how to replace the timing belt on a Lada Garanta:
Changing the belt yourself
Replacing the timing belt of a Lada Priora with 16 valves is not the most difficult procedure. Buy a kit that includes tension rollers, stock up on tools, and you’re good to go.
Instructions
- Lift the hood, use a hex wrench to unscrew the five bolts on the cover, and remove it. Unscrew the two bolts from the lower timing cover.
- Disconnect the crankshaft sensor.
- On the passenger side, place a jack under the wheel, lift the car with it, and place the wheel in a suspended position. This will make it easier to align the marks of the mechanism and camshafts - they should be parallel, opposite each other. Combine them with fifth gear engaged, turning the wheel to the correct position. Turn off gear transmission.
- Find the flywheel and remove the rubber plug with a regular screwdriver. Under the muffler you will see a flywheel with a mark, it should be located opposite the mark on the left side.
- You need to get to the crankshaft pulley; to do this, remove the wheel or turn it to the right, you need to turn it all the way. Unscrew the five bolts that secure the mudguard.
- Ask a friend to engage fifth gear and press the brake, at this time, using ratchet No. 17, unscrew the bolt that secures the crankshaft pulley. Rotate in the opposite direction clockwise.
- Remove the thrust washer
- Unscrew the bolts securing the tension and thrust rollers. Use key 15. Remove the rollers, remove the belt.
- Now install new rollers, do not tighten the tensioner type, they will be used for adjustment. Reinstall the camshaft pulleys, then the crankshaft pulley.
- Put on a new belt - pull it onto the crankshaft, then around the pump, then onto the camshaft pulleys.
The new product is installed, all that remains is to adjust the tension:
- Pull the tensioner pulley in the opposite direction clockwise - when you installed the new kit, you did not tighten this pulley.
- All that remains is to align the marks on the tension roller, just tighten the bolts tightly.
- Turn the crankshaft pulley exactly two turns. Rotate the pulley in a clockwise direction. Be sure to make sure that the marks on the two shafts match.
To make sure the tension is correct, press the stretched rubber with a force of about ten kilograms. If the product bends by more than seven millimeters, you will have to carry out the rubber tensioning procedure again. In ideal condition, the rubber should not be pressed under a pressure force of 10 kg.
Replacement frequency
The manufacturer's technical documentation states that the timing belt on the Lada Granta must be replaced every 60 thousand kilometers.
But here it is worth noting that this is a limit value and it is better to replace it before reaching such a mileage, approximately 50 thousand km, but there are cases when the drive requires replacement at 40, or even 30 thousand km, it all depends on the quality of the belt and its working conditions.
In any case, it is better to periodically check the condition of the drive (recommended every 15 thousand km) and if signs of wear are detected, replace it immediately.
If this is not done, then it may break, which is fraught with serious consequences - the engine pistons will collide with open valves, leading to their damage and subsequent expensive repairs.
How long does it take to replace it?
The factory operating instructions for the vehicle recommend replacing the timing belt after a mileage of 75 thousand km. This standard is not always followed by owners, and there are good reasons for this. How long the drive lasts before replacement depends on many factors. This is the quality of the parts used, the operating conditions of the vehicle, and the technical condition of the engine. During each maintenance, the tension and condition of the timing drive should be checked. If cracks, peeling, or other damage appears, the belt should be replaced.
With a high mileage of the car, natural wear of the crankshaft and camshaft pulleys occurs, this significantly reduces the service life of the entire timing drive. The drive is also afraid of engine oil getting into the belt operating area. It softens its structure, the teeth are easily cut off. If the car has been sitting idle for a long time, it is also better to replace the drive due to its aging. Most owners and experts recommend changing the belt after a mileage of 50 thousand km.
Checking condition and tension
As already noted, so that a belt break does not lead to serious problems, it is necessary to periodically check its condition and tension.
Checking the condition of the belt is quite simple and you can do it yourself.
To do this, you need to unscrew and remove the protective drive covers, jack up the front right wheel, engage a higher gear and spin the wheel.
The engaged gear will ensure rotation of the crankshaft and timing drive through the gearbox.
When rotating, you must carefully inspect the belt. If any defects or signs of wear are noticed on it - torn teeth, peeling of rubber from threads, cracks, significant abrasions, then the belt must be changed regardless of the mileage.
Additionally, when checking the condition of the drive, its tension should also be assessed.
Although the Grant uses a roller with automatic tension, you cannot rely on the fact that it works normally and it is better to check the tension, especially since it is very simple to do.
The belt must be taken with two fingers in the middle of the area opposite the tension roller, that is, on the span between the shaft pulleys and turned clockwise.
Moreover, if even with significant force it is impossible to twist it at an angle greater than 90 degrees, then the belt is tensioned normally. If it twists at a larger angle, then it is necessary to adjust its tension.
Adjust the tension to ensure maximum mileage
Normal belt tension
What is the best way to adjust the timing belt tension? To do this, take pliers to remove the locking rings and insert the ends into the grooves from the outer race of the roller (tensioner). The belt is tensioned, while using pliers you need to turn the tension roller counterclockwise so as to align the cutout of the outer race with the protrusion of the bushing (rectangular). The roller mounting bolt is tightened with a wrench. It is worth noting that the spare timing kit does not include anything other than a belt and rollers, so all keys and sockets must be purchased separately.
How to complete the installation of this element? After installing the pulley from the generator drive, you need to rotate the crankshaft by the mounting bolt 2 turns (clockwise) and check the alignment of all marks. If there is a discrepancy, then all operations must be carried out again, because no matter how high-quality the timing belt itself is, it will not be able to perform its functions if it is poorly installed. After all the operations and reassembly of the parts, you need to start the machine and let it run for about a quarter of an hour.
Next, you need to re-check the belt tension: when a force of 100N is applied to the middle of its long part, the “sag” should be in the range of 5.5 to 6 millimeters. If you are not confident in your experience in carrying out such work, it is better to contact a car service center that specializes in Priora, so that later you do not have to pay for the repair of the entire engine. But it’s worth having basic knowledge of how to tension a belt, because this part often fails on the highway, far from service stations, even if the car has low mileage.
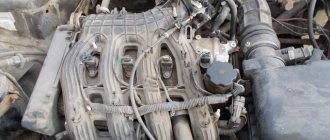
Replacing the timing belt on the 8-valve Lada Granta: engines 11183 and 11186
All the latest models of front-wheel drive cars produced by the car plant located in Tolyatti have a timing belt in the gas distribution mechanism. Lada Granta fully applies to these models.
About engines
Lada Granta engines with 8 valves in the cylinder head are indexed 11183 and 11186. The first of them began to be produced in 2004, the second later, namely in 2011. The power of the “83” unit is 82 horses, with 87 hp for the “86” modification.
Motor 11186 is an improved engine of the “83” model. It uses a lightweight connecting rod and piston group. It was possible to achieve a reduction in the mass of the piston group by almost 30%.
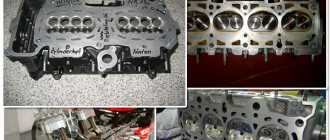
The cylinder head is subjected to specific heat treatment, which increases its strength and wear resistance.
The cooling system of the power unit also received some changes. The skirts of lightweight pistons are coated with graphite lubricant, this avoids the appearance of scuffing on the cylinders of a cold engine.
The compression ratio of the “86” engine became 10.5 versus 9.6 for the “83” modification. The cylinder head gasket of the new engine is now thinner, it is 0.43 mm versus 1.2 on the old model.
Does the valve bend?
Unfortunately, this problem exists for the Lada Grant. It appeared from the moment the production of the first cars with front-wheel drive, the VAZ 2108, began. Subsequently, the working volume of the power unit of this model was increased, it became equal to 1.5 liters.
The engine index became 21083, in which the pistons have a recess in the head. This made it possible to prevent the pistons from meeting the valves if the timing belt in the timing drive breaks or is installed incorrectly.
This particular power unit was taken as the basis for the engine for the Granta, so there were no valve bends.
Upgrading this engine to model 11186 involves installing lightweight parts of the connecting rod and piston group.
The pistons have become shorter in height, which does not allow making recesses in the head to prevent them from meeting the valve.
Replacement procedure
Many owners of this car prefer to carry out this operation in specialized workshops, but some do it themselves. There is nothing overly complicated in this procedure; there is no need to purchase special equipment or devices. You can replace the timing belt yourself in the garage. You will need to prepare a set of wrenches, a mounting shovel, a jack, a stand for the body, wheel chocks, gloves, and rags. Round nose pliers with curved ends are suitable as a key for adjusting the tension roller.
Replacing the timing belt on a Lada Grante is performed in approximately the following sequence:
- The car is placed above the inspection hole or on a flat surface, the handbrake cable is tightened, and wheel chocks are installed under the rear wheels.
- Open the engine compartment hood and disconnect the terminals from the battery.
- The generator set drive belt will interfere with work, so it is removed.
- Now, using the hex number “5”, remove the four screws that secure the front protective cover of the gas distribution mechanism drive.
- To avoid accidentally damaging the crankshaft position sensor, it should be removed from the cylinder head and set aside. Do not allow metal filings to come into contact with the sensor; they may further distort its readings.
- Next, you need to set the piston of the first cylinder to the top dead center position.
- Removal of the toothed belt is hampered by the generator drive pulley on the crankshaft, which must be removed. To do this, tear off the wheel bolts of the right front wheel and raise the body with a car jack.
- A stand is installed under the body, the wheel is removed, and the protective shield is on the mudguard.
- An assistant is needed to remove the crankshaft pulley. Ask him to engage fifth gear and press the brake pedal hard. Some experts insert a powerful screwdriver into the hatch on the transmission housing between the teeth of the flywheel.
- Applying some force to the head “17”, unscrew the bolt and remove the pulley from the crankshaft.
- You will again need the fifth hexagon number, with which you need to unscrew the three screws of the lower protective casing of the timing mechanism, after which you can remove the protection.
- Now you need to loosen the tension roller fixing bolt; a 15 mm spanner is best suited for this. After this, the roller will rotate and release the tension of the drive belt, which is easily removed from the gears and taken out of the engine compartment.
Important! After this, you cannot turn the engine crankshaft to prevent the pistons from meeting the valves.
Typically, the belt is replaced together with the tension roller and coolant pump, so they must be removed from the cylinder block. There is an adjusting washer under the roller, which is installed back during assembly. When removing the pump, pour a certain amount of antifreeze into a previously prepared container. Installation of a new timing belt is carried out in the reverse order. Please note that you need to check the position of all installation marks on the crankshaft and camshaft, cylinder block and timing belt guard.
Setting marks
This is an important procedure when replacing the timing belt, so it must be taken seriously. This engine has four timing marks in the timing drive. Two on the crankshaft and camshaft gears, one on the cylinder block in the crankshaft area, the last one is on the metal protective casing. Two more marks are located on the flywheel and gearbox housing. They will be clearly visible when the rubber plug is removed. It is the marks of the flywheel and the box casing that will indicate the position of the piston of the first cylinder at top dead center.
Turn the crankshaft with a key to “19” clockwise until all the marks of the mechanism coincide. The camshaft pulley mark in the form of a conical recess or boss will be in a horizontal position and coincide with the protrusion on the protective casing. The mark on the crankshaft pulley will look strictly vertical and coincide with the mark on the cylinder block.
Tension
The installed new timing belt must be tensioned to the required parameters. Before doing this, be sure to check the position of the installation marks again; if everything is in order with them, you can tension the drive. To do this, you need to turn the tension roller counterclockwise until the marks on it match. There is one mark in the form of a cutout on the outer frame, the second on the inner one in the form of a protrusion. You can turn the tension roller with a special wrench or pliers.
Some craftsmen insert drills of suitable diameter into the holes on the moving part of the roller. Use a screwdriver between them as a lever and turn the clip until the marks match. After this, you can tighten the screw securing the tension roller. After all the work is done, you need to manually turn the crankshaft a few revolutions, making sure that the marks have not moved. After this, you can install the protective cover.
How to set timing marks for 8th grade grant
The Lada Granta gas distribution mechanism is driven by a belt. This type of device has been familiar to car enthusiasts for a long time. After all, the timing belt design migrated from the VAZ 2108 engine, which became the basis for all subsequent modifications of VAZ power plants. The Grant is equipped with two types of engines: an 8-valve engine and a 16-valve engine. The gas distribution system of the 16-valve power unit has a complex structure and increased dimensions compared to the 8-valve one. Accordingly, replacing the Granta timing belt becomes more complicated.
The main feature of the 16-valve device is the presence of two camshafts operating synchronously, in parallel with the crankshaft. The structure is located in the cylinder head. All three shafts are synchronized via a toothed belt. The main disadvantage of a timing belt drive is the unreliability of the belt itself. When it breaks or jumps, the valves meet the pistons and bend. The structure of the 16-valve timing belt is clearly shown in the photo.
16 valve unit
How to check tension
At the end of the work, it is necessary to adjust the tension of the timing belt drive on the Priora. The adjustment is made as follows:
- Using a special wrench, you need to turn the tensioner pulley counterclockwise.
Tensioner adjustment key
You can check the tension by applying force to a rubber product weighing 10 kg. The deviation value should not exceed 5-7 mm.
When tightening the pulley and roller bolts, it is recommended to use a torque wrench. The tightening torque for each element is equal to the following values:
- for the tension roller – 35-41 Nm;
- thrust roller – 105-110 Nm;
- pump mounting bolts – 15-20 Nm.
After adjustment, you can put the protective cover back in place. Finally, the generator belt tensioner roller is installed, as well as the belt itself. It is also recommended to replace these elements with new ones. Finally, do not forget to fill the coolant before starting the engine.
Upon completion of the work done, you can start the engine and check its operation. If the marks are correctly set, the engine will start the first time the key is turned in the ignition switch. In this case, the engine should operate evenly and keep the speed in the region of 800-900 rpm. Listen to the timing belt drive. There should be no extraneous sounds or noises. The presence of a whistle or hum indicates that the tensioner is too tight and needs to be loosened.
Simple replacement of the timing belt Lada Kalina 2, Granta with an 8-valve engine
Yesterday one of our regular customers came to us with a recently purchased second-generation Kalina to replace the timing belt, roller and pump, plus all the fluids, but more on that in another article. This engine was also installed on the Grant, so this article will be relevant for it as well. The speedometer shows 60,000 and I believe that for this engine this is the optimal replacement interval, even though all reference books say about 75,000.
Let’s make a reservation right away that when the timing belt breaks on this car, the valves bend. It is recommended to check the condition of the belt every 15,000 kilometers.
To work, we will need a set of keys and sockets, as well as a 5-point hex and a key for the tension roller. The entire procedure takes approximately one and a half hours.
The engine is similar to the eighth.
First, remove the protection, drain the antifreeze, and for convenience you can remove the right front wheel. Next, loosen the locknut of the generator belt tensioning mechanism. Using a 10mm socket, unscrew the tensioner pin and remove the belt.
We unscrew the four bolts with a 5mm hexagon and remove the upper protective cover of the timing belt.
When does a belt need to be replaced on a Priora: possible consequences
It is recommended to replace the timing belt every 30 - 45 thousand kilometers. Of course, the probability of a belt breaking with such a mileage is very low, but the indicated mileage is the resource of the product. There are many cases where motorists clock twice the mileage indicated above on the tachometer, and have never changed the belt. The serviceability of the product in question is measured not only by its integrity. During operation, it stretches, therefore the quality of engagement decreases and the likelihood of slipping increases.
Timing belt with worn teeth: what can happen if the product is not replaced in a timely manner
This is interesting! The service life of the timing belt is influenced by various factors: the nature of the ride, the quality of the product, the ingress of foreign liquids and objects onto the belt drive, etc. It is impossible to indicate the exact mileage that a timing belt will last. To avoid having to go to a service station for major repairs, it is recommended to monitor the operating time of the product on a car such as the Priora.
Signs that the timing belt on a Priora needs to be replaced are the following factors:
- presence of extraneous noise when the engine is running;
- changing the color of exhaust gases;
- problems when starting the engine;
- extraneous vibration.
Photo of a worn and torn belt on a Priora: what you shouldn’t let your car do
Replacing the timing belt on a Priora 16 valve may be necessary much earlier than at 30-45 thousand km. This is due to oil, dirt and antifreeze getting on the belt drive. Antifreeze or coolant poses a particular danger to the integrity of a rubber product. If a coolant leak occurs, which is caused by a leak in the pump gasket or failure of the pump, then the service life of the rubber product is reduced tenfold. If a coolant leak is detected, the causes should be promptly identified and eliminated. If the cause is a violation of the integrity of the pump or gasket, then the timing belt will need to be replaced at the same time. If there are problems with the strength of the belt at high speeds, irreparable consequences may occur in the form of broken pistons and deformation of connecting rods.
Timing belt malfunctions on Grant and methods of elimination
Failures of the distribution device in advanced cases can lead to failure of the power plant. This can be avoided if you inspect all gas distribution elements in a timely manner and correct defects and breakdowns in a timely manner.
Main symptoms of malfunctions and procedures
| Cause | Remedy option |
| The engine does not develop maximum power, insufficient dynamics. | |
| Violation of the gaps between the pusher and the camshaft cams. | Adjusting the gaps. |
| Gap between seat and valves. | Grinding seats, replacing valves. |
| Engine operation is unstable and often stalls. | |
| Violation of the clearances of pushers and cams. | Adjusting the gaps. |
| Valves burnt out or deformed. | Replacement of worn elements. |
| Oil consumption has increased. | |
| Worn or deformed valve gaskets. | Replacing gaskets. |
| Worn valves or guide bushings. | Replacing valves or guides. |
| Valves are knocking. | |
| Large gap between the camshaft cams and the drive levers. | Set the correct gap. |
| The spring has failed. | Change the spring. |
| Large gap between rod and guide. | Replacement of worn elements, repair and grinding of cylinder head. |
| Camshaft cam wear. | Replacing the camshaft. |
| The drive belt is noisy. | |
| The belt tension has weakened. | Pull the belt. |
| Worn tensioner roller. | Part replacement. |
| The tensioner rod is jammed. | Remove the jam. |
| The camshaft is noisy. | |
| Camshaft cams and levers are worn. | Replacement. |
| Bearings are worn out. | Replacing bearings. |
| The compression in the cylinders is reduced. | |
| Valves burned out. | Install.new.valves. |
| Loose fit of valves to seats. | Grinding of seats and valves. |
Diagnosing timing belt faults is a complex procedure. Signs may also indicate other components and assemblies. To accurately determine the cause of the failure, it is necessary to dismantle the cylinder head. In a private garage, this procedure is quite labor-intensive, and you also need to have special skills and equipment.
In what cases does a belt break?
- Exceeding the permissible replacement interval without carrying out intermediate prevention;
- Systematic operation of the power unit under loads for which it is not designed;
- Defects in the manufacture of a part or component;
- Frequent contact with the surface of oil, chemical reagents, compounds that cause a reaction, delamination of rubber;
- Drive tension exceeds the permissible norm;
- Insufficient drive tension;
- Tooth wear, deformation, damage.
The duration of the engine operation after time “H” is also an important factor. The faster the driver turns off the ignition, the less disastrous the consequences and vice versa. Service station mechanics know of cases where the rocker arm and valve bases literally pierced the wall of the cylinder block and came out.
The need to replace the timing belt
According to the maintenance regulations, the timing belt must be changed no later than 75 thousand kilometers. In fact, if we take into account the quality of consumables for domestic cars, it is recommended to replace them at least every 45–55 thousand kilometers. Failure to comply with the regulations leads to the need for serious engine repairs. A belt break (cutting of teeth, jumping) will inevitably result in the valves being damaged as a result of a strong impact on the pistons. Moreover, it may be necessary to replace not only the valves, but also the entire piston group. Therefore, it is important to inspect the belt at least once every 15 thousand km for cracks, traces of oil, etc.
To better understand the importance of replacing the timing belt, you need to know how it functions. Due to the belt, the engine torque is transmitted through the crankshaft to the camshaft (to several camshafts in the case of a 16-valve engine). In turn, the camshafts are responsible for the synchronization of the valve timing. If the belt breaks, the correct operation of not only the timing belt, but also the entire mechanism is disrupted. Even with a slight slip of the belt, a phase shift will be observed, and accordingly, engine operation will be disrupted.
The situation is as follows: power is significantly reduced, the engine overheats, fuel and oil consumption increases sharply. If the belt simply breaks, this will cause the exhaust and intake valves to open in front of the piston. As a result, they will be damaged. This development of events leads to a major overhaul of the engine. If this happens on the road, the driver needs to call a tow truck, and this is an additional expense. In order not to take unnecessary risks, it is necessary to promptly replace all faulty parts and consumables of the timing mechanism.
Video instructions
Working with a 16-valve engine
Replacing the drive on an 8-valve engine
Auto mechanics recommend carrying out a scheduled technical inspection of the Lada Priora timing belt every month. This part must be replaced if cracks, abrasions, cuts or other defects appear. Replacing the alternator belt on a Priora is carried out when a high-frequency whistle appears as a result of turning on electrical appliances.
- Author: Konstantin Kostin
In my free time, I read a lot, play airsoft (a team military sports game) and amateur radio communications. Lots of professional connections. My strengths: communication skills, endurance, responsibility. Rate this article:
- 5
- 4
- 3
- 2
- 1
(1 vote, average: 4 out of 5)
Share with your friends!
Snapshot
The surface of the toothed part of the belt should not have folds, cracks, undercuts of teeth and separation of fabric from rubber. The reverse side of the belt should not have wear, exposing the cord threads, or signs of burning. There should be no delamination or fraying on the end surfaces of the belt. If defects are found on the belt or there is a significant discrepancy between the belt tension control elements (see photo above), the belt must be replaced. You should also replace the belt with a new one if traces of engine oil are found on it (before installing a new belt, the cause of oil getting on the belt must be eliminated) or when replacing the coolant pump.
Attention! Failure of the timing belt (breakage and cutting of teeth) can lead to valves sticking into the pistons due to mismatch of the rotation angles of the crankshaft and camshaft and, as a result, to expensive engine repairs.
We replace the timing belt in accordance with the maintenance regulations every 75 thousand km or if defects are detected on the belt.
To avoid damaging the crankshaft position sensor, it must be removed.
According to the regulations, the timing belt needs to be replaced every 75,000 km. The advice applies to VAZ-11183, 11186 and 21116 engines. All of them are 8-valve and are installed in Grant cars. Let's consider replacement steps.
When to change: consequences of untimely change
It is recommended to replace the timing belt on a Priora after different periods of time. The manufacturer claims that it can withstand one hundred thousand mileage, but experience shows that a change may be needed much earlier.
The optimal period is every fifty thousand kilometers. Some argue that over such a short service life, rubber is simply not capable of failure. However, no one takes into account the conditions - roads, fuel quality, etc.
Also, during the operation of the mechanisms, it wears out, the rubber stretches, and therefore does not provide the correct tension of the timing belt, and slippage is possible. The teeth can wear off - because of this, traction with the gears is not ensured.
There is no exact time for a change that would suit all motorists. Some take good care of their vehicles, drive carefully, and use only high-quality fuel. Others use a more extreme type of driving, foreign liquids get on the rubber, etc.
In order not to lose your car during the repair period and not to spend a fortune on restoring the mechanics, write down or remember the date of the last timing belt change on the Priora. Next, regularly check the condition of the rubber; if worn, replace it with a new device.
Signs of possible failure
There are several characteristic signs that should alert the driver:
- When the engine is turned on, extraneous noise occurs. Sometimes drivers confuse a timing belt malfunction with a poorly functioning tension pulley.
- If the color of the exhaust gas has changed.
- The engine doesn't start well.
- An unusual vibration is felt.
Pay attention to these “symptoms”, even if the Priora’s mileage with a new timing belt has not yet reached 50 thousand km. It may fail earlier if foreign liquid gets onto the drive - oil, coolant, as well as dust or dirt.
It’s worse if it’s the coolant that gets onto the drive. Firstly, this means that the gasket that ensures the pump is sealed has failed, or there is a problem with the pump. Then the rubber is damaged and service life is reduced tenfold.
Even if the belt is new, but coolant or antifreeze gets on it, it will fail even after operating for 10 thousand miles. You will have to replace the Priora timing belt and figure out why foreign substances get on it.
How to check the serviceability of the belt yourself
If you suspect that it is time to replace the Priora timing belt, it would not hurt to check the serviceability of this rubber product. Visual diagnostics will allow you to check the serviceability and absence of scuffs on the Priora timing belt.
You should have a choice of one of the tools at hand, or two at once - a 5-point hex key, or a T-30 sprocket bit. If one doesn't work, try the second.
- Open and lift the hood.
- You will see the front panel covering the mechanism and timing belt.
- Take the key and unscrew the five bolts that hold the front panel, remove it.
- In front of you you will see a mechanism, including a tension roller.
- Place a jack on the passenger side and place the wheel in a suspended position. Engage fifth gear while it is working, look at the surface of the belt for damage, even small defects.
- If you notice cracks of any size, mechanical cuts, or threads sticking out, be sure to replace it by contacting a specialist or yourself.
- Check the pump. If any traces of coolant leakage from the pump are noticeable, then the rubber will also have to be changed, even if there is no mechanical damage.
- Check the tension roller. Auto mechanics advise changing it less often than tires. The average lifespan is approximately one hundred thousand kilometers. Change it every other time you change the belt.
- Measure the belt tension. To do this, press on the stretched rubber in the area between the gears of the two camshafts. You need to press with a force of about ten kilograms. Correct tension of the timing belt should not bend more than seven millimeters.
- Check that the rubber is not too loose. Make sure that the Priora timing marks match the original condition. The first, similar to a recess, is located on the outer race of the tension roller. The next one is located at the base of the roller. The maximum deviation is four millimeters; if the tension does not meet the standards, the product will have to be changed.
Diagnosis of malfunction of the gas distribution mechanism
The process of diagnostics and identification of the source of failure is quite complex. Sometimes, without digital equipment, it is impossible to conduct a full inspection and assess the general technical condition of components and assemblies.
- Always go by ear. Feel the motor running. If you hear extraneous, previously uncharacteristic sounds, knocking on “cold” or “hot” - most likely the reason is in the timing belt;
- Pay attention to the level of fuel consumption, acceleration dynamics, and the informativeness of the accelerator pedal. Passivity, poor “responsiveness” are factors indicating a possible breakdown;
- Rhythmic operation at idle: in good condition, tact failures, tripping, and vibrations are unacceptable. The average speed is 950 rpm, the minimum is 850 rpm, the maximum is 1050 rpm.
Checking the timing belt
According to the documents that come with the car, the belt synchronizing the movement of the shafts has a service life of 45 thousand kilometers. However, it may fail earlier due to increased loads or insufficient attention to the car engine.
A performance check must be carried out every 15 thousand kilometers. To do this, you will need to remove the cover from the timing belt drive.
- First of all, check the belt tension control tab: the cutout of the inner roller disk should coincide with the tab located on its rectangular bushing. Even with minor discrepancies, it is necessary to replace this consumable.
- Next, inspect the outside of this Lada Granta component. Make sure there are no signs of wear, oil, carbon deposits, or threads.
- At the end, the belt must be integral, without separation into layers and fibers.
Imported analogues
Various components are suitable for replacing belts “2108-1006040-10”:
- GATES – 5521 or 5521XS;
- BOSCH – 1 987 949 095;
- DAYCO – 94089;
- CONTITECH – CT527;
- Finwhale - 2108-1006040.
The timing belt “21116-1006040” can be replaced with another part:
- GATES – 5670XS;
- CONTITECH – CT1164;
- QUARTZ (Germany) – QZ-5670XS.
Usually the choice is made in favor of GATES products. The letters "XS" in its catalog mean "reinforced". Grantovods have already told us in detail about the timing of replacing the timing belt, its choice, and signs of wear in the material: when to change the timing belt on Grant: recommendations from the plant and grantovods.
Original timing belt and fake
Attention! Components from GATES (England) are most often counterfeited! From the photo you can understand what the main difference is. Beware of fakes.
Features of the Priora car
The engine of the new Lada
The engine on the Priora belongs to the class of so-called DOHC engines (Double overhead camshaft), which have two shafts, each for its own row of valves (two for exhaust, two for intake). The valves are driven by pushers, which gives an advantage in power delivery.
The timing belt on a Priora car is a rubber-mechanical product with teeth along the inner edge. Its rim indicates the type of engine for which the part is suitable, as well as markings indicating the number of teeth (137) and width (22 millimeters). When purchasing a timing belt, you should check its quality by pressing on a non-toothed surface. Obvious product defects include the appearance of longitudinal or transverse cracks, delamination, and excessive roughness on the teeth.
The timing belt goes through a tensioner pulley, a timing pulley on the crankshaft, a coolant pump pulley, a pulley (toothed) for the exhaust camshaft, a pulley for the intake camshaft, and an idler pulley. The system also has marks on the crankshaft pulley, oil pump, belt cover (rear), and on both camshafts.
In the factory configuration, the car is equipped with a Gates Kit timing belt with plastic rollers, which are not of good quality, so experienced “prior mechanics” prefer to change this part even before the recommended period expires.
What is a timing belt for?
The timing belt on a Lada Granta car is necessary to synchronize the operation of the camshaft and crankshaft. In the instructions for cars 16 and 8 cl, the replacement period is regulated. However, nevertheless, most car enthusiasts know little about it and may not even know its location, not worrying about how to change it correctly. It is easy to find; you just need to lift the hood of the car. In the most visible place there is a timing belt covering many pulleys. By opening the instructions that come with the vehicle, you can also easily find the section that describes this unit. The timing belt interacts not only with the crankshaft and the camshaft, but also with several other systems. Such a load significantly reduces the life of the belt, which makes it possible for it to break.
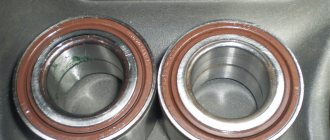
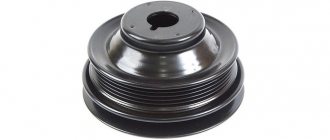
Replacing timing rollers
Along with the timing belt, the tension and support rollers should be replaced.
- To remove the tension roller you need to unscrew the mounting bolt. To remove the support roller, unscrew the bolt with a 15mm spanner. Remove the roller assembly with the bolt and thrust washer.
- The washer has cores that prevent the washer from being removed from the bolt.
Before installing new timing pulleys, apply thread sealant to the bolt threads. We do not completely tighten the tension roller bolt.
Reviews
And you can decide which timing belt for the Grant is right for you based on reviews from the owners of this car.
Oleg: after running into a Boshev counterfeit, I prefer products from a domestic manufacturer. This is the second time I have bought a BRT belt. It runs the required 75 thousand without any problems. I recently changed the tension roller. I installed the Vologda one, let's see how it performs
Vitaly: I prefer not to skimp on spare parts, so I only install from the German manufacturer Gates. You can feel calm with it even on a long trip.
Slava: the most reliable and proven option is the manufacturer Contitech. Although it is more expensive than Bosch, the quality is many times better. My friend (his Kalina) and I bought it at the same time. He took something cheaper, made in Russia. The salespeople talked me into talking about Contitech. I'm very pleased, because my friend threw his away a long time ago, and I still drive it. Although it looks like new, I’m thinking of changing it, it’s already done more than 130 thousand. I'll take the same one.
Parts from the VAZ catalog
Let’s immediately look at the list of VAZ components and special tools:
- Tensioner roller for internal combustion engine 11183 – 2108-1006120, nut for it – 00001-0021647-21;
- Timing belt (11183) – 2108-1006040-10;
- Automatic tension roller – 21116-1006226;
- Timing belt (11186/21116) – 21116-1006040;
- Key for automatic roller – 67.7812.9573-01;
- Key for roller VAZ-11183 – 67.7834.9525.
The tension roller of the "2108" family has two slots on one side. These slots should look “up”, that is, away from the engine.
Tensioner roller for motor 11183
The slots were made for special tools. It is designated by the numbers “67.7834.9525” (see list). And for automatic rollers, the key is designated differently - “67.7812.9573”. What it looks like is shown below.
The automatic roller can also be adjusted
It remains to list how the mounting bolts, washers, etc. are designated:
- Three bolts for the VAZ-11183 cover – 00001-0009024-11, washers – 00001-0026406-01;
- Timing drive cover (11183) – 21080-1006146-10;
- Bolts for VAZ-21116 covers – 2108-1003286-00, spring washers – 00001-0011977-73;
- Top cover – 21116-1006226-00, bottom cover – 21116-1006218-00.
We hope no questions arise here.
Installation of all shafts according to marks
First check that the gear is in neutral.
There is a rubber cover on the crankcase body closer to the clutch assembly. It needs to be removed. The point is to achieve alignment of the marks on the flywheel and in the scale slot. When this is done, fix the flywheel with a screwdriver.
Of course, it is easier to perform such an operation with two people. Know that the desired position of the shaft corresponds to the alignment of marks AB and CD (see figure).
The crankshaft itself must be rotated to the right using a 17 or 19 key (motor 11183).
The meaning of this is illustrated in the photo. The alternator belt must be removed.
The alternator belt blocks access to the timing drive parts. You will have to loosen the fastening and remove this belt.
Use a 13mm wrench to loosen the lower mounting bolt. Then unscrew the upper fastening nut and remove the bolt. The generator casing is pressed against the engine and the structure is secured with wire. The belt can now be removed. Installation of the alternator belt is carried out in the following sequence:
1
.
Secure the generator; 2
.
Throw the belt over the pulleys, as shown in the photo; 3
. Having engaged 5th gear, roll the car back.
Please be aware that reusing the alternator belt is a last resort. It would be better to buy a new part.
Engines Lada Granta
Lada Granta cars are equipped with several types of VAZ power plants. There are 5 of them in total, these are:
- 11183-50;
- 11186;
- 21126;
- 21127;
- 21126-77.
In almost all modifications of the Lada Granta internal combustion engine, if the timing belt suddenly breaks, the valves will bend.
This does not happen only on the eight-valve engine with serial number: 11183-50, which was installed on the standard Granta from the very beginning of its production. However, here, too, everything depends on the engine speed at the moment the belt drive fails. There have been cases when serious problems appeared on this unit after it broke. Another 8-valve engine, which received the index 11186, not only bends the valve when the timing belt breaks, but can also cause damage to the pistons and connecting rods. In the best case, if the belt drive breaks on this installation, the intake valves bend.
The sixteen-valve engine 21126 is a modified version of one of the most popular internal combustion engines from VAZ - 21124, and many experts consider it the best of all that are equipped with Granta, but it also bends the valves due to the lack of recesses for the pistons.
The modified unit 21126, which received the factory index - 21127, was also not without the problem of valve bending, however, like the engine 21126-77 (installed in the Lada Granta Sport). How long is the timing belt life expectancy on Grant models?
How to choose a quality spare part
The Lada Granta timing belt plays a primary role in engine operation, so you need to choose it carefully. During movement, this part can withstand enormous loads, and it must be of the highest quality. Today, there are several proven manufacturers whose products deserve high marks. The most famous and good timing belts for Granta brands: • Contitech • Gates • Dayco • Bosch Among domestic manufacturers, one can highlight the BalakovoRezinotekhnika (BRT) company, which provides Granta timing belt life and an affordable price.
For ease of selection for a 16-valve Grant, you can use the following table:
| Brand | Catalog number |
| BRT | 2112-61006040 |
| Lynx | 137FL22 |
| Conti | CT1137 |
| Bosch | 1987949662 |
| Gates | 5631XS |
| Contitech | CT1137 |
| Dayco | KTB944 |
When purchasing products from a well-known company, every driver thinks about which timing belt is best for Grant. But besides this, the car owner must be careful not to fall for a fake. It is necessary to check the presence of holograms and other identification marks used by a particular company, as well as the coincidence of the original part number and the inscription on the box.
You should buy spare parts only from trusted retail outlets, which bear full responsibility for the quality of the products sold.
Sources
- https://autorn.ru/lada/granta/396-zamena-remnya-grm-lada-granta.html
- https://AutoTopik.ru/vaz/1082-zamena-remnya-grm-lada-granta.html
- https://srr-nsk.ru/strahovka/zamena-grm-lada-granta-8-klapanov-shema-i-metki-podrobnaya-instruktsiya.html
- https://AvtoKart.ru/dvigateli/lada-granta-zamena-grm.html
- https://lanister.ru/avto-sovety/remen-grm-granta-8-klapannaya.html
[collapse]