Not a single car can do without such a device as a starter. On the VAZ "Seven" the performance of this unit directly depends on the serviceability of the relays that provide power supply and start of the starter. If problems arise with switching elements, the causes of the problems must be identified and eliminated in a timely manner.
- Starter activation relay
Where is it located? - Examination
Video: checking the power supply to the starter relay on a VAZ 2107
- Operating principle
By car
- Removing the starter and relay
STARTER VAZ 2107
Let's take a closer look at the problem when the starter clicks, but the car itself refuses to start.
Initially, experts advise carrying out diagnostics, since the causes of such a problem cannot always be detected the first time. You need to have at least an approximate idea of where the “wind is blowing” from. If you decide to independently find the source of why the starter clicks but does not start, then you should understand this device, the circuit, as well as other components that are responsible for its operation.
The design is divided into 3 units, such as:
- the starter itself;
- power supply system (battery);
- switching with connections (relays, wires).
Purpose
The starter of the VAZ 2107 car is an electric drive, powered by a battery. The main purpose of the unit is to engage the engine flywheel at the moment when the driver turns the ignition key to start the crankshaft and the engine itself.
Kinds
Generally, there are 2 types of starters. Their differences mainly relate to operating efficiency, as well as design features: geared and gearless.
- Gearless. Is a classic option. The motor armature and bendix in this version are located on the same shaft.
- Geared. Its difference from a gearless one lies directly in the gearbox with a planetary gear, which is located on the armature shaft and is necessary to start the bendix. The classic version has certain disadvantages, which forced engineers to change the design. The main disadvantage of the gearless type is the low maximum power. Engine sizes have grown over the years, so has the need for more power to start the engine. As a result, the size of the starter, the weight and, accordingly, the final cost have been increased.
The gearbox option makes it possible to squeeze the maximum power potential out of the engine while maintaining weight and size.
VAZ 21074 engine control system diagram
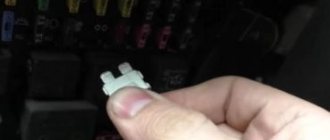
Starter fuse for Lada Granta
Wiring diagram of electrical connections of ECM VAZ 21074 - circuit elements. 1 — controller connector; 2 — mass air flow sensor; 3 — coolant temperature sensor; 4 — crankshaft position sensor; 5 — throttle position sensor; 6 — oxygen concentration sensor; 7 — speed sensor; 8 — ignition module; 9 — solenoid valve for purge of the adsorber; 10 — electric fan relay; 11 — electric fuel pump relay; 12 - main relay; 13 - fuse for the power circuit of the electric fuel pump relay: 14 - fuse for the power circuit of the main relay; 15 — fuse-link; 16-fuse protecting the constant power supply circuit of the controller; 17 - diode; 18 — idle speed regulator; 19 — nozzles; X1 - diagnostic block; X2 - connection block to the vehicle electrical system.
STARTER RELAY
When the starter clicks and does not turn, and a cracking noise is heard from the relay, then the fault may concern the control cable that powers the relay or the relay itself. In such a case, the power unit can be started by shorting the positive from the battery to the positive terminal of the relay.
Thanks to this starting method, the starter works, then you can be sure that the problem does not concern the battery. Most often the relay, ignition switch, and wiring are to blame.
Where is
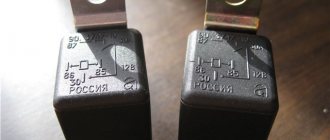
The engineers provided for the location of the relay under the right side of the hood, or rather near the right wing of the car. It is mounted on a stud with a nut.
Examination
If the starter relay clicks, then you should first check its functionality. You must use a special “control” or voltmeter. The work is done as follows:
- It is necessary to remove the wire block from the relay.
- Check the contacts in the block and relay to see if they are oxidized. If yes, then clean them thoroughly.
- Check the ground on the relay going to contact number 86.
- Also check the voltage in wire 85, which goes to the relay, when you want to try to start the car with the key. You also need to check wire number 30.
- If the wires conduct current, then the problem is not the power supply.
MAIN REASONS WHY THE RELAY CLICKS BUT THE STARTER DOESN’T TURN
If the engine does not start, but the starting system itself responds to turning the key, then not everything is as bad as it seems. The main causes of failure include the following:
- battery is low;
- lack of contact or reason in the wiring;
- The ignition switch does not work;
- the starter does not work;
- The solenoid relay for the VAZ 2107 starter does not work.
To solve the problem, you need to know the order of work. Since the battery is the main source of power for the car, then in most cases it is its discharge that is the problem. Try charging the battery or installing another one.
Breaking the starter is much more difficult, since it must be dismantled, which is not so quick and easy to do. Once the starter has been removed, you can begin to search for the cause of its malfunction.
Initially, you need to perform diagnostics, which will require a working battery. Ground is connected to the body of the product, and the positive terminal is connected to the starter stud. If the unit starts to work, then the problem is probably in the solenoid relay. If the starter does not work, then the failure, as a rule, lies internally, so the unit needs to be disassembled.
Brushes and relays are in constant working order, so it is clear that sooner or later they will wear out. They periodically need to be replaced, as at one point your car will refuse to start.
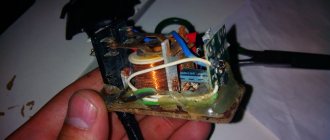
Diagram and description
The design of the VAZ retractor relay is shown in the diagram and it hardly requires explanation. The solenoid formed by the cylindrical retractor coil and the armature pushes the starter fork and meanwhile moves the contact plate that closes the starting contacts of the starter motor. The relay itself is a dielectric container with contact plates mounted in it. On the outside, the contacts end in a threaded part, onto which the terminals are placed and clamped with nuts.
The relay's operation is also extremely simple. When we turn the ignition key, we supply current not immediately to the starter, but to the control relay, which is located under the hood in the VAZ 2107. The contacts of the device close and pass current from the battery to the contacts of the retractor. Voltage is applied to the holding winding, which creates a magnetic field. Under its influence, the rod is simply retracted into the device body, thereby killing two birds with one stone - using a lever, it brings the Bendix gear to the flywheel crown and closes the contacts that supply current to the electric motor. As soon as the engine starts, the current supply stops, the spring returns the rod to its original position, disengaging the bendix and flywheel, breaking the contacts and de-energizing the electric motor.
STARTER FAILURE
If a click is heard after turning the ignition key, but the engine does not start, then, as a rule, the cause of the breakdown is the unit itself. If one click is heard, then the charge required for ignition is reached, since the relay clicked. So the problem is not with him. The cause may also be an unstable charge, which is not enough to ignite.
In such a case, it is advisable to try to start the car several times at intervals of half a minute. Sometimes this helps, but if the issue is not resolved, then you need to check the elements for malfunction:
- bendix;
- retractor unit;
- winding for open circuit;
- check if the winding is short-circuited;
- The bushings and brushes were worn out (then you just need to replace these elements).
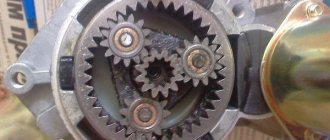
Types and design of electric starter relay
There are three types of starter relay:
- blocking (preventing the device from starting when the engine is running);
- unloading (converting lower currents into stable 12 V);
- retractor (traction), which is attached directly to the starter.
The first two are certainly important, but they are not installed on every car, unlike the “traction” one, without which the engine will not start.
The traction electromechanical relay is responsible for:
- The bendix is thrown into engagement with the flywheel.
- Closing and holding the bridge between the “plus” of the relay and the starter.
- Stable power supply to the brush assembly of the electric starter.
- Timely shutdown of the trigger mechanism.
Starter solenoid relay diagram
Inside, it is arranged simply: under the metal body there is a two-winding coil with a core. On the one hand, the body has a protruding rod (the pulling end of the armature), on the other, an ebonite cover with three terminals (2 powerful contact bolts and one “pin”). The lower bolt is connected to the plus of the electric starter by a power wire (oblique). The armature - a metal core - “walks” longitudinally inside two windings (coils): “retracting” (VO) and “holding” (CU). When retracted, it presses on a movable electrode, at the end of which a spring-loaded copper contact plate is attached. At the end of the armature (core) stroke, the plate is pressed against the “nickels” of the bolts, closing a short circuit - from one to the other, and then to the electric starter brushes.
The edge of the core is connected to a fork lever that moves the Bendix gear forward. In the non-working position, it protrudes far from the body, and when current is supplied to the pulling coil, it goes under it, “pulling” the upper edge of the “fork” behind it. Swinging on the axis, its lower edge moves forward - carrying out, through the driving clutch, the Bendix (gear with a freewheel) into engagement with the teeth on the flywheel crown. When this happens, a metallic knocking or clicking sound is heard.
CAR BATTERY IS DEFECTIVE
One of the most common reasons that the starter starts to crackle and turns poorly is that the battery is insufficiently charged. Such symptoms appear when the main power source of the car is discharged or broken.
To make sure that the problem lies in the battery, you need to check how the engine starting system behaves. The following problems may occur:
- Lack of any response to ignition. There are no sounds, the starter does not click, does not show any signs of life. If such a problem is detected, then check the performance of the battery by turning on any electrical consumer - a tape recorder, lighting fixtures, etc.
- The instrument panel flashes and a crackling sound is heard from the solenoid relay. In such a case, as a rule, the battery is to blame.
- The starter clicks and sometimes the dashboard goes dark.
In the above cases, it is initially checked how charged the battery is. Use a load fork or a multimeter. In such a case, you just need to charge it.
When, after carrying out the manipulations, it was possible to find out that the battery is working, then it is necessary to start looking for other reasons for the starter’s failure to spin.
DIAGNOSTICS OF EXTRACTOR RELAY
The malfunction of the VAZ 2107 starter, regarding clicks and refusal to turn, may lie in the relay. The relay is connected using two cables that go to the ignition switch and to the battery. One cable is connected to the battery terminal (+), the other to the ignition terminal (+). There is another wire that connects the relay to the starter drive.
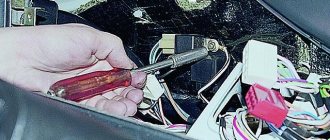
To identify the cause of the breakdown of the solenoid relay, you need to use a jumper with which to connect both terminals. The connection itself should be made using a regular screwdriver or other convenient tool. It is important that the jumper does not touch other metal surfaces when making a connection.
BENDIX
This part is a more advanced analogue of the flywheel engagement unit, which begins to unwind after turning the ignition key. After the engine starts, the gear goes away. Bendix is also necessary for the normal operation of the solenoid relay.
If this unit is acting up, then when igniting it should make a loud crunching sound. In such a case, the starter should be dismantled, disassembled and checked:
- Turn the gear clockwise with your fingers. If the Bendix is working, then the gear should turn hard and be slightly spring-loaded.
- Now you need to scroll in the opposite direction. If the bendix is to blame, then you will succeed. If it is working, then the gear should remain in place even with serious force.
Is it possible to fix it?
Relays for starters used in Zhiguli cars received identical parts in view of completely identical tasks. The only inconvenience is that, depending on the supplier manufacturer and the modification of the car itself, the attachment points of the units may differ slightly from each other, and some differences in internal components are allowed.
Unit mounting location
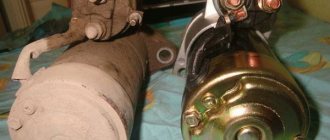
There is no point in repairing the devices; for VAZ-2107 and 2106 it is easier to purchase the entire starter assembly. But, if there are financial difficulties, you can only replace the relay. And this is the order in which you should proceed. Be sure to disconnect the battery first! The starter is installed in the car electrical network in such a way that shorting its contacts can lead to burnout of the entire car wiring.
Purchase of VAZ-2106 starter assembly
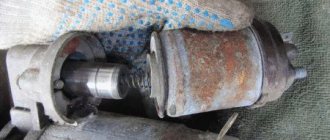
Then remove and thoroughly clean the starter from dirt. This is necessary to ensure that random particles do not get into the electrical winding and prevent a short circuit. Now we disconnect the contact from the bolt of the traction relay, unscrew the tightening screws and remove the part.
Modern cars are equipped with such a part as a starter, the main purpose of which will surprise no one. Before its invention, a special L-shaped lever was used to start cars. With its help, the driver, standing in the middle of the car, manually cranked the crankshaft, and the engine started. This starting lever is called a “crooked starter”. Today, the VAZ 2107 is equipped with an electric starter, which allows you to start the engine by turning the ignition key while sitting in the passenger compartment. One of its most important mechanisms is the solenoid relay, the purpose of which we will learn in more detail.
BRUSHES AND WINDING
The starter design consists of four metal cores, which are also called shoes, and a winding connected into a circuit.
The voltage supplied to the winding comes from the central input. In turn, the output is output to positive copper-graphite brushes going to the commutator. They also connect negative brushes coming from the starter mass. Several small springs constantly press the brushes. Graphite is not a strong enough material, so sooner or later they break. When the life of the brushes comes to an end, the solenoid relay stops receiving voltage.
When such a problem occurs, the starter will not spin or make sounds. In case of repair, the unit is disassembled, the condition of the brushes is assessed and replacement is made. If the brushes can still fulfill their intended purpose, then the problem usually lies in the winding. When the winding is completely burned out, then the varnish coating should also burn out.
And the copper color turns black. In such a case, you can change the winding or replace the part with a new one.
What does a car need a traction relay for?
The starter solenoid (or traction) relay is a fairly important device. At the dawn of the automotive industry, the role of this unit was played by a long handle and the driver himself, who, by inserting it into the hole in the flywheel, accelerated the engine. Later, cars acquired starters with retractor relays, which are designed to provide initial force to the gear that drives the motor shafts.
Starter traction relay
In the designs of most cars (as in “classic” VAZ models), the retractor relay is a small unit mounted directly on the starter housing itself. His tasks are the following:
- moving the bendix gear to engage the flywheel teeth and returning it to its original position after the engine starts running;
- energy distribution between the starter drive and the electromagnet;
- synchronous operation of the starter during engine starting.
The starters installed on the VAZ-2106 and 2107 starters are actually the same. Regarding the solenoid relay, we can say that it has not undergone any significant changes. But there is one more detail with the same name, which is considered the difference between these two models. This is the starter activation relay: on early VAZ models it is not there at all, but in 2107 it appears.
Relay for turning on the VAZ-2107 mechanism
Before this innovation, control from the ignition switch went directly to the solenoid relay.
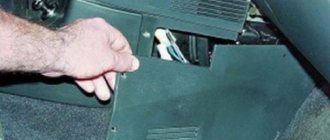
It is worth saying a few words about this mechanism. The starter activation relay is located some distance from the starting mechanism itself, so you should look for it by wires. Naturally, with each new release of VAZ, its location changed. But when it first appeared in 2107, the starter relay was located on the right mudguard in the engine compartment. It is easy to remove and replace with a 10mm wrench. But the traction relay still does more work and fails much more often, so let’s talk about it in more detail.
DIAGNOSTICS OF WIRING AND CONTACTS
If the starter does not turn, then the reason may relate to the vehicle's electrical wiring or bad contacts. Often the problem appears along the voltage path from the (+) terminal to the solenoid relay. To start the starter, 200 Amperes are needed, but if the reason is in the contacts, then it is not a fact that exactly this amount of current will reach. In such a situation, the solenoid relay will work, since it only needs 10 Amps, but the voltage is not enough to spin up the starter.
In such a case, you can hear several clicks, and sometimes entire series. First, you should carefully check the car's wiring. If oxidation is detected on the contacts, they must be cleaned in order to be able to transmit current in full.
BUSHINGS
These elements are located on both sides of the starter. Their task is to control the rotation of the shaft. If the bushings are too worn, then the starter will not start and will make clicking noises. Problems can arise if the starter is not installed correctly and is not in the right place. There could also be a short circuit in the winding.
Heavy cranking may indicate poor performance of the bushings, even if the power unit is warmed up.
The failure of the bushings is not a serious failure, but if you do not want to encounter a problem when the car refuses to start, then they need to be changed in time. Moreover, the bushings can cause the starter shaft to jam, which can lead to self-ignition.
UNIT REPAIR
According to experts, the service life of the starter is up to 6 years. If this unit has been in regular use for several years and has stopped working, then it should be carefully checked. Regardless of the cause of the breakdown, the first thing that needs to be done is to conduct a visual inspection to identify visible problems.
You should carefully inspect the contacts, since often the starter stops working precisely because of them. An unstable charge can also cause the starter to fail to turn, so you need to try starting the car several times.
But even if the car starts, you should not assume that the breakdown resolved itself. Sooner or later the car will stop starting and the breakdown will need to be solved in a radical way. Simply replacing the starter may not always solve the problem.
To remove a part for subsequent disassembly you need:
- Disconnect the terminals and remove the battery.
- Remove the protective shield under the engine.
- Unscrew all nuts that secure the starter wires.
- Remove the bolts that connect the starter to the crankcase.
- Pull out the starter.
- Unscrew the nuts and remove the relay from the cover.
- Unscrew the bolts, remove the covers, and then remove the rotor.
Replacing bushings
To replace the bushings, you should increase the gap formed between the shaft and the support. The cause is often a misalignment that causes the rotor to touch the plate on the stator. The defect is solved by replacing the part.
- You need to knock out the front support and remove the rear bushing. This can be done with a special puller or by drilling.
- New parts must be installed using soft mandrels. Under no circumstances should you warp the products or use excessive force.
- Before installing the bushing, it is recommended to immerse it in engine oil for several minutes to saturate the porous material.
Replacing brushes
These elements supply voltage to the rotor, or rather its winding.
Instructions for replacing brushes:
- Remove the cover.
- Unscrew the 4 screws that secure the brushes.
- Replace the elements with new ones.
- Clear the cavity from recycling.
Relay repair
This unit is necessary for the gear to move along the rotor. The element is located on the body of the unit.
First, the control relay is checked. The screw securing the part should be tightened thoroughly to check for oxide on the wire and plates.
To test the relay you need to close the drive directly. The unit must be replaced with a new one if the rotor rotates.
If the unit is working properly, the resistance on the coils is 75 - 55 Ohms. If it does not meet these indicators, then they need to be changed, since they cannot be repaired.
Assembly and installation
To assemble the unit, you must perform the same steps, only in reverse order. Correctly install the cotter pins and corkscrew rings that are provided in the design of some elements. Check the node for functionality.
Removal and Replacement Guide
Fuse and relay block VAZ 2107
If you do not know how to remove and disassemble the mounting device or safety elements and how to replace the old unit with a new one, then we will consider each instruction in turn.
Changing fuses yourself
Before you begin replacing the safety devices located in the main unit, you must turn off the ignition and battery terminals under the hood.
The replacement procedure is carried out as follows:
- Find the installation location of the device. There are latches on the plastic cover of the block; press them. After removing the cover, you will be able to see a diagram printed on the reverse side, which indicates the location and purpose of all used elements.
- Then you need to identify which device has failed and needs to be replaced. Sometimes a breakdown can be determined visually - the component itself may be burnt out, sometimes a broken thread is clearly visible in it.
- Under the cover of the device you will see tweezers, which can be used to remove the device. If you don't have tweezers, you can use pliers.
- Remove the burnt out element and replace it with a new one, then replace the cover and connect the battery terminals (video filmed and published by the AVTOCLUB_22 channel).
Replacing fog lamp fuses
If the fog optics break down, you should first diagnose the operation of the device. The component is located inside the car.
To check and replace, follow these steps:
- First you will need a Phillips screwdriver, use it to remove the two switches located in the middle of the console, near the audio system.
- Using a screwdriver, you will need to press out two fasteners.
- Then remove the plastic insert.
- You can now remove the fuse housing. Remove the protective cover of the device and replace the part with a new one.
1. Remove the two switches with a screwdriver.
2. Press on the pad fasteners.
3. Remove the insert and remove the device.
Changing the fuse box
Removing and replacing the block with components is done as follows:
- First, open the engine compartment of your car and remove the air filter housing. Unscrew the nuts that secure the housing using a Phillips screwdriver.
- Then under the device you will be able to see a plug with cables connected to the device, you need to unplug it. The product body itself is marked in colors; it corresponds to the color of the connected connectors. By taking these plugs into account, the need to label cables can be avoided.
- After this, you should climb into the vehicle interior and remove the shelf, which is located under the control panel. After this, unscrew the bolts that hold the glove box housing.
- Next, disconnect the plug with cables connected to the connectors directly on the device. Once you do this, you will be able to see the color coding.
- Using a wrench, remove the bolts that secure the block itself. Please note that the outermost screw on the case is hidden, so you will not be able to see it immediately.
- At the end, remove the block with the devices, now the device can be replaced. Installation of a new device, as well as assembly of components, is carried out in the reverse order.
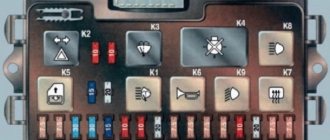
The mounting fuse block contains some electrical control elements of a VAZ car and most fuses that protect electrical circuits from short circuits and overloads. It is located in the engine compartment on the left side, immediately on the metal partition between the engine compartment and the cabin. Here is the photo (top left):
Decoding old-style fuses, diagram, video
The block of the old-style carburetor “seven” includes 17 fuses fixed to the board using spring contacts and 6 electromagnetic relays.
The block has two printed circuit boards mounted parallel to each other and connected by jumpers. It is also connected to the car’s network through detachable connections made in different colors for proper docking. The photo below shows a diagram of the location of the VAZ 2107 power supply control elements.
Photo of old VAZ 2107 fuse box
The body is made of plastic; there is a cover on top with the location of the elements on the block and their purpose in the form of images. The table below shows the decoding and pinout with the assignment of fuses and relays.
Table with transcript
| Fuse and relay number (rated current*) | Purpose of fuses and relays VAZ 2107 |
| F1 (8A/10A) | Responsible for the operation of the rear lights, or more precisely, for the light that turns on when the gearbox shifts into reverse. It is also responsible for the operation of the electric motor of the stove (heater), the rear window heating relay, also called the winding. In a VAZ 21057 car, this relay is responsible for the electric motor of the rear window washer. |
| F2 (8/10A) | Designed for headlight and windshield cleaner relays, as well as wipers of the VAZ 2107. |
| F3/4 (8A/10A) | Is a backup |
| F5 (16A/20A) | Responsible for the element (heater) of the rear window and, accordingly, for its relay, and all contacts of this unit. |
| F6 (8A/10A) | “Cigarette lighter” in a VAZ 2107 car, as well as a socket (plug) for a lamp. |
| F7 (16A/20A) | Responsible for the engine cooling fan, its engine, as well as the sound signal of the VAZ 2107 |
| F8 (8A/10A) | “Hazard signal”, as well as a breaker for direction indicators and hazard warning lights (in hazard warning mode) |
| F9 (8A/10A) | "Fog lights". Generator voltage regulator G-222 (on some vehicles) |
| F10 (8A/10A) | Instrument panel, parking brake, carburetor electro-pneumatic valve, voltmeter, fuel level, brake fluid level, oil pressure, turn signals, battery charge. |
| F11 (8A/10A) | Stop signals. Interior lighting. Brake lamps. |
| F12 (8A/10A) | Headlight cleaners, high beam (right headlight). |
| F13 (8A/10A) | High beam (left headlight) and high beam indicator lamp |
| F14 (8A/10A) | Engine compartment lamp. License plate lighting. Side light (left headlight and right rear light). |
| F15 (8A/10A) | Glove compartment lamp. Instrument lamp. Cigarette lighter lighting. Side light (right headlight and left rear light). |
| F16 (8A/10A) | Headlight cleaner relay. Low beam (right headlight). |
| F17 (8A/10A) | Low beam (left headlight) |
| * The denominator is the value for pin fuses | |
Sources
- 7vaz.ru/remont/ne-krutit-starter-na-vaz-2107.html
- drive2.ru/b/517935948453904763/
- bumper.guru/klassicheskie-modeli-vaz/elektrooborudovanie/rele-startera-vaz-2107.html