Please adhere to the appropriate traffic regulations when using lighting devices.
When driving a vehicle on a rainy day, the window glass will quickly cool down and the temperature of the glass inside the vehicle will quickly decrease, so the moisture remaining in the air will accumulate and create condensation. In this case, water will appear on the inside of the window glass. The reason for the appearance of condensation on the inner surface of the headlight glass is the same. In other words, the amount of water in the air will increase as the temperature rises and if the temperature drops, the water will accumulate and create condensation known as fog.
If condensation appears on the light fittings of a vehicle, then after turning on the high and low beams, the condensation that appears on the glass of the headlights will begin to dissipate and disappear after 1 hour - this is normal. If not, there may be water inside. Contact the appropriate service station for repairs.
When replacing a light bulb, carefully check the installation of each part of the light bulb to ensure proper installation and good insulation! Otherwise, serious consequences may occur due to water or dust getting inside!
High pressure water jets should not be used to clean the engine compartment, especially the light fittings. Otherwise, due to the high jet pressure, parts of the light fittings may become loose and come off, and the vent, wiring and electrical connectors may become wet.
As a result, the water that will be inside the light fittings or steam will not dissipate, which will lead to the creation of a large amount of condensate.
parking lights
Turn the outer ring of the steering column switch lever 1 to a position where mark 2 aligns with the corresponding symbol.
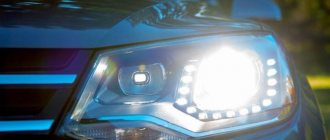
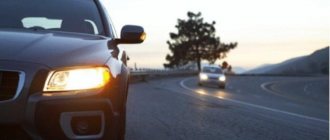
Low beam headlight
Turn the outer ring of the steering column switch lever 1 to a position where mark 2 aligns with the corresponding symbol. The corresponding warning light on the instrument panel will light up.
High beam headlight
If the low beam is already on, then to turn on the high beam, pull the lever of the steering column switch 1 towards you. The corresponding warning light on the instrument panel will light up.
To turn on the low beam headlights again, move the switch lever toward you again.
Fog lights
Please note that if it is necessary to turn on the fog lights, the side lamps and low beam headlights must be turned on. Typically, the front fog lights are turned on in case of fog, snowstorm, rain, or when visibility is severely limited.
Turn the middle ring 3 of the steering column switch lever to a position where mark 4 aligns with the corresponding symbol.
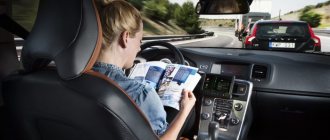
Automatic switching on of headlights upon ignition
In order to organize such operation of the lighting elements, it is necessary to connect them to the ignition power source, and as many know, some devices can be connected at any position of the ignition switch, while others begin to function only when the ignition is already on. Based on this, the most convenient place to connect the headlights is the heater switch button (the rightmost switch block).
For this scheme you will need:
- any standard five-pin relay;
- diode;
- wires.
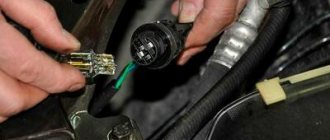
Next, we need:
- Remove the size switch (switch block on the leftmost side).
- Disconnect the positive wire from the key block responsible for the low beam operation (usually this is a green double wire) and connect it to the relay.
- You need to insert an additional wire into the positive wire that goes to the heater switch and also connect it to the relay.
- Connect the wire that powers the headlights to the relay.
- Throw the wiring to minus (to the body).
The connections can be soldered, but for full-fledged work, an ordinary insulated twist will suffice. As a result, automatic low beam headlights will work as soon as you turn on the ignition.
However, this method is considered not the most economical, since the headlights start working immediately, which is not very important in winter, when the engine needs to be warmed up or when repairing a car.
Types of foglights
According to traffic regulations, the use of fog lights is officially permitted; many manufacturers equip factory-produced cars with fog lights. But many universal types are also produced by third-party companies. By type there are:
- Front fog lights;
- Rear fog lights.
The design features differ in the source of light used. Common types of fog lights:
- Halogen. Relatively inexpensive light sources, in demand among car enthusiasts. The disadvantages include the short service life of the lamps. During intensive use, they require frequent replacement;
- Xenon. The characteristics of the light spectrum are better than those of halogen lamps. They work long enough. The price is quite high;
- LED fog lights. The highest price category. Lamps with excellent light beam. They have a long service life. Lamps are prone to overheating. Requires fairly good ventilation.
Automatic switching on of headlights after engine start
To organize such a work scheme, you can go in two directions: connect to the oil pressure sensor or to the handbrake.
Method 1: Connecting to the oil pressure sensor
To make this connection you will need:
- relay;
- transistor (2 pieces);
- wires;
- microcircuit K561TP1.
All parts are placed in a small relay housing, after which the device must be connected to an oil pressure sensor. When the pressure in the engine lubrication system normalizes, that is, when the engine is turned on, the sensor will open, and the power from it will go to the capacitor. Ultimately, the voltage to the relay will be supplied through the transistors included in the headlight power supply. When the engine is turned off, power from the sensor is supplied to the desired lamp located on the dashboard. At this time, the capacitor that is included in the headlight control unit begins to discharge and the power supply to the relay stops.
In this case, you can also control the headlights manually if you use a parallel connection. In order to set the time to turn off and turn on the headlights, just select the resistance on the board. The higher this parameter is, the longer it will take the headlights to turn on and off.
True, not everyone likes this method, since this scheme is much more complicated (you need to pull wires and make 3-4 connections).
Method 2: Connecting to the handbrake
This method is much simpler, since in this case it is enough to just slightly modify the headlight connection diagram for ignition, which we talked about at the very beginning. To do this, just add another relay and a short wire (about 25 cm) to the standard contact of the handbrake button.
Thanks to this method, the headlights will turn off as soon as you pull the handbrake, and light up when you release it.
Radmir RP Krmp answers to exam questions in a driving school.
What does the letter M mean on the indicator panel? Answer: The engine is on.
Which key turns on the headlights? Answer: Left Alt.
Maximum speed in the city? Answer: 60 km/h.
What do you need to do to refill your gas tank? Answer: None of the options are suitable.
The instructor asked you to start the engine. Which key starts the engine? Answer: Left Ctrl.
You're almost out of gas, what do you think can be done to reduce your gas mileage? Answer: Turn off the engine.
Which key is used to close the transport? Answer: Right Ctrl.
What is the duration of engine operation with a full gas tank without special actions to reduce gasoline consumption? Answer: 50 minutes.
Based on traffic rules, is overtaking across a solid line allowed? Answer: Only when overtaking a vehicle at a speed < 30 km/h.
You are driving along the road, look in the rearview mirror and notice a car with the car on. flashing beacon, your actions? Answer: Among those proposed, there is no correct one.
You saw a sign posted (oncoming traffic has the right of way), what does it mean? Answer: The driver of the oncoming vehicle will have the right of way.
What should a driver do when he sees a sign (give way)? Answer: Give way to vehicles moving on the road you are crossing.
Based on the traffic rules, the installed sign (main road) shows the driver what? Answer: There is a section of road ahead where the driver has priority right of passage through intersections of unequal roads.
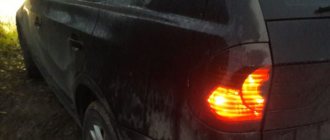
When is it recommended to turn on the rear fog lights?
The use of rear fog lights increases the safety of movement during difficult weather conditions. With the rear fog lights working, the car is easier to spot for those driving behind you. It will be easier for them to keep their distance.
According to the requirements of paragraph 19.7 of the traffic rules, rear additional lighting can be turned on only in bad weather conditions, when visibility does not exceed 300 meters. In other cases, they cannot be used, as this violates traffic regulations. As a rule, rear fog lights shine quite brightly and can blind other drivers.
Practical exam at driving school Radmir Krmp
After successfully passing the theory at the driving school, we move on to passing the practice. We immediately find ourselves in the training machine. First of all:
- Fasten your seat belt using the /rem
- Start the engine with left Ctrl
- Turn on the headlights with the left Alt
After this, we begin to follow the red signs.
When driving, do not forget to stop at Stop , and also follow the traffic lights. If you make two mistakes, the exam will fail.
After successfully passing the practical part of the exam, the message “Exam passed successfully” appears and you are automatically issued a driver’s license.
Causes
There are several common reasons why the optics do not go out after the ignition is turned off. Let's take a closer look at the low beam relay malfunction, the power button sticking, and the steering column switch failing.
Low beam relay
Low beam relay
In most cases, this happens due to a stuck relay. Experienced drivers simply tap it with a screwdriver and it comes off. If it does not help, then the element is replaced with a new relay.
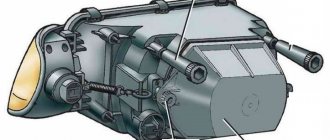
The device for opening and closing the wiring of car lights is located in the installation - a special block, along with fuses. At least on the latest VAZ cars, it is located in the compartment on the left side of the driver.
This decorative plug must be removed to see the mounting block.
And here is the mounting block in the photo.
Mounting block
According to the VAZ scheme, the relay device responsible for the optics is located in this location.
Relay on the diagram
To remove any type of relay, the mounting block contains oval red tweezers.
After removal from the mounting block, the relay looks like this.
Button or key for turning on the dimensions and lights
The button may also be broken or there are problems with the wiring. In the case of the button, the size and light keys get stuck. The contacts simply close internally and it does not turn on.
It is noteworthy that this button is never actively used by motorists. A priori, it is left on, but when it gets stuck, it naturally does not perform its functions normally.
Optical keys in cars
The key is called a light switch, and is initially considered a flimsy thing and not entirely reliable.
Often this particular key becomes the favorite upgrade option for “handy” motorists. Noticing that the key is missing only an indicator that could turn the button into a useful thing, they improve it. This modernization makes it possible to significantly simplify the life of the driver, who was previously constantly worried about whether I turned off the headlights or not.
To carry out the upgrade, just use an LED. You also need a donor button, a soldering tool and a heat gun.
You need to do the following:
- disassemble the donor button, remove the contact legs and the light filter for the window;
- insert an LED and additional contacts along with a light filter inside the key.
Here's how to connect:
Connection
- additional (new) contacts are introduced from above;
- plus is taken from pin 6, minus is taken from pin B.
The LED is soldered here:
Where to solder the LED
An LED is embedded in the slot on the right.
In the end it turns out like this:
Tuning button
Green light – clearance, white – low beam.