VAZ 2106 car starter - device, design features
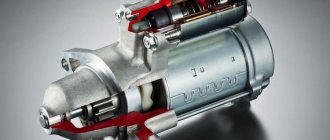
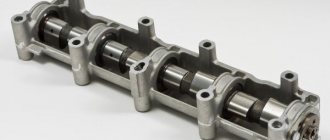
Currently, VAZ 2106 cars are mainly equipped with a starter 35.3708 (Fig. 9.7) with an end manifold. Starters made in Germany or Belarus can be installed on some VAZ 2106 cars produced. These starters are interchangeable with starter 35.3708 in terms of their characteristics and installation dimensions. Technical characteristics of the VAZ 2106 starter Type of starter... ST-221 or 35.3708 Rated power, kW………………1.3 Current consumption at rated power, A…………………………260 (290*) Consumption current in a braked state, no more than, A... 500 (550*) Current consumption at idle (without relay)*, A, no more than.........35 (60*) ______________________ *For starter 35.3708.
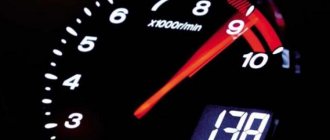
In the 70-80s, the ST-221 starter with a cylindrical collector was used. This starter differed from the 35.3708 starter in the design of the rear part and the stator winding, which consisted of two shunt and two series coils (the 35.3708 starter has one shunt and three series coils in the stator winding). According to its characteristics and installation dimensions, starter 35.3708 is completely interchangeable with starter ST-221. The site discusses the repair of starter 35.3708 as the most common at present. Starter 35.3708 consists of a housing 17 with field windings (stator), an armature 19 with a drive, two covers 6 and 15 and a traction electromagnetic relay. The covers and the housing are pulled together into a single unit with two bolts (for the ST-221 starter - two studs) screwed into the cover 6. The stator has four poles 18 with winding coils. Three winding coils (serial) are connected to the armature winding in series, and one (shunt) is connected in parallel. The armature consists of a shaft, a core with winding and a collector. The armature shaft rotates in two cermet bushings, soaked in oil and pressed into the covers. At the front end of the shaft there is a starter drive, consisting of a roller overrunning clutch and gear 1. The purpose of the clutch is to transmit torque from the starter armature shaft to the flywheel ring when starting the engine, and after starting, working in overtaking mode, to prevent the transmission of torque from the flywheel to anchor. The starter electromagnetic relay is bolted to the front cover 6. The magnetic system of the relay is formed by the relay flanges, the yoke (surrounding the winding) and the core. Inside the magnetic system there is a coil of 8 relays. When the starter is turned on, armature 7 of the relay is retracted and lever 5 moves the drive with gear 1, bringing it into engagement with the flywheel ring. At the same time, plate 9 closes the contact bolts 11 of the relay, and the power to the starter windings is turned on. The starter connection diagram is shown in Fig. 9.8. When the starter is turned on, the voltage from the battery through the ignition switch is supplied to the windings of the starter traction relay (retractor P1 and retainer P2). After closing the contacts of the traction relay, the retractor winding is turned off. Useful tips To avoid many starter malfunctions, when operating it on a VAZ 2106 car, follow a number of simple rules. When starting the engine, turn on the starter for no more than 10-15 s and again after 20-30 s. Continuous long-term operation of the starter can lead to overheating of the armature and stator windings. If after three attempts the engine of a VAZ 2106 car does not start, then you should check and eliminate malfunctions in the engine power supply or ignition systems. After starting the engine, immediately turn off the starter, since prolonged rotation of the drive gear with the flywheel (especially when the choke is closed or the accelerator pedal is pressed) can lead to jamming of the starter overrunning clutch. It is not allowed to move a VAZ 2106 car using a starter. This causes significant overload and damage.
Rice. 9.7. Starter 35.3708 VAZ 2106: 1 - drive gear; 2 — overrunning clutch; 3 - drive ring; 4 — rubber plug; 5 — drive lever; 6 — drive side cover; 7 — relay anchor; 8 § relay winding; 9 — contact plate; 10 — relay cover; 11 — contact bolts; 12- collector; 13 — brush holder; 14 — armature shaft bushing; 15 — cover from the collector side; 16 — casing; 17 — body; 18 — stator pole; 19 — anchor; 20 - intermediate ring; 21 — restrictive ring
Rice. 9.8. VAZ 2106 starter connection diagram: 1 - battery; 2 - pull-in winding of the traction relay; 3 — ignition switch; 4 — holding winding of the traction relay; 5 - starter; 6 - generator
Carburetor internal combustion engine
Most classic VAZ models with a carburetor are equipped with a KSZ contact ignition system. Since 1987, cars began to be equipped with a contactless ignition system. The engine for the VAZ 2104 was created on the basis of the VAZ 2103 power unit, and accordingly, the VAZ 2103 electrical circuit was used.
Classic ignition
The KSZ includes a distributor (2), a coil (5), spark plugs (1), and connecting wires. The system also includes a capacitor (3), a relay (7), a breaker cam (4), a mounting block (6), and a switch (8).
On machines with KSZ, a distributor 30.3706-01 is installed. It is located on the left side of the cylinder block in the front part. Thanks to it, the circuit of the primary winding is interrupted and high voltage is distributed across the spark plugs in the required sequence. The distributor consists of ignition timing regulators, a high-voltage pulse distributor, and a breaker with contacts.
A B-117A with an open magnetic circuit is used as an ignition coil. It is located in the engine compartment and is attached to the left mudguard using two nuts. The device is used to convert low-voltage current into high-voltage current. The installed A17DVR spark plugs serve to ignite the fuel-air mixture in the cylinders of the power unit.
A VK347 type switch is installed, which has an anti-theft device. The anti-theft operating principle: when the key is removed from the lock in the “Parking” position, the locking rod extends, which blocks the steering shaft, entering a special groove.
Electronic ignition
The design of the contactless ignition system includes:
- distributor (distributor);
- sensor;
- switch that controls the system;
- high voltage coil;
- spark plug;
- connecting and high-voltage wires.
On VAZs with BSZ, a distributor 38.3706-01 is installed, its location coincides with the KSZ distributor. The coil consists of two windings. One is connected to the ignition switch relay, and the second is connected through a high-voltage wire to the distributor.
Using small cross-section wires, the coil and distributor are connected to a switch, which is responsible for the timely supply of a spark. The commutator converts the sensor pulses into a pulse current, which is supplied to the primary winding of the coil. The coil is also located in the engine compartment, like the KSZ coil.
The operating instructions contain an electrical diagram of the VAZ 21043 carburetor with a description of the main components included in it.
Electrical diagram of VAZ 2104
What exactly is making noise and why?
Let's try to understand this issue. The main causes of noise coming from the gearbox are:
- improper operation of the gearbox, in particular the use of counterfeit transmission fluid purchased on the black market and operation of a vehicle with a non-working clutch;
- poor quality of gearbox components;
- maximum service life of manual transmission;
- unskilled technical work on diagnostics and repair of gearboxes.
In addition, the main malfunctions that can result in noise in the gearbox are:
- sudden difficulty switching on speed: in order to engage one or another gear, the driver will sometimes need to move the gearbox lever several times to the neutral position with the clutch depressed;
- The box automatically switches off the car’s gear while driving;
- Transmission fluid may leak from the gearbox.
It should also be noted that the VAZ 2109 gearbox can make noise in various conditions: at neutral speed, while shifting gears, or simply while driving at a certain speed. And each of these noises can indicate a different malfunction of the box.
In addition, during diagnostics, one must not forget that only one external sign may indicate several malfunctions in the gearbox. Therefore, it is virtually impossible to visually (i.e., by the type of hum) calculate which component of the box has failed. The damage can only be determined by removing and disassembling the box.
It is also necessary to add that repairing a transmission and eliminating defects requires a lot of knowledge, so it is better not to do this at home. The gearbox is an important unit in the structure of any vehicle, so it is better to entrust its repair and diagnostics to a qualified specialist.
Often the hum of the unit manifests itself:
- when you press the clutch;
- when turning on the third and fourth speeds;
- at neutral speed;
- when driving a car at high speeds.
Most domestic VAZ 2109 car owners face such problems. But if when you press the clutch, extraneous sounds disappear, then this may indicate several breakdowns. In particular, the fifth speed or reverse gear may fail. In addition, the input shaft bearing or release bearing may be faulty.
As practice shows, in the case of bearings the problem is not critical. If noise appeared in your car and then disappeared after several hundred or thousand kilometers, then most likely the remaining bearings were simply ground up by the unit system.
If your VAZ 2109 starts making noise, this does not mean that the bearings or reverse gear have failed. These problems are the most common, but only high-quality diagnostics can specifically determine what has gone wrong.
Symptoms of a problem
You can determine that there are problems with electrical equipment by the following signs:
- Charger. The battery charging light flashes and goes out when the headlights are turned on. Knocks out the jumper in the voltage regulator. When the ignition is turned on, the charging indicator does not light up.
- Movement. Speed spontaneously increases when moving. Jerking when moving at low speed. Unstable idle. Loss of power during acceleration.
- Wiper. The wipers move jerkily. Windshield wipers do not turn on or do not work in rainy weather. The wipers move jerkily.
- Closures Fuse No. 9 burns out after turning on the ignition or at the start of movement. Fuse #1 blows. Fuse No. 7 burns out when the lights are turned on.
- Dashboard. When the power grid is loaded, the devices begin to display incorrect values.
- Start the engine. Doesn't turn or...
- Lighting fixtures do not work.
Basic electrical wiring faults: short circuit or break.
In the event of a short circuit, fuses, relays, devices burn out, and even a fire is possible. In the event of a break, either some node, system or device, device, etc. fails. You need to be able to understand the wiring diagram of VAZ 2103, 2104 and other models, find and fix faults (video author - MR.BORODA).
Replacing the starter on VAZ 2108, VAZ 2109, VAZ 21099
Welcome! The starter - it is only needed to start the car, then when the engine is running it is already turned off (its bendix with the gear goes back and thereby disengages from the flywheel), now we will explain everything to you, if you don’t understand, you already know that is a flywheel? This is a part that is installed at the end of the crankshaft (it is fixed directly at the tip), the flywheel spins along its axis if you start the car’s engine (the crankshaft also spins with it, and thanks to it, the flywheel spins if the crankshaft stands still, then you can’t move the flywheel in any way), and the starter is inserted with its front part (Mask) inside this very flywheel and when you start to start the engine of the car, the bendix with the gear engages in the flywheel standing still (There the starter gear comes into contact with the teeth flywheel), after entering the starter, current flows and the starter gear begins to rotate (gear rotation speed is 250 crankshaft revolutions per minute, respectively 4 revolutions per second), thereby (the starter gear engages with the flywheel) and the flywheel also begins to rotate, Well, together with the flywheel, the crankshaft rotates thanks to which the car’s engine starts, and when you remove your hand from the ignition key, it is pulled back with the help of a spring and thereby the bendix at the starter also returns to its place (the gear disengages with the flywheel), and this is how the car starts.
Note! Front-wheel drive cars are much more convenient to repair than classic ones, so replacing a starter in Samara doesn’t require a lot of tools or time (In classics, to remove the starter, you need to disassemble the engine a little because you can’t get to it, since it’s in very low convenient place), stock up on the most important thing: Wrenches and an inspection hole in order to crawl under the bottom of the car!
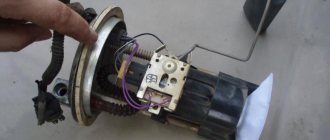
Where is the starter located? On cars of the Samara or Samara 2 family (It makes no difference), the starter is located in the same place, if you look from the top of the car, the first thing you will need to find is the battery (It is shown with a red arrow in the small photo), then by looking deeper into the engine compartment you can see the starter itself (it is indicated by a white arrow), the easiest way is to change it and look at it from the bottom of the car, that is, drive the car into the inspection hole and look at the starter from there (a large photo was taken from the bottom of the car) it will be inserted into the engine.
When should you replace the starter? When he stops starting the car, for example, you turn the ignition key and it clicks (You will immediately understand this when you encounter this problem), or you also turn the ignition key, the bendix does not engage and the starter idles (In this case, there will be a sound like if the starter spins, but the engine won’t start), well, another case is when the starter spins but very, very poorly (Slowly), here either your battery is dead, charge it in this case, or the bushings on the starter are damaged disrepair and the shaft has shifted in this case, replace the bushings with new ones or the starter itself, if you do not have the money to buy a new unit, but have a little time, you can remove the starter, disassemble it and change all the faulty parts in it, more details about For information on how to disassemble and reassemble the starter, read the article: “Repairing a starter on a car”, by the way, it says about replacing these bushings.
How to replace the charging relay?
Important! First, as always, we turn off the ground, remove the negative wire from the battery terminal, then remove the yellow wire going from the generator to the relay, then use a Phillips screwdriver to unscrew it; Then we take it out together with the brushes: Now we need to carry out diagnostics. To do this, we test the voltage on the brushes with a voltmeter, and we power the relay itself from the battery, “simulating” the rectified current of the generator
At the same time, we apply () to terminal “B”, to the yellow wire, and connect (-), “ground” to the other terminal. We are familiar with the signs of trouble. If you don’t have a tester, you can take a 1-3 W, 12 V light bulb. When installing a new relay, you need to press it firmly during installation, since new, unworn brushes provide more resistance.
In conclusion, let me tell you about several other reasons for the lack of charging or imitation, and also give advice:
- If you have a VAZ 2107 injector, then it is strictly not recommended to reset the battery terminal for various “checks” while the engine is running, and especially to allow strangers near the hood for this purpose. This is very harmful to electronic “brains”.
- It is advisable for those who like to “light up” to be able to say a firm “no” if you have a VAZ 2107 injector.
- On the instrument panel, the connectors are not soldered to the board, but riveted. Therefore, in some cars in the cold, while the interior is cold, there is no contact with the charging lamp. It lights up, simulating a lack of current from the generator. After the interior has warmed up, contact is restored and the lamp goes out.
- The next reason for those who like to go to the car wash in the cold. When water gets into the relay and brush assembly and freezes there, there is no charging. The solution is to heat it with any powerful hairdryer.
Article number and approximate price for the original VAZ 21099 starter
The original starters for the VAZ 21099 have a factory index of 29.3708 and 5712.3708. For a new product, the car owner will need to pay more than 3,000 rubles. The wide popularity of the VAZ 21099 led to a large number of used starters for the car at car dismantling yards. For a supported node you will need to pay from 1200 rubles. The problem with such a purchase is the inability to determine the residual life of the product.
Starters for VAZ 21099, which go on retail sale, have article numbers 21130370801000 and 2108370801006. Their price starts from 3,200 rubles. The nodes have similar operational characteristics.
Dismantling and replacement
To make it more convenient to replace the relay, it is recommended not to be lazy and still remove the starter itself. This will allow you to simultaneously check the condition of the starter while replacing the relay.
The removal procedure described below concerns an assembled relay, which has the ability to replace individual structural elements.
- Disconnect the negative terminal from the battery.
- Disconnect the red terminal from the relay. This is a red wire.
- Using an 8 mm wrench, unscrew the nut securing the brush assembly. You will find it behind the relay.
- Remove the contact that this nut held in place.
- Unscrew the fastening of the solenoid relay to ground. We are talking about coupling bolts.
- Next, you need to dismantle the power wire, after which the relay itself is pulled out.
- The fastening nuts are unscrewed from the end part, which allows you to remove the upper part of the relay.
- It is advisable to immediately replace the relay core with a new one.
- Install a new relay.
- Proceeding strictly in reverse order, reassemble the assembly, which will allow you to complete the replacement of the unit.
- When separating the relay into its two component parts, be sure to ensure that the core does not slip out and the spring does not jump out.
We can say that replacing the gearbox on a VAZ 2114 is not so difficult. It is much easier to replace a non-separable relay, since to replace it it is enough to unscrew all the fasteners in the same way and disconnect the contacts.
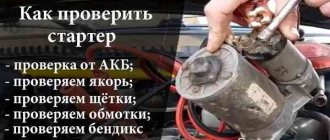
Do-it-yourself starter repair in a VAZ 2108
The starter of the VAZ 2108 car is the most frequently broken part
Therefore, it is important to be able to repair and replace it yourself, without resorting to the services of car services, it will be much cheaper. This simple step is easy to do by following the detailed instructions. The main task of the starter is to convert mechanical energy into electrical energy in sufficient quantity to start the engine
The main task of the starter is to convert mechanical energy into electrical energy in sufficient quantity to start the engine.
Starter VAZ 2108
Long-term operation of the starter is contraindicated, but car enthusiasts do this a lot, especially in low temperatures in winter. This use is one of the most common causes of VAZ 2108 starter failure.
The most common breakdowns are:
- The relay does not work and the armature does not turn;
- Low armature rotation speed;
- The crankshaft does not rotate;
- The starter continues to operate even though the engine has already started.
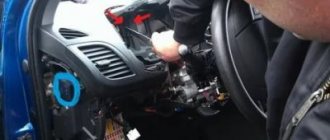
All these problems require repair. To carry out repair work, you will need to remove, check and disassemble the starter of the VAZ 2108.
How to remove the starter?
- Place the VAZ 2108 car on an inspection hole, overpass or on a jack;
- Place the gearbox in neutral;
- Remove the shield;
- Pull the hose out of the air collector;
- Remove the starter.
How to check the strater?
In order to check the windings you will need a multimeter.
- Place the part on its end, with the leads of the windings pointing upward;
- One probe of the device must be applied to the positive terminal, the other to the starter bolts;
- We check whether the starter turns or not;
- If it turns poorly, it means the starter is not working;
- If the starter is working well, you need to check the relay;
- To test the relay, pass a voltage of 12 V to the terminal, apply the minus to the body;
- If the ohmmeter does not show voltage surges on the scale, then the relay needs to be repaired or replaced. The VAZ 2108 relay needs to be disassembled only if it requires repairs.
Check the surface of the commutator and the armature, clean them of dirt with a cloth soaked in alcohol. There is no need to use acetone or other strong solvents for this purpose. The core and cage also need to be wiped dry and treated with a small amount of silicone grease.
How to disassemble the starter?
Prepare a free work surface and a set of tools. Inspect the VAZ 2108 starter carefully before you start disassembling it. Mark the wires so as not to mix them up during assembly.
Anchor VAZ 2108
- Using a 10mm wrench, unscrew the two stud nuts;
- Remove the starter and armature from the studs;
- Remove the center gear from the armature shaft;
- Unscrew the two screws of the back cover;
- Remove the back cover;
- Remove the brushes;
- Remove the anchor;
- Remove the adjusting washer from the armature axle;
- Remove the armature shaft support;
- Remove the drive planetary gears;
- Remove the drive;
- Separate the support from the lever;
- Place the end part of the ring gear on a block of wood;
- Place the 13 key on the restrictor ring according to the instructions;
- Use a hammer to compress the locking ring;
- Remove the locking ring;
- Remove the drive gear travel limiting ring;
- Remove the drive assembly;
- Unclench the retaining ring with pliers;
- Take it off;
- Remove the washer and drive shaft support;
- Remove the planetary gear ring gear from the drive shaft;
- Inspect the commutator and armature windings (there should be no traces of charring);
- Scratches on the commutator must be treated with fine-grained sandpaper;
- If the anchor is badly burned or worn out, it must be replaced with a new one;
- The shaft neck also needs to be treated with fine-grained sandpaper if scoring or enveloping of bearing materials is detected;
- Carry out a control measurement of the armature winding with an ohmmeter to detect short circuits;
- Check the brushes for wear, replace if necessary;
- Reassemble according to the instructions, but in reverse order;
- Before installing the brush holders, you need to remove all the springs and push the brushes into the guides.
This instruction will enable both beginners and experienced car enthusiasts to save money on starter repair and replacement services.
The fastest and most cost-effective upgrade is installing coolers
The standard heater of the VAZ 2105 does not always cope with cold winter weather. Do-it-yourself modification of the VAZ-2105 stove will not require too much labor and money if the car owner decides to modify the standard equipment by installing coolers on the side deflectors. It is worth noting that absolutely everyone should improve the heating equipment of the VAZ-2105, since due to the irrational design, all the air entering the cabin goes down. Thanks to the installation of coolers, which are usually included with PCs, you can adjust the air flow going to the sides. Experts recommend purchasing devices that can make at least 1500 revolutions per minute. Despite the fact that a do-it-yourself modification of the VAZ-2105 stove will not require much expense and time, it will help increase the level of comfort.
How does it all work?
First you need to understand how everything works. So, on the VAZ-2107, the on-board network is powered from two sources - the battery and the generator. The first provides electricity to all consumers until the power plant is started. The battery itself is a storehouse of electrical charge, which it releases when needed.
A generator is a unit that generates electricity, but for this it is necessary that it perform a mechanical action (its rotor rotates). In order for the generator to operate and power the network, it is driven from the crankshaft via a belt drive.
Everything works simply: to start the engine, the battery energy is supplied to the power electric motor - the starter, as well as the ignition system. After the power plant starts, the generator will be driven by the drive, the generated energy of which will power all devices. It will also be supplied to the battery to restore the charge spent on starting the power plant.
Recharging the battery from the generator must be carried out without fail, otherwise after several starts of the power plant, the loss of electricity in the battery will be significant (the battery runs out), and it will simply not be able to start the engine.
In order to monitor charging, a warning lamp and a voltmeter are installed on the dashboard of the VAZ-2107. Thanks to these control devices, it is possible to detect that the battery is not charging.
If the entire circuit through which the battery is recharged is in good condition, then after turning on the ignition, the charge indicator lamp lights up, but after starting the engine and entering the operating mode, it should go out, which indicates that voltage is supplied to the battery. In this case, the arrow on the voltmeter should be in the green zone, indicating that the voltage parameters correspond to the norm. But if, after starting the engine, the lamp lights up and “blinks”, while the arrow may twitch, this indicates a malfunction.
It should be immediately noted here that it often happens that the battery icon is on when the engine is running, but the voltmeter shows that charging is in progress. In general, the behavior of this system can be very different - charging is not happening, it is, but control devices show the opposite, recharging periodically disappears, but then is restored. In this case, there is a possibility of undercharging or overcharging, which are detrimental to the battery. A weak battery will eventually lead to it being completely discharged over time and making it impossible to start the car.
Starters for VAZ (Lada) 2107
for repair of VAZ (Lada) 2107 BATE geared starters have become famous for this behavior, in frosty temperatures from -5 in the morning it turns very hard and at the same time the battery sits down accelerated, because there is a jam in the filling of the starter (I came across pictures of analysis, everything moves out of its proper place, magnets etc).
The choice fell on the startvolt gearbox. It turns vigorously, drops to 11.5 volts, the sound is like a foreign one)) so far I’m happy.
I put the Chinese Cargo at seven, everyone said s... nya, I drove with it for 4 years and sold the car, I still run with it. It turns like crazy, the car starts perfectly, I think everything will be fine.
Write your review about starters
Why is the battery charge light dim?
If the lamp burns dimly, then the generator voltage is less than the battery voltage, i.e. ... If the lamp burns dimly or blinks with a known good battery, then the reason is in the generator (brushes or voltage regulator) or its harness - the belt or charging wire.
Interesting materials:
How to smooth corners in Corel Draw? How to group pictures in Excel? How to group a table? How do husband and wife sit at a wedding? How much does Stapel shrink? How hard does the kebab cook? How to sync sounds to iPhone? How to scan to Canon 4410? How to scan with HP Ink Tank 315 printer? How to scan directly into Word?
Device
You may be interested in: How to clean carbon deposits from pistons? Methods and means for cleaning pistons from carbon deposits
A mechanism such as a starter plays a very important role in the starting system of the VAZ-2105. It is an electric motor with a voltage of 18 volts. The block consists of the following elements:
- starter anchor;
- collector plates;
- poles, or cores;
- overrunning clutch (Bendix);
- steel cylinder.
The device also includes 4 excitation windings located inside the walls of the block housing. The VAZ-2105 starter injector has a similar structure. The service life of this part may vary. Typically, breakdowns occur no earlier than the car has traveled 80-90 thousand km, and with regular maintenance this figure can be up to 150,000 km.
You will be interested in: “Nissan Qashqai”: dimensions, description, characteristics and reviews
Fine for driving without lights during the day
Daytime is characterized by a reduced risk of accidents, since all approaching objects are clearly visible in conditions of unlimited visibility.
However, a motorist may receive a fine in cases where the vehicle does not have lights on:
- headlights, which are used to illuminate nearby inverter elements;
- fog lights;
- daytime running.
Most modern cars already have the function of automatically turning on the light mechanisms when the power unit starts operating. This feature not only virtually eliminates the possibility of receiving a fine, but also increases the level of traffic safety.
Older car models require manual activation of the lighting equipment. Drivers do not always notice the violation in a timely manner, for which they receive unexpected fines. This is explained by the fact that in the daytime it is quite problematic to notice unlit headlights. Often, traffic police officers do this earlier than vehicle owners.
The absence of lighting when a vehicle is moving is sanctioned by the state. The prescribed penalty is prescribed in Article 12.20 of the regulatory document of the Russian Federation, regulating the features of administrative proceedings. If the lighting elements are not turned on during the day, the driver will receive a fine of 500 rubles or a warning.
Diagnostics
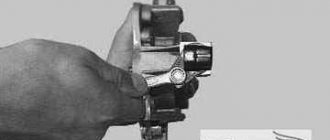
To understand which part of the starter the breakdown occurred in, you should thoroughly clean it. First, the solenoid relay is checked. If it is working properly, a loud click will be heard. Another evidence of the serviceability of this mechanism is that the bendix moves slightly forward. The absence of a click indicates that the relay is broken and needs to be replaced with a new one.
If the problem is not in this part, then you need to make sure that all the insulation is in good condition. All damage can be restored with impregnating varnish and then checked with special electrical measuring instruments.
When, after a complete inspection, all parts are found to be in good condition, the rotor insulation must be checked. Traces of burning and soot on the anchor indicate that this device needs to be replaced. The collector must be clean, free of deposits, and if this defect is present, you can clean the element with sandpaper. After all procedures, the coupling is checked. It should spin freely in one direction and be locked in the other.