Theory “on fingers”: how everything works
On the VAZ 2107, devices can receive power from 2 sources. The first is the battery, the second is the generator. The battery supplies energy when the engine is turned off. It has a certain charge, consumed as needed. The generator produces electricity, but only if the rotor is spinning. That is, with the engine running.
Battery operation diagram: 1. Battery, 2. Negative diode, 3. Additional diode, 4. Generator, 5. Positive diode, 6. Stator winding, 7. Regulator, 8. Rotor winding, 9. Capacitor, 10. Mounting block, 11. Control lamp, 12. Voltmeter, 13. Ignition relay, 14. Lock.
The battery charge is used to start the engine. When the engine starts running, the battery energy is not consumed: the generator supplies all devices with it. A charge is also supplied to it to restore wasted energy. But if the battery is not charging, its own energy will be enough for a limited number of starts. The battery will then be completely discharged. And the car owner will have to solve the problem of how to start a VAZ 2107 if the battery is dead. After all, not everyone has “crocodiles” in their trunk, and not everyone will agree to share electricity with their battery.
Car modifications
VAZ-2105 . The base model was produced in 1979 with a 1.29-liter carburetor engine producing 63.6 horsepower. It was equipped with a 4-speed gearbox.
VAZ-21050 . The same model of the five, but with a 5-speed gearbox.
VAZ-21051 . Modification with a VAZ-2101 carburetor engine with a volume of 1.2 liters and a power of 58.7 horsepower, a 4-speed gearbox as in the basic version.
VAZ-21053 . Modification with a VAZ-2103 engine with a volume of 1.45 liters and a power of 71.4 horsepower. It was equipped with both 4 and 5-speed gearboxes.
VAZ-21053-20 . Modification with a VAZ-2104 injection engine with distributed injection, volume 1.57 liters and 82 horsepower. The gearbox is 5-speed.
VAZ-21054 . A special modification for the needs of no less special services, such as the traffic police, the Ministry of Internal Affairs and the FSB. It was equipped with a VAZ-2106 carburetor engine with a volume of 1.57 liters and a power of 80 horsepower. In addition, an additional gas tank and battery were installed.
VAZ-21054-20. Another special modification, but with a more powerful VAZ-21067 engine with distributed injection, 82 horsepower, which meets the Euro-3 environmental standard. The gearbox is 5-speed.
Useful tips
Recommendations that will be useful during operation and maintenance of the battery to extend its operating time:
- test the battery from time to time and recharge it from the mains as often as possible (at least once a quarter);
- Make sure that the generator, wires, and car voltage regulation functions are in good condition to ensure the battery is properly charged while traveling;
- measure current leakage;
- measure the density of the electrolyte substance after full charging, compare the numbers from the table above, correct the situation if necessary;
- Keep your car battery clean to minimize leakage current.
Do not short-circuit the output terminals of a car battery, as the consequences in this case will be disastrous.
Types of relay regulators
All regulators that were used on VAZ cars at different times can be of only two types:
- External regulator.
- Three-level internal regulator.
Starting with the 2105 and 2107, the factory installed only internal relays on the alternator. External ones were used on older models and they were removed from the generator, since they were not particularly compact. On these machines, the relay was installed under the hood on the mudguard on the left.
If there was a need to replace the external regulator, then this was done easily and simply - it was in an accessible place, attached directly to the body with self-tapping screws, and was simply removed. The main thing that needed to be taken into account when replacing it was the correspondence of the terminals to pins 67 and 15. It was enough to simply check the correct connection of the new relay using the diagram, start the engine and take the measurement again.
Let's summarize:
As you can see, there are many reasons why the battery does not have charge. At the same time, a number of problems when the battery does not charge are common to different cars (for example, a VAZ 2107 is not charging or the battery of a foreign car is not charging). Moreover, some of them can be easily detected and eliminated with your own hands. The main thing is to determine why the battery is not charging, after which appropriate measures are taken.
Finally, we note that even ordinary car enthusiasts usually do not have problems with cleaning the terminals and restoring the integrity of wires and contacts. If the problem is with the generator, if you do not have the skills to repair it, it is only recommended to dismantle it yourself and then transfer the generator to a specialized service for repair. This will allow you to avoid common mistakes that are made when repairing a generator with your own hands, and also obtain a guarantee for the repaired device.
Source
What to do if the battery on a VAZ 2107 (injector) does not charge?
There are two energy sources in a car. Battery and generator. Moreover, the generator is the main one, since it is able to charge the battery while driving. In the most extreme, desperate cases, battery energy can be used. According to various estimates, in the most optimistic case, you can drive about 100 km on a flat road on a battery. In this case, the headlights should not be turned on, the heater should not be turned off, and, preferably, the ambient temperature should be low and the speed should be constant so that the radiator fan does not turn on. And the battery will be fully charged. Only in this case all the energy will go into the “spark”.
If the VAZ 2107 engine (injector) is running and there is no battery charge, there may be many reasons.
Let's start with the generator. The VAZ 2107 (carburetor) has an alternating current generator (model 372.3701), and an alternating current rectifier is built into the design. This is a synchronous three-phase motor.
The reasons why the battery is not charging can be common, regardless of whether you have a carburetor or an injector. Let's consider the reasons when the generator is to blame, that is, there is no voltage at its terminals. This can happen because the rectifier bridges (diode), the winding and many other reasons have burned out.
Attention! Before claiming that charging has disappeared specifically in the VAZ 2107 generator, check:
- If there is incoming voltage at the generator, this does not yet prove that it is the generator that is damaged and there is no outgoing current. After all, diodes supply current to the excitation winding of the generator. In this case, the battery charge lamp will light up on the dashboard.
- It is also worth measuring the voltage in the network with a tester. If it is below 12 V, then most likely there is a short circuit somewhere, and in this case the wiring may heat up intensely.
- You should check the generator belt, or rather, its tension. If it is loosely tensioned, then instead of driving the generator rotor, the belt slides along it itself, since there is no contact.
- The generator charging relay has failed. We need to talk about this separately.
The charging relay on the VAZ 2107 (injector) is located in the same housing with the brush mechanism, and its task is to stabilize the output voltage. Several years ago there were relays that were stamped into a printed circuit board and were located under the instrument panel and were non-separable. In the figure, the relay is indicated by an arrow. In everyday life, due to its characteristic shape, it is called a “tablet”.
Now, with the development of microelectronics, the printed circuit board is successfully replaced by a semiconductor relay. The sizes have become smaller, and there are no problems with installation.
VAZ 2107 The generator does not charge. The control lamp does not work.
Similarly, you can continue checking with the ignition on. A melted positive wire is caused by a large current, such as the one that goes to the starter. Current is supplied to the main terminals of the starter through a thick wire, bypassing the fuses (from the fuse, current through a thin wire goes only to the starter relay drive). Check the thick wire that goes to the starter, there is a terminal in the shape of the letter “G”. — If the nut on the terminal is loose, then the terminal may tilt and, with a strong impact or shaking, touch the engine block, and the battery jumper would immediately burn out (it is unlikely that the wire itself).
If dirt has accumulated there, then a current leak may occur, which will negate the charging of the battery. If everything is in order with the terminal of the thick wire to the starter, then I would remove the starter itself, its relay and check, clean and file the terminal of the main contacts and the relay contacts themselves. Maybe somewhere in the starter it periodically shorts out, maybe it doesn’t turn off completely, and there’s a leak through it. Since the starter has been removed, it wouldn’t hurt to send it for diagnostics. Sorry if I'm wrong and distracting with my guesses.
How to determine the charge level?
Primary control of the charge level on the VAZ 2107 is carried out by instruments on the panel: a control lamp and a voltmeter. If the charge is normal, the indicator arrow will be in the green area, and the control lamp should go out when the engine is running.
To more accurately check the voltage level, you need a voltmeter. As mentioned earlier, the correct charge is 13.6 - 14.1 volts.
You can purchase a special automotive electronic voltmeter or one combined with a watch. Installed both instead of the standard clock and on the dashboard.
Preparing to Troubleshoot
If a problem is detected, we begin diagnostics. First, let's prepare the tools.
- Multimeter (voltmeter);
- Emery cloth or needle file;
- Knife;
- Pliers;
- 12-volt indicator lamp (control).
Device Description
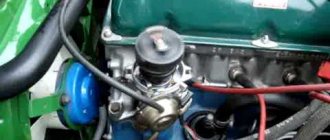
On the VAZ 2105, generator units G 222 were first installed, and since 1987, model 37.3701 began to be installed. The device is a 3-phase electromechanical machine with an electromagnetic exciter that converts the mechanical energy of a rotating rotor into electrical energy. Rotations are transmitted to the rotor through the VAZ generator drive belt, mounted on the crankshaft pulley. The unit is located on the right in the engine compartment in front of the engine.
Device design diagram
In the design of the generator unit:
- stator;
- rotor;
- graphite brushes of the VAZ generator;
- voltage regulator;
- rectifier;
- relay-regulator.
Generator connection diagram
The maximum output current of the generator unit is 55 (45) Amperes. The operating voltage is 13.6-14.6 Volts. Right rotation.
Sometimes, after repair or tuning, generators from a VAZ 21053 or 2108 are installed on models manufactured before 1987. If the connection is incorrect and the circuit is violated, the battery will not charge.
CHECKING THE OPERATION OF THE GENERATOR
The VAZ 2114 generator should be checked every six months, even if the device itself is operating in normal mode.
The first signs of a malfunction, upon detection of which it is necessary to check the generator on the VAZ 2114:
- The battery light on the instrument panel glows excessively brightly even when the engine is running, this indicates that the battery is overcharged;
- The battery light does not light up after the ignition is activated, the turn signals, wipers and similar devices do not turn on - the battery is not charged because the generator is not working;
- The generator is very noisy
Now let's figure out how to check the generator. To do this, we need a multimeter; you can purchase it at any auto store for 400-600 rubles. The check is performed according to the following algorithm (the method can be used on the VAZ 2113 and VAZ 2115):
- Turn on the ignition. We make sure that all the dashboard lights are on;
- Let's start the fourteenth. The battery light on the dashboard, if the device is working properly, should go out;
- Warm up the engine to operating temperature (90 °C). Now you need to create the maximum load on the car’s electrical network, for this you will need to turn on all the devices that consume electricity - the radio, high beams, stove, cigarette lighter, heated glass;
- Set the multimeter to voltmeter mode. Here we need an assistant who will sit in the driver’s seat and maintain engine speed at 3200-3500 rpm;
- We connect the multimeter probes to the battery. During the heaviest load on the on-board electrical network, the generator must produce a voltage of at least thirteen volts. If the multimeter shows a reading less than the required one, it means that due to a malfunction, the generator on the VAZ 2114 produces low voltage;
- Next, turn off all energy consumers and check the electrical appliance at minimum load. We do the same thing - we take measurements when the engine is running at 3200-3500 rpm. Now the multimeter should show at least 14.7 Volts.
Checking with a multimeter
Knowing how many volts the generator on the VAZ 2114 should produce, after detecting inconsistencies, it is necessary to begin troubleshooting and, if necessary, repair or replace the device.
Questions from readers
And now I would like to answer questions from our readers!
The lamp does not light, the voltmeter needle remains at zero when the ignition is turned on.
We check the wires on the generator to see if the wire has come loose from terminal “61”. If everything is normal there, you need to check whether there is a “plus” on this wire using a test lamp, an indicator screwdriver or a multimeter.
If there is a “plus” , we check the “tablet” (aka “chocolate”) and the generator. There is no “plus” - you will have to remove the instrument panel and check the lamp. Replace the burnt out one.
Let's start the engine . The control lamp should go out, the voltmeter needle goes into the green sector and is located from the middle to the right edge (photo). If everything is so, then most likely the generator is working normally .
The lamp does not light up, the voltmeter needle shows normal
Check fuse No. 10 in the mounting block. 99% of the time it will be burnt out. In this case, all other lamps on the instrument panel will also be de-energized. Replace it with the same one and test again. If the fuse burns out again, you need to look for the cause, that is, a short circuit. We check whether the wires from the generator are disconnected, whether the insulation is frayed somewhere, etc.
The lamp remains on or dims slightly
If you give it gas, it goes out at high speeds and lights up again when they decrease. The voltmeter needle is in the white sector and goes to the edge of the green when the speed increases. The generator output is faulty. The same conclusion if the lamp continues to light at any speed, and the voltmeter needle is in the white sector and even goes to red.
If the generator seems to be working, but the battery is gradually discharging, we will perform another check. We start the engine, turn on the heater fan and low beam, take the key to “10” and, loosening the negative terminal of the battery, remove it. An idling engine (about 900 rpm) should not stall. If the engine stops, put the terminal back in place and start it again. While holding the speed at 1200-1500, remove the terminal again. Has the engine stalled again? Then turn off the headlights, leave the heater fan on and repeat the test. Now the engine with the negative terminal disconnected from the battery continues to run. output works, but does not produce the required current; it needs to be repaired.
Troubleshooting yourself
It’s wise to start car repairs by looking for the simplest faults, in our case mechanical damage. You should inspect the drive belt, adjust its tension, and rule out a malfunction of its brush mechanism. You can tighten the fastenings of the power wires. If this work does not bring results and the on-board network voltage on the VAZ 2114 is still low, then you can begin to disassemble the entire assembly and carry out a full diagnosis of it.
Checking the generator winding
The stages of work, as in the first case, should preferably be carried out from simple to complex:
- Check the regulator to see if it is in working condition.
- Check the voltage on a cold motor, it should be no less than 14.5 V.
- Turn off the car engine and disconnect the battery terminals.
- It is imperative to disconnect the electrical wiring from the unit to be repaired.
- Carefully remove the protective cover from the electrical contact unit.
- Remove the wiring block and regulator.
- Check the condition of the brushes and brush holder; if they are faulty, replace them with new ones.
- Make sure the regulator (tablet) is working properly. This can be done using a battery, two regular batteries (finger-type batteries) and one 12 V incandescent lamp. To determine the operating status of the regulator, it is necessary to alternately apply voltage of 12 V and 15 V. The lamp on the brushes should be lit.
- If a regulator malfunction is detected, you must buy a new one and replace it.
- Check the diode bridge. Replace the faulty spare part with a new one by removing the generator from the car.
Checking the diode bridge
- If you have minimal knowledge of an electrician and armed with a multimeter, check the functionality of all diodes (six power and three additional). To do this, you need to unscrew the nuts securing the spacer bushings, disconnect the wires and remove the horseshoe.
- Check the generator winding. If a breakdown is detected, it must be replaced.
- Disconnect the battery using the following tools: - pry bar; — keys for 13 mm and 10 mm; — 3 socket heads for 13, 17 and 19 mm. First, you should remove the wire that powers the battery, then use a 13 mm socket to unscrew the 2 bolts that secure the adjustment bracket. After this, turning the generator, you can slowly remove its mounting axis to the bracket.
- Be sure to diagnose the performance of the front bearing assembly.
What to do if the generator does not work.
If the generator does not work, then the red battery discharge light continues to light when the engine is running.
It is necessary to check whether the alternator belt is in place or not and check its tension
You need to check the 10th fuse
Check the voltage at the output of the wire to the voltage regulator, at point B, should be 12 Volts.
Check for the presence of positive voltage from the battery at the power output of the generator.
If there are positives at both points, but the generator does not work, you can try replacing the voltage regulator without removing the generator. This is difficult to do, and impossible on old rusty generators. You'll have to remove the generator.
If the generator is very old, it must be replaced. See generator repair
If the battery is discharged and the light does not light, then you need to check the voltage with a voltmeter. If the voltage on the battery is above 13.5 Volts, then the generator is working, but the battery is no longer suitable.
If the voltage is less than 13.5 Volts and the light does not light, then you need to check the 9th fuse, there may be an open circuit in the control light circuit, or the PC 702 relay is faulty. If you have fixed the problem with the light bulb, then you need to find the cause of the low voltage and the generator malfunction.
You need to pay attention to the voltmeter. If the voltmeter needle moves into the red zone of the scale, then the voltage has become higher than normal.
At the same time, the battery will become wet, an acidic smell will appear, the lights will burn brightly and blink. This happens if the voltage regulator has broken. You need to measure the voltage on the battery, make sure that it is more than 14.5 Volts, the regulator is definitely broken and needs to be replaced. If the regulator is in an aluminum case, then the I 112V tablet is installed in it; it should not be confused with the I 112A tablet, and even more so, with the I120 tablet, which is similar in appearance
The letters on the regulator Ya 112 In many of its analogues with other designations should be BVSh, if VVSh, then this is Ya 112A and it cannot be put.
More modern single-case regulators for G 222 generators with a brush assembly are much more reliable.
Features of the generator device
The generator housing consists of two covers made of aluminum alloy, tightened with four bolts and nuts, between which a round stator core is clamped. Rotor bearings are installed in the covers: the front one is in a through bearing, the rear one is in a blind seat of the cover. The rotor rotates inside the stator and housing on two bearings. The front end has a slot for a key and a thread for the fan nut. An adjusting washer is installed between the front rotor and the front bearing, which is often forgotten to be installed when repairing the generator. At the rear end of the rotor shaft, in front of the rear bearing, two copper slip rings are pressed in, insulated from the shaft and connected to the ends of the field winding.
A BPV6-50 rectifier is installed to the inside of the back cover. It consists of two horseshoe-shaped aluminum buses insulated from each other, into which three silicon diodes (valves) of the BA-20 type are pressed. The internal bus is isolated from the housing, but is connected to the generator terminal bolt “30”, while the other has contact with ground. The legs of the diodes in pairs from each bus are bolted to the ends of the phase windings of the stator, and their other ends are connected together - a star connection. In the G 222 generator, a wire goes from this point to a terminal on the back cover, from which a wire goes to terminal “85” of the RS-702 type charge indicator relay. There are no wires at 37.3701 from the common point of the phase windings.
Brushes are pressed to the contact rings of the rotor by springs, one of which is connected to terminal “B”, and the second to terminal W of the voltage regulator installed on the brush assembly in the upper rear part of the generator. In 37.3701 there are three diodes connected at one end to the phase windings, and the second are connected to one point, the wire from which goes to the regulator relay terminal Sh and terminal “61” on the rear surface of the generator. The diodes are connected in such a way that they pass positive half-cycles to pin “61”.
The electronic voltage regulator is non-separable and since 1996 has been installed in a metal case riveted to the brush holder. A capacitor is mounted between the housing and terminal “30”.
Generator connection diagram
Generator connection diagram for VAZ 2107
The VAZ 2107 charging scheme depends on what type of generator is used. To recharge the battery on cars such as VAZ-2107, VAZ-2104, VAZ-2105, which have a carburetor engine, you will need a G-222 type generator or its equivalent with a maximum output current of 55A. In turn, VAZ-2107 cars with an injection engine use a generator 5142.3771 or its prototype, which is called a high-energy generator, with a maximum output current of 80-90A. It is also possible to install more powerful generators with an output current of up to 100A. Absolutely all types of alternating current generators have built-in rectifier units and voltage regulators; they are usually made in the same housing with brushes or are removable and mounted on the housing itself.
The VAZ 2107 charging circuit has minor differences depending on the year of manufacture of the car. The most important difference is the presence or absence of a charge indicator lamp, which is located on the instrument panel, as well as the method of connecting it and the presence or absence of a voltmeter. Such circuits are mainly used on carburetor cars, while on cars with injection engines the circuit does not change, it is identical to those cars that were manufactured previously.
Generator set designations:
- “Plus” of the power rectifier: “+”, V, 30, V+, WAT.
- “Ground”: “-”, D-, 31, B-, M, E, GRD.
- Excitation winding output: Ш, 67, DF, F, EXC, E, FLD.
- Output for connection to the serviceability lamp: D, D+, 61, L, WL, IND.
- Phase output:
,W,R,STA.
- Output of the stator winding zero point: 0, MP.
- Output of the voltage regulator for connecting it to the on-board network, usually to the “+” of the battery: B, 15, S.
- Voltage regulator output for powering it from the ignition switch: IG.
- Voltage regulator output for connecting it to the on-board computer: FR, F.
Generator circuit VAZ-2107 type 37.3701
- Accumulator battery.
- Generator.
- Voltage regulator.
- Mounting block.
- Ignition switch.
- Voltmeter.
- Battery charge indicator lamp.
When the ignition is turned on, the plus from the lock goes to fuse No. 10, and then goes to the battery charge indicator lamp relay, then goes to the contact and to the coil output. The second terminal of the coil interacts with the central terminal of the starter, where all three windings are connected. If the relay contacts close, then the control lamp lights up. When the engine starts, the generator generates current and an alternating voltage of 7V appears on the windings. Current passes through the relay coil and the armature begins to attract, and the contacts open. Generator No. 15 passes current through fuse No. 9. Similarly, the excitation winding receives power through the brush voltage generator.
Possible generator malfunctions, their causes and methods of elimination
| CAUSE | REMEDY METHOD |
| The warning lamp lights up or lights up intermittently when the vehicle is moving. | |
| Alternator drive belt slipping | Adjust the belt tension |
| Break in the connection between plug “85” of the charge warning lamp relay and the center of the generator star | Check and restore connection |
| Charge warning lamp relay misaligned or damaged | Check the relay, adjust it or replace it |
| Open circuit in the power supply circuit of the excitation winding | Reconnect |
| The voltage regulator is misaligned or damaged | Clean contacts, adjust or replace regulator |
| Worn or stuck generator brushes; oxidation of slip rings | Replace the brush holder with brushes; wipe the rings with a rag soaked in gasoline |
| Open circuit or short circuit to ground of the generator excitation winding terminals | Connect the winding leads to the slip rings or replace the rotor |
| Short circuit of one or more "positive" valves of the generator | Replace the generator rectifier unit |
| Open circuit in one or more generator valves | Replace the generator rectifier unit |
| Break in the connection between plugs “86” and “87” of the charge warning lamp relay | Reconnect |
| Open circuit or interturn short circuit in the stator winding | Replace generator stator |
| The warning lamp does not light up when the ignition is turned on | |
| Burnt out filament | Replace the lamp |
| Charge warning lamp relay misaligned or damaged | Clean contacts, adjust or replace relay |
| Open circuit in the connection between plug “87” of the charge warning lamp relay and plug “I” of the fuse box | Reconnect |
| Short circuit of one or more “negative” generator valves | Replace the generator rectifier unit |
| Short circuit of the stator winding to ground | Replace stator |
| The generator is running, but the battery is charging poorly | |
| Weak belt tension; slipping at high speeds and when the generator is running under load | Adjust the belt tension |
| The fastening of the wire lugs on the generator and battery is loose; battery terminals are oxidized; wires are damaged | Clean the battery terminals from oxides, tighten the clamps, replace damaged wires |
| Battery faulty | Replace the battery |
| The voltage regulator is misaligned or damaged | Clean contacts, adjust or replace voltage regulator |
| The battery is being recharged | |
| Poor contact between ground and voltage regulator housing | Reconnect |
| The voltage regulator is misaligned or damaged | Adjust or replace voltage regulator |
| Battery faulty | Replace the battery |
| Increased generator noise | |
| Generator pulley nut loose | Tighten the nut |
| Fan blades are bent | Align the fan or replace it |
| Generator bearings are damaged | Replace bearings |
| Interturn short circuit or short circuit to ground of the stator winding (generator whine) | Replace stator |
| Short circuit in one of the generator valves | Replace the rectifier unit |
| Brushes creaking | Wipe the brushes and slip rings with a cotton cloth soaked in gasoline. |
The VAZ 2105 battery has boiled - what to do?
There are several reasons why batteries boil. Let's consider them in order of importance:
- Recharging the battery
- Short circuit of cans
- Sulfation of plates
- Electrical system overload
- Battery polarity reversal
If the battery boils on your car while driving, you must immediately take the following steps:
- turn off the engine;
- open the hood to provide air flow; if the battery has a jacket, remove it; Allow the battery to cool to a temperature below 40 degrees Celsius (easily determined by touching it with your hand); close the hood, start the car and drive to the nearest gas station;
- purchase distilled water and top up to the required electrolyte level;
- if the battery is maintenance-free, topping up can be done through the gas outlet;
- if the repair kit contains a multimeter, measure the voltage on the battery with the engine running; if the voltage exceeds 15 Volts, disconnect the thick wire of the generator, carefully insulating it and securing it to the nearest body element;
- Continue driving to the parking or repair site, turning off, if possible, all additional comfort devices (stove, car radio, air conditioning and others).
Upper left part of the VAZ-2106 wiring diagram
This diagram allows you to examine the elements of the front of the machine. Here are the following:
- Side left and right turn signal (1);
- Several sidelights (2);
- External (3) and internal (4) headlight samples;
- Connected sound signal (5).
Next are the internal elements of the car's electrical wiring, which are hidden under the hood and body. These include:
- Electric motor terminals for both fans included in the cooling system of the VAZ-2106 engine (6);
- A set of sensors responsible for the timely activation of the electric motor (7);
- 2 types of relays - one is used when turning on the sound signal (8), and the other when regulating the operation of the electric motor of the cooling system (9);
- Small voltage regulator in the car (10);
- Vehicle ignition system coils (11);
- 2nd electric motor, which is responsible for the operation of the windshield washer (12);
- One of the main sensors of the VAZ-2106 - it determines the level of brake fluid in the car and promptly gives the owner a command about non-compliance with the required standards (13);
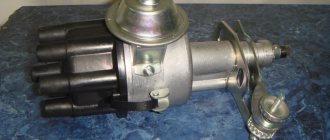
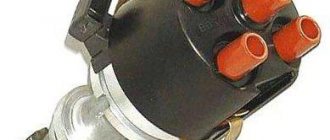
- Also marked in the center of the diagram are the ignition system distributor (14) and the motor for operating the windshield wiper (15).
This part of the circuit is completed by the following electrical equipment:
- Car spark plug set (16);
- Sensors monitoring the oil mixture pressure lamp (17) and a gearbox with an indicator of this pressure on the panel (18);
- Also shown is the connection of the sensor for the current temperature indicator in the engine coolant (19) and the engine compartment lamp of the VAZ-2106 (10).
Advice: if problems arise with the operation of the engine and specifically the chassis, first check the tire pressure in the car using the table - are all the wheels properly inflated? Then start researching your wiring problems!
Fuses and relays VAZ 2104, 2105
The mounting fuse block for VAZ 2104 and 2105 (carburetor, injector) is located in the engine compartment on the right side and is mounted on the front panel. This block is closed on top with a lid on which symbols are indicated with the purpose of the relay, numbers of fuses and protected circuits. Most car electrical circuits are protected by fuses that are installed in the mounting block.
| Fuse no. | Current strength, A | Protected Circuits |
| F1 | 10 | Tail lights (reversing lights). Heater motor Warning lamp and rear window heating relay (winding) |
| F2 | 10 | Electric motors for the windshield wiper and washer pump. Windshield wiper relay |
| F3 | 10 | Spare |
| F4 | 10 | Spare |
| F5 | 20 | Rear window heating element and heating relay (contacts) |
| F6 | 10 | Cigarette lighter. Portable lamp socket |
| F7 | 20 | Sound signals and relay for turning on sound signals. Engine cooling fan motor and motor switch relay (contacts) |
| F8 | 10 | Direction indicators in hazard warning mode. Switch and relay-interrupter for direction indicators and hazard warning lights in emergency mode |
| F9 | 7.5 | Generator voltage regulator (on vehicles with G-222 generator) |
| F10 | 10 | Turn indicators in turn signal mode and corresponding indicator lamp. Turn signal interrupter relay. Turn signal indicator Tachometer Fuel level indicator. Coolant temperature gauge. Voltmeter. Fan motor activation relay (winding). Battery charge indicator lamp. Indicator lamps for fuel reserve and parking brake activation. Warning lamps for emergency drop in oil pressure and insufficient brake fluid level. Indicator lamp for turning on the parking brake. Indicator lamp for covering the carburetor air damper (for a carburetor engine). Electric fan thermal switch. Carburetor pneumatic valve control system Generator excitation winding (generator 37.3701) |
| F11 | 10 | Rear lights (brake lamps). Body interior light |
| F12 | 10 | Right headlight (high beam). Winding of the relay for turning on the headlight cleaners (with the high beams on) |
| F13 | 10 | Left headlight (high beam). Indicator lamp for high beam headlights |
| F14 | 10 | Left headlight (side light). Right rear light (side light). License plate lights. Engine compartment lamp Indicator lamp for turning on side lights |
| F15 | 10 | Right headlight (side light). Left rear light (side light). Cigarette lighter lamp. Instrument lighting lamp. Glove compartment lamp |
| F16 | 10 | Right headlight (low beam). Winding of the relay for turning on the headlight cleaners (with the low beam on) |
| F17 | 10 | Left headlight (low beam) |
Diagnostics
To check the installed relay, simply measure the voltage at the battery terminals, and it will become clear what condition it is in. To check what has been removed and is suspicious, the verification method is slightly different, but in any case it will help to identify:
- Absence or poor contact in the brush holder terminals.
- Broken brush conductors.
- The relay itself is faulty.
A multimeter or a 12-volt test lamp, the power of which does not exceed 2 W, is simply connected to the regulator brushes. It is enough to apply 10-12 V, the lamp should light up or the multimeter should show the corresponding value. After this, a voltage greater than the nominal voltage is supplied - 16-20 volts. In this case, the relay should operate, but the lamp should not light. If the lamp continues to light when the voltage increases, then the regulator is broken and does not perform its functions. In this case it must be replaced
Also, when replacing, you should pay attention to the condition of the brushes. They should protrude beyond the brush holder by no more than 5 mm
This way you can test your regulator and save the battery from premature wear. Keep an eye on the network voltage, and have a good trip!
How to solve a problem
The procedure for finding the reason why the generator does not charge the battery:
- Check to see if the accessory drive belt (or alternator belt) is broken. If the belt is intact, check its tension.
- If the belt tension is normal, but the warning light is still on, check that the wiring harness block and the positive wire terminal are securely connected to the generator. Please note that wires may be broken or broken within the insulation.
- Check the reliability of the wire connections to the battery terminals.
- Check the integrity of the generator fuse in the engine compartment mounting block. Replace the blown fuse if necessary.
- If, after all the measures taken, the charging lamp continues to light while the engine is running, then most likely the generator is faulty (for example, the voltage regulator is faulty
How to check the operation of the generator
The battery in a car is an important element of the system, which is responsible for providing the car’s on-board network with electricity. The generator is used to charge the battery while it is active. Unstable operation of a device generating electricity causes a voltage drop in the network and failure to restore the capacity of the power source.
Normal generator performance means timely and complete replenishment of the battery charge level, which decreases under load. Checking the battery charge level from the generator is simple and can be done by the car owner himself.
Diagnostics of an automotive energy-generating device includes a visual inspection of the unit, its elements and related parts, as well as voltage and current measurements. At least twice a year, you should check the tension of the drive belt, excessive weakening of which leads to a decrease in the performance of the generator, and sometimes can lead to breakdown of the device. Once a year, you can check equipment elements - fasteners, diode bridge, voltage regulator and others. Timely maintenance of the battery will also guarantee the absence of problems - cleaning the terminals, adding distilled water.
Diagnostics of indicators such as voltage, current, resistance are also necessary twice a year. To carry it out, you will need special devices - a voltmeter, multimeter or load fork.
Reasons for the battery not charging
To start the engine and proper operation of the ignition system and other electrical circuits of the VAZ 2105, it is necessary to have DC voltage in the on-board network. When the engine is not started, the battery maintains the proper voltage. After the engine starts, the car's generator charges the battery and maintains the on-board voltage at 13.6-14.2 V.
Checking the battery charge using a voltmeter
Regardless of engine speed, the output voltage at the generator remains constant. A relay-regulator is responsible for this, which changes the voltage of the generator excitation circuit. If the voltage rises above the permissible level, the winding current decreases, reducing the output voltage. And vice versa.
If the VAZ 2107 has lost charging, the reasons may be as follows:
- Generator malfunction;
- break or poor contact in the excitation network or generator output voltage;
- broken generator belt.
Restoring normal operation of the generator should begin by determining the reason for the lack of battery charge.
VAZ 2105 generator malfunction
Experts suggest that on a VAZ-2107 with an injector, the standard generator is 5142.3771 (eight). It has one very important feature: it produces more current - not 55A per hour, like other generators, but about 80-90 A. This is due to the properties of the injector, which requires more electricity (but also has a higher power density).
Car battery current leakage
Experts advise checking the generator for malfunctions in the following order:
- inspect the diodes that supply electricity to the excitation winding of the generator (if they are burned out, they should be replaced with new ones);
- use a tester to measure the voltage level in the current-carrying circuit (if its value is less than 12 V, then there may be a short circuit, which means the wiring is overheating).
Break or poor contact in the excitation network or generator output voltage;
Often, symptoms that indicate characteristics of a faulty generator can also appear as a result of completely different problems. As an example, poor contact in the fuse socket of the generator field winding circuit will indicate a generator malfunction. The same suspicion may arise due to burnt contacts in the ignition switch housing. Also, the constant lighting of the generator malfunction indicator lamp can be caused by a breakdown of the relay; the blinking of this switching lamp may indicate a generator malfunction.
Broken alternator belt
As a rule, the generator belt breaks due to its wear. While working, it is under a fairly decent load, and although modern belts are made of very durable materials, over time the following appear:
- abrasions;
- cracks;
- teeth wear off;
- the edges are fraying.
If you find at least one of these signs, then do not delay replacing it; the consequences will not take long to arrive.
A characteristic whistle can indicate that something is not right with the drive. This usually happens in wet weather. It happens that it disappears while driving, but sometimes it doesn’t. This occurs due to the weakening of the belt tension. Sometimes it is enough to use tension mechanisms to tighten the belt more, but, as a rule, it needs to be replaced. You can replace the drive yourself - this is not a difficult job, or you can contact a service station. It's up to you, but he should be fine. If the alternator belt breaks, don’t worry. This is a non-critical failure. It’s just that now, when you start driving, the battery will stop charging, and the systems will begin to intensively consume battery energy.
POSSIBLE FAULTS
If in maximum load mode the generator produces 12 Volts on the VAZ 2114 (a very low indicator indicating a breakdown of the unit), it is necessary to look for the reasons for its malfunction. It could be:
- Loose belt tension;
- Failure of the generator circuit - the mass has oxidized or the wiring has frayed;
- Faulty voltage regulator;
- Worn or damaged brushes;
- Bearing wear;
- The fuse has blown.
To increase the generator voltage on a VAZ 2114, it is necessary to identify the exact reason why the device is not functioning correctly.
First, check the belt tension - when you press moderately hard with your finger, the belt should not be pushed through by more than one centimeter. The integrity of the external wiring and oxidation of the mass is checked by visual inspection.
Next, we check the voltage regulator, this is done with a multimeter. We connect the device to the generator outputs. With the fourteenth wheel turned on, the tester should show a voltage of 14-14.2 Volts. Now the assistant needs to press on the accelerator; if, as the speed increases, the voltage changes by more than 0.5 Volts, then the regulator is not functioning correctly.
Now you need to check the diodes. We switch the tester to ringing mode and alternately short-circuit the multimeter probes on each of the diodes. The tester should emit a sound signal only when testing in one of the directions; if the tester beeps in each direction, the diode is broken.
Make sure the generator set is working properly!
VAZ 2105 injector diagram
1 – electric motor of the engine cooling system fan; 2 – mounting block; 3 – idle speed regulator; 4 – electronic control unit; 5 – octane potentiometer; 6 – spark plugs; 7 – ignition module; 8 – crankshaft position sensor; 9 – electric fuel pump with fuel level sensor; 10 – tachometer 2105; 11 – control lamp “CHECK ENGINE”; 12 – car ignition relay; 13 – speed sensor; 14 – diagnostic block; 15 – nozzle; 16 – adsorber purge valve; 17, 18, 19 – injection system fuses; 20 – ignition relay for the injection system; 21 – relay for turning on the electric fuel pump; 22 – intake pipe electric heater relay; 23 – electric heater of the intake pipe; 24 – intake pipe heater fuse; 25 – oxygen concentration sensor; 26 – coolant temperature sensor; 27 – throttle position sensor; 28 – air temperature sensor; 29 – absolute pressure sensor;
- A – to the “plus” terminal of the battery;
- B – to terminal “15” of the ignition switch;
- P4 – relay for turning on the fan motor.
No battery charge VAZ 2105
Re: Charging disappears. I accelerate the speed to 3500, it appears
Unread message Violent » Sun Jul 25, 2010 6:12:01 AM
Re: Charging disappears. I accelerate the speed to 3500, it appears
Re: Charging disappears. I accelerate the speed to 3500, it appears
Unread message Bars87 » Sun Jul 25, 2010 7:37:44 AM
It is categorically not recommended to do this - I know from my own experience, I have already burned an alarm unit in this way.
Is the alternator belt properly tensioned?
Re: Charging disappears. I accelerate the speed to 3500, it appears
Re: Charging disappears. I accelerate the speed to 3500, it appears
Re: Charging disappears. I accelerate the speed to 3500, it appears
Unread message megavolt » Sun Aug 15, 2010 21:48:32
Re: Charging disappears. I accelerate the speed to 3500, it appears
Unread message guest » Mon Aug 16, 2010 10:36:24
Re: Charging disappears. I accelerate the speed to 3500, it appears
Unread message dragon61 » Mon Nov 22, 2010 10:42:28
Re: Charging disappears. I accelerate the speed to 3500, it appears
Unread message from Olezhek » Mon Nov 22, 2010 10:48:09
People believe nothing so firmly as what they know least about, and no one speaks with such self-confidence as writers of all sorts of fables - for example, astrologers, fortune tellers, palmists. Religion, superstitions. Michel Montaigne
Re: Charging disappears. I accelerate the speed to 3500, it appears
Unread message dragon61 » Mon Nov 22, 2010 17:07:06
Re: Charging disappears. I accelerate the speed to 3500, it appears
Unread message by igor1c » Mon Nov 29, 2010 5:36:36 AM
oh how I also suffered with this crap, but FOUND FOUND. reason. The charge disappears because the terminals on the battery oxidize (visually, I personally don’t notice this), but after cleaning with sandpaper the charge appears, it’s also worth checking the ground (clean the wire terminal that goes to the body). Moreover, this happens to me once a month consistently, I coated the terminals with lithol so that they would not oxidize - to no avail. Only periodic cleaning of the terminals helps.
How to determine the lack of battery charge on a VAZ 2105
The easiest way to determine the lack of charging is using the car’s instruments, that is, the charging indicator lamp and the sensor (voltmeter) on the instrument panel. The sensor arrow should be in the green sector, and the battery lamp should not light up when the engine is running. Otherwise there is no charging.
But the best way is to check the voltage on the battery with a multimeter. When there is a charge, the voltage on it lies in the range of 13.6-14.2 V, and when there is no charge, it will only have its own voltage of 12 V (± 0.6 V). Under no circumstances remove the terminals from the battery to check to avoid damage to the RR, ECU and other electronic devices on your car.
To troubleshoot battery charging problems, you must use the following tools:
- control lamp 12 V;
- multimeter with a measuring range of up to 60 V AC and DC voltage;
- flat blade screwdriver;
- shaped screwdriver with a Phillips blade;
- pliers;
- knife;
- emery cloth.
What to do if the battery is boiling
The lamp goes out, the voltmeter needle goes to the right into the red sector, and there is a sharp “chemical” smell in the cabin. At idle, the needle is in the green sector, but as soon as you accelerate, it goes all the way to the right. This indicates that the voltage regulator (chocolate) has failed . If this happens, moving on is more expensive! All the electrical equipment of the car may burn out, and the battery will get damaged, the electrolyte will “boil”, the plates may become warped. To get to the repair site, you can temporarily turn off the generator by removing the wire from terminal “61” of the generator. You can drive for quite a long time on a good battery, just don’t forget to turn off unnecessary electrical appliances - heater fan, heated rear window, radio, etc. Headlights or running lights will have to be left.
Voltage too high (overcharge)
This article describes a simple way to determine if the alternator, voltage regulator, or connections between them are faulty. How to repair all this in the next article .
It turned out that the wire on the device in the plug had become loose and did not connect, the lamp came on when I fixed it and the charge started
I turn on the ignition, the right headlight is on and there is no charging
Discharged battery voltage
A battery whose terminal voltage is less than 11.6 volts is considered completely inoperative (discharged). In such a situation, the operation of an automobile energy source is impossible: the electrical equipment of the car will cease to function. That is, the battery needs to be charged.
A full discharge seriously affects the condition of lead batteries, which are especially sensitive to this problem. For such a battery to lose more than half of its capacity, just one deep discharge is enough. Batteries that contain antimony are more resistant to strong discharge. The same can be said about gel and AGM products. It is recommended to prevent the battery from being completely discharged, which will negatively affect its service life.
The winter period is worth mentioning separately. At this time, due to the slowdown of chemical reactions, the activity of the electrolyte decreases, which is fraught with its freezing. To prevent such an incident, it is recommended to maintain the voltage of a charged car battery and not allow it to drop below 12.5 V.
The VAZ 2105 battery has boiled - what to do?
There are several reasons why batteries boil. Let's consider them in order of importance:
- Recharging the battery
- Short circuit of cans
- Sulfation of plates
- Electrical system overload
- Battery polarity reversal
If the battery boils on your car while driving, you must immediately take the following steps:
- turn off the engine;
- open the hood to provide air flow; if the battery has a jacket, remove it; Allow the battery to cool to a temperature below 40 degrees Celsius (easily determined by touching it with your hand); close the hood, start the car and drive to the nearest gas station;
- purchase distilled water and top up to the required electrolyte level;
- if the battery is maintenance-free, topping up can be done through the gas outlet;
- if the repair kit contains a multimeter, measure the voltage on the battery with the engine running; if the voltage exceeds 15 Volts, disconnect the thick wire of the generator, carefully insulating it and securing it to the nearest body element;
- Continue driving to the parking or repair site, turning off, if possible, all additional comfort devices (stove, car radio, air conditioning and others).