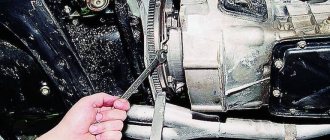
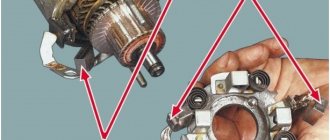
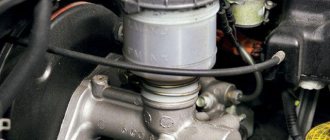
The VAZ 2109 5-speed manual transmission was produced at a plant in Tolyatti from 1987 to 2005 and was installed on all numerous AvtoVAZ front-wheel drive models on the 2108-09 platform. This transmission is designed for torque of power units up to 1.6 liters and 120 Nm. The ninth family also includes 5-speed manual transmissions: 2113, 2114 and 2115. The main thing you need is to constantly monitor its condition, control work processes and not subject it to strong stress. The VAZ 2109 gearbox is reliable, as well as low maintenance costs, since Russian parts are much more affordable than foreign ones.
Useful tips
It is extremely important to monitor the serviceability of the gearbox, and if signs of breakdown are detected, fix them immediately. Do it yourself or with the help of a car service - this is your personal decision.
When operating a car in city conditions, you have to change gears more often. Therefore, it is recommended to use motor oil here. This ensures that the synchronizers remain effective longer. Transmission oil is better suited for highways, increasing the life of bearings and gears, although the synchronizer lasts less.
Internal structure of the box
Oil disappears
Unlike engine oil, rarely does anyone check the transmission oil level. But in vain, because sometimes you can simply get a dry dipstick. If measures are not taken in time, increased noise will appear (since the gears are running dry). For what reasons does oil leak from the box? There are several factors:
- The crankcase cover does not fit tightly.
- Worn shaft seals.
- Loose oil drain cap.
- Cracks in the transmission pan (solved by replacing the element).
It is worth noting that if there is no or insufficient oil level, the box does not operate at its temperature range. Because in addition to its lubricating properties, this liquid takes on part of the temperature loads. If there are oil leaks, the box may simply overheat.
Device
To understand the essence of repairing, disassembling and assembling a gearbox, first of all you need to get acquainted with its structure. In the case of the VAZ 2109, the box structure is as follows:
- On the input shaft there is a block of drive gears that are in constant mesh with the driven gears of the gears when moving forward;
- The second shaft has driven gears with needle bearings. There is also a pair of synchronizers located there;
- The secondary shaft is created together with the drive gear of the main transmission;
- The driven gear of the main gear is attached to the flange of the two-pinion differential box;
- Differential bearings are always mounted with interference, which is adjusted by selecting rings of different thicknesses.
It is difficult or crunching to engage the gear
The problem is a consequence of the failure of synchronizers. The first and second gear synchronizers often wear out. At first, the driver notices difficulties when turning on the desired speed. Then all this begins to be accompanied by a crunch, like on the 53rd LAWN. Do not forcefully press the lever - this will damage the gear block. If there is a problem with the synchronizers, use double squeezing with re-throttle. This is the only way to preserve the gearbox elements while moving to the repair site.
If the box begins to knock when moving, most likely a tooth on the shaft gear or main pair has broken. The element cannot be repaired and must be replaced entirely.
Malfunctions and their elimination
Gearbox repair largely depends on the nature and type of fault. There are several options for the breakdown of this unit, in each of which appropriate actions should be taken to eliminate them.
| Malfunction | Possible reasons | What do we have to do |
| There is noise in the gearbox |
|
|
| Gears are difficult to shift |
|
|
| Spontaneous gear disengagement occurs |
|
|
| Gears are switched on with noise and crackling |
|
|
| There is an oil leak from the gearbox |
|
|
In most cases, problems with the gearbox are eliminated by dismantling and disassembling it. Do not take on this type of work without the proper skills and experience.
The transmission goes out
If you lose speed while driving, the gear assembly is most likely worn out. The locks on the gear and clutch also fail. These elements are replaced entirely with new ones.
It is worth noting that the gear on the “nine” can also fall out due to too fast shifting. The manufacturer recommends a two-second pause when switching to increased speed. If you continue to ignore this problem, you may encounter failure of the synchronizers.
Dismantling
To dismantle the box, we recommend that you rely on the instructions, strictly follow the sequence and reinforce your skills with visual videos.
- Disconnect the negative terminal from the battery and drain the oil from the gearbox system.
- Unscrew the bolts that hold the crankcase guard in place and remove it.
- Disconnect the ground (wire) from the clutch housing.
- At the end of the clutch cable, loosen the tension on the nuts slightly.
- Remove the cable end from the clutch lever.
- Disconnect the block from the traction relay.
- Disconnect the wire going to the starter traction relay.
- Dismantle the starter itself directly.
- Disconnect the drive rod from the joint tip. We are talking about traction, which switches gears.
- Disconnect the cable from the car's speedometer drive.
- Unscrew the tie rod ball joint.
- Remove and press the steering rod hinge pin out of the strut swing arm.
- The shank of the inner CV joint of the front wheel drive should be pressed out and moved to the side.
- Disconnect the second CV joint.
- Remove the clutch housing shield.
- Release the gearbox from the fasteners holding it to the engine.
- Remove the box.
Carefully remove the gearbox
Be sure to move it horizontally away from the motor before directly removing the box. Then disengage the input shaft. Be careful not to damage the clutch spring petals.
Technical characteristics of the VAZ 2109 gearbox
| Type | Mechanics |
| Number of gears | 5 |
| For drive | front |
| Engine capacity | up to 1.6 liters |
| Torque | up to 120 Nm |
| What kind of oil to pour | TNK Trans KP 80W-85 |
| Lubricant volume | 3.4 liters |
| Change of oil | once every 75,000 km |
| Replacing the filter | every 75,000 km |
| Approximate resource | 150,000 km |
Disassembly
Having removed the gearbox, you can proceed directly to the main thing - disassembly. This will allow you to change damaged elements as you work, identify existing faults and solve problems on your own.
- Clean and thoroughly wash all external surfaces of the gearbox.
- Place the box in a vertical position and remove the back cover.
- Remove the clutch cable bracket, then use a rubber hammer to knock the rear cover off the gearbox.
- Remove the old gasket. She will be replaced.
- Engage any of the two gears - 3 or 4.
- Unscrew the bolt that holds 5th gear, then turn it on.
- Simultaneously turning on the indicated speeds will allow you to fix the shaft and prevent it from turning.
- Unscrew the nut on the secondary shaft, and then on the primary one.
- Remove the 5th speed synchronizer along with the fork.
- Remove the fork from the coupling. Remove the synchronizer as carefully as possible. If you allow the clutch to move away from the hub, the spring-loaded balls that secure the synchronizer will simply fall apart.
- Remove the 5th speed synchronizer locking ring.
- Remove the 5th speed driven gear from the output shaft.
- Remove the thrust ring located on the needle bearing.
- Remove the needle bearing itself from the 5th speed gear.
- Remove the drive gear from the drive shaft and remove the bearing plate.
- Now the needle bearing bushings should be removed from the secondary shaft, and the thrust washer should also be removed.
Jewelry work
- Take out the ring that secures the input shaft bearing, and then a similar ring for the secondary shaft.
- Unscrew the locking plug and remove the ball and locking spring. Next you can get a couple more clamps.
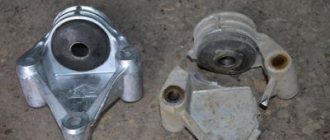
- Remove the rear engine mount.
- Unscrew the reverse gear lock plug, tilt the box and thus remove the lock ball and spring.
- Remove the clutch housing and gearbox housing mounting bolts.
- Acting as carefully as possible, separate the two units. To do this, there are grooves in the crankcases into which the ends of a screwdriver are inserted. By shaking, you can disconnect the elements without any problems.
- Remove the gearbox housing.
- Unscrew the bolt securing the 1st and 2nd speed shift fork.
- Remove the fork and stem.
- Unscrew the bolt securing the 3rd and 4th speed forks.
- Separate the rod head from engagement with the lever, remove it along with the fork from your gearbox.
When disassembling the box into parts, be sure to pay attention to the condition of the elements. If you detect faults in time and replace gearbox components, you can get by with inexpensive but very effective DIY repairs.
Disassembled gearbox
The car jerks when starting, it is impossible to shift into gear
The cause of the malfunction is not always the VAZ-2109 gearbox itself. Repairing it may not save it if the clutch assembly is faulty. But it is this system that interacts with the gearbox and engine. It is through the clutch disc that torque is transmitted from the flywheel to the transmission shaft. Typically, this unit serves at least 120 thousand kilometers. But many “nines” have old-style odometers, which reset to zero at 100 thousand.
It is difficult for the driver to control when this or that part in the clutch has been replaced. If the car jerks at start-up and the transmission is difficult to turn on, most likely the disc has been worn out. The plates wear out on it and the damper springs fly out. The petals on the clutch basket are also bent. We have already said about bearings that they are noisy. All this together affects the behavior of the car on the road.
What to pay attention to
So, following the instructions, we disassemble the gearbox of your VAZ 2109. Along the way, pay attention to the following points:
- Bearings. When they wear out, a noise from the box occurs. Plus, worn bearings negatively affect the condition of other gearbox elements;
- Synchronizers and sealing washers. If their condition leaves much to be desired, then the gears shifted poorly precisely because of them. Replace them;
- Clutch system, cotters, coupling hub clamps. All this must be replaced separately if there are signs of wear or defects;
- Blocking rings, synchronizers. If there are chips or nicks, don’t even think about alternative solutions, replace them immediately;
- Bearing tracks. Over time they wear out. If signs of wear are found, perform a complete replacement. In this state, they were only a short time away from breaking;
- Gap between gears and locking rings. Normally it is no less than 0.6 mm. In case of deviations, there is only one solution - replacing the rings;
- Retaining rings. If elasticity is lost, these elements must be changed, since they will no longer be able to perform their functions.
When assembling the gearbox, do not forget to lubricate the new gaskets with a layer of lithol. And when pressing the oil seals, do it with the working edge inward. The metal clip should be located on the outside.
During the process of reassembling the gearbox, all rubbing components should be treated with oil, and do not forget about the sealant for connecting the clutch housings and gearbox. Doing everything yourself is quite possible.
Didn't find the information you are looking for? on our forum.
Backstage
If the gearbox on a VAZ-2109 is ringing, don’t be upset. All owners of "nines" have this problem. Moreover, the rocker rings both on “killed” and on relatively fresh cars. The AvtoVAZ representative office itself is aware of this defect. And vibration occurs due to the incorrect location of the support points of the internal combustion engine and the gearbox. As a result, the nodes vibrate, and the ringing is transmitted to all other parts, including the slide. Some solve this problem by installing an o-ring in the rocker area, others get used to it and drive like that, with a ringing sound.
Repair features
This process is carried out on the box removed from the car. The operation consists of several stages:
- Removing the dipstick from the gearbox.
- Removing the clutch cable bracket and rear cover.
- Unscrewing the fifth-speed fork bolt, as well as the primary and secondary shaft nuts.
- Removing the fifth gear gear with the secondary shaft fork and synchronizer.
- Removing the thrust plate and bushing from the secondary shaft.
- Removing the fifth gear gear.
- Unscrewing the screws of the secondary shaft thrust washers and bearing retaining rings.
- Removing the plugs, springs and balls of the reverse locks. The process is carried out on an inclined box.
- Unscrewing the mounting bolt and 12 nuts of the transmission housing. The element is separated from the clutch housing with a slotted screwdriver.
After disassembling the VAZ-2109 gearbox, you need to replace all worn elements:
- Bearings.
- Shafts.
- Gears.
- Gear shift rod.
- Seal of axle shafts and shafts.
The VAZ-2109 gearbox is assembled in the reverse order. The crankcase is sitting on the new sealant.
The fundamental principle that the design of the VAZ 2109 gearbox must meet is to achieve an increase in the operational characteristics of the vehicle in conjunction with minimizing fuel consumption. The main tools for implementing these tasks in mechanical transmissions in general, and in the VAZ 2109 manual transmission in particular, are:
Rational selection of the number of gears.
Optimization of gear ratios.
Increase in the quality level of the gear shifting process.
The importance of the latter can hardly be overestimated, since smooth switching guarantees not only a significant increase in the degree of reliability of the vehicle’s systems, components and assemblies, but also a reduction in the driver’s asthenicity (fatigue). The device that ensures smooth shifting is the VAZ 2109 gearbox synchronizer, the diagram of which is presented below.
Synchronization of forward gears is carried out by equalizing the rotation speed of the secondary shaft of the gearbox and the rotation speed of the constant mesh gears that rotate freely on it.
Many domestic car enthusiasts are interested in the question: “How to disassemble the VAZ 2109 gearbox yourself?” This is dictated not only by considerations of economy, but also by the desire to gain practical experience in repairing your “iron friend”.
Dismantling the VAZ 2109 gearbox
The main indications for performing this process, which is characterized by sufficient labor intensity, are: replacing failed gearbox elements or carrying out major repairs. Preliminary activities include:
Other differences
- there is no additional bushing on the switch;
- not the same number of passes;
- marking with special paint numbers on the gears of the transmitting elements;
- location of ball bearings in crankcase sockets;
- This gear is equipped with a synchronizer equipped with a locking ring;
- gear 5 of the transmitting element is installed on the spokes of the input shaft;
- The shape of the cover on the rear transmission type system is deeper.
The lever is dangling
If the gearshift lever on a VAZ-2109 is loose, you should check the serviceability of the gearbox hinge (cardan). They have a tapered bolt that can unscrew. In most cases, the problem is solved by tightening it. Note that this bolt is tightly tightened from the factory. It is unscrewed to adjust the scenes.
Backlash also occurs due to a broken return spring, which is located in the gearbox mechanism. It usually changes every 4 years or 100 thousand kilometers.
The cone bolt also unscrews. It is smaller in size than the cardan and is located inside the box itself under the gear shift element.


