Nowadays it is difficult to imagine a modern car without a working receiver or listening to a high-quality soundtrack. Many trim levels of new cars do not have speakers installed in the Lada Vesta. Starting with the Comfort package, the Lada Vesta comes with factory speakers.
And also, not all car configurations are equipped with a multimedia system, but there is audio preparation in the car. The simplest configuration of the machine has noise-insulated holes for the speakers.
Multimedia system
Basic functions and capabilities of the head unit
- Playing music files, radio;
- the ability to connect third-party accessories to play songs via AUX, SD card, other file drives, USB;
- displaying the current time and date on the display, both in active and inactive states;
- Hands Free option allows you to talk on the phone without being distracted from the controls;
- ability to connect third-party gadgets, functional equipment: rear view camera, tablet, navigation system.
Budget versions of MMC do not have a display, so interested car enthusiasts additionally purchase accessories for listening to music. The MMC is located in the center of the torpedo, harmoniously integrated into the overall design.
Restart after installation
In order to avoid memory errors and prevent the occurrence of emergency situations, all reinstallation work must be carried out with the battery terminals removed.
If, after turning on for the first time, the radio is frozen or the parameters on the screen are displayed incorrectly, you should restart. To do this, you need to remove the flash drive, remove the terminals, pause for 1 minute and turn on the radio again.
If your Android device malfunctions, you need to “reflash” the control system.
Lada Granta 2022
The Lada Granta car has been familiar to everyone since 2011, because it is a budget model that has gained wide popularity not only in Russia, but also abroad. The main reasons for the great popularity of Grants are their modern appearance, comfort and affordable price. Great demand for cars is a success that the auto company reinforces not only with modernization, but also with the release of new generation models.
It is known about the Lada Granta 2020-2021 that the car will receive global changes. The reason for their implementation is the transition to the Global Access or B0 platform from the Renault-Nissan concern. The potential for the use of the B0 base by the Russian auto industry is obvious, and it can be assessed using the Lada Xray model. Although the platform is considered budget, its use for assembling Grants has a negative side, which is reflected in an increase in the cost of the car.
What will the new Grant 2020-2021 be like - interior and exterior
The appearance of the new Grant will definitely be different, because the platform provides for an increase in dimensions, which means that the designers face a difficult task. On the one hand, the exterior will have to be redesigned, which will have to fit into the new platform, and on the other hand, it will be necessary to maintain the class of the car, which belongs to the budget segment. Forecasts and information from first sources indicate that the new Grant will have a more expressive and stylish appearance.
The interior is expected to undergo a redesign of the front panel, which will only have a rich appearance from the outside. For finishing it is planned to use the same inexpensive woven materials and plastic.
What's under the hood of the new Grant 2020-2021
Perhaps Granta fans will be disappointed, but there can be no talk of changing the technical content. The same 1.6-liter units with a power reserve of 87, 98 and 106 hp will be installed under the hood. The car will be based on a 5-speed manual transmission, but for automatic transmission fans, it is planned to produce models with a 5-speed robot.
The Lada Granta 2022 model year is offered in 7 trim levels; this is one of the most affordable new cars in Russia, so prices for it start at 483,900 rubles. We offer it in 3 modifications: 1.6 87 hp MT, 1.6 106 hp AMT and 1.6 98 hp.
It is not yet known when the new generation of Lada Granta will be released, but the manufacturer has set the deadline for the implementation of its plans as 2021. Specialists from France and Romania are actively working on developing the design of the new product, and it is expected that the first photos will soon be shown to the general public.
Installing speakers in front and rear doors
We remove the door trims and remove the sound insulation from the places where the speakers will be located. AvtoVAZ decided to borrow a solution from Renault Logan. The place where the speakers should be placed has three mounting holes, not four. Therefore, to install speakers (without cutting metal you can place speakers up to 16 cm in size) you will have to make special spacers for the front and rear doors (author). We select the thickness of the rings and the inner diameter individually (check that the speakers do not rest against the back).
The Vesta doors already have wiring for connecting speakers, but the connector for connecting the speakers is non-standard and came from Renault or Nissan. If you cut the block, you will lose the warranty. It is recommended to connect via an adapter (ZRS-AG-22 or CT55-17).
There is already a mesh in the door trims, so we simply perform the assembly in reverse order. By the way, dealers may require a certificate of qualified installation of an audio system, be prepared for this!
Video example of installing 16.5 cm speakers in the front doors of a Lada Vesta:
Speaker installation
All Lada Vesta configurations have audio preparation, which simplifies the task of installing equipment, because there is no need to run the necessary cables and wires.
The required minimum is present in all Vesta configurations, which allows you to effortlessly install both the head unit and dynamic heads with your own hands.
Installation of speakers does not require additional tools, so the work can be carried out without special training.
Before installing the speakers, you must carefully remove the insulation material in the places where the acoustics will be located.
Also, to seal the fasteners, you will need gaskets made of felt or similar material, which you can cut out yourself.
The installation area is equipped with only three fasteners, so to fix it with 4 fasteners you will need to install special stands. These stands can be made independently or purchased in advance at an automotive equipment store.
Then unscrew the screws at the bottom of the casing, bend the linings and push the spacers into this space. There is no need to secure them additionally; they will sit tightly in the prepared niche.
The installation area must be soundproofed. It is possible to improve the sound quality when playing audio.
The wires for the audio system are already in the cabin, but their connectors may not be standard. Therefore, it is better to purchase adapters in advance so as not to cut off the standard connectors, because this may affect the vehicle's warranty service.
This sequence of simple steps will allow you to install good-sounding speakers quickly and without the cost of installation by outside specialists
You need to act carefully, slowly, so as not to damage the trim and plastic in the cabin.
Screen/Display Description
1 – folder number indicator; 2 – track number indicator; 3 – playback window; 4 – “Radio” mode indicator; 5 – SD memory card playback mode indicator; 6 – USB flash drive playback mode indicator; 7 – indicator connection to the device radio via Bluetooth;8 – radio station scanning mode indicator;9 – random track playback mode indicator;10 – repeat mode indicator of the track being played;11 – equalizer mode indicator;12 – stereo mode indicator;13 – mode operation indicator loudness;14 – silent mode indicator;15 – indicator of the mode for displaying stations by genre or receiving text information transmitted by FM radio stations;16 – indicator for transmitting information about the general state of road traffic;17 – indicator of the mode for displaying the names of some stations;18 – indicator of the reception mode of regional radio stations; 19 – indicator of the search mode for alternative frequencies.
The first reviews from owners about the standard Lada Vesta radio are only positive. The radio is quite functional with a friendly interface, nothing superfluous. The sound of the music is good. For an ideal case, the only thing missing is the buttons on the steering wheel. You can learn more about the audio device from this video:
Support for files on external media is exactly the same as on a more expensive multimedia system. For owners of Lada Vesta, we are posting a user manual for the radio, in which you can find a detailed description. To download files, you need to log in to the website, password ladaonline.
Review of the radio from the magazine “Behind the Wheel”:
Special thanks for the large control keys. Nowadays, almost everyone has standard double-din audio systems, but for some reason this does not always mean successful ergonomics. Often, creators prioritize the beauty of a large display, which is absolutely useless in the absence of navigation or a rear view camera. Vesta’s priorities are correct: it’s easy to get to the right button without looking, and two lines on the screen are more than enough to display the necessary data.
Some may regret the lack of a CD player, but let's be objective: this format is becoming a thing of the past. It is more convenient to use SD cards and USB flash drives. It’s much easier to record and re-record music on them, they don’t take up any space at all, and they hold so much data that you won’t be able to listen to everything in every “long-distance” trip.
Take the survey. Help us evaluate the stock radio by leaving reviews about it. Let us remind you that other operating instructions for Lada Vesta can be found in this section.
Key words: cassette player Lada Vesta
How to connect to a car network
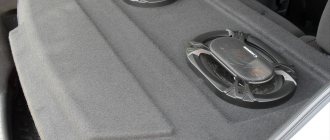
The initial configuration of the car has six speakers evenly distributed throughout the cabin to distribute acoustics.
Audio preparation of the fret includes connecting the electrical wiring from the sound amplifiers to the installation site of the receiver, where it is attached to the connectors for subsequent connection.
To connect a Pioneer car radio or equivalent, you will need to purchase an antenna adapter and a wiring harness with an ISO plug that matches the connector on the car. The harness cables are connected to the wires coming from the head unit. The wiring joints are connected by soldering or crimped with a tube. From the outside, the joint is insulated with heat shrink tube or fabric tape.
When using standard equipment, no additional adapters are required. The radio settings in Lada Vesta depend on the type of head unit used. The user programs the radio, adjusts the balance and equalizer curve for better sounding acoustics. The operating modes of additional equipment (rear view camera or AUX port) are also configured.
Finally, I gathered the strength to write the installation of the radio in the Lada Vesta, connector to connector, which means without cutting, soldering and other heresies.
The Chinese 7033B radio from Alik was chosen as a candidate for installation. An overview of which can be found here: link. Trials by choice are also available here: link. And also, the best rear view camera in its class, for a very affordable price: link.
First we need to purchase a transition frame. One of the options is provided to us by the Asian brothers: link. There are many options both on Avito and on Yandex.Market.
In addition to the adapter frame, we need some cables to connect the rear view camera, the standard antenna connector, as well as the buttons on the steering wheel.
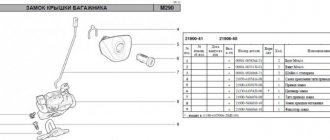
ISO connector - links: one time two; Mini ISO connector - links: one two; Adapter for antenna - links: one two; Connector for the rear view camera of the Luxe configuration and higher - links: one two. I express my gratitude to the user Drive2: unnown, he helped a lot with finding the connector code. Before ordering, be sure to check through the emergency hatch of the trunk lock whether you have this connector; sometimes it happens that it is cut off at 0 at the factory. Otherwise, you will have to lay the wires yourself. What a “live” connector looks like, photo below.
For successful work, we need to look at the electrical circuit of the car. For myself, I outlined a diagram of the connectors that are present in the car and will be needed when connecting. The diagram itself is presented below. We will rely on it further.
Before connecting, you should pay attention that if you are using a standard rear view camera, be sure to use a step-down power module on connector C7, because The standard camera operates at 6V. Still Chinese, usually 12V. From the mini ISO connector I brought out the usual AV yellow cable that came with the rear view camera itself.
For the buttons on the steering wheel to work correctly, it is necessary to turn on the resistance according to the diagram. Connect connectors C13 - C15 to the ground of connector C19. We don't need anything more from the mini ISO connector.
Next we will work with the ISO connector, similarly freeing it from unnecessary pins
To connect a rear view camera, you need to connect the previously purchased connector according to the diagram, in the end you will get a universal adapter for any Chinese camera.
As a result, we connect the ready-made harnesses, each of the connectors, to the places provided for it. All functions of the radio work, the buttons on the steering wheel work. And, one of the advantages, I didn’t have to run the wire to the rear view camera.
If you have any questions, I will be happy to answer them.
I will leave additional links to the necessary accessories: Soldering iron: link Solder: link Heat-shrinkable tubes: link Set of resistors: link Anti-noise tape: link
From the moment I bought the car, the plan was to install MMC on Android, I like it better than WinCE. For installation, I chose an inexpensive device, which in terms of functionality and quality suited me quite well - ACV 7610 (RUB 12,000).
In total, about 15,700 rubles. I found the pinouts for the luxury Lada on the Internet, and the pinouts for the radio are in the manual.
Let's get to work. We won't cut the original wiring; we use donor adapters for switching. First of all, we make a male-to-female ISO A and B adapter. To do this, we use the ISO connector A and B with the wires from the radio kit and the purchased ISO connector A and B "dad". We connect part B, which is responsible for the speakers, one to one, there are no problems here. The most important part is A, where the power and controls sit. You have to be careful here.
On the Lada connector, power is supplied from the battery to A4, power from the ACC ignition switch is supplied to A7, and on MMC ACV it is exactly the opposite: A7 and A4. They need to be connected correctly! For what? – Next. In order to prevent the radio from turning off when starting the engine, we attach a simple circuit to the ACC wire.
We select the capacity based on the desire for the duration of operation of the radio without an ignition key. With a capacity of 10,000 μF, I was able to operate for 3 minutes, with a capacity of 2,200 μF - 45-50 seconds, I didn’t experiment further, but the logical series can be continued. If you cross-connect (see above), it will not work.
About connecting the buttons on the steering wheel. In connector A of the radio there are three wires A1, A2, A3, labeled Key1, KeyGND, Key2, respectively. We use them to connect to C16, C19 and C18, respectively, in the blue Lada block. We cut and connect in the donor adapter! C16 and C18 are two white wires, they can be connected to A1 and A3 in any combination, C19 is black, ground, black with black) Then we solder 100 resistors to wires C13 (blue), C15 (white blue), C14 (white red), 220, 330 Ohms, respectively, we put them in heat shrink, solder the other ends together and solder them to the black wire C19, we insulate everything.
Thus, we get an adapter, for which the huckster sellers charge 2000-2500 rubles! Then training through the radio menu and - oops, the buttons work!
Now about connecting the rear view camera.
The camera was installed on a saber, power was supplied right here on the back door through the crocodile clips from the reversing light. PPS, a year and a half of operation showed the unreliability of these crocodile clips - they do not provide reliable contact. So I threw them the hell away and made a beautiful twist with insulation))) Now the image doesn’t disappear whenever it wants)
There is a video on the Internet on how to take everything apart. Thanks to the author blaker
The price tag for a native camera is off the charts, somewhere around 9,000 rubles. Therefore, I refused it. There was a tulip on the return wire of the camera; it was stuck into the corresponding tulip of the radio. In addition, in the camera wire there was output 12 from the reversing light (a separate wire), it was connected to the corresponding wire of the radio.
This 12V is on pin A1 of the Lada connector, you can use it. I need this to display an image on the radio screen when reversing. After all the work done, I now have the Luxury version with multimedia))) That’s probably all. I will answer all your questions. PS In the future, I will replace and install a connector like this at the bottom instead of the standard AUX-USB
Price tag: 15,700 ₽ Mileage: 4100 km
OEM radio controls
In the left corner there is a function key for activating/deactivating the radio. To the right there is a built-in microphone for conversations via Hands Free, and there is also a reset button to factory settings.
To the right is a monochrome display that displays basic information about tracks and radio frequencies.
Below is a slot for a storage card. It is mainly used for inserting a card and flashing the module, but if necessary, it can be used to read music tracks.
Below the perimeter there are preset buttons:
- MUTE – mute sound;
- Key to accept and reject calls (red and green);
- SCAN - multifunctional key for surfing the navigation menu;
- RADIO and AUDIO for switching playback modes from storage media;
- In the center of the structure there is a washer - a regulator for selecting functions, listing, changing the volume;
- At the very bottom there is a block with mechanical keys (6 in total) for quickly jumping to saved radio stations.
Connecting a rear view camera
Lada Vesta MMC diagram:
To activate the camera, we use the standard connectors (green connector). Mini-ISO MMC:
- C7 – nutrition;
- C8—CAM─;
- C9 - CAM+.
If you followed the step-by-step instructions, the image from the camera will be displayed on the display.
Vesta's standard MMS
All versions of Vesta, with the exception of the basic one, have MMS installed. The minimum configuration of the car is equipped only with an audio system. The main functions of the MMC are playing audio files from removable media, receiving radio signals, navigation, parking assistance with video playback from the rear view camera.
- processor CSR S3681 B036BK K609B CPU SiRFatlas VI 800mhz Cortex A9;
- RAM Micron D9PSK 2X 256MB DDR3-1600 Clock Rate 800 MHz MT41K128M16JT-125 IT:K;
- internal memory 2 GB Micron NQ283 NAND FLASH 2gb MT29F2G08ABAEAH4-IT;
- internal memory 8 GB SDMMC 8GB SAMSUNG KLM8G1WEMB-B031;
- bluetooth CSR 8311 Bluetooth v4.1 BlueCore CSR8311 QFN Automotive;
- WI FI CSR 6030 Wi-Fi IEEE 802.11b/g and n;
- digital video decoder AKM8859 DIGITAL VIDEO DECODER PAL/SECAM/NTNC AK8859VN;
- audio AK7757VQ Audio DSP with 24bit 3ch ADC + 4ch DAC + MIC Amp;
- power controller MPS MP4570 Automotive Power Systems;
- TPS65150 Low Input Voltage, Compact LCD Bias IC With VCOM Buffer;
- TJA1042 high-speed CAN transceiver;
- CAN and K-Line controller Freescale S9S12G96F0CLF;
- controller Fujitsu 32-bit ARMTM CortexTM-M3 based Microcontroller.
The following elements are used to manage and play files:
- seven-inch touch screen;
- “Mode” key – select modes;
- “MUTE” – mutes all sounds;
- Volume control – pressing once turns the device on or off;
- microphone for the ability to talk on the phone without hands - Handsfree;
- “Reset” – button to reboot the device;
- slot for reading a removable SD card;
- connector for reading information from removable USB media and connecting various gadgets;
- AUX connector for connecting headphones or external audio devices.
Additional control
In addition to the buttons near the touch screen, MMS functions on the Lada Vesta are controlled using duplicate buttons located on the steering wheel:
- volume control;
- selection of file and radio playback modes;
- turning off all sounds;
- button for navigating through folders and tracks on removable media; in another mode, the buttons are responsible for accepting/ending an incoming call.
Photo 2 (Additional controls on the steering wheel)
Such equipment first appeared on AvtoVAZ cars. Previously, a standard audio system and MMC without duplication on the steering wheel were offered. Thanks to this, Vesta can compete with budget foreign cars of the same class in approximately the same price segment.
Key Features
The system combines several different devices that should be in every modern car. The main one is the audio system, consisting of a 7-inch touch screen. Its peculiarity is its resistive base and the need to press with a stylus or other similar object. The input method is not the most progressive, but in weather conditions with sudden temperature changes, the resistive screen works without failure. The sound is reproduced through six speakers to create surround sound.
The system recognizes most SD and USB drives, but with a limitation - the media should not contain more than 1024 files and 256 folders. The flash drive must be formatted to FAT 16 or 32 with a maximum number of partitions - 4. Cards supported by MMC Lada Vesta:
- SDHC no more than 32 gigabytes;
- SD no more than 4 gigabytes;
- USB 2.0 and 3.0 no more than 64 GB.
The user is warned by the instructions that the download speed depends on the number of files on the drive. The optimal solution would be a medium that contains only audio and video files.
Files supported by MMC:
- WMA audio codec, bitrate no more than 128 kbps, sampling 44100 Hz;
- video codec WMV3 with a frame rate of 25, bitrate 750 kbps.
Before use, it is recommended to convert all files to the required parameters. For these purposes, the manufacturer recommends the free Freemake Video Converter program. When playing back, keep in mind that the files will be played in the order they were recorded.
Recommendations for removing the casing
It is impossible to install a sound system in a Lada Vesta car without removing the door trim. When dismantling the cladding, be extremely careful not to scratch the plastic. Under no circumstances should you use a screwdriver; we only use a plastic card.
To dismantle the plug at the end of the door, pry it off with a card; there are special recesses at the bottom. In the same way, the window lift buttons are dismantled using a card; the fastening antennae are located at the back and on the sides in front of the MUS.
Removing the trim
Removing the trim
Removing the trim
Removing the trim
The casing itself is attached, in addition to self-tapping screws, to 4 more “hedgehogs”. They will definitely break if you do not use a special removal tool. The Lada Vesta has hedgehogs from Nissan or Renault, but if you modify the grand ones, which are much stronger and cost several times less, you can save money.
Thus, the trim from the left door is removed. Removing the trim on the right side has its own characteristics. There is no need to remove the power window buttons and look for the secret screw plug. Simply remove the handle cover. To do this, you need to pry the plugs from the bottom; there is a special groove in it, using a plastic card. Then you need to unscrew two 10 mm screws, the next step is to remove the trim, as with the left door.
Audio mode
The audio player window is intuitive. All audio files are played on 6 speakers, the sound of the acoustics is at a decent level. You can adjust the sound using the equalizer (there are 6 pre-programmed settings for Jazz, Rock, Voice, etc.).
It is possible to listen to music via Bluetooth from your phone. One drawback worth noting here is that information about the file being played is not displayed on the MMC screen.
Requirements for MP3 files with constant or variable bitrate:
- 32-320 kbit/s at sampling rates of 32000 Hz, 44100 Hz and 48000 Hz for MPEG-1 Layer 3;
- 16-160 kbit/s at sampling rates of 16000 Hz, 22050 Hz and 24000 Hz for MPEG-2 Layer 3;
- 8-160 kbit/s at sampling rates 8000 Hz and 11025 Hz for MPEG-2.5 Layer 3.
Requirements for WMA files with constant bitrate and bit rate:
10-320 kbps, with variable bitrate and bit rate 32-192 kbps, and sampling rates 8/11.025/16/22.050/32/44.1/48 kHz.
Requirements for WAV files:
8/16/24 bit resolution with 44.1 kHz sampling rate.
Requirements for FLAC files:
with a sampling rate of 44.1 kHz.
Reviews
| № | Positive |
| 1. | Sergey Ivanovich , 44 years old (otzovik.com): I use the standard radio, the quality is good, the functionality is sufficient. |
| 2. | Fedor Stepanovich , 40 years old (www.zr.ru): my comrades are all agitating me to install a 2-DIMM stereo system. I haven’t decided yet, because the price is steep, but the offer is good. |
| 3. | Vitaly , 22 years old (autobann.su): the quality of the standard MMC is not great, but it will last for several years, and then I’ll buy an imported one. |
| 4. | Daniil , 33 years old (lada-vesta.net): The factory stereo system is not bad, functional, no complaints. |
| 5. | Vitaly Semenovich , 43 years old (otzovik.com): for me, sound quality is not important, so MMS suits me, no comments. |
| 6. | Stepanovich , 44 years old (www.zr.ru): Three years have passed since the purchase of the car, all components are working properly, the condition is as if from the factory. |
| 7. | Vasilyevich , 20 years old (autobann.su): my positive review of domestic transport and assembly. A worthy car, a rival to many European brands. |
| 8. | Tolik , 43 years old (lada-vesta.net): I’m not a music lover, for me the quality and purity of sound are not particularly important. The phone is always on in the car. |
| 9. | Stepan Nikolaevich , 39 years old (otzovik.com): it has been working properly for two years, no special comments. |
| 10. | Konstantin , 43 years old (www.zr.ru): I’m happy with the purchase of the car, the interior is quiet, the acoustics are good. |
| 11. | Anton , 35 years old (autobann.su): after three years of operation, I can’t say anything bad about the MMC. |
| Negative | |
| 12. | Dmitry Viktorovich , 44 years old (www.zr.ru): constant problems with the firmware, glitches periodically. |
| 13. | Sasha , 37 years old (otzovik.com): in six months I’ve already been to a service station twice, with an electrician, changing relays and switches. |
| 14. | Nikolai Vasilyevich , 46 years old (autobann.su): replace the standard radio with an imported one, the sooner the better. |
Lada XRAY Cross Instinct model 2022
In March 2022, an updated version of the XRAY family from AvtoVAZ was presented - Lada XRAY Cross Instinct. This model is a Lada X-Ray Cross in the maximum configuration, which is called Instinct. A characteristic feature of the new product is the roof and mirrors, which are painted black. On the roof there is a black antenna in the shape of a shark fin. Alloy wheels have a double color, emphasizing the crossover style.
The car is equipped with a number of the following options:
- climate control;
- multifunction steering wheel;
- heated windshield, steering wheel and all seats;
- window lifters.
At the head of the dashboard is an 8-inch multimedia display with a rear view camera. The multimedia system includes Yandex.Auto options, the Alice voice assistant, a 4G modem, as well as various services and browsers. Today you can see not only photos of models of the updated Lada X-Ray, but also see the new product in person. The first cars are already arriving at official dealers at a starting price of 1 million 33 thousand rubles.
The car is available with two versions of power plants. The first is a VAZ 122-horsepower unit with a 5-speed manual transmission, and the second is a 113-horsepower engine from Renault-Nissan, combined with a CVT.
FakeHeader
Comments 52
Hello. Tell me how you became friends with Elm.
Yes.elm I only have the bluetooth version
In addition, there was a +12 output from the reversing light in the camera wire (a separate wire), it was connected to the corresponding wire of the radio. - - - with which? What was the name of the wire?
The picture of the radio pinout shows the BACK wire. +12 reverse is supplied to it, this locks all functions of the radio and only the image is displayed
Doesn't turn on when engine is off
In what position is the ignition key?
in off (Ignition off)
If you connected everything correctly, this is correct. This is not a paradox. If you want constant operation of the MMC, then you need to power it not using + 12V from the ignition switch (ACC), but by taking the constantly hanging voltage used to power the MMC settings memory. It's clear?
From which contact do you supply power to the antenna amplifier? Lada westa sw cross.
Signed on the picture. Take from C4
Standard cameras have appeared in Westashhop. Price 5K
My friend, if the radio has only one wire to control the steering wheel, then how?
China radio, wire 10 in the photo
Connecting the three-wire interface of the multifunction steering wheel to the (one) two-wire interface of the radio The standard resistive interface of the radio control buttons on the steering wheel of a car usually contains three wires: KEY1(SW1), KEY2(SW2) and KEY GND. At least for Toyota, this is the case if the radio control is not implemented via CAN BUS (we will not consider this case). In radios manufactured in China, there are usually also three separate wires allocated for this: KEY1, KEY2 and KEY GND. In this situation, we connect the corresponding wires to each other and configure the necessary buttons in the radio.
But it happens that the radio has only one wire dedicated to the multifunction steering wheel. In this case, you can try the following scheme: connect the KEY GND wire from the steering wheel to the body of the radio, the brown (usually) wire KEY1(SW1), which controls the volume and switching tracks, to the KEY wire of the radio, and the gray KEY2(SW2), which controls the radio modes MODE, through a 5.1 kOhm resistor we connect to the brown wire KEY1 (SW1). After that, we go to the radio settings and check the operation of the resulting circuit in the Steeering wheel control settings, setting up the buttons we need. In theory it should work