Operations for installing spacers under rear shock absorbers
To install the rear spacers under the shock absorbers, hang up the rear of the car. Using a 19mm socket, unscrew the bolt securing the lower ear of the shock absorber, holding the nut from turning with a wrench of the same size...
Please note that the spacers are mirror symmetrical and can be installed on one side or the other of the car. The side of the spacer with the greater distance from the edge to the mounting bolt hole (shown in the photo below) should be installed towards the center of the car.
In order to decide which spacer to put where, you need to decide on the face-to-face length of the shock absorber + spacer. So, when installing the spacer correctly, it is necessary that the line passing through the centers of the holes for fastening the spacer to the beam and the lower end of the shock absorber is close to vertical and coincides with the axis of the shock absorber attached to the spacer. (see photo below for one and the other side respectively)
We install the spacer on the beam eyes. We insert a spacer between the beam eyes and insert the bolt.
Place a nut on the bolt and tighten it to a torque of 70–85 N.m. In this spacer position, the rear of the vehicle can be raised to the selected height. In order to select the middle position during installation (see photo), the right and left spacers would have to be swapped. We chose the bottom position. Insert the bolt into the holes in the spacer and into the shock absorber bushing.
Place a nut on the bolt. We install a spacer for another shock absorber in the same way; naturally, the selected height should correspond to the first case. We tighten the nuts securing the lower ends of the shock absorbers to the spacers in the “car on wheels” position with a torque of 70–85 N.m. To correctly install the pressure regulator, press the rear of the car with a force of 40–50 kgf. Using a 13mm wrench, loosen the bolt securing the pressure regulator to the regulator drive lever bracket...
...and move the bracket with a screwdriver so that the gap between the lever and the lever spring is within 2.0–2.1 mm.
We check the gap with a drill or a piece of wire of the appropriate diameter; a two-ruble coin also corresponds to this gap; you can use that too. After adjustment we carry out a road test. An observer outside the car should note that the rear wheels lock, which should occur slightly later than the front wheels when braking sharply from a speed of 30–40 km/h. If the locking is too late, we reduce the gap; if it is early (the locking of the front wheels is ahead of the locking), we increase it, with the obligatory check in the manner indicated above.
Higher, and higher, and higher: how and why to raise the car body with spacers
Looking at the cars that drive around Russian cities, you might think that all the car manufacturers have colluded and are producing cars of the wrong height. How else can we explain the fact that a huge part of our population has a desire to either lower the car or raise it to an unattainable height? Let’s put aside the questions of lowering for now and talk about how and why car enthusiasts lift their cars with spacers.
What is clearance?
If you think that a car's ground clearance, also known as ground clearance, is the distance from the lowest point on the bottom of the car to the supporting surface (road surface), then you are mistaken... This lowest point is not sought for measurement over the entire area of the bottom of the car, but only on its so-called “central part”. The concept seems vague, but there are simple formulas for calculating it. There is no point in delving into them. For ease of understanding, the “central part” of the average sedan, used to determine ground clearance, looks something like this (marked in red):
As we can see, many points of the lower part of the body (suspension elements in the wheel area, marked with arrows, mudguards, sill plates, muffler tips and some others) are not taken into account when determining ground clearance and can (and do turn out to be!) noticeably closer to the asphalt than that point , which is taken as a reference when determining the official value of ground clearance. And if you consider that the factory clearance figures for foreign cars are most often valid only for an empty car, without cargo or passengers, then you shouldn’t be surprised when a city car scrapes its bottom on a completely harmless dirt road on the way to the country.
The procedure for installing spacers on the rear pillars of a VAZ 2110
All you need for this operation are the spacers themselves for the rear springs for the VAZ 2110, a small set of tools and a little accuracy.
Let's look at the whole operation, breaking it down into 16 stages:
- First of all, using available tools, you need to hang up the rear part of your VAZ 2110 and remove the rear wheels;
- Next, taking a 19mm wrench, you need to unscrew the bolt that secures the shock absorber from below. To prevent the bolt from turning, securely fix the nut with another suitable wrench.
- Remove the bolt.
- We take one of the spacers. Which one is not important, since they are symmetrical and equally suitable for any side of the VAZ 2110.
- We orient the spacer with the larger side facing longitudinally in relation to the length of the car.
- The spacer has three holes that connect it to the end of the shock absorber. You need to select one of the holes depending on what lifting height of the VAZ 2110 you need.
- Remember which hole you chose, you will need to select a similar hole on the other spacer.
- We mark the longitudinal axis of the shock absorber and mentally draw an imaginary line through the centers of the holes with which the spacer is attached to the bottom of the shock absorber and the beam. This line must be vertical.
- Observing all of the above, you need to put a spacer on the eyes available in the beam.
- Between these same eyes we place a spacer sleeve.
- We fasten everything with the appropriate bolt.
- Tighten the nut. To do this, you should use a torque wrench. It will allow you to maintain the optimal, in this case, force - about 80 Nm.
- Next, the bolt is also inserted into the shock absorber bushing. Tightens his nut. The recommended force is the same as in the first case - about 80 Nm.
- Next, we proceed to install the pressure regulator. To do this, you need to press on the car trunk with a force of about 45 kgf.
- After this, loosen the pressure regulator bolt connecting it to the regulator drive lever.
- Using a suitable screwdriver, move the lever bracket until the gap between the lever and its spring is about 2.05 mm. Use a wire of suitable thickness to check the distance.
For a car with passengers and a payload of 320 kg (4 people) in the cabin and 40 kg of cargo in the trunk, the wheel alignment angles must be within the following limits:
| camber angle | 0°±30′ |
| convergence | 0°00'±10' (0±1 mm) |
| caster angle | 1°30’±30′ |
Angles of vehicle wheels in running order (without driver, passengers and cargo):
| camber angle | 0°30’±30′ |
| convergence | 0°00'±10' (1.5±1 mm) |
| caster angle | 0°20’±30′ |
C.O.D
Payment for the order upon receipt is possible if you choose the delivery method Russian Post
You can choose one of several forms of payment:
To pay for your order:
- Select product
- Add to Basket
- Select delivery method
- Fill in the recipient's details
We will quickly and reliably deliver goods throughout Russia, CIS countries and neighboring countries
Our logistics department was created specifically to provide the most profitable and convenient way to deliver our products to your warehouse. Depending on the parameters of the cargo being shipped, our specialists will choose the most suitable transportation option to your city.
Delivery throughout Russia We cooperate with various transport companies throughout our country. The goods are dispatched after payment for the goods within 1-2 working days or as agreed with the manager. You can calculate the cost of delivery to your city yourself using the calculators on the transport companies’ websites.
Delivery to the terminal is FREE.
Adjusting headlights after installing spacers
To adjust the headlights, you need a flat area where you place your ten and walls (preferably light in color) at a distance of 4-6 meters from the nose of your car. The vehicle must be fully fueled, have approximately your weight in the front seat, and have all tools and a spare tire in the trunk.
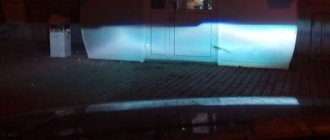
Having prepared everything described above, we turn on the headlights in low beam mode and, using their sequential shading with a piece of cardboard, begin the adjustment. By rotating the screws that secure the headlights, we, in a way, “raise” the light spot to the optimal level. Having done this, set the vernier of the headlight range control to the minimum load position of the VAZ 2110. In general, we wrote in more detail about adjusting the headlights in this article “Adjusting the headlights of the VAZ 2110”.
Important points
There is no need to completely unscrew the nut from the bolt securing the lower strut! Otherwise, there will be problems with removing the bolt and damaging the thread. You need to use a hammer - by carefully hitting the nut, the bolt can easily be knocked out.
- There is no need to tighten the springs!
- When using spacers for the rear springs, do not forget to check the quality of the springs - if they have shrunk from long-term use of your VAZ 2110 or are too soft, even though they are new, then replace them! Otherwise, the car’s control when cornering and at high speed will deteriorate sharply; it will begin to “scour” from side to side!
To summarize, we can say that using spacers on the rear pillars you will raise the body of the VAZ 2110, and its chassis will remain at the same height. The car's ground clearance parameters will also remain unchanged.
Spacers for rear pillars of VAZ 2110
Spacers for the rear pillars are recommended for use on uneven surfaces. They reduce the frequency of their impacts and snags on the car body. If the VAZ 2110 is used mainly when driving in a rut, then the spacers are virtually useless.
Most drivers have more than once encountered the problem when, with a heavily loaded trunk, the car sag and the wheel arch liners begin to touch the rear wheels. There can be two ways out of this situation: replacing the shock absorbers with tighter ones or installing spacers under the shock absorbers. Both choices have the right to life, but everything has its pros and cons. In this case, you need to consider both options most closely and settle on one.
Stories from our readers
“Fucking basin. "
Hi all! My name is Mikhail, now I’ll tell you a story about how I managed to exchange my two-wheeler for a 2010 Camry. It all started with the fact that I began to be wildly irritated by the breakdowns of the two-wheeler, it seemed like nothing serious was broken, but damn it, there were so many little things that really started to irritate me. This is where the idea arose that it was time to change the car to a foreign car. The choice fell on the melting Camry of the tenth years.
Yes, I had matured morally, but financially I just couldn’t handle it. I’ll say right away that I am against loans and taking a car, especially not a new one, on credit is unreasonable. My salary is 24k a month, so collecting 600-700 thousand is almost impossible for me. I started looking for different ways to make money on the Internet. You can’t imagine how many scams there are, what I haven’t tried: sports betting, network marketing, and even the volcano casino, where I successfully lost about 10 thousand ((The only direction in which it seemed to me that I could make money was currency trading on the stock exchange, they call it Forex. But when I started delving into it, I realized that it was very difficult for me. I continued to dig further and came across binary options. The essence is the same as in Forex, but it’s much easier to understand. I started reading forums, studying trading strategies. I tried it on a demo account, then opened a real account. To be honest, I didn’t manage to start earning money right away, until I understood all the mechanics of options, I lost about 3,000 rubles, but as it turned out, it was a precious experience. Now I earn 5-7 thousand rubles a day. I managed to get the car buy after half a year, but in my opinion this is a good result, and it’s not about the car, my life has changed, I naturally quit my job, I have more free time for myself and my family. You’ll laugh, but I work directly on the phone)) If If you want to change your life like me, then here’s what I advise you to do right now: 1. Register on the site 2. Practice on a Demo account (it’s free). 3. As soon as you get something on the Demo account, top up your REAL ACCOUNT and go to REAL MONEY! I also advise you to download the application to your phone, it’s much more convenient to work from your phone. Download here.
If you think about what affects a car's ground clearance , it becomes clear that there are a number of ways:
- screw suspension.
- install spacers between the body and the strut support.
- install non-standard strut supports, springs (longer) or shock absorbers.
- install interturn spacers in the springs
- install higher rubber bands under the springs
- replace tires and wheels
If you install “house” spacers under the pillars, you will be able to raise the rear of the car.
As you might have noticed, there are many ways to make a car taller, but how are increasing ground clearance and car performance ?
Spacers as a means of increasing ground clearance
Shock absorbers and ground clearance, where is the truth?
When the car is standing still, the shock absorbers will not lift the body - after all, it hangs on springs.
The role of the struts can be understood in motion, when the car sways and “pecks” on soft or dead shock absorbers. You drive off the curb and your car’s nose hits the asphalt! If the shock absorbers are in good condition, they will “catch” the car halfway. Thus, shock absorbers do not affect ground clearance, but have the same effect as increased ground clearance. Alternative shock absorbers may have a longer rod, which will provide more suspension travel. We discuss these subtleties in the topic “which shock absorbers are better to choose.”
Replacing springs to increase ground clearance
The car body hangs on springs, so they have a direct impact on ground clearance.
Springs 2108 are installed on the front suspension of the VAZ 2110 car as standard. “Tens” with 16kW internal combustion engines are equipped with reinforced springs 2112. In addition, suspension springs are divided into two classes “A” and “B”.
If you prefer to load your car to capacity, then perhaps you should choose class A springs (yellow), because... They hold a little more load.
The rear springs of cars of the tenth family are also different. For example, springs 2112 are lower, but more elastic, and 2111 are higher, but softer. Anyone interested can check out the selection of rear springs on the forum or in the topic “which springs are best to choose.”
Do not forget that if the spring is very strong, then the rebound stroke of the shock absorber decreases (the shock absorber does not work, the suspension does not function), and there is a lack of ride comfort (the car is “goat”). As a result, rapid failure of the shock absorber.
Interturn spacers in springs, for what?
Spacers for springs
Spacers are made of high-strength rubber, do not deform and are able to support the weight of the car.
They are installed between the spring and the body. If the spring sag, then no spacer will save it, because in such a spring the interturn distance is reduced. Driving on such springs is already becoming dangerous, because the stroke before the coils close is reduced. It’s a different matter when such a spacer is placed on a normal spring and a working body. In this case, it will increase the ground clearance, but at the same time the rebound stroke will decrease and the compression stroke of the shock absorber will increase, which in general is also not very pleasant. The third case is when the spring is normal, but the ground clearance has decreased due to body aging. In this case, the spacer will not harm the car.
It is worth noting that VAZ did not approve the spacers.
How much will the ground clearance increase after replacing the wheels and tires?
Depending on the configuration of cars of the tenth family, wheel rims are installed with a 13th or 14th radius.
If you replace the standard wheels of a car with wheels of a larger radius, then no matter how you look at it, the vehicle's ground clearance will increase. As well as replacing tires with higher ones (for example, 175/55 R13 to 175/65 R13). It is important to know what size of wheels and tires is the maximum permissible for a particular car (data for wheels/tires according to VAZ 2110). I wouldn’t be surprised if, after installing high tires, the wheels start to touch the fender liners.
Install houses on the rear suspension of the car
Negative consequences of increasing clearance
If the vehicle's ground clearance is increased by no more than 5cm, then there should be no negative effects.
But a further increase in clearance will be associated with unjustified difficulties. In addition to those points described above, add less stability of the car on the road (drift and large rolls) and greater wear of suspension components and assemblies. What does it mean ? When the center of gravity rises, the car's roll and sway increase while driving. To prevent a rollover, it is important that the vehicle's suspension is adjusted correctly. An example would be a tall Mercedes A class when it capsized in front of journalists during the “moose test”. Then they delayed the release of the car and began to modify the chassis. It all ended with increasing the elasticity of the suspension and replacing the wheels with low-profile ones. You can combat vehicle roll by installing various additional stabilizers.
Spacers were installed front/rear to increase the car's ground clearance. At the rear, at medium height adjustments, at maximum, the rear lifts up strongly, and more or less evenly. At speed the car became more rolly (felt at 130-140 km/h and with a side/headwind). But the ground clearance has increased and this is a big plus, it has helped more than once (entrances to curbs, parking in the city, driving on ruts, driving on roads not cleared after snowfall...). Supplies were made taking into account the angle of the grenade and in consultation with people who have been driving this way for a long time. There was a desire to increase the ground clearance even more, but I couldn’t find any bolts for the supports that were longer than those that came with the spacers (in front), and they were too short for two spacers at once.
The issue price is about 1500 rubles. (rear spacers - 1 pair, front spacers - 2 pairs + work).
The ground clearance of the VAZ 2110 or ground clearance , as for any other passenger car, is an important factor on our roads. It is the condition of the road surface or its complete absence that makes Russian motorists interested in the ground clearance of the Lada 2110 and the possibility of increasing ground clearance using spacers.
To begin with, it’s worth honestly saying that the real ground clearance of the VAZ 2110 may differ significantly from that declared by the manufacturer. The whole secret is in the method of measuring and where to measure ground clearance. Therefore, you can find out the real state of affairs only by arming yourself with a tape measure or ruler. The official ground clearance of the VAZ 2110 is 160 mm when the car is loaded. In an empty car, you can easily measure 180 mm of clearance.
Some manufacturers use a trick and declare the amount of ground clearance in an “empty” car, but in real life we have a trunk full of all kinds of things, passengers and a driver. That is, in a loaded car the ground clearance will be completely different. Avtovaz is honest in this regard. Another factor that few people take into account is the age of the car and the wear and tear of the springs—their “sagging” due to age. The issue can be resolved by installing new springs or purchasing spacers for sagging VAZ 2110 springs . Spacers allow you to compensate for spring subsidence and add a couple of centimeters of ground clearance. Sometimes even an inch of curb parking makes a difference.
But you shouldn’t get carried away with “lifting” the ground clearance of the VAZ 2110, because spacers to increase ground clearance are oriented only on springs. If you do not pay attention to the shock absorbers, the travel of which is often very limited, then independently upgrading the suspension can lead to loss of controllability and damage to the shock absorbers. From the point of view of cross-country ability, high ground clearance in our harsh conditions is good, but at high speeds on the highway and in corners, serious sway and additional body roll appear.
At the rear of the “ten”, so-called “houses” are traditionally used to increase ground clearance. Which simply lift the entire rack assembly. This method is suitable for almost all front-wheel drive Ladas. For an example, we suggest watching the video.
Any car manufacturer, when designing the suspension and choosing the ground clearance, looks for a middle ground between handling and cross-country ability. Perhaps the simplest, safest and most unpretentious way to increase clearance is to install wheels with “high” tires. Changing wheels makes it easy to increase the ground clearance by another centimeter. Do not forget that a serious change in ground clearance can lead to damage to the CV joints of the Lada 2110. After all, the “grenades” will have to work at a slightly different angle. But this only applies to the front axle.
What are shock absorber spacers?
It’s good if a fully loaded car begins to sag, but there are also cases when the suspension is simply low or the shock absorbers are so worn out that the slightest load begins to put pressure on the wheel arch liners. In this case, as mentioned above, there are two options:
- Replacing shock absorbers;
- Installing the spacer.
So what are these shock absorber spacers? It's actually quite simple. This part, by its design and purpose, is designed to increase the length of the shock absorber.
This part is placed directly under the rack. Then the shock absorber is inserted into the spacer, the whole thing is securely fastened and it turns out that the car becomes slightly higher.
The great thing about using this simple mechanism is that you don’t need to make any changes, you don’t have to cut anything, cook it, etc. During the installation process, all standard bolts and regular wrenches are used, well, with a small addition.
How to raise the front suspension?
Unfortunately, the quality of our roads requires some design changes to be made to most cars. This article will discuss how to raise a car's suspension. We will consider in detail several options for performing this operation. From the technical side, such tuning is not accompanied by any difficulties, and can be performed by anyone who knows the design of their model.
Ways to raise the suspension
The problem of how to raise the front or rear suspension can be solved in 5 ways:
- installation of stands;
- replacing springs;
- interturn supports;
- replacing spacers on springs;
- replacement of wheels and tires.
Special stands allow you to raise the clearance without structural changes or replacement of parts. The only drawback is that they add only a few centimeters to the height. These elements are installed between the supports and the body. They are made from several materials: polyurethane, aluminum and plastic.
The first bushings, with frequent driving on uneven roads, begin to compress, which leads to deformation of the body under their influence. The latter do not lead to the consequences described above. Instead, they provoke corrosion when in contact with a sand-salt mixture. The disadvantages of the latter elements include only a limited service life.
Spring replacement
It is known that springs have a direct effect on the amount of clearance, since the body practically weighs on them. When choosing them, it is necessary to take into account the design features of the car. For example, for a VAZ 2110 car, segments from model 2112 or 2111 are suitable. The former are more elastic, the latter are higher, but softer.
It is necessary to take into account the fact that if you choose a spring that is too powerful, it can reduce the shock absorber stroke. In other words, this may cause the last method to exit due to its blocking. The consequences are expressed in a decrease in ride comfort and rapid breakdown of the above-described segments.
Installation of interturn supports
This part makes it possible to slightly raise the clearance without much effort. This is achieved by reducing the compression ratio of the spring. A special element made of rubber is placed on it. As a result of installing the supply, machine stability is improved and sway is reduced.
Plus, there is additional protection for the suspension from possible punctures. The only drawback is the reduction in shock absorber travel. Therefore, it is necessary to choose the dimensions of the gasket taking into account an increase in height of no more than 5 cm.
Replacing spacers for springs
This method is similar to the previous one. The difference is that the spacer is not placed on the spring, but between it and the support. Spacers are made of high-quality polymer, which gives them increased wear resistance and the ability to withstand significant mechanical loads.
To raise the rear suspension in this way, you need to make sure that the spring and support segments are of good quality. Sagging springs must be urgently replaced, as they reduce the stroke of the coils. When mounting the spacer on high-quality parts, maximum efficiency is achieved. The clearance and compression of the shock absorber increases, but the rebound stroke decreases.
Replacing tires and wheels
This method is the most common and effective both technically and aesthetically. Installing rims one or two inches larger than standard will increase ground clearance and make the vehicle more attractive.
Moreover, such manipulations do not have any negative consequences. The only negative is the high cost compared to previous methods. It is important to know the maximum allowable size of wheels and tires for your model, otherwise the wheels may begin to touch the wheel arch liners.
The material described above fully reveals the answers to the questions: how to raise the rear suspension or the front. However, you need to understand that such a procedure has negative consequences. You can avoid them by adhering to the standard rule: do not increase the height by more than 5 cm.
If this value is exceeded, driving performance deteriorates significantly, wear of components accelerates, road stability decreases and the quality of controllability decreases.
Installation process
The first thing to do is to jack up the rear of the car. Check that the car is standing securely, because you will have to move under it for quite a long time, so protect yourself in advance.
Spacer for shock absorber
Then, using two wrenches, you need to remove the bolt that holds the lower shock absorber ear in place. At the same time, hold the bolt nut with another wrench and unscrew it. Once the shock absorber is freed and the bolt is removed, it's time to install the spacer.
When installing this mechanism, it is easy to notice that both spacers are symmetrical; they can be placed on both the right and left sides under any rack. However, one important point should be taken into account: the side of the spacer, which has a larger gap between the lower edge and the bolt hole, should face the middle of the car, i.e. be located closer to the center.
We place our mechanism on the beam eye, equip it with a special spacer and insert a bolt. Then we screw on the nut and tighten it thoroughly, at this stage the part is already fully installed and ready for use.
Now all that remains is to place the shock absorber strut in our part and also firmly clamp it using the removed bolt and nut. By selecting the desired hole, you will adjust the ride height of the machine. In this case, it is necessary to select one of the three holes before starting installation, because otherwise the spacer will have to be rearranged with the other side.
On the other side of the car, you need to do exactly the same manipulations, unscrew the shock absorber, install a part to raise the level of the rack and thoroughly tighten all the bolts. Next, we lower the car to the ground, remove it from the jacks, and proceed to adjust the brake pressure, headlights and castor tilt.
Safety
Whatever method of increasing the ground clearance on the VAZ 2110 you choose (if you need it, of course), remember that safety comes first. You want to get a car that will be more stable on the road, and not ready to roll over every minute even on a small obstacle?
Therefore, be sure to adjust the suspension to increase its elasticity. Swap out the regular tires on your car for low-profile tires. To ensure this, also install additional stabilizers.
Adjustment work
Once again, it is worth saying that if you are an inexperienced person, then it is better to find a familiar specialist who would help carry out everything planned, from installing the described part to calibrating all the values, or take the car to a service station.
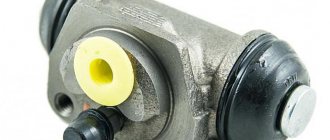
If you understand the structure of your car, then you need to start by adjusting the position of the pressure regulator. To install it correctly, you need to apply a force of 45-50 kgf to the rear of the machine. After this, you need to unscrew the bolt that holds the pressure regulator and move the drive bracket using a screwdriver until the gap between the spring and the lever is about 2 millimeters. You can check the remaining gap by simply placing a piece of wire with a diameter of 2 millimeters into it or taking a similar drill.
Now you can start setting the desired light level. To do this, you need to place the car on a flat horizontal surface at a distance of 5 meters from any light wall, let it be the wall of a house or garage, it doesn’t matter. It is better to do this “trick” together, at the same time the tire pressure is checked and the companion sits in the driver’s seat. Now a horizontal line is drawn on the wall at a height of 60 cm from the floor and split in half in the center of the car. Now, from the center of the horizontal line, measure the distance of the car headlights and draw perpendicular vertical lines. There should be a beam of light at the intersection of the horizon and vertical lines.
Conclusion
In general, the method of installing spacers under shock absorbers, on the one hand, is not such a difficult thing, however, there are nuances in this task that only a fairly experienced person can do. And of course, this part is designed specifically to reduce the costs that you might incur when replacing shock absorbers. At the same time, the car stops sagging due to increased weight and the fender liners no longer touch the wheels. So spacers are a worthy way to eliminate this problem, which has every right to life.
"Houses"
Another method of increasing ground clearance is to install so-called “houses” on the rear suspension. The “houses” have special holes through which the ground clearance is adjusted, and they are installed between the eyes of the rear suspension beam and the bottom of the shock absorber.
But experts generally cannot come to a common opinion - whether the “houses” of the VAZ 2110 help or harm it. Some people believe that they are needed when the springs have sagged, and with their help it will be possible to lift the rear of the car. Others suggest replacing the springs and not “fencing up houses”.
