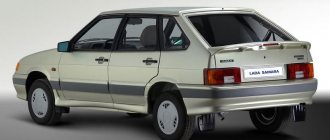
Bumper VAZ 2110
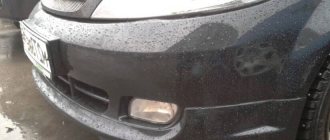
Removing the front bumper of VAZ 2110, 2111 and 2112 is not difficult. Both the rear and front bumpers of the VAZ 2110, 2111 and VAZ 2112 are absolutely the same. Moreover, it was easy to remove the bumper on this particular car, since there was no protection or fender liners.
how to remove the front bumper of a VAZ 2110
In order to change the bumpers on a VAZ 2110, you will need the following tool - these are socket and open-end wrenches for 8 and 10, as well as a double-sided screwdriver. And “there’s a pair for each creature” (two socket and open-end wrenches), it’s simply not convenient to use one or another wrench everywhere.
How to unscrew the front bumper of a VAZ 2110
How to unscrew the front bumper of a VAZ 2110
And so, if the car has fender liners, you will have to unscrew them from the bumper along the line of the bumper's wheel arch.
Replacing the front bumper ten, twelve
Next, the right and left sides of the front bumper are held in place by one 8mm bolt on each side. As a rule, they are rusty and often even the bolt heads break off. The bolt remains in the nut and then it is difficult to secure the side of the bumper. To screw the bolt back into it, you have to drill out and tap a new thread. To avoid this, first spray it with “VDshka” or brake fluid, wait 5 minutes and carefully turn the bolt counterclockwise. If it starts to turn tightly, tighten the bolt a little, lubricate it again and continue unscrewing.
How to remove the bumper of a VAZ 2110
The same applies to the “apron” studs, to which the bottom of the bumper is attached with 10mm nuts. Most often, on the vast majority of cars, this part of the “apron” is deformed, the studs are broken off and the bumper is not attached to it at the bottom (impacts on curbs, off-road driving, etc.). But the bumper still holds tight. You don’t have to worry, he won’t go anywhere. And so, unscrew the nuts...
How to remove the front bumper tens with your own hands
And in order to unscrew the last two 10mm bolts that hold the bumper in the upper part, you will have to remove the radiator grille, but how to remove the grille of a VAZ 2110? Yes, it’s very simple... Open the hood and unscrew two 8mm screws on both sides of the grille (photo below).
How to remove the grille of a VAZ 2110
After that, it is necessary to release the lower mounting ears of the radiator grille. Hook with your fingers and slightly pull all 4 teeth in order towards the radiator.
Replacing the radiator grille of a VAZ 2110
Now, we got to the treasured bolts. You just need to unscrew them a little (not necessarily all the way) so that the bolt washers release the edge of the bumper.
Replacing the bumper of a VAZ 2110
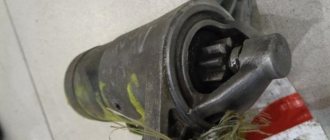
If you also have to replace the fog lights of the VAZ 2110, then they must first be disconnected from the power supply (in the under-bumper part). Simply unplug the plugs. And on the bumper itself they are held in place by only two screws on both sides.
How to remove the bumper on a VAZ 2110 (video)
Front bumper VAZ 2110, price - on average 1,700 rubles
Rear bumper VAZ 2110, price is the same 1,700 rubles on average
Radiator grille VAZ 2110, price 250-300 rubles.
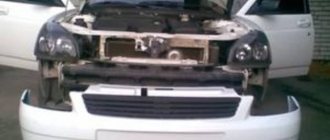
How to replace the front bumper on a VAZ 2110-VAZ 2112?
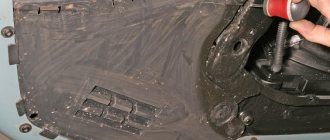
Removal: 1) At the very beginning of the operation, you will need to take a wrench with you, or a socket, and together with these tools, look under the lower part, namely strictly under the bumper of your car, there you will see that the so-called engine mudguard is attached to the lower part of the bumper (Some people also call it crankcase protection, although this is a completely different part, but still you will most likely understand what we are talking about), so this mudguard is attached to the body with five nuts in its front part, so just unscrew all these nuts (The remaining nuts, and even more so, you don’t need to completely remove the mudguard), because if you neglect this, this mudguard will greatly interfere with replacing the front bumper on your car.
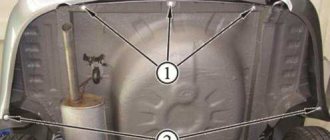
2) Then move into the car interior and, already inside the cabin, pull the handle that opens the hood of your car, after the hood is slightly opened, approach it and thereby lift it and place it on a support in order to gain access to the engine compartment, after To do this, you will need to remove the so-called radiator grille from the car, for this you will need to unscrew two bolts, one of which is already unscrewed in the photo, and the other is just unscrewed and their location is also indicated by arrows, so when the bolts are unscrewed, lift and thereby completely remove the radiator grille from the car in order to gain access to the remaining bolts that already secure the bumper itself.
Work progress
- Since the wiring (license plate light) is connected to the rear bumper, it would be better to disconnect the negative terminal of the battery to avoid a short circuit;
- Open the trunk and fold back the rear trunk trim, then fold back the edge of the side trim on the left side to expose the wiring harness that goes to the license plate light. Disconnect the wire block;
- Unscrew the nut and disconnect the license plate light wire going to ground;
- After this, unscrew 1 bolt of the upper fastening of the bumper mount on both sides;
- Next, unscrew 1 bolt of the lower bumper mounting on both sides;
- Now we remove the bumper itself, pushing it back and passing the wires through the hole in the rear panel of the body;
Withdrawal algorithm
First, let's select the necessary tool. We will need a 10 and 13 wrench, 8 and 10 sockets, and a Phillips screwdriver. Just in case, it is better to have penetrating lubricant (WD-40) and a rag on hand.
Keys and screwdriver.
WD-40 lubricant.
We carry out the work in this order:
- If the car has fender liners installed, you need to remove them: a 10 nut and two 8 screws in the far part of the fender liner (closer to the door). Then unscrew the two screws on top and the three screws securing the fender liner to the lower edge of the bumper. You can not remove the fender liner completely, but release only the front part, but this is not so convenient.
Unscrew the 2 screws of the lower fastening of the fender liner to the bumper.
We also unscrew the screws of the upper fastening. - Remove the false radiator grille. Under the hood, unscrew the two bolts along the edge and remove the grille from the grooves below.
Using a 10mm wrench, unscrew 2 screws.
Having released the lower clamps, pull the grille up. - Remove the negative terminal from the battery.
- If fog lights are installed, turn them off by removing the contact blocks on each headlight.
We disconnect the fog lamp blocks.
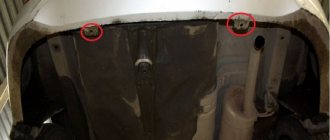
- From below, the bumper is attached to the vehicle's load-bearing frame with two bolts - on the left and on the right.
- From below, unscrew the five points attaching the bumper to the mudguard.
- Lastly, unscrew the two bolts of the upper fastening of the bumper to the power frame. Now the bumper is supported only by the side clamps.
Unscrew the bolts securing the bumper to the bracket from below.
From above, unscrew the bolts securing the bumper to the front panel. - Carefully and evenly push the bumper towards you from each side and remove it from the car.
Use a 10mm socket to unscrew the mudguard screws.
Remove the bumper by sliding it forward.
Installation of a new or repaired bumper is carried out in the reverse order. Good luck and keep your bumpers away from curbs!
The car bumper acts as a protective buffer. It is he who suffers primarily in collisions and touches. It is possible to repair a part locally in rare cases. Therefore, removing the front bumper of the VAZ 2110 for restoration work will be the most correct solution. If you have minimal plumbing tools, the entire operation will take no more than 1 hour.
Why are they replacing?
The reasons for replacing bumpers are different for everyone. But a few basic examples can be given.
- The driver is a fan of tuning, so he decided to change these body elements.
- The old body kit is covered with scratches and chips, so it needs updating and painting. This work is complicated, so it’s easier to just replace it.
- As a result of an accident or an accident, the old bumpers have become unusable, so they need to be replaced with similar or more exclusive, original ones. Depending on the wishes of the car owner.
- There was a desire to install original optics in order to provide a visual effect and improve the quality of the headlights. But the old bumper is not suitable for these purposes. We have to dismantle it.
Removing the front bumper
So, you have made the appropriate decision, because the old body element will go to its well-deserved rest, and a new structure will take its place. Whether it will be a factory bumper or whether it will be about tuning is up to you. The main thing here is to dismantle the old structure and install another in its place - a matter of technology. More precisely, the reverse sequence of dismantling.
For removal you will need a certain set of tools and materials, which include:
- Open-end wrenches 10 and 8 millimeters;
- Socket wrenches 10 and 8 millimeters;
- A set of screwdrivers or one double-sided screwdriver;
- The almighty WD40;
- Dry, clean rags;
- New body parts, linings, etc.
Further, the set of tools and materials depends entirely on the front and rear body kit element you choose. Some bumper models require certain tools or attachments. It is best to ask the seller about this.
Now we can proceed directly to the task at hand.
- If you have fender liners, be sure to remove them. To do this, simply unscrew the fasteners along the entire line of the wheel arch.
Removing the wing fenders
- The left and right sides of the front bumper are held in place with one bolt each. The factory bolt requires an 8mm wrench.
- It is not uncommon for these bolts to rust and the heads to fall off under strong pressure when unscrewing. If the bolt remains there without a head, it will be difficult to reinstall the new bumper.
- Therefore, we recommend treating the bolts with WD40. An alternative is regular brake fluid. After treatment, allow the product to react. It is enough to wait about 5-10 minutes.
- Now carefully and gradually unscrew the bolts counterclockwise. If it still doesn’t budge, return the bolt to its original position, treat it again with the product, and finally remove it.
- It is not uncommon for the head to eventually fail, which leads to the need to drill out the old bolt and then cut a new thread. The task is not an easy one, so let’s hope that you can get by with little blood, as they say.
- Further it is not better, since the apron studs with 10 mm turnkey fasteners holding the bottom of the bumper are also characterized by similar properties of rusting and complicating dismantling work. Often this element of the apron is crumpled, deformed due to impacts on holes, curbs, as a result of off-road travel, and so on. At the same time, the bumper stubbornly continues to hold strong. This is what VAZ 2110 means.
- Be sure to carefully unscrew these nuts and treat with WD40 if necessary.
- Ahead of you are the last bolts holding the bumper, this time from above. There are two of them, they require a 10 mm wrench. But the problem is that to dismantle these very last two bolts you will have to remove the radiator grille. On the other hand, this is an excellent opportunity to tune the front of the car by installing not only bumpers and trims, but also a new grille.
- To remove the grille, lift the hood and unscrew the two screws on both sides of the radiator grille. Here you will need an 8mm wrench.
- Now we release the lower fasteners of the grates. Hook them with your fingers and slightly pull all four teeth towards the radiator itself. Just take it one at a time.
- Now you've reached the cherished last two bolts. It is not necessary to unscrew them completely. Unscrew a little, which will allow the fastener washers to release the edge of your bumper.
Removing the front end
We recommend: Do-it-yourself valve grinding when repairing the engine head
Removing the rear bumper
If you additionally plan to replace the rear bumper, you will also have to remove it first. The work is not difficult, it will take you about an hour.
Rear bumper
- Disconnect the negative terminal from the battery. This is necessary for the reason that the wiring from the license plate light goes to it. We don't need short circuits.
- Open the trunk and remove the rear trim. Not completely. It is enough to simply fold the part that interferes with work deep into the trunk.
- Move the trim on the left, which will allow you to get to the wiring block and disconnect the connector that goes to the license plate light.
- Unscrew the fastening nut and disconnect the wire going to ground, that is, the car body.
- Now unscrew the upper bumper mount. For this purpose, the VAZ 2110 has one bolt on each side.
- The two lower mounting bolts are unscrewed in the same way. One on each side.
- Next, the bumper is removed and brought back. Don't forget to pass all the wires through the back panel, where there is a hole.
- Unscrew the three mounting screws on the license plate illumination housing, as well as the three fasteners from the wiring harness clamps. The housing with optics is removed from the old body element and installed on the new one.
Removing the rear
Removal process
Before we remove the bumper from the front of the car, the battery on the VAZ 2110 should be disconnected. This is a mandatory rule stating that plumbing work must be performed on a de-energized machine. Leave the hood open. Turn the steering wheel in any direction. This gives improved access to the two screws that secure the fender liner to the bumper. Unscrew the screws with a Phillips screwdriver. We turn the steering wheel in the opposite direction and perform a similar operation with the fender liner on the other side.
On a VAZ 2110, when replacing front bumpers, it is not necessary to remove the lockers. But this can be done quickly without removing the wheel by unscrewing just one nut with a 10 mm wrench and 5 self-tapping screws.
Let's move on to the bottom of the fasteners. Disconnect the fog lights (if installed). The inner side parts of the buffer are secured to the guide brackets, one screw on each side. We turn them out with an 8 mm head. Take a 10 mm spanner or socket wrench and unscrew the five nuts securing the bumper between the engine protection and the lower panel of the radiator frame (TV). Then, you need to unscrew two 13 mm bolts connecting the buffer to the supporting frame of the body, the side members. Next, move on to the top part.
On a note! It is recommended to pre-treat the steel fasteners of the front bumper with liquid key, since the lower studs on the VAZ 2110 often break.
Unscrew the two screw bolts of the false radiator grille. Its lower part is attached to groove joints. We remove the grille from its seats. There is access to two bolts connecting the bumper to the channel (steel buffer amplifier). Using a socket wrench or 8 mm socket, unscrew the fasteners. The bumper is completely unscrewed. It can be removed by pulling the element towards you from each side one by one.
Preparatory stage
Content
Removing the front bumper of a VAZ 2110 is mainly done from the bottom of the car. Therefore, it is necessary to provide a dry area for dismantling/installation work. It is possible to carry out the removal in the inspection hole, this makes the task easier.
To work, the car owner will need a tool such as:
- Phillips screwdriver;
- open-end wrenches: 10, 13 mm;
- spanners or heads: 8, 10 mm;
- liquid key.
Removing and replacing the front bumper of a VAZ 2110 may require the help of a partner. This is necessary to avoid unwanted damage in the form of scratches or chips on the freshly painted part.
On a note! It is possible to cover the surface of the bumper with paper tape; this will also protect the paintwork during installation.
Installation process
After body repair and painting, the bumper is reinstalled in the reverse order. If the owner plans to replace the bumper on his VAZ 2110, then certain difficulties may arise with the new buffer. Mismatch of fasteners with seats is the most common problem with purchased elements. Moreover, some parts may not fit as they are defective. You should exchange the defective buffer in the store or make adjustments before painting to avoid damage to the paintwork.
As described above, attaching the front bumper to a VAZ 2110 is easy. But it is better to do the installation with a partner. It is very difficult for one person to insert the side fasteners into the seats and exert a certain force on the buffer. As a rule, its central part is difficult to fit onto the channel and the side parts will jump out of the brackets.
Upon completion of installation, you should check whether the bumper fits into the seats everywhere. It happens that the owner screws the front part, but the side guides remain free. In this case, you have to unscrew the fasteners, remove the part and reinstall it.
If the inspection gives a positive result, then the fastening sequence looks like this:
- screw the two upper bolts into the steel channel;
- then, install the lower part of the buffer on the five lower studs;
- We press the buffer with the crankcase protection and secure it with nuts;
- screw 2 fasteners to the side members (head 13 mm);
- screw the bolts into the side internal mounts (under the wings).
- connect the fog lights.
- fasten the fender liners in place;
- Installation completed.
On a note!
If you have autoplasticine available, it is recommended to apply it to the surfaces of the fasteners. Thus, studs, nuts and screws are perfectly preserved, and the processed edges are not destroyed during the next dismantling. Summarizing the material of the article, it becomes clear that removing the front bumper of a VAZ 2110 is not a difficult task. It is worth adding one point: it is advisable to carry out work in a warm room. Cold plastic is difficult to bend and the fragility of the material increases.
Welcome! The front bumper - it basically constantly suffers on the road, then I wanted to park but it didn’t work out well, then the brakes didn’t work very well and thereby caught up with the car in front, etc. Therefore, you have to change the front bumper many times while you are using the car, but not everyone knows how to do this, so we wrote this article especially for such people, in which we tried to detail the process of replacing the front bumper on cars of the tenth family.
Note! To replace the bumper, you will need to stock up on: Various types of wrenches, you may also need sockets with an extension, or a wrench, and you will also need to take a screwdriver with you!
Summary:
Selection of new bumpers
Plastic body parts for the “ten” are sold in two versions:
- bare plastic without paint coating;
- painted in a specific color and completely ready for installation.
This body kit is cheaper, but it still needs to be painted
The first type is worth purchasing when you need to repaint the entire car or its color is so unique that it is difficult to find a painted bumper. A coated part will cost more, but it can be immediately installed on the car without unnecessary worries about painting. Prices for standard and some styling products for VAZ 2110-2112 are presented in the table.
| Type of body kit for VAZ 2110 | Front factory | Front AVR | Front "Sniper" | Rear factory | Rear AVR | Rear E-4 | Rear Brooklyn |
| Cost of an unpainted element, rub. | 2630 | 3860 | 3490 | 2760 | 3855 | 4000 | 4150 |
| Price of painted element, rub. | 3250 | 5260 | 5460 | 3250 | 5265 | 5770 | 5920 |
Note. The rear bumpers of the VAZ 2110 and VAZ 2112 are not interchangeable, although they have a similar shape and are attached to the body in almost the same way.
VAZ 2110 with front styling bumper AVR
If you analyze the prices given in the table, it becomes clear that buying an unpainted product rarely justifies itself, since you still have to pay extra for painting and waste time. When choosing new parts, you should pay attention to the following points:
- the quality of the paintwork, the absence of manufacturing defects and small chips along the edges that may occur during transportation;
- front elements can be sold with or without a plastic amplifier, choose the appropriate option for yourself;
- it is better to choose products where the manufacturer has provided additional internal ribs that strengthen the structure;
- The plastic should be flexible, not hard and brittle.
Styling bumper Sniper gives an aggressive appearance
How to replace the front bumper on a VAZ 2110-VAZ 2112?
Removal: 1) At the very beginning of the operation, you will need to take a wrench with you, or a socket, and together with these tools, look under the lower part, namely strictly under the bumper of your car, there you will see that the so-called engine mudguard is attached to the lower part of the bumper (Some people also call it crankcase protection, although this is a completely different part, but still you will most likely understand what we are talking about), so this mudguard is attached to the body with five nuts in its front part, so just unscrew all these nuts (The remaining nuts, and even more so, you don’t need to completely remove the mudguard), because if you neglect this, this mudguard will greatly interfere with replacing the front bumper on your car.
Bumper repair technique
To use this repair technology, it is necessary to collect fragments when the bumper is damaged. Repairing chips on the bumper requires a soldering machine. Collected fragments or purchased plastic strips are soldered to the area where the bumper is damaged. Adhesion depth - 80%.
The technique is similar to the first one. The difference is in the soldering material - instead of fragments, wire and nails without heads are soldered in. Solder on the back side of the bumper.
The soldering material is copper wire. Solder from the inside of the bumper. Soldering from the outside is allowed if there is no access from the rear.
A decorative radiator grille will be required. Connect the bumper at the damage site using the soldering method. The technology differs from previous ones in its high reliability of fastening.
The methods are suitable for repairing the rear bumper and the front. Pay attention to the material the bumper is made of. It is indicated on the inside of the bumper.
Choosing a new bumper
Body parts made of plastic are available for sale in 2 types:
The first version should be purchased if you need to repaint the car completely or its tone is unique and it is difficult to find a painted bumper. A coated part will be more expensive, but you can immediately install it on the car and not have to think about painting.
Note that the rear bumper on VAZ-2110 and VAZ-2112 cars will not be interchangeable, even though they have a similar shape and are fixed to the body in almost the same way.
If you compare prices, it is noticeable that purchasing an unpainted bumper is very rarely justified, since in any case you will need to pay for painting and waste time. When choosing new parts, pay attention to the following nuances:
- what is the quality of the paint base, carefully inspect for defects and minor chips;
- front parts are sold both with a plastic amplifier and without (choose the appropriate one);
- give preference to products where the manufacturer provides additional internal ribs (to strengthen the structure);
- the material (in this case plastic) should be elastic and not brittle/hard.
Note. If the parts are improved or painted in expensive colors, then the cost may differ by 1-1.5 thousand rubles.