Valve lapping do it yourself - a simple procedure, provided that the car owner has previously had experience in performing repair work. To carry out lapping of valve seats, you will need a number of tools and materials, including lapping paste, a device for dismantling valves, a drill (screwdriver), kerosene, and a spring with a diameter extending into the hole of the valve seat. In terms of time, grinding in engine valves is a rather expensive procedure, since to perform it it is necessary to dismantle the cylinder head.
Why do you need to grind valves?
The following methods for solving the problem are aimed more at owners of VAZ classics (VAZ 2101–2106), but in the case of VAZ 2108–2109 models the process will not be much different. In many respects it is generally universal.
Most often, the need to grind valves is encountered during engine overhauls. The piston rings and gaskets have been replaced, other important components have been installed, so now is the time to check the valves for leaks: this will reveal the need for their grinding.
It should also be remembered that this procedure will not be superfluous when carrying out other repair work. In particular, those in which the cylinder block is dismantled. It's always better to be safe than sorry.
Why is it important to maintain the correct engine compression levels?
One of the most important quality characteristics of engine operation is the presence in the combustion chambers of the cylinders of the compression level recommended by the manufacturer. This characteristic depends on:
- the degree of wear of the cylinder itself, its piston rings, and the piston;
- the quality and integrity of the sealing gasket located between the cylinder head and the cylinder block itself;
- how tightly the intake valves, and with them the exhaust valves, adhere to their seats in order to avoid the passage of gases through the gaps.
Ideally, compression should be at the same level in all cylinders. And since the wear of the piston group components is almost the same, the fact that compression is detected in the cylinders that differ from each other may indicate poor valve operation.
By the amount of compression you can preliminarily judge the condition of the engine: if it is not the same in the cylinders, it’s time to grind the valves
How to check valve lapping
Upon completion of valve lapping, it is imperative to perform a quality check of the lapping. This can be done using one of two methods.
Method one
The method described below is the most common, but it will not always show the correct result with a 100% guarantee. It also cannot be used to check the quality of valve lapping on engines equipped with an EGR valve.
So, to perform the check, it is necessary to place the cylinder head on its side, so that the holes of the wells to which the manifolds are connected “look” up. Accordingly, the valves will be located in a horizontal plane, and their covers will be located vertically. Before checking that the valves have been ground in, it is necessary to dry the valve outlets using a compressor to ensure that possible fuel leakage from under them is visible (that is, so that the vertical wall is dry).
Next, you need to pour gasoline into vertically located wells (or even better, kerosene, since it has better fluidity). If the valves ensure tightness, then the poured kerosene will not leak out from under them. If fuel leaks out from under the valves, even in small quantities, it is necessary to perform additional grinding or other repair work (depending on the specific situation and diagnosis). The advantage of this method is that it is easy to perform.
However, this method also has its drawbacks. Thus, with its help it is impossible to check the quality of valve grinding when the engine is running under load (gas leakage under load). Also, it cannot be used for engines equipped with a USR valve, since their design implies the presence of corresponding valves in one or more cylinders, through which fuel will flow out. Therefore, it will not be possible to check the tightness using this method.
Method two
The second method of checking the quality of valve lapping is universal and the most reliable, since it allows you to check the passage of gases through the valves under load. To perform the corresponding check, it is necessary to position the cylinder head “upside down”, that is, in such a way that the valve outlets (holes) are on top and the manifold well holes are on the side. Next, you need to pour a small amount of fuel (in this case, it doesn’t matter what kind, and even its condition doesn’t matter) into the valve outlet cavity (a kind of plate).
Take an air compressor and use it to blow a stream of compressed air into the side well. Moreover, it is necessary to supply compressed air both to the opening of the intake manifold and to the opening of the exhaust manifold. If the valve grinding was done efficiently, then air bubbles will not come out from under them even under the load provided by the compressor. If there are air bubbles, it means there is no tightness. Accordingly, the grinding was performed poorly and rework is necessary. The method described in this section is extremely effective and versatile and can be used for any engine.
Basic lapping methods
Valves can be ground in using specialized equipment or auxiliary tools:
- The first option is to use an automated machine. In this case, there is not even any grinding as such: the valve and seat are simply chamfered, which ensures the most rigid alignment and mating accuracy. The result is a high-strength profile that can ensure excellent engine performance.
Automated valve grinding process on a machine
- The valves can be ground in using a manual milling machine. There are many machines, including those designed for engines of certain modifications. Here, too, everything is done quite quickly and accurately.
If you have a manual milling machine in your garage, valve grinding can be done efficiently and quickly
- Do-it-yourself valve grinding. This is a popular method, but at the same time the most labor-intensive and time-consuming. All defects and surface irregularities are removed using a special abrasive paste, and the main tool is a special T-shaped device with a hole for inserting the valve stem.
A special wrench for manually grinding valves will simplify manual work
Required Tool
The work of grinding valves is not particularly difficult, but it takes a long time to complete, especially if you do it yourself.
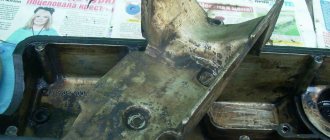
It is impossible to perform them on a car; you will have to partially disassemble the power plant, namely remove the cylinder head.
Therefore, when deciding to grind the valves, you should immediately take care of having a new cylinder head gasket.
The tools you will need to perform this operation are:
- Set of keys and sockets;
- Device for desiccation of valves;
- Device for performing grinding;
- Grinding pastes;
- Rags;
- Kerosene.
Grinding valves at home
To carry out the work quickly and get a high-quality result, you must follow the following sequence of actions:
- The disassembled cylinder head is installed on a workbench and securely fastened.
- The required valve is placed in its place, and its rod is fixed in the tool.
- A layer of lapping paste is applied to the contact area of the valve with its seat.
- The valve is then placed so that there are no gaps at all.
- Circular movements are made clockwise and counterclockwise.
- After some time, the valve turns over, a new layer of abrasive paste is applied and rotation resumes.
- The grinding process continues until a matte, uniform strip 1.5–2.0 millimeters thick is formed on the valve seat and its plate.
Video: manually grinding valves without tools
The method itself is quite tedious. But it allows you to fully control the grinding process and monitor the result obtained.
About proper seat lapping
On the threshold of the third millennium, it’s time to abandon handicrafts and, if you decide to get into the cylinder head, get into it professionally, “with your head.” The head of the Motortekhnologiya company, Alexander Lizunov, will tell you how to do this.
Would it even occur to a sane person, even in an emergency, to perform a neurosurgical operation on a sick friend, neighbor or drinking buddy at home? If you can’t do without this, there is not a single hospital (even a veterinary one) in the area for a thousand miles, then you can take a risk. But even here you will need at least four most important things: a scalpel, a clamp, alcohol, a cucumber. This is not bullshit on a moonlit night, but the simplest analogy with repairing the valve mechanism of a cylinder head, which can be safely compared with our head. Yeah, the one where “there’s nothing to hurt, just a bone,” but it still hurts. And there’s absolutely no point in adding headaches to yourself by “chemically” doing something with the valve seats yourself.
It will be easier and more reliable to entrust the repair to a specialist. Of course, if there is no specialist nearby, you will have to do everything yourself. But... without an urgent need to try to do everything on your own, to put it mildly, is inhumane, and even downright stupid. So, not “scalpel, clamp, alcohol, cucumber”, but some information, the knowledge of which will help, at least “not harm”, and even help the affected valve seats.
We strongly warn you: do not trust craftsmen who, having heard about repairing the engine valve mechanism, react unequivocally: “No problem! We’ll be there in no time, and everything’s in order!” and at a small trot they go for abrasive powder, and, as a rule, they get it not in a store (money is a pity), but in the protective casing of an electric sharpener - there is plenty of it, and all for free. It got to the point that books on car repair began to appear on sale, in which there is not a word about restoring the shape of the chamfers of valve seats, but a lot of things are written about lapping as a means of serious repair. If you follow this logic, then rock and roll may well be considered the best cure for a cold. But the valve mechanism is one of the most critical components of the engine, and it has to work really hard. This is understandable - the crankshaft can develop over 6000 rpm.
It is difficult to visualize 200 piston movements per second. It is not easier to imagine how each valve can open 50 times per second and close the same number of times. And if we also remember that in this case the temperature of the burning mixture reaches 2300-2500°C, and the valves themselves, for example, exhaust valves, heat up to 600-800°C, then it will become clear: at the “workplace” they feel calm and comfortable, as in Hiroshima.
Agree that, although the seats and the valves themselves are made of alloy metals, under such conditions it is very difficult to ensure the tightness of the combustion chamber. Naturally, valves, seats and guides are subject to wear.
We list the main malfunctions of the valve and associated parts :
- burning of the mating surface of the valve and seat with the formation of cavities;
- warping, or even cracks of the valve plate and seat;
- mechanical damage to the seat due to a faulty valve.
The listed defects are often associated with the use of non-standard fuel and spark plugs, incorrect adjustment of the ignition system and valve mechanism drive. Operating wear of valve seats is expressed in deformation of the edges of the chamfers and a violation of the tightness of the interface between the seat and the valve, which can be seen from traces of gas breakthrough (carbon deposits).
Severe wear of the guide bushings leads to disruption of the geometry of the seats and even to their destruction. This is especially true for exhaust valve seats.
The profile of the valve's working chamfer practically follows the shape of the worn seat.
It is the sum of all the circumstances that explains the fact that the valve mechanism often fails and will continue to fail. If these damages are minor, they can be relatively successfully dealt with by “grinding in.” In the same case, if, as a result of wear or due to a malfunction, the geometry of the valve seat and guide sleeve is disrupted, grinding will not achieve anything good. Here the valve is being ground in, like, excuse me, a dead poultice, here it requires much more serious repairs.
To make it clear how serious the repair must be, let’s at least look at what shape the valve seats have and what determines the choice of just such a design solution for this important engine part. The thing is that the design of the seat is subject to various and often mutually exclusive requirements, such as heat resistance, wear resistance, reliability of the seal of the “seat-valve” pair, etc. It should also be noted that the important fact is that the shape of the surface of the valve seat affects the filling process and cleaning the engine cylinder. Let's start with the main thing. The first requirement of the seat-valve interface is to ensure tightness throughout the life of the engine. For this purpose, a special chamfer is made on the saddle, called a working chamfer (see figure).
A - upper auxiliary chamfer; B - working chamfer; C - lower auxiliary chamfer; D —valve disc diameter; d is the diameter of the valve stem.
In order to function normally, it needs to have a minimum width, because... To ensure tightness, it is not so much the area of contacting surfaces that is important, but the required specific pressure at the interface. On the other hand, this chamfer removes a significant part of the heat from the valve itself, which means it should be as wide as possible. To reconcile these contradictions, it is necessary that in practice the width of the working chamfer of the seat is 1.2 -1.6 mm for inlet seats and 1.5 - 2.0 mm for exhaust seats, and its angle in most cases is 45°. Its location relative to the working chamfer of the valve disc is also important: the point of contact should be in its middle. In this case, the valve disc will experience minimal deformation and thermal stress.
Now about the additional chamfers of the saddle: why are they needed? Their main role is the formation of gas flows entering and exiting the cylinder. After all, the speed of these flows in the head collectors can reach 60-100 m/sec in different operating modes, and when they pass through the narrowest part, i.e. cross-section “valve-seat”, significant turbulence occurs in the working mixture (air in diesel engines) and the exhaust gas flow. Auxiliary outer and inner chamfers reduce these turbulences and help reduce aerodynamic drag in the “seat-valve” section. The result is better filling and cleaning of the engine cylinders, especially at high speeds. See how everything is thought out. The designers tried their best, calculated the shape of the seat and chamfer, took into account everything that could be taken into account, and provided for what could not be taken into account... And you - “grinding in, grinding in.”
It is not difficult to predict that artisanal, primitive repair methods will not lead to anything good. When repairing such a complex part, it is important not only to adhere to the general principle of operation, but also to high precision processing, which is achievable only with the help of high-quality modern tools and with the most scrupulous adherence to technology. In the West, this has long been understood, and that is why overhauled engines there have the same service life as new ones. And here, if we manage to achieve 70% of the resource, it is already considered that the work has been done conscientiously. And proponents of “old-fashioned” methods of car repair are not least to blame for this.
Nobody argues that the grandfathers were not fools, but the machines they had to deal with were no match for the current ones. Now let's move from theory to practice , from reasoning to repairing valve seats.
Using the Neway tool, we will restore worn seats of the Mercedes OM 615 diesel engine.
1. The collet design of the guide rod (pilot) ensures its reliable self-centering and fixed fixation in the valve guide.
2. We put the cutter on the installed pilot. High machining accuracy is ensured by precision fit of the cutter. The gap is 3-5 microns.
3. At the first stage, with uniform rotation of the tool, the lower chamfer of the seat is formed. Next, turn the cutter over and process the upper chamfer.
4. We form a working chamfer with a milling cutter with the required angle. Typically this is 45° or 30°. The force on the cutter should be minimal.
5. To control the location of the contacting belt, we perform “developing” grinding for 5-10 seconds.
6. If the working chamfer of the seat is formed incorrectly, the contact area may shift. For example, to the top of the valve chamfer.
7. In this photo, this drawback was eliminated by additional milling of the upper valve chamfer and re-forming the working one.
8. Refurbished saddle. Due to the high precision of processing and the microrelief created by the cutter knives, lapping is not required, of course, if the valve is restored or new.
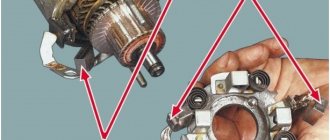
We take a screwdriver in our hands
Since not everyone has the required amount of free time, patience and perseverance, folk craftsmen introduced another method using a screwdriver.
A drill is also often recommended, but its chuck has a significantly higher rotation speed, which may not have the best effect on the final result. So if you still decide on a drill, then you need to take a tool with the ability to adjust the speed and the reverse function. In this case, the valves can be ground in either through the combustion chambers or simply from above.
Grinding in valves from the combustion chamber side
The work is performed in the following sequence:
- The first step is to make small solid washers from metal with a diameter slightly smaller than that of the valve discs. Holes are cut in the center of these washers, as for a flat screwdriver.
- Using molten bitumen (or equivalents), slotted washers are attached to the valve discs.
- The cylinder head is turned over with the combustion chambers facing up, the required valve is put in place and a layer of paste is applied to the area to be ground.
- A rod with an end like a flat-head screwdriver is attached to the drill chuck.
- The flat end of the rod is inserted into the cut of the washer and at low speeds of the drill, grinding of the valve begins.
- The valve is turned in each direction about ten times. It must also be remembered that when changing the direction of rotation, the abrasive paste must be reapplied.
- After the procedure, its spring is attached to the valve.
- You can remove the washer from the valve by heating it.
- The remaining bitumen is removed with solvent, gasoline or similar means.
How to lap valves from above
The entire process is almost identical to the manual method. The main difference here is that the valve is rotated using a tool. Some people directly attach the valve stem to the drill chuck, but for greater efficiency and safety, it is better to insert a stem with a diameter close to that of the valve stem into the chuck. Then an approximately 10-centimeter piece of rubber tube is taken and the mentioned rods are connected with its help. For greater reliability, the rubber tube should be clamped at the ends with clamps.
Minimum required tool for grinding valves with a drill
Video: how to grind valves with a drill
Standard set of lapping tools
The most important tool is abrasive or diamond paste. It must be applied to the edge of the valve - the paste will create a sandpaper effect and allow you to quickly grind the plate to the seat.
According to the type of processing, the paste composition differs in the size of the abrasive elements - from coarse-grained to fine-grained. Coarse abrasive is used for initial grinding. Final grinding is carried out using a fine-grained paste - then the head of the component will be firmly installed in the seat.
Pastes also vary in price - from inexpensive ones for personal use to branded formulations for professional lapping. You can carry out independent processing with a composition of average cost. It is important to monitor the condition of the valves themselves and the correctness of the grinding process.
The next step is to choose the tool for the job. Lapping can be carried out by:
- Electric drills.
- Wooden device with suction cups.
- Pneumatic tool.
- A special pneumatic machine for tapping.
The electric drill for lapping is the most popular among amateur craftsmen because of its accessibility and versatility. Repair shops can use a special chamfer grinding machine.
Processing and restoring seats requires the use of special tools. This is a cutter for removing excavations - a device made in the shape of a valve seat. The cutter is put on the drill, since the drill is usually of medium size.
The tool is used if the valve heads are damaged due to burnout.
You will also need a desiccant to remove the “crackers” - the parts connecting the spring plates to the valve.
Nuances worth knowing about
To an experienced repairman, the tips below may seem unnecessary, but a novice repairman should definitely remember the following:
- It is better not to remove all rockers (cams on the valves) right away. It is necessary that each valve gets its own rocker back. While the engine is running, the camshaft cam and the corresponding rocker grind in and if they are “separated”, unpleasant clicks may appear when the valves operate, despite the fact that they have been properly adjusted before.
- And you also need to understand that each valve must return to its place. Changing them even after grinding in would not be the best idea.
- You can use various abrasive pastes in your work. You can start with the largest and end with the smallest. This will improve the results obtained.
- For a better fit, it is sometimes suggested to use machine oil at the finishing stage.
Valve grinding is carried out using various abrasive pastes
What lapping paste should I use?
At the dawn of the automotive industry, dust from diamond wheels mixed with engine oil was used to grind valves. Today, these mixtures are replaced by a variety of grinding pastes. They differ in the content of abrasive elements, fraction sizes and, accordingly, price.
The paste is selected depending on the degree of contamination, quality and grade of valve metal, year of manufacture and engine model. The grinding method – manual or mechanical – also matters.
An important factor in choosing a paste is the experience of the master . For example, a beginner using coarse paste can easily damage a valve or seat. Therefore, for novice craftsmen, it is recommended to use a fine-grained paste, while grinding in with this product will take more time.
Automotive stores sell coarse-grained paste called “Classic” or “Diamond” for initial lapping. For final grinding, FABO paste is used - a finishing anti-friction, non-abrasive treatment. This paste is sold in a set of two tubes, with large fractions and a grinding one.
There are also multifunctional pastes such as ABRO Grinding Paste GP-201. It can not only grind valves, but also clean rust from metal parts and even be used to sharpen cutting tools, such as planes. Its price is much lower than the special “FABO”, so, as they say, it will come in handy on the farm.
“PERMATEX” or “Done Deal” pastes are also used for polishing chrome parts, since they do not contain technical diamond, but silicon carbide.
Important! Before buying a paste, you need to carefully read its composition and range of applications.
If the repair finds the driver without paste, and it is impossible to postpone the grinding - the engine has already been disassembled, you can mix abrasive removed from ordinary, fine sandpaper with oil, and for final polishing use the paste of the State Optical Institute or better known as GOI paste.
Checking the quality of work performed
You can check how tightly the valves fit, as mentioned at the beginning, using kerosene. This is the most common method. The valves are assembled, springs are installed on them, then the head block is turned over so that the combustion chambers face up. After this, the cylinder head, where the ground-in valves need to be checked, is filled with kerosene. If after 10–15 minutes no leaks have occurred, then you can proceed to grinding in the next “clients”.
Using a vacuum tester will be no less reliable. The device is connected to the holes on the side of the intake and exhaust manifolds. If the pressure gauge readings are lower than required, it means that the seal of the valves is insufficient and you need to repeat their grinding.
There is also a method using a pencil. To do this, lines are drawn on the working edge of the valve seat along the entire circumference. The next step is to install the valve in its place, press it and turn it clockwise a couple of times and back. After this, we take out the valve and look at the marks made with a pencil. Everything is fine if the lines have disappeared and the surface has been painted over evenly. If there are any irregularities, grinding should be continued.
Visual comparison of lapped and unlapped valves
How to grind in correctly - the process of completing the work
The grinding process begins with desiccation of the valves. First, we place an object under the valve plate that serves as a stop for it.
To facilitate the memorization process and to ensure that errors are eliminated when installing rockers, experienced car enthusiasts recommend removing and grinding the valves one at a time. A popular way to remove valves is using a special puller (purchased at a car dealership or car market), but sometimes the crackers on the cone stick and are not immediately removed. In this case, according to the experienced Kulibins, you can take a tube of suitable diameter and, placing it on the top of the valve (cracker), lightly “bale” it with a hammer. A light blow breaks off the crack if it is stuck and makes it easier to remove the valve with a puller.
After removing the spring, pull the valve out of the seat and visually inspect it. After a long period of work, even if it hasn’t burned out, there is still carbon deposits on it, so we grind in the valves. To do this, you will need a special grinding powder or paste (Permatex Valve Grinding Compound, GOI paste, VPM-Auto, M-14 - M-40, etc.). The pastes are used immediately, and the powders are diluted with engine oil, resulting in a viscous substance that is applied to the chamfer of the valve plate. Pastes and powders have different grain sizes: coarser for initial grinding, finer for final grinding.
After spreading the bevel of the seat with paste or diluted powder, insert it back into the seat, press lightly and turn so that the paste is evenly distributed along the bevel of the plate and hits the seat. After this, on the back side of the cylinder head, attach the chuck of a drill or screwdriver to the valve stem (a drill is better because it has more pure revolutions).
Important! Do not distort the drill under any circumstances in order to grind the valves correctly.
It is better to carefully pull the drill up with your fingers, resting them in the area of the chuck, and holding it by the handle
First, the drill should work in one direction for a while, then switch to the opposite direction (turn on reverse). After several minutes of work in each direction (1 minute in each direction), the valve is removed and inspected. The result is visible to the naked eye; the valve seat is shiny or matt gray. If inclusions or stains remain, repeat the procedure, applying finishing paste. The same applies to the saddle, if it has inclusions, shells or uneven color, the grinding is repeated. If the valve is properly ground to the seat, it is installed in place, having first replaced the oil seal with a new one.
Important! Valve seals MUST be changed! This is a one-time use item. Otherwise, all the work will go down the drain, the valve will feel loose in the seat, will not provide a complete seal, and oil will flow through it into the cylinders. Something else useful for you:
Something else useful for you:
- How to Replace Valve Guides
- Self-adjustment of valve clearances on a VAZ 2110
- Crankshaft position sensor - check, device, signs of malfunction
The oil seal is removed using pliers. They grab the oil seal and, turning it from side to side, remove it from the groove. The main thing is not to hit the guide bushing so as not to damage it.
When the old oil seal is removed, install a new one. To do this, it is recommended to insert the valve into the seat so that it serves as a guide and facilitates the installation process. The new oil seal is placed on the valve stem, a tube of suitable diameter is taken, and by lightly tapping the tube with a hammer, we put the oil seal in place. We can tell by the sound that the seal is in place. At first it is heard only in the area of the oil seal, and after it is in place, the sound begins to spread throughout the cylinder head.
Don’t forget that a hole is formed at the end of the rod, which we must remove. If you leave it, the motor will run intermittently. It can be easily ground, for example, on a sharpening machine, the main thing is that the surface of the end of the rod is smooth (even slightly convex is allowed).
Having dried the valve, we move on to the next one. The drying process is simple, even if there is no special puller, use an open-end wrench, but then you will need outside help. One person presses the spring with an open-end wrench, and the other installs the cracker.
Having carefully wiped the end of the valve and the rocker from dust, dirt and mechanical particles, we assemble the unit and install the rocker, securing it with a spring. We move on to the next valve, observing the same sequence of operation.
After grinding in, we check whether the valve is loose or not? The cause of valve play can be either the wear of the guide bushing or the valve itself. If there is wear on the valve, then we can see it with the naked eye, and then it is worth changing it, and if it is in order, then we change the guide sleeve.