To make a car stand out from the general flow of traffic, some car owners use various types of tuning - they paint the car in the original color, install voluminous bumpers and moldings, supplement the optics with LEDs, and install additional spoilers. Now another type of car improvement has become very fashionable - underbody lighting; in the dark, a car illuminated from below with neon light looks very impressive.
Initially, neon bulbs were used for illumination; recently, they are increasingly being replaced by LEDs. Lighting for the lower part of the car is found in a variety of options, here a lot depends on the imagination of the owner of the car, but we must not forget that not every improvement is approved by the rules of the road.
Installation of neon lamps for underbody lighting
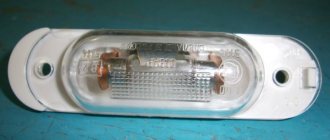
A neon lamp is a lighting device “stuffed” inside with neon, which has a red-orange glow. Often the same name is used for lamps filled with another inert gas; as a result of the use of helium, argon, krypton and mercury vapor, a different color is obtained:
- blue;
- lilac;
- white-blue;
- bluish green.
Neon bulbs are able to create diffused light, distributing it evenly over the illuminated surface. But neon lighting has disadvantages:
- the price of such lamps is quite high;
- gas light lamps are quite fragile and fail due to vibration;
- installation of neon elements must be done very carefully and carefully;
- Lighting devices are generally not durable; inexpensive Chinese lamps fail especially quickly.
Neon lighting fixtures can be purchased in the form of lamps or tubes, they are sold in specialized stores, and the product can be ordered on the Internet. Lighting devices are used for installation outside the car and inside the car, secured with screws or double-sided tape. To ensure that inert gas lamps last longer and do not fail due to shock, they are often housed in a shock-resistant housing that provides vibration isolation. The main advantages of neon lighting:
- Providing brighter, more uniform light than LEDs;
- ease and simplicity of installation;
- low heating temperature (no more than 40 degrees Celsius), so the lamps can be safely placed near flammable materials (near electrical wiring, fragile plastic elements).
Neon lighting is sold both as individual elements and as whole sets; its cost depends on the configuration, brand, pricing policy of the seller, type of lighting elements (thread, tube or lamp); of course, goods are always sold cheaper in bulk.
What is the fine for illuminating the underbody of a car?
The illuminated bottom of the car is a risk that car owners take. There are fines for incorrect installation of LEDs. Such lighting is not included in the list of external lighting devices. Based on GOST 8769-75, the front of the car can only have yellow, orange or white lights, and the rear - red. It is forbidden to equip the radiator grille, just like the bumper, with red and blue LEDs; white lights cannot be installed on the rear body.
The light emanating from the bottom should be directed straight down, but not to the sides. It is unacceptable for red radiation to go forward beyond the machine body, and white radiation to go back. This condition is indicated in the new Customs Union on the safe operation of vehicles. Traffic police officers may interpret such lighting as an illegal special light signal. A fine is no longer enough here - according to Art. 12.5 part 4 of the Administrative Code, the culprit faces deprivation of driver's license for a period of 1-1.5 years.
If you install red lights or reflective equipment in front, you may lose your license for six months to a year. All lighting from the car will be removed. For installation of lighting carried out according to the rules, the traffic police inspector will not deprive you of your rights, but may issue a fine. And the point here is not the installation of improper lighting fixtures, which should not be on the car. The reason lies in the equipment of the car without any permitting documents.
Nobody will give you permission to equip your car with LED or neon lighting for the underbody of your car. In this case, violating s. 12.5 part 1 of the Administrative Code, you can easily be fined 500 rubles. or issue a warning. The violation is not serious, but only if the lighting does not extend to the radiator grille, bumper, etc.
Precautions during operation
Since installing an LED strip requires contact with electricity, take precautions and do everything carefully.
- Carry out the work on a lift or in a special inspection pit in good lighting;
- If possible, use glasses and gloves;
- get down to business only if you are well versed in electronics;
- Use tools as intended.
Don’t forget about the other participants in the DD - they should not feel discomfort from the fact that you decided to equip your car with a spectacular accessory.
If you follow all the nuances and installation rules, you are unlikely to be fined or deprived of your license. However, an experienced traffic police officer will definitely find your creativity inappropriate when using a car and may turn out to be intractable. To avoid this, do not exceed the restrictions established by the rules, study the issue carefully, but be prepared for the fact that you may or may not be allowed to use this accessory.
LED underbody lighting
Installing LED backlighting is a more economical lighting option, since LEDs are noticeably cheaper than neon lamps. In addition, LED elements have their own advantages:
- they are not so sensitive to shock loads;
- are highly economical;
- have a wide range of different shades;
- characterized by a long service life;
- can operate directly from 12 Volts;
- practically do not heat up.
LED underbody lighting is more popular among car enthusiasts than neon, and is also very easy to install, so many car owners often install the lighting themselves. Perhaps, LEDs have only one significant disadvantage - it is not sufficiently diffused light, hitting one point, but when there are a lot of lamps, the lighting is more or less uniform.
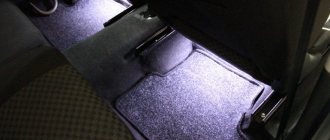
One solution is to install LED strips; with their help, you can provide not only beautiful light from below the car, but also stylish, effective interior lighting, highlight wheel arches or wheel rims. The cost of LEDs can be an order of magnitude lower than the prices of neon lamps, for example, a green LED strip 24 cm long costs on average 180-200 rubles, there are also cheaper options.
Introduction
Illuminating the underbody of a car is an original way to make your vehicle stand out from the crowd. Few people decide to undertake such a radical modernization, because you will have to pay at least $100 to create original underbody lighting at any service center. In fact, almost any car owner can make the lighting themselves. In order for the car to take on a spectacular look, you will need a couple of hours of free time and budget materials that can be purchased at any auto parts store. Despite the fact that home-made lighting excludes remote control of LEDs or neon lamps using a remote control, improving the bottom will give the car a pleasant exterior.
Basic Rules
Such lighting can be done in several ways, for example, with LED lamps or neon. The work is not difficult to do; you can do the tuning yourself.
But many owners are interested in the question of a fine in 2022 for such lighting. Does it exist? We answered these questions in this article.
Indeed, there is a fine for car owners. But, it can only be imposed if the tuning was done incorrectly. Carefully read the law and current regulations so that traffic police officers do not have any claims or grounds for imposing a fine.
First, let's turn to the requirements of regulatory documents for the operation of vehicles. The composition of optical devices (according to GOST) should be as follows: fog lights, low and high beam headlights, road train sign, license plate lights, as well as side, rear, front turn indicators, parking and side lights, reflective elements, additional spotlights.
As we can see, LED backlighting is not included in this list. It is not recognized as an optical instrument. But, according to GOST 8769-75, it should only be white, orange or yellow in front, and red in the back. You cannot install blue, red LED lamps in the radiator grille and bumper, or white lamps in the rear.
Next, let's look at the traffic rules document, clause 3.6. Here are the faults that prevent you from using the machine.
You cannot install reverse alarms at the rear of the car, or use license plate lighting in colors other than white. All retro-reflective lights in any color other than white are not permitted at the front.
Although the law does not mention the rules for underbody lighting, from the above we can conclude what color lighting is allowed and which should be avoided.
Is underbody lighting allowed, fines in 2017
Fans of external tuning are concerned about whether underbody lighting is allowed on a car, and what the punishment will be if the rules are violated. In practice, traffic police inspectors quite often fine for homemade lighting, but their actions are not always lawful, and besides, the legislation does not clearly state what changes in the design of a car are offenses. Although LED or neon underbody lighting is not included in the standard lighting equipment of a vehicle, nowhere in the traffic regulations is it stated that its use is prohibited. It is important here how lighting fixtures of different colors are located, since it is not allowed to install:
- in front - optical devices of any color except white, yellow and orange, and retroreflective elements should only be white;
- at the rear - any lights except yellow, red and orange; retroreflective elements here can only be red.
We recommend! How to call the traffic police from a mobile in Rostov
To illuminate the license plate, it is permissible to use only white lamps; in 2022, a fine for incorrect placement of light elements on the car body can be replaced by deprivation of the right to drive a car for up to 1.5 years. Many drivers know well where they cannot install light elements, so they place them according to the rules, but traffic police officers still find violations, because here they can interpret another article, for example, about unauthorized changes in the design of a car that are not registered with the traffic police.
As a rule, drivers get off with a warning or a fine of 500 rubles for installing underbody lighting. Much depends on the region, the pickiness of the traffic cops; in some places, inspectors do not pay attention to additional lighting elements.
When installing underbody lighting, the car owner should remember the important traffic regulations:
- lighting should not look like a signal given by a special service vehicle, for example, do not switch from blue to red;
- the light can only be located under the car itself, it is necessary that it does not extend beyond the dimensions of the car;
- Light rays must not be reflected from the road, and if they are reflected, they must match the acceptable colors in front and behind the vehicle.
As such, there is no fine in the rules for illuminating the underbody; however, drivers are often charged 500 rubles. for driving a vehicle that does not comply with GOST 8769-75.
Nuances during operation
When operating a car with an illuminated bottom, traffic police inspectors may ask you questions. In the DD rules, lighting acts as a prohibited lighting device. Adjust its light so that it is not too bright and does not distract the attention of other drivers on the road. To do this, contact an experienced lawyer, car service specialists, or independently study the material available on these issues.
Is neon illumination of the underbody of a car allowed?
In the current Russian legislation, there is no formal prohibition on installing lighting equipment on a car. Most of the requirements for violation of which traffic police officers fine car owners relate to clause 3.1 of the Russian Federation Traffic Regulations, which prohibits the operation of a car if external lighting devices (their type, number or location) do not correspond to the standard design of the car. But, according to GOST 8769-75, backlighting is not included in the list of external lighting devices.
Neon light will not affect the technical component of the car in any way
As for other restrictions, the same section of the traffic rules stipulates a ban on certain colors of light sources, depending on their location. It is prohibited to use a car in which :
- in front there are lighting devices of all colors except white, orange or yellow, as well as reflective elements – except white;
- at the rear there are lights (or license plate illumination) that are not white, or lighting fixtures of any color other than orange, red and yellow;
- Reflective devices are installed at the rear of all colors except red.
Based on these provisions of the traffic rules, light tuning is an acceptable procedure. If it doesn't clash with the color, you can use it.
But there is another point in the rules, according to which any changes made to the design of the car must be registered with the traffic police and the documents for the car. It is unlikely that it will be possible to obtain registration for illumination with LEDs or neon, and the operation of such a machine will be considered an administrative offense.
You will probably be able to avoid a fine if you adhere to the following rules:
- direct the luminous flux from neon or LED lights when illuminating the bottom, only onto the road, and not to the sides;
- do not install lights of prohibited colors in the radiator grille or front bumper, for example, red or blue;
- do not use white light elements for the rear bumper, which is allowed here only for the license plate and lights;
- Do not use flashing LED lights for external illumination of the machine.
Attention! Flashing neon lighting of any elements of the car’s exterior can be regarded by a traffic police officer as a special signal, for the illegal installation of which the driver can be deprived of the right to drive a vehicle for a period of one to one and a half years.
See also:
Do-it-yourself led lighting for car rims
Options for LED illumination of the underbody of the car
To illuminate the lower part of the car, you can use various lighting solutions, it all depends on the imagination of the vehicle owner and his financial capabilities. There are options:
- connecting lighting elements directly to a 12 Volt power supply (the easiest way);
- installation of LED elements of different colors;
- installation of a circuit in which the LEDs blink and light up alternately;
- use of backlight with remote control.
All of the above options can be combined; there are multi-color schemes that work as color music, have many different modes, connect to an audio system or function in standalone mode. To illuminate the bottom, it is not necessary to design from scratch; there are many ready-made factory lights offered by the industry.
Installation materials
To equip a car with LED lighting with remote control you will need:
- Self-tapping screws for metal.
- LED strip with protection of at least IP65.
- Ties measuring 2.5x100 mm.
- Control unit with remote adjustment.
- Silicone tube.
- Screwdrivers, soldering iron, drill.
- Heat-shrink tubing.
- Perforated L-shaped building profile.
- Beacons for leveling floors.
- Aluminum corner.
- Multicore cables with copper wire and double insulation 0.75-1 mm.
What to choose, neon and LED underbody lighting?
Both LED and neon underbody lighting have their advantages, but today LED lighting is actively replacing neon. Neon underbody lighting looks great on cars with low suspension, as it has a limited brightness. For installing backlighting on cars for everyday use, LED backlighting will be preferable because it has a higher brightness. Also, do not forget about the design features of neon lighting. The light-emitting element of neon backlighting is neon gas enclosed in a glass tube, while in LED backlighting, light is emitted by groups of LEDs, usually in groups of 3 pieces. And in case of damage, the neon backlight will go out completely, while only one segment of the LED backlight will go out, and it is much more difficult to damage the semiconductor elements enclosed in a durable silicone tube than breaking the glass bulb of the neon backlight. And the most important advantage of LED lighting compared to neon is the ability to install multi-color underbody lighting. This saves you from the painful choice of backlight color.
It is clear that many neon connoisseurs sooner or later switch to LED models, although their cost is higher.
You can order installation of underbody lighting for your car at our tuning center in St. Petersburg, call +7 (812) 988-60-93.
Some points during use
Quite often, car enthusiasts have the question: “Is it prohibited to install car lighting?”, “What will happen if it is still prohibited?” and so on. In most regions of the Russian Federation, traffic police officers consider this type of tuning unacceptable. And, usually, they believe that underbody lighting falls under Article 12.4 of the Administrative Code, Part 1. According to this article, drivers must pay a fine for lighting in the amount of 3,000 rubles. or they may confiscate (remove) the backlight.
Therefore, it is worth considering in advance what kind of lighting to install and whether it is worth it at all, and, of course, how to handle it. Experienced riders recommend making an emergency shutdown button just in case, in order to avoid unpleasant situations with consequences.
Video of installing underbody lighting:
Ready-made kits for car underbody lighting
A lighting kit can be assembled independently from individual elements, but it is more convenient, faster and easier to use ready-made industrial kits - they have almost everything you need, in addition, many of the models offered are highly functional and have many different modes. For example, a device with an RGB remote control with 252 LEDs illuminates the car in seven colors, is controlled from a distance of up to fifty meters, and provides up to 15 operating modes. This set consists of components:
- four flexible LED strips (2x90 and 2x120 cm);
- control unit;
- remote control;
- wiring for installation.
For RGB to work, a power supply of 12-15 Volts is required; the circuit implements such effects as running light, fading lights, variable and constant glow.
DIY LED illumination of the underbody of a car
From the instructions below you will learn how to make cheap lighting for the underbody of a car using LEDs with your own hands. The backlight is made in such a way that it lights up when you unlock the car door using the remote control or key, and slowly goes out after the doors are locked after closing. The project is very simple, but will require a lot of time if you want to achieve a good result. A Honda Civic was used in the project. The main idea of the project was to produce underbody lighting, the price of which would remain at a minimum level. Step 1: Gathering materials and components. What will you need to realize your idea? Multimeter. Four-position switch (three and two positions are also suitable). Packaging foam. Glue gun and glue itself. Thin and long wooden plank. A large number of LEDs (color to suit your taste). Soldering iron A lot of time (more than four hours). Kerosene and a piece of cloth. Capacitors. The larger the capacitance, the better, no less than 16 V. The total capacitance of the capacitors used in the project was about 19800 µF. Insulating tape. Wire cutters or cable stripper. You can buy LEDs either at your local electronics store or online. The price of them, of course, will vary. The project used red LEDs, which were the cheapest and most suitable for achieving our goal.
We recommend! How to replace an expired driver's license
Step 2: Making the LED strip.
We used wood as a base to hold the LEDs because we had a huge amount of thin, long eucalyptus strips left in our house after renovating it. You can use PVC or other material if you find it more suitable. Note that the supply voltage for the red LEDs is approximately 2VDC. While blue, white and some green ones require about 3.3V DC. When powered from the car's on-board network (12.6-14.6 V), you can power six LEDs connected in series. 6x2=12V, so a resistor is needed to prevent the LEDs from failing. You can see that a 30 ohm resistor will work just fine.
Using packaging foam, we created a fixture of our own design for soldering LEDs at the same distance from each other. We decided to separate the LEDs for the side lights by a distance of five centimeters, and the front and rear lights by a distance of four centimeters. We're sure there are better ways to do this, but we're not sure there are very many. Embed the LEDs into the foam at the required distances to create a template of sorts. Now you will not be mistaken in determining the distance between them during subsequent connections. Do not forget to make a depression with your finger or a screwdriver in the place where the LED legs are soldered so as not to melt the foam with the soldering iron.
The LED connection stage is perhaps the longest of the entire project. It took several hours, including fixing the effects of breaks and absent-mindedness.
Step 3: Wiring for LED strips.
Continuing from the previous step, we will connect the LED strings to the wooden strips. We used hot glue, which is very convenient because it hardens quickly. Glue was used to secure the soldered LED legs.
PVA glue was applied on top. Don't overdo it with the glue; the LEDs themselves should still be movable (for adjustment in later steps). The wiring is pretty simple. If you have skills and knowledge in the field of electronics, you will easily cope. An image has been included for beginners. On it, the black wire is connected to the end of the LED filament, and the red wire is connected to the resistor. Leave a margin of about 10-15 centimeters of wire on each wooden plank, this will make their further installation easier.
Step 4: Capacitors.
For now we will put the planks aside to allow the PVA to dry. It's time to make your backlight fade out.
This has already been done and you can see an image of the result. Connect the required number of capacitors together in parallel, make sure they do not short out, and place them in a case or insulate them as shown in the image.
Step 5: Testing.
Now it's time to check what has been done to you so far. Connect the LED strips to any 12-14V power source. Then connect your capacitors in parallel with the LEDs. All LEDs should light up when turned on and slowly go out when turned off (do not remove the capacitors from the LED strips). If something does not work, check the polarity of the LEDs and make sure that there is enough voltage to power the LEDs. Note that if you use a power supply with much higher voltage, the LEDs may burst and you will need to repair the LED strips.
Step 6: Install the LEDs on the bottom of the car.
It's time to use your imagination. All car models are different from each other, and your taste may differ from ours. Install LEDs where you see fit. We used a glue gun to attach the LED strips to the car frame. Later, a more reliable connection was used using heat-resistant glue. This should prevent the slats from falling. If you have a jack, use it. It's even better to use a car lift. We recommend a screw connection instead of glue, but we weren't going to drill any holes ourselves. Also remember that the exhaust pipe gets hot and can melt your wires if they run too close to it. The strips can also be secured using neodymium magnets. This will make them removable. Disassemble the old hard drive and remove the magnets from it. Then use superglue to secure them to the back of the LED strip. Now place the strips in the desired locations and they will remain there until you remove them yourself.
Step 7: Connecting the Wires. It's time to connect the strips. This step is similar to the previous one - you can do it the way you want. In order to be able to turn on the backlight from the remote control, I connected it to the wires of the ceiling lamp. Make sure the fuse or wiring can handle this additional load. If the fuse is blown, find other wires and use transistors or relays to synchronize the dimming of the light with the ceiling lamp. When connecting wires, connect “plus” to “plus” and “minus” to “minus”. It's simple. But remember, locating the wires going to the lamp may take some time. It is quite difficult to illustrate how the wires are connected step by step due to the differences between car models. But if you have reached this step, we are confident that you can do everything correctly. At such times, a multimeter is your best friend. What is the switch that controls the lights? It has modes: - ON. — constant light; - ON – when the doors are opened using the remote control, OFF. – when the doors close. — OFF – when the car is open and ON. – when the brake pedal is pressed, regardless of whether the car is moving or not. — OFF – the circuit is open, the lights are not lit (in case the police have appeared or you simply do not want to drive with the lights on). This will be easy to do with a four position switch.
But we didn't have one when we built the backlight, so we used three separate switches. They were connected so that each was responsible for one function.
Epoxy glue was used to glue all three switches together. This must be done carefully so that it does not get inside the switch and glue it inside. Once you're done, check how it works. If you hear a popping sound, check the fuse and wiring. If the lights come on, you have completed this difficult stage.
Step 8: Hide the wires.
Now comes the important step. Try to make it look professional, both inside and out. Where necessary, cut the wire or hide it behind the panel. Place the switch somewhere so that it remains stationary.
We recommend! Transport Tax Benefits for Labor Veterans in the Moscow Region
Step9: Wait for sunset. This is probably the most annoying stage. Let's wait until the sun goes down to see the backlight lights.
As we can see, the LEDs are not on the same line. But we deliberately left the LEDs some mobility when we glued them to the bar, remember?
The time has come to take advantage of this trick and line them up.
LED lighting is now attached to the underbody of your car. We hope that you will not consider the time it took to make it wasted. Of course, you could spend these few hours installing LEDs in a service center, but what makes this lighting especially valuable is the fact that you made it yourself, with your own hands.
Based on materials from www.instructables.com
Assembly stages.
1. The first thing you need to take care of is the frame for installing the lamps. Since the frame will perform the important function of holding the backlight, it is worth making it quite reliable. Foam plastic mounted on a rigid frame is best suited as a base. In the frame body, it is necessary to mark the places for fixing the lamps. In order to achieve uniform illumination of the bottom, it is worth installing the bulbs at an equal distance from each other.
2. A long wooden strip is perfect as a frame. After the foam plastic and wooden frame are connected into a single structure, it is necessary to mark with a marker the places for installing the diodes. To get equal distance between lamps, it is best to use a ruler.
3. The next step is to begin attaching the lamps to the manufactured structure. After installing the lamps in the frame, it is necessary to connect them together to obtain a complete electrical circuit.
4. Next, you need to connect the resulting electrical circuit with a conductor. A resistor must be connected in parallel to this design. After which, we connect the required number of capacitors and carefully insulate all points of connection of the resulting circuit. Circuit insulation should be approached with due responsibility so that the diodes are resistant to moisture. Even with high-quality assembly of the structure, the lack of good insulation inevitably leads to a decrease in the service life of the backlight.
5. Upon completion of isolation, we proceed to testing. In order to check the functionality of the resulting circuit, it is necessary to connect each strip with diodes in turn to the vehicle’s on-board network. You can also use a special device to determine the voltage in the network.
6. After preliminary diagnostics, we connect the tape to the capacitors. At this stage, it is worth checking the polarity of the connection and the tightness of all connections.
Now the backlight has been assembled and tested, which means it’s time to begin the long-awaited installation stage.
The resulting structure can be installed in any part of the car body. The most impressive lighting of the car looks at the bottom. Depending on the manufacturer and model of the vehicle, the design of the bottom may be different, which makes the installation of the backlight a purely individual procedure. For ease of work, it is best to use a special car lift. But, as a compromise, you can use a reliable jack or inspection hole. In this case, the labor intensity depends on the chosen location for installing the lamps.
Despite the fact that you can see a considerable number of illuminated cars on the roads, each of them is unique in its own way. The right to choose the color, number and installation location of lamps gives the car enthusiast an excellent opportunity to distinguish the car from the general flow.
During installation, you should take into account the vulnerability of the diodes and under no circumstances fix the structure near the exhaust pipe. The service life of lamps in this location is minimal due to the constant influence of high temperatures.
Do-it-yourself underbody lighting installation
According to the instructions, double-sided tape is used to install LED strips; the controller (control unit) is mounted under the hood, the connecting harnesses are pulled from top to bottom, and the wires are connected by twisting or soldering. When connecting the LEDs and the control unit, the polarity must be observed, otherwise the electronic circuit may be damaged. To secure the tapes to the bottom of the body, the metal surface must be thoroughly washed from dirt and degreased. Then you should remove the protective film from the tape, attach the LED elements to the body metal, connect the controller to the car's power supply, and check the device in operation.
To prevent battery charge from being wasted when the engine is not running, the power should be connected to the ignition circuit. Also, fastening with adhesive tape can hardly be considered very reliable; many car owners who install the backlight themselves prefer other methods of installing LED strips.
Cost of equipment and installation
As has already been said, the price of the equipment will depend on your desire and ability to afford the money, the minimum set will cost the buyer 1,500 rubles, the set will include an LED strip, a control unit, control buttons and in some cases a remote control.
It will all depend on your car, how big it is or how well you want the lighting to be done. As for the installation work, in case you are afraid to install it yourself, it will cost you from 2000 rubles, since the process is labor-intensive and cannot be completed in 30 minutes.
Installing underbody lighting
Installing car lighting step by step:
- Make sure the backlight is working before attaching it to the car body.
- If you want to illuminate the entire bottom of the car, use a sequential lighting option, connect a pair of wires to the power supply. For the parallel connection method, connect the lighting elements in parallel and connect an additional wire to the power source. The length of the strip should not exceed 5 m.
- Cut the line into pieces, the total length of which corresponds to your measurements + 20 cm. Tinning is used to connect the wires.
- Connect the finished element to the power source, insulate the solder joints with shrink film. Do not use purchased connectors - they reduce the reliability of the system due to constant vibration while the car is moving.
- Attach the tape to the profile with nylon ties, the distance between which is 10 cm. For reliability, make holes in the profile.
- Cut the fastening profile into pieces, leaving a margin of 3-5 cm - this will allow you to securely fasten the body at the soldering points. Do not allow the tape to stretch or sag as it may burst.
- Think about where in the cabin the control unit and RGB controller will be installed. Connect the backlight to power.
- Insert a fuse into the process gap.
- To protect against excessive loads, purchase and install a stabilization circuit - this will make the tape last longer.
Methods for attaching lighting to the bottom of a vehicle.
One of the simplest and most reliable is to use high-quality glue. After all the light bulbs are securely fixed in their places, all that remains is to connect the structure to the car network. In this case, the connection method also completely depends on the preferences of the car enthusiast. Often, lighting is connected to the ceiling lamp in the cabin. It is important not to forget to connect the remote control to the circuit and install it in a convenient position. During connection, you should avoid sharp bends and twisting of the wires.
It is best to remove the wires under the casing in order to prevent mechanical damage and extend the life of the backlight. All vulnerable areas of the structure can be further insulated.
Now all that remains is to wait for darkness to fully appreciate the result of the work done.
Budget option for lighting installation
If you mount the underbody lighting from separate components, for a medium-sized passenger car you will need approximately five meters of LED strip; wires must be soldered to its edges to connect to the power supply.
If the LEDs do not have a waterproof coating, they will need to be protected from above; for this you can use a flexible polymer hose of a transparent color; it must be taken with a reserve (about 6 m) so that not only the tape itself, but also the connections are protected.
installation is performed as follows:
- the tape is cut into four parts - 2x1.0 and 2x1.5 m, short sections will be stretched parallel to the front and rear bumpers, long sections - along the sides of the car body;
- a hose is placed on top of each section; before installing the tapes, it would not be superfluous to check the functionality of the LEDs by connecting them to power, for example, to a car battery;
- LED elements on the bottom are located along the perimeter of the car body; the strips can be attached in different ways. A fairly reliable fastening is achieved using plastic ties, and to install them, you need to drill holes in the metal;
- after installing the LEDs, the leads from the strip are connected to the power supply using a voltage stabilizer and a rectifier diode;
In the electrical circuit, you can provide a shutdown switch installed in the gap in the positive wire from the battery to the stabilizer, and it’s a good idea to install a fuse in the positive gap that goes directly to the LED strip. When installing the entire bottom lighting yourself, it will cost very little, about 500 rubles, but in this case the light will be constant, without any effects.
Related articles:
- Anti-gravel film for a car: installation features When cars drive on roads, elements of the front part of the body are often subject to various types of minor damage - crushed stone and small pebbles fly from the road. To prevent [...]
- Do-it-yourself parking sensor installation Many vehicles already have this useful option, which is installed at the manufacturer. But, if necessary, you can always install parking sensors on a car in any […]
- Installing lenses in headlights without the help of specialists Upgrading headlights is one of the types of car tuning; by performing it, car owners solve several problems at the same time. The biggest reason why drivers change factory lights […]
Classification of diode strips
LED strip is a universal light source, suitable for creating all kinds of shapes, lighting angles or brightness. Installed in any, even the most inaccessible place on the car. Before equipping your car with such an accessory, it is recommended to study the types of LEDs, because each of them has special characteristics.
Based on the color of the LEDs
Diode strips can be monochrome, emitting one color, or universal RGB, that is, play with different colors. With monochrome lighting the situation is simpler, but for flickering universal diodes you will need equipment in the form of a controller, control panel or power supply.
By LED sizes
The LED strip has different markings: the housing with a pair of output ends is designated by the letters DIP, and the surface-mounted equipment is marked SMD. The second option is more effective, so it is recommended to install just such lighting on the bottom of the car; it is divided into categories:
- SMD5050 - the presence of large diodes measuring 5x5 mm, with a power of 0.24 W and high brightness;
- SMD3528 is the most commonly used option with diode sizes up to 3.5 mm and a power of 0.08 W;
- SMD3010 - mainly used in side lighting, has diodes measuring 1x3 mm and a power of 0.08 W.
By LED density
Density characterizes the number of LED lights located on 1 m of strip. There are two options:
- Type 3028 contains 60, 120 or 240 lights. In the latter version, the diodes are arranged in two rows.
- Type 5050 has 30, 60 or 120 lights per meter, where the latter option has a double-row arrangement of diodes.
The higher the density of light bulbs per 1 m of strip, the brighter the backlight will be.
By protection class
The IP indicator with the following number has been approved at the international level. This designation indicates the resistance of diode equipment to environmental influences. The first number is an indicator of the element’s protection from mechanical influence, the second is the level of protection from moisture.
- IP20 - with such illumination of the car from the bottom of the bottom, the diodes are poorly protected. The luminous strip is suitable for use in places inaccessible to moisture.
- IP65 - the strip is coated with epoxy resin, which allows it to be mounted outside the car.
- IP68 - reliable protection. The device is coated with a layer of transparent silicone and is suitable for installation outside the car and can withstand any adverse weather conditions.
Making reliable underbody lighting: a step-by-step guide
Please note: follow safety precautions when working to avoid injury.
- Buy three L-shaped aluminum profiles one and a half meters long. If only the thresholds are illuminated, then you can only buy two. You also need to purchase a strip with LEDs.
- Now, directly, about installing the illumination on the thresholds. You need to attach it to the inside of the wide part of the profile. After 10 centimeters we drill a hole with a diameter of 3 millimeters. There should be 2 holes every ten centimeters. The width between them should be equal to the width of the LED strip. The backlight is attached to nylon ties.
- We apply tape, secure with ties, and trim the edges of the fasteners.
- L-shaped profiles are attached to the edge of the thresholds using self-tapping screws. The structure must be strong and not loose. To be sure, fasten at 3-5 points.
- Next, the lighting is mounted on the rear bumper. A 6 mm construction beacon is suitable for these purposes.
- The structure is attached using self-tapping screws to the vehicle frame. Everything should be securely fastened, four points will be enough. To hide the light source, secure the structure above the extreme point of the rear bumper.
- The front uses the same L-shaped profile. It must be attached to the crankcase protection.
- The edges of the profile must be bent so that the light source is not visible from the side.
That's all. Homemade illumination of the underbody of the car is ready. Even though it's inexpensive, it looks beautiful. The only negative is that over time the light becomes dim due to dirt. This can be solved by regularly wiping the cable with LEDs from dust and swamps with a damp piece of cloth.