The dashboard in any car is one of the main components of the electrical circuit, used to monitor the condition of the main units. Since the tidy is practically the only component with which the driver most often visually interacts, many car owners are thinking about improving it. How to tune the VAZ 2109 dashboard and what is the pinout of the control panel, read below.
Why doesn't it light up?
- First, remove the cover of the mounting block and make sure that the fuse is intact. The fuse markings are located on the inner surface of the cover. You should look for fuse F16 or F5, depending on the year of manufacture of your VAZ 2109.
- If the fuse is intact, be sure to check whether the contacts of the fuse you are looking for have not oxidized. It is not uncommon for shields to fail due to broken contact.
- Check if there is power to the dashboard. To do this, you will need a warning light and the ignition on. Disconnect connector X4 in the mounting block and check for voltage at pin 3. The disadvantage of the VAZ 2109 design is that when it rains, the mounting block immediately becomes wet. This causes oxidation of the contacts in the pads, which causes the electrics to stop working. Sometimes not only the contact is oxidized, but also the board of the Nine mounting block.
If none of the above actions yielded results, you will have to be disappointed. After all, now you need to remove the dashboard and check the condition of the wiring, contacts, and negative connections. Here it is better to trust a professional electrician or set aside a whole day to troubleshoot problems yourself. There is no need to rush here.
general information
VAZ 2109 electrical faults
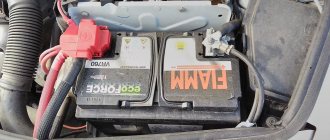
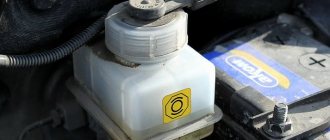
Let's start with general information. You should know that the VAZ 2109 has two power sources - the battery and the generator. The battery is designed to supply current when starting the power unit of a car, as well as to power the starter and other 12 V consumers when the engine is not running. When the engine starts, all the “initiative” goes to the generator. Now this element provides current to all consumers, even the ignition system and battery.
Electrical faults of the VAZ 2109 and their elimination
Instrument panel and its diagram
A common electrical problem on the VAZ 2109 is the instrument cluster. It is built into the dashboard on the driver's side and includes a system of instruments that monitor the current condition of the car. These could be devices such as an oil pressure sensor, an engine speed sensor, or simply a series of warning lights.
VAZ 21093 electrical faults
Signposts
- If the temperature and fuel level gauge does not work, the cause may be a malfunction of the light bulbs or sensors themselves, or an open circuit in the power supply.
- Treatment: test the entire circuit and check the fuses. If it doesn’t help, then check the functionality of devices and sensors, and then replace them.
Fuel tank arrow
- It also happens that you have just filled up at a gas station, but the indicator arrow returns to the beginning of the scale.
- We check whether the float limiter has been knocked down. It also happens that it is incorrectly installed or adjusted (limiter).
- We remove the sensor and re-adjust.
- If this same arrow constantly jumps and finally drops to the zero mark, the problem is a weak contact of the resistor. There may be another reason: a break in the resistor.
- Treatment: replace the fuel level regulator with a new one.
Light bulbs
- Another popular malfunction associated with the constant burning of this light bulb. The reason may be a short circuit in the sensor itself or its flexible bus.
- Treatment: disassemble the regulator, straighten the busbar and eliminate the short circuit.
Warning lamps
- If the indicator lamps on the instrument panel do not work, then they may have burned out or are loose in their sockets.
- Treatment: lamps are replaced or their contacts are tightened.
- It is possible that the contacts have oxidized. In this case, it is necessary to clean them thoroughly.
Note. In general, in this case it is recommended to test all wiring with a tester.
Problems with the speedometer
- An equally common malfunction that requires the following operation: replacing the cable.
- Before replacing, it is recommended to check the tightness of the tip nuts.
- It also happens that noise is heard when the speedometer operates. In this case, most likely, the flexible shaft was deformed.
VAZ 21093 electrical equipment malfunction
At this point, checking and troubleshooting the VAZ 2109 electrical faults can be considered a completed task. It is extremely important when working with your own hands that you do not ignore the instructions for the car. In addition, it will be useful to study various photo and video materials. If you learn how to fix such problems yourself, you can save a lot of money on your family budget, because the price for services of this kind from auto electricians is excessively high these days.
Disassembly of the unit, its reassembly
To check the functionality of the VAZ 2108, VAZ sensor 2109
it is necessary to disassemble the unit. You will need the following set of tools:
- screwdriver;
- key to 7;
- replaceable head for 10.
The following actions are performed sequentially:
- We recline the back seat and see the lid. Use a Phillips screwdriver to unscrew the fasteners and remove the compartment cover.
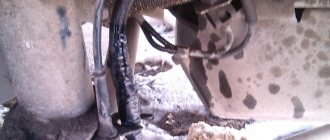
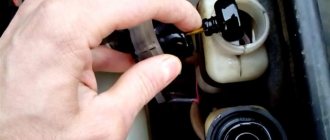
- There are a bunch of wires in the compartment, all of them must be carefully disconnected one by one so as not to damage them. This is where the 7 head comes in handy.
- Next, use a 10mm head to unscrew the fuel sensor itself, and then remove it from the gas tank. This should be done carefully, without jerking.
This completes all manipulations to disassemble the sensor assembly. Now the device can be cleaned, resistance checked or replaced. If there is external mechanical damage on the device body, you don’t even have to check it, but it is better to immediately replace it with a new one. The sensor cannot be repaired, just like its spare parts. Assembly is carried out in the reverse order, without any changes. Before connecting the wires, it is advisable to check their integrity. This is all that may be needed when dismantling the unit.
Instructions for installing a new panel
If you want to replace a low tidy with a more advanced, high one, then in any case you will have to change the entire center console.
Removal and installation instructions look like this:
- First, you need to turn off the power to the on-board network; to do this, disconnect the battery, remove the steering wheel, as well as the steering column switches and the ignition switch. You will also need to disconnect the ignition relay.
- Next, unscrew the two bolts that secure the control panel visor and remove it.
- Now you need to compress the spring and remove the shield itself from the center console. Disconnect all wires and connectors connected to the dash, including the speedometer cable, the econometer hose, and the odometer cable. After this, the tidy can be moved to the side.
- Then remove the regulator from the hydrocorrector of the optics light, the tidy light switch knob, as well as the interior heater and fan regulators. To do this, pull the controls towards you.
- After this, unscrew the two bolts securing the center panel trim on the sides; the trim itself can be moved towards you. Then you need to disconnect the connectors.
- Now the key in the lock should be turned to position “0”, this will disable the anti-theft system. A connector with wires is connected to the lock itself; it must be disconnected. Next, unscrew the two nuts and two bolts, after which you can remove the steering column pipe with the switch.
- Remove the choke handle located under the instrument panel. Pull it towards you so that you can feel the pull. You need to unscrew the two bolts that secure the damper guide rod, after which the choke can be removed.
- Now you can unscrew four more screws that secure the heater control panel in the car. Unscrew the bolts located on the side of the shield on both sides. Also unscrew the lower console mounting bolts with nuts that secure the control panel lighting switch and the optics hydraulic corrector. To do this you will need a 22mm socket wrench, it must be high.
- After completing these steps, you need to unscrew the bolt that secures the center console in the glove compartment. Then all you have to do is unscrew one bolt at a time on each side securing the center console. The console itself can then be dismantled.
- As for installing a new high panel with tidy, this process does not present any particular difficulties. All dimensions at the mounting points on the body are the same, but this procedure also has its own characteristics. To install your new console, you will need the appropriate wiring harness. If you use an existing harness, then you will need to rearrange the terminals in it, taking into account the connection diagram. In addition, it will be necessary to change the cables leading to the heater to longer ones, the same applies to the speedometer cable. If you are installing a new console, you will also need other roof pillar side trims, these must be installed before you install the console. Since the new dashboard will not use a flow meter, the tube from it will need to be plugged. In addition, the signal to the tachometer will need to be supplied from wire K on the coil, which is connected to the speed sensor cable bracket.
- Immediately before installation, you should reassemble the new console, and wrap the connection points of the blowers with electrical tape and, preferably, glue them with foam rubber or anti-creaking agent. It is also necessary to change the foam rubber of the heater, since the old one will no longer be able to perform its functions. Also make sure that the choke can close completely and remember that the cable from the new speedometer should be installed before you install the console. The assembly procedure begins with laying a new wiring harness and connecting all connectors. Before you finally assemble everything, turn on the dashboard and check how all the indicators and gauges work. After this, the console can be put back in place.
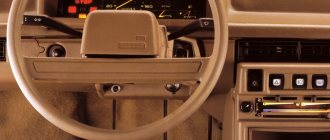
Position of the ignition key in the lock
In the ignition switch, the key can occupy the following positions:
- 0 — all consumers are turned off. The key does not come out. Steering is not locked;
- I — ignition is on. The key does not come out. Steering is not locked;
- II - ignition and starter are on. The key turns fully clockwise, overcoming the force of the spring. The steering is not locked. In this position, the key is not fixed; for the starter to operate, it must be held by hand. Immediately after starting the engine, the key should be released, and it will return to position I under the action of the return spring. The ignition switch has a built-in locking device that will prevent the starter from being turned on while the engine is running. You can only turn the key to position II again after you have returned the key to position 0;
- III - ignition is turned off. The key is removed. When the key is removed, the steering is locked. To turn off the anti-theft device, insert the key into the ignition switch and, turning the steering wheel slightly left and right, turn the key to position 0.
Currently commenting:
Let's go shopping, I'm already. ))) I read the news and in Akue, the price of oil, the price of zabucks
I hope it doesn't happen. Otherwise I can’t survive on salt alone :smile-1:
With our quality of TV program content, a TV is no longer really needed. Slowly answer
Yes, the point is different. Just imagine, they will introduce a quarantine with a ban on leaving the house,
how much should you invest in food and TB so as not to lose or even earn??20t.r.? 50
Why invest? The ruble is getting cheaper? So what, everything has been stable for twenty years and with
Don’t you consider this situation as an investment of the population’s money in products? Doll
Certificate of registration of mass media No. FS 77-76203 16
Sources:
https://kalina-2.ru/remont-vaz/vaz-21099-ne-rabotaet-panel-priborov-prichina https://adaptsport.ru/remont/vaz-2109-ne-rabotaet-panel-priborov.html https://avto-mpad.ru/drugoe/ne-rabotaet-panel-priborov-vaz-2109-karbyurator.html
Why doesn't it light up?
- First, remove the cover of the mounting block and make sure that the fuse is intact. The fuse markings are located on the inner surface of the cover. You should look for fuse F16 or F5, depending on the year of manufacture of your VAZ 2109.
- If the fuse is intact, be sure to check whether the contacts of the fuse you are looking for have not oxidized. It is not uncommon for shields to fail due to broken contact.
- Check if there is power to the dashboard. To do this, you will need a warning light and the ignition on. Disconnect connector X4 in the mounting block and check for voltage at pin 3. The disadvantage of the VAZ 2109 design is that when it rains, the mounting block immediately becomes wet. This causes oxidation of the contacts in the pads, which causes the electrics to stop working. Sometimes not only the contact is oxidized, but also the board of the Nine mounting block.
If none of the above actions yielded results, you will have to be disappointed. After all, now you need to remove the dashboard and check the condition of the wiring, contacts, and negative connections. Here it is better to trust a professional electrician or set aside a whole day to troubleshoot problems yourself. There is no need to rush here.
VAZ 21099 (carburetor) panel flashing
#1 Nikolay1493760682
- Author
- Posts: 0
- Top
- Name or Quote
#2 Slaven
- Name: Vladislav
- City of Yaroslavl
Very little input. You need to look for the reason somewhere in the wiring. Moreover, it is quite likely that the problem is completely trivial, maybe a mass is leaking somewhere, and this is what results in such a garland followed by stopping the engine.
- Top
- Name or Quote
#3 Igor1957
- Name: Igor
- Rostov-on-Don
Most of all, it looks like either a mass is coming off somewhere or some kind of contact, but I’m leaning towards the fact that the mass is coming off. So it’s worth looking under the dash first, there should be several ground wires there. I won’t tell you the exact location, since I don’t remember now.
- Top
- Name or Quote
#4 Anton
it happened, the shitty armor wires pierced and touched the connector on the distributor, everything blinked and died))
- Top
- Name or Quote
#5 Tezipe
- Name: Andrey
- City Novosibirsk
Was the dash blinking because of the explosive wires?
This is the first time I've heard of this, to be honest.
- Top
- Name or Quote
#6 Tiran90
- Name: Anatoly
- Vladivostok city
There is no ground somewhere or there is a problem with the connectors on the fuse block, most likely they have oxidized. That's why the car behaves this way.
- Top
- Name or Quote
#7 Padik
- Name: Igor
- Moscow city
VAZ 21099 (carburetor) on bumps the panel flashes and the car stalls. Please tell me where to look for the reason?
There are a lot of people walking around somewhere – that’s 90%. This happened to me on 2108, somehow the mass began to come off, but I don’t remember where. As a result, I had to reconsider all the braids of the mass and decided that there was a problem with it. The dashboard was also flashing, the car was also stalling.
- Top
- Name or Quote
Messages 11
1 Topic by Andrey08 2009-12-16 13:01:12
- Andrey08
- User
- Offline
- Registered: 2010-08-11
- Messages: 91
- Reputation: [ 0 | 0 ]
Topic: Not Working: All Tidy, Wipers, Fern Guard on VAZ 21099
My friend has a VAZ 21099 injector.
And recently the following happened: all the instrumentation stopped working (speedometer, tachometer, etc.), the wipers and ferns do not work. the headlights seem to come on
Today I talked to him, they say in the morning everything worked fine, but in the afternoon it immediately turned off right on the go.
I advised him to pay attention to the fuse box (they say the frost has hit, condensation is forming or it’s just wet)
I would like to hear your opinion, what do you think about this? mb has this happened to anyone?
2 Reply from maik 2009-12-16 19:38:20
- maik
- User
- Offline
- Registered: 2008-11-25
- Messages: 187
- Reputation: [ 0 | 0 ]
Re: Not working: All tidy, wipers, fern on VAZ 21099
My friend has a VAZ 21099 injector.
And recently the following happened: all the instrumentation stopped working (speedometer, tachometer, etc.), the wipers and ferns do not work. the headlights seem to come on
Today I talked to him, they say in the morning everything worked fine, but in the afternoon it immediately turned off right on the go.
I advised him to pay attention to the fuse box (they say the frost has hit, condensation is forming or it’s just wet)
I would like to hear your opinion, what do you think about this? mb has this happened to anyone?
You can also check the ground on the tidy. (mass is strength))) all troubles come from it.
3 Reply from ils 2009-12-17 06:58:25
- ils
- User
- Offline
- Registered: 2009-06-16
- Messages: 540
- Reputation: [ 0 | 0 ]
Re: Not working: All tidy, wipers, fern on VAZ 21099
I agree with maik - most likely the mass has moved away. It is attached under the dashboard above the place where the steering shaft is screwed to the body. The second place is the ignition switch relay. I’ve seen two types of such relays - some have a tongue that needs to be screwed to the body (there is one in the engine compartment - it looks like a starter relay), the second has a black wire - it should go somewhere to the body. I checked it on the pile - as soon as the mass disappeared from this relay, the entire tidy died, the wipers also did not work.
4 Reply from SokolOFF 2009-12-17 08:38:33 (2009-12-17 08:42:23 edited by SokolOFF)
- SokolOFF
- User
- Offline
- Registered: 2008-12-25
- Messages: 624
- Reputation: [ 0 | 0 ]
Re: Not working: All tidy, wipers, fern on VAZ 21099
Judging by the quantity of everything at once, I dare to guess:
- ignition switch contact group
- one of the pads (it seems red) flew out of the block on the passenger compartment side
-a flooded block is also an option
PS I would check in just this order)) Well, first, of course, a visual inspection of the block. As for the mass, IMHO, it’s unlikely. After all, the headlight switch in the same place takes a lot of weight.
By the way, I just remembered another question: are “headlights” HEADLIGHTS (low beam, high beam) or dimensions? And does the car even start? Simply, if the lights are on, but the car does not start, then 90% of the ignition relay is either a contact group (or their wiring). I had such a case.
5 Reply from Andrey08 2009-12-17 09:37:00
- Andrey08
- User
- Offline
- Registered: 2010-08-11
- Messages: 91
- Reputation: [ 0 | 0 ]
How to remove the instrument panel
It's okay if the testing mode does not produce results. On some cars it is not there at all, and therefore there are other ways to repair the speed sensor. Here is one of them: drive the car into the garage, set it to the parking brake. After opening the hood of the car, disconnect the battery from the wire with the minus sign . This will allow you to avoid short-circuiting the on-board network. Now you need to pull out the instrument panel. Remove the trim, and then carefully unscrew the steering wheel. After this, you need to remove the switches that are located under the steering control. Having done the above, you need to unscrew all the self-tapping bolts that hold the instrument panel in place.
Having completed all the above steps, you can remove the dashboard on which the instrument panel is mounted. To do this, you need to grab it by the edges and then pull it slightly in your direction. Now disconnect all the wires attached to the dashboard. But before you disconnect them, label each wire. This is necessary in order to avoid mistakes when putting the entire structure back together. After disconnecting the wires, pull out the dashboard.
The instrument panel is attached to the dashboard with several bolts. Unscrew them to disconnect it. Now you need to remove the glass, which is held in place with glue-sealant. The place that connects the glass and plastic needs to be heated with a hair dryer. After completing these steps, you can easily detach the glass.
Dismantling
There may be several reasons for dismantling the low panel of the VAZ 2109:
- Body repair;
- Repair of panel components;
- Car noise insulation;
- The desire to replace the old torpedo with a new one, etc.
Regardless of the reasons that forced you to remove the panel yourself, the work should be carried out strictly according to the instructions.
We offer you a step-by-step guide that will allow you to remove the low type of panel installed on the VAZ 2109 without outside help.
- Remove the stove control knobs. A total of three.
- Remove the heater fan switch knob. To do this you need to pull it towards you.
- Unscrew the 2 fasteners of the dashboard trims on both sides of the console. The cover needs to be pulled towards you.
- Disconnect the wiring block from the rear fog light switch.
- Disconnect a couple of power connectors and one power wire from the rear window defroster switch.
- Disconnect the wiring block from the hazard warning light switch.
- Remove the wiring harness from the exterior light switch.
- Disconnect the power supply for the cigarette lighter illumination.
- Disconnect the cigarette lighter wiring harness and remove the panel trim.
- Remove the 4 heater control panel fasteners.
- Unscrew the 2 fasteners of the instrument panel visor.
- Remove the instrument cluster visor itself.
- The spring clamps must be compressed.
- Remove the instrument cluster housing from the panel.
- Unscrew the speedometer mounting nut, and then disconnect the speedometer cable.
- Disconnect the block with wires (it is white) from the instrument panel.
- Remove the hose from the econometer fitting, and then remove the cotter pin.
- Disconnect the cable from the speedometer that resets the odometer for the day.
- You now need to disconnect the red block from the instrument cluster.
- Remove the instrument panel light switch handle and the headlight hydraulic adjustment handle. They need to be pulled towards you.
- Unscrew the mounting nut of the instrument backlight switch.
- Unscrew the fastening nut of the headlight hydraulic corrector socket.
- Remove the steering wheel and its paddle shifters.
- Insert the key into the ignition and turn it to position 1. This will disable the anti-theft device. Only after this can you turn off the power supply to the ignition switch.
- Unscrew the 2 mounting bolts and 2 nuts of the steering column tube.
- Remove this pipe, taking the ignition switch along with it.
- Pull the choke handle towards you (we are talking about carburetor suction). There should be a craving. After this, the handle is removed from the rod.
- Unscrew the 2 choke guide rod fasteners holding it to the instrument panel.
- Remove the mounting screw on the left side of the dashboard.
- Unscrew the fasteners for the lower panel fixation on the left.
- Similarly, remove the fasteners from the side and bottom on the right side of the dashboard.
- Unscrew the panel fastening screw, which is located inside the glove compartment.
- There remains one fastener on both sides of the panel, which must be unscrewed in order to eventually remove the tidy.
The backlight of the instrument panel of the VAZ 2109 does not light up
ktotam 03 Oct 2007
Hello! When you turn on the side lights, low beam, high beam, the panel is not illuminated (neither the priority panel, nor the sidebar/low beam key, nor the heater panel), but the green light is on (that the lights are working) and when the high beam is on, the blue light is on (that the high beam is on) . I looked through the book lengthwise and crosswise, then diagonally, except for the electrical diagram of the panel itself, and how to fix a problem like “if the lamp does not light, then replace it,” I did not find anything. I rang the board, checked/replaced the light bulbs, what should I do? Maybe there is some kind of sensor? Or maybe it's the button? A cliff cannot form on its own.
The dashboard of the VAZ 2114 is out of order, what should I do?
If on a VAZ-2114 car on the instrument panel none of the indicators installed on it work (speedometer, odometer, tachometer, fuel level and coolant temperature indicators), then the first thing the driver will have to do is check the integrity of fuse F3, which is located in the mounting block. If it has burned out, then before replacing it, you need to find the reason why it burned out, otherwise the newly installed new fuse will have the same fate as the previous one. Most often, fuses burn as a result of a short circuit.
Even if the fuse is intact, then do not be lazy to take it out and check the condition of the contacts. There are cases when the contacts oxidize, and the electrical circuit in this place is interrupted. After making sure that the fuse is intact, the next step is to check the ignition relay, which is located inside the car to the left of the steering column. It is attached to a pin upside down. In the block where this relay is inserted, you can try to short-circuit the power wires using a jumper. If the instrument panel comes to life, the ignition relay will have to be replaced.
If the ignition relay is working properly, there are only two possible reasons for the instrument panel not working: the ignition switch and the mounting block. Before installing the ignition relay on the VAZ-2109 car, the lock contacts burned quite often, and they had to be cleaned by disconnecting the contact group from the lock itself. After changes were made to the principle of supplying voltage to the ignition switch, its contacts began to burn very rarely, but the likelihood of this phenomenon still remained. On the mounting block, in its board, tracks may burn out; in order to see this, the mounting block will have to be removed from the car.
In addition to the reasons listed above, which can lead to failure of the instrument panel, it is also necessary to check the reliability of fastening the ground wire.
Causes of errors
The main reason why the fuel level may be displayed incorrectly on the instrument panel is long-term operation of the sensor.
Most often, the device is replaced with a similar one from another car model, for example, VAZ 21099, 2110. After the replacement, some drivers notice that the data is displayed incorrectly. Most often this happens if the sensor is removed from an earlier version of the car and installed on a later one, for example 2109
for 2110 model. In addition, incorrect data may also appear after installing the Europanel.
The reason may be in the contacts, but there is no exact solution, so if you want to change the sensor, then look for a similar model.
Another reason is a littered float. When this part of the device is left in gasoline for a long time without cleaning, it can become covered with a rather unpleasant coating. As a result, the structure becomes heavier, which leads to constantly overestimated performance, as well as to rapid breakdown of the lever and float. The float can be replaced, but only with exactly the same one, not a similar one.
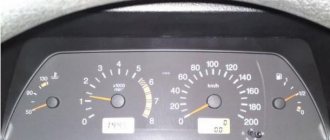
Instrument panel device
On the instrument panel of the VAZ-2112 there is:
- Speedometer.
- Tachometer.
- Fuel level indicator.
- Direction indicator.
- Liquid temperature indicator in the cooling system.
- Control lights.
- Blocks for connecting wires.
Before you start doing any work on the dashboard, it is recommended that you familiarize yourself with its pinout. In other words, you first need to understand where each wire goes and what it is intended for.
Pinout and instrument panel diagram
Instrument panel pinout
1 — fuel reserve warning lamp; 2 — instrument cluster lighting lamps; 3 — right turn indicator lamp; 4 — left turn indicator lamp; 5 - backup warning lamp; 6 — coolant temperature indicator; 7 — indicator lamp for external lighting; 8 — control lamp for the carburetor air damper; 9 — oil pressure warning lamp; 10 — parking brake warning lamp; 11 — battery charge indicator lamp; 12 — tachometer; 13 — control lamp “CHECK ENGINE”; 14 — speedometer; 15 — brake fluid level warning lamp; 16 —hazard warning lamp; 17 — control lamp for high beam headlights; 18 — fuel level indicator.