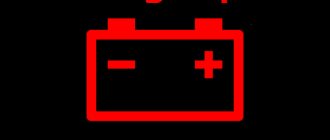
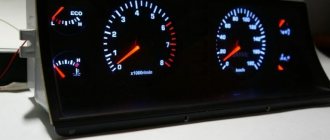
Battery charging lamp is on - it means the generator is not working, the car owner’s first thought when he saw the battery icon on the dashboard. However, the reason why the charge indicator lights up is most often much more trivial - it is a loose drive belt tension or poor contact. But it is also possible that you will have to disassemble the generator because wear of the generator brushes or failure of the diode bridge, as well as some others, is possible.
The first thing to do if the battery charge light comes on while the engine is on is to check the voltage at the battery terminals. This is necessary in order to determine the location of the repair site - in the engine compartment or in the dashboard of the car.
| Situation when a malfunction occurs | The node that caused the malfunction | Possible causes of failure |
| When ignited, the battery light comes on | — | When the engine starts, that is, when the ignition is turned on, the battery warning light should light for 1...2 seconds and then go out. If it continues to glow, additional diagnostics are needed. |
| Battery light does not go out | Generator |
|
| Accumulator battery |
| |
| The battery charging lamp lights up periodically | Generator |
|
| The charging lamp is dim | Wiring |
|
| Generator |
| |
| Battery light flashes | Generator |
|
| At idle (low speed) the battery light comes on | Generator |
|
| Accumulator battery |
| |
| The battery light is on and goes out after recharging. | Generator |
|
| Signal lamp | The use of LED lamps instead of incandescent lamps in cars where the use of incandescent lamps is provided. | |
| The battery light comes on when driving | Generator |
|
| Battery | Partial or complete failure of the battery, its critical discharge. | |
| Battery light comes on when cold | Generator |
|
| The lamp is on, charging is in progress | Generator |
|
| Signal lamp |
| |
| Accumulator battery |
|
Reasons why the battery charge lamp is on
When the power supply is in good condition, the battery warning lamp on the dashboard lights up only when the engine starts, and after one or two seconds it goes out. If this does not happen, or, for example, the icon is activated when the engine is idling or while driving, this is a sign of a malfunction, and you need to look for the reason why the battery warning light is on. So, the causes of this malfunction may be problems with the following units.
Generator
Most often, the battery light comes on if the generator does not transfer energy to the battery after starting the engine. This happens when the following problems occur:
- Loosening the belt tension . Or a critical situation - its breakdown. In this case, the belt will slip along the pulley, due to which the generator pulley will not rotate at the required angular speed and, accordingly, generate electricity at a low voltage, insufficient for normal battery recharging. Another option for belt slippage is contamination of its inner surface and/or the surface of the generator pulley. In such situations, during the cold season, a whistle appears from under the hood.
- Brush wear . Over time, generator brushes wear out naturally, causing the generator to produce electricity at low voltage.
- Problems with the voltage regulator relay . The task of this unit is to limit the voltage transmitted from the generator to the battery. If the specified regulator fails, then usually the voltage is not transmitted to the battery at all, as a result of which the battery lamp on the panel lights up.
- Diode bridge . Its function is to convert the alternating current produced by the generator into direct current. Accordingly, if it fails, the generator will not charge the battery.
- Faulty generator pulley bearings . So, with significant wear (or with a very strong belt tension), significant bearing play or jamming may occur. This usually results in belt slippage with the consequences described above.
- Poor contact on the generator . Despite the fact that the terminal connection where the output wires of the generator are brought together is protected mechanically (usually by a cap or similar device), often over time the contacts can oxidize and become contaminated with dirt and/or oil. All this leads to poor contact and decreased conductivity. Similar reasoning is valid for “mass” contacts. If the ground is bad, the battery will not receive the proper charge, and accordingly, the battery icon will light up on the dashboard.
- Break in one of the phases of the generator winding (open circuit) . As a rule, this happens with contacts that are connected using a bolted connection. In particular, the bolt may unscrew over time and the contact between one of the phases and the diode rectifier may break. An open circuit is also possible if both power diodes on the rectifier unit fail. This can also happen with generators, where the contacts are connected not with bolts, but with soldering. Please note that in this case, the emergency lamp with battery on the dashboard will glow at half incandescence . And when you increase engine speed, it stops burning.
Battery
The battery icon on the panel lights up when the battery simply cannot accept a charge. The first reason for this is the old age of the battery or its partial failure. Alternatively, there is a low level of electrolyte in it. The second reason is oxidation of the terminals and contacts suitable for it or contamination of surfaces.
Signal lamp
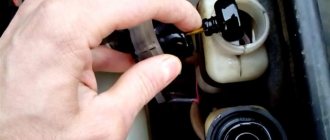
On many domestic cars, for example, VAZ 2109, VAZ 2110, VAZ 2114, VAZ 2115, an old type lamp with a filament is installed as a battery warning lamp. On these models, it is possible to change this lamp when dismantling the instrument panel if it fails.
However, some car enthusiasts, due to inexperience or ignorance, install an LED lamp instead of an incandescent lamp. This leads to the fact that after starting the engine and idling, the lamp (at a voltage of just over 12 Volts) continues to burn. However, if you force the engine speed up to about 2000 rpm, the battery light goes out.
Wiring
Often the cause of incorrect operation of the battery lamp is damaged wiring. For example, when a lamp burns at half intensity or even dimmer, and in a variety of situations. Often the wiring is to blame. For example, a wire going from the battery to the generator. In particular, there are cases when, with a damaged wire (fracture, damage to the insulation), the lamp begins to glow a little even with a slight load on the battery.
Similarly, the battery lamp may burn at half incandescence due to poor contact on the voltage regulator (the so-called “chocolate bar”). Poor contact may be due to corrosion or mechanical damage.
Diagnostics and repair
First, check that the battery is not charging or the indicator light is not on and the battery resistance (ohmmeter) is not on.
Connect one multimeter probe to pin 30 of the generator, and the other to the generator housing.
If the diode bridge is working properly, the resistance value should tend to infinity.
- Then check the positive diodes for damage. The procedure is as follows:
- Connect one probe to pin 30 on the generator.
- The second multimeter probe should be placed on one of the diode bridge mounting screws.
- If everything is in order with the diodes, the resistance value tends to infinity.
Make sure the negative diodes are not "damaged":
- Place one multimeter probe on one of the diode bridge mounting screws.
- The second sensor should be placed on the generator housing.
- If the diodes are intact, the resistance tends to infinity.
- Checking additional LEDs:
- One probe is located at terminal 61 of the generator.
The second probe must be installed on one of the diode bridge mounting screws.
Generator brushes
When the diodes are ok, the resistance value tends to infinity.
Voltage regulator
A damaged pulley bearing can cause imbalance or seizure. In the first case, the belt will “eat up” and wear out. In the latter case, the generator shaft will not rotate or will jam. In any case, replace the bearing, if possible, or the pulley itself.
Diode bridge
As for the pulley bearing, the pulley is usually completely replaced with a new one.
- It is necessary to check the positive output contact of the car alternator. In particular, it should be free of traces of corrosion, oil, various process fluids, dust, and dirt. Therefore, clean all contacts. Same with “mass”. You need to check the quality of the contacts on it. It is also advisable to lubricate the closed contacts with a special protective lubricant.
- If one of the generator phases is broken or the power diodes are damaged after removing the generator, perform the following diagnostics:
- Check the threaded connections of the generator phase cables with the diode bridge. Most often, corrosion occurs on one of the contacts, a loosened (unscrewed) screw, or possible contamination. Therefore, for preventive purposes, it is necessary to inspect not only the damaged contact, but also other similar contacts. If the cable is broken, you can try to replace it, but it depends on the specific situation. Often in such cases (or if the insulation is damaged), the wires (winding) are replaced with new ones. Or the entire generator is replaced.
Identify damaged power diodes and replace them (replace diode bridge). Sometimes it happens that the soldering on the diodes is interrupted. In this case, the diodes are soldered.
- Check the stator winding for darkening of the windings. In this case, it makes sense to check the integrity of the insulation visually and with a multimeter by checking the insulation resistance value. If the insulation of the wires is darkened, it means that the generator is already significantly worn out and it is better to replace such a winding with a new one (rewind).
- If the wiring from the alternator to the battery is damaged, check and replace if necessary. At the same time, clean all contacts, both on the generator and on the battery (terminals). Clean the diode bridge contacts on the generator and its positive output contact.
- If oxidation appears on the generator brushes, they should also be cleaned. Make sure that the graphite from the brushes has not spread to other parts of the generator. If the brushes are worn out, replace them with new ones. Sometimes it is enough to improve the “chocolate” contact.
If the battery charge light is on but not charging, perform a complete check of the battery, alternator, fuses, lamp, and wiring. According to statistics, the most common cause of such a breakdown is wear of the generator brushes or problems with their contacts. The diode bridge fails less often.
Battery indicator readings on laptops from different manufacturers
Below we have tried to collect information about the operation of battery indicators on laptops from popular manufacturers. Perhaps this will help you navigate if there are problems with your laptop's battery. The information has been collected from various sources and may contain some inaccuracies. If you find any discrepancies, please write in the comments. We will fix it promptly.
Many Asus laptops have a two-color battery charging indicator. It can be in the following states:
- green. The battery charge is 95-100%. The laptop runs on mains power;
- orange. The laptop is running on mains power and the charge level is less than 95%;
- orange flashes. The laptop runs on battery power. Charge level is less than 10%;
- switched off. The laptop runs on battery power, the charge level is 10-100%.
On Acer laptops, the battery light basically has two states:
- yellow. When charging the battery;
- green color. When powered from an electrical network.
For Dell laptops, the battery charge indicator works as follows.
When powered from mains:
- green light is on. The battery is charging;
- flashes green. The battery charge is almost full;
- switched off. Disconnected from external power or fully charged.
When powered by battery:
- does not burn. The battery charge is normal;
- flashes orange. Battery charge is below normal;
- orange is on. The battery charge is critically low.
On most Sony laptops, the manufacturer makes the following indication:
- orange is on. The battery is charging;
- flashes green. Charging ends in normal mode;
- flashes orange. Battery charging ends in sleep mode;
- fast flashing orange. Battery failure or incorrect installation.
Lenovo
For Lenovo laptops everything is quite simple:
- indicator is off. The battery has a normal charge level (10─100%);
- lights up orange. The battery needs to be charged.
Toshiba
Toshiba's battery status indication is as follows:
- white on. The battery is fully charged;
- lit amber. The battery is charging;
- flashing amber. The battery is low.
Let's sum it up
As you can see, there are many reasons why problems arise with battery charging. In this case, the battery icon on the panel may often light up constantly, blink, or, conversely, not light up. To detect the cause, it is necessary to check individual elements step by step as discussed above.
Finally, we note that you first need to check the condition of the battery itself; the battery must be in full working order. At the same time, you should find out if there are any problems with the electrical equipment in the car, which could result in a rapid discharge of the battery during idle time.
If the battery is normal, there are no other hidden reasons for its discharge, then often the culprit is the generator, relay - regulator or bad contact. Moreover, after conducting qualified diagnostics, it is possible to identify, localize and efficiently eliminate the malfunction.
Voltage regulator
A part with a direct connection to the generator, due to which incorrect operation of the alternating current device affects the condition of the part.
A visually small detail, malfunctions of which lead to many troubles. For example, overcharging or undercharging the battery. The relay often breaks on cars manufactured in the last 5 years. Main reasons:
- Interturn breakdown of the generator;
- Destruction of generator brushes;
- Diode breakdown;
- Changing the battery poles.
The problem is diagnosed by the battery charge level. Overcharging or undercharging indicates a defective regulator. If there is a malfunction, the part must be replaced as it is not repairable.
Battery
A common cause is lack of charge. To clarify, check the voltage at the terminals using a load fork or measure it with a tester. Normal voltage is 14V, in case of problems it will be lower.
Options for solving the problem depending on the situation.
- The generator supplies voltage, but the battery discharges quickly. In this case, the wires and contacts are stripped, after which the readings are taken again. When the current level is not restored, the voltage on the device is measured. If it is higher than on the battery, then the cable is replaced.
- No voltage to the battery. The cause may be a blown fuse that needs to be replaced.
- The voltage is normal, but drops sharply under load. The reason is a generator malfunction.
Also check the battery terminals. Oxidized weak contacts are protected with fine sandpaper and then coated with a special agent.
Reset
If your laptop battery is not charging, you can solve this problem by doing a hard reset. Turn off the computer, disconnect it from the charger and remove the battery.
Follow your computer manufacturer's instructions to remove the battery.
On some computers, you may need to hold down the computer's power button for 30 seconds to reset the battery status information.
Install the battery, connect the charger, and turn on the laptop.
What to do if the charging light is on
It will be quite difficult to cope with the above malfunctions somewhere along the way, except that the alternator belt can be changed if you suddenly always carry a spare one with you.
But not everything is so scary, and even with the battery charge lamp on, you are quite capable of continuing to move. The role of the power source will simply fall entirely on the shoulders of the battery. Nevertheless, even without recharging the battery, you can travel a sufficient distance if you follow these simple, but necessary in this case, recommendations:
- You shouldn’t turn off your car’s engine without a compelling reason. The fact is that when starting, the starter consumes quite a lot of electricity. So, in case of a forced stop, you should then start using the traditional method - “from the pusher”.
- It is better to refuse to include additional elements that consume electricity. Yes, without music, a heater, heated mirrors and rear window, driving will be noticeably less comfortable. But it’s better than getting stuck somewhere in the cold in the middle of the highway.
- It is also better to refuse to turn on fog lights and high beams at night.
- To prevent the battery from being powered by a faulty generator, it is better to immediately disconnect the wires coming from it and wrap them with insulation.
By following these simple tips, you can easily get to the nearest car service center or your home garage.
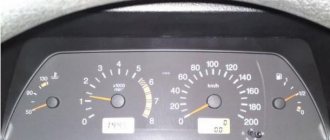
The battery lack of charge indicator lights up on the panel
Diode bridge
The diode bridge is used to convert alternating voltage to direct voltage. If at least one of the diodes breaks down, the device stops coping with its tasks, which is why a voltage that does not correspond to its parameters begins to flow into the on-board circuit of the machine. That is why the rectifying bridge must be checked in the case when the battery charging light is on, but there is charging (VAZ 2107, 2106).
You can also determine the health of the diodes using a multimeter in the appropriate mode. Turn on the tester and connect the red probe to the positive terminal of the bridge, and the black probe to one of the contacts marked “AC”. The threshold (pass) voltage for silicon diodes ranges from 400 to 1000 mV. If the device shows you a value that does not fit within the specified range, the bridge must be replaced. It is impossible to repair it.
Loose or damaged alternator belt
During diagnostics, it is imperative to check the condition of the alternator belt. Sometimes it happens that due to its long-term operation or under the influence of other factors, it becomes deformed, as a result of which the generator drive misfires. Pay attention to the belt tension. Its weakening leads to the same effect.
If the belt is not deformed and has no visible damage, it can simply be tightened. Otherwise, it must be replaced. The normal belt tension is such that it can be rotated around the horizontal axis by 85-90 degrees.
How to check a generator on a car without removing it Our review
- When the engine is running, the light that monitors the battery charge is either constantly on or blinking.
- The battery spontaneously discharges or boils away;
- The headlights shine dimmer than they should;
- The operation of the motor is accompanied by rattling or a low, continuous squeak. Alternatively, the generator may howl;
- As the engine speed increases, the brightness of the headlights increases sharply. This phenomenon is considered normal when revving at idle speed. However, once the headlights reach normal brightness, the intensity should no longer change. If you accelerate - they burn brighter, release the pedal - they dim, which means the generator is clearly unhealthy.
- The generator drive belt is inspected. The degree of tension is controlled; If delaminations, tears or cracks are detected, the belt is immediately replaced. In some situations, more complex actions are not required;
- The fuse is checked - like any other, it quite often fails;
- Next, you need to make sure that the rotor rotates freely, the wires are not pinched or frayed anywhere, the contacts have not come loose, and the housing is not cracked;
- The charging relay is replaced with a new one - this is the easiest way to make sure that everything is in order with it. In most cases, a visual inspection cannot give complete confidence in its performance.
- The engine starts. The meter remains connected to the battery;
- All the electrics on board start to work randomly: the heater turns on, the headlights turn on/off, more gas is periodically given, you can turn on the audio system;
- During the described executions, testimony is taken. If the voltage remains stable between 14 and 14.2 V, your difficulties are not caused by the generator. If jumps of no less than 0.5 V are noticed (and usually they reach 1 V), you have a direct path to a specialist who will find what has gone wrong in this node;
- Bearings can fail (it is they that cause the whine and whistling of the generator); the reason for the non-working condition can be clogged or worn out generator brushes, worn or again clogged rings.
AutoFlit.ru
Generator faults
If the battery charging light is on, but there is charging (VAZ 2106, 2107), the generator must be checked. The most common problems in terms of our malfunction are a break in the rotor excitation circuit or wear (damage) of the brushes.
First of all, the generator must be dismantled and disassembled. To check the rotor winding, we use the same multimeter turned on in ohmmeter mode. We connect its probes to the terminals of the winding and measure its resistance. For a working rotor it should not be less than 4.5 ohms. If the resistance does not reach this value, most likely an interturn short circuit has occurred somewhere. If it is not detected at all, the winding may break.
Let's move on to the brushes. We take them out of their seats and inspect them for wear. If the length of the brushes does not exceed 7 millimeters or they show signs of damage, we change them. Pay attention also to the condition of the brush commutator. If defects are detected in its copper plates, we change the rotor.
Some useful tips
To avoid problems associated with a faulty battery charging circuit, use the following tips.
- Pay more attention to your car's dashboard. This way you will know not only about the charging status of the battery, but also about the operation of other systems and mechanisms.
- Check the alternator belt regularly. The correct operation of the entire on-board network when the engine is running depends on its condition and tension. If you find the slightest defect in the belt, do not delay replacing it.
- Don’t be lazy at least once a month to check the voltage supplied by the generator to the battery terminals. If any discrepancies with the recommended values are detected, perform a full diagnostic of the on-board network.
- Periodically conduct a visual inspection of the condition of the battery terminals and generator terminals. Having discovered their oxidation, clean them with fine sandpaper and treat them with a liquid like VD-40.
- Do not allow water to get on the generator, battery and relay regulator. It can cause a short circuit in the electrical circuit. It is better to entrust engine washing to specialists.
- When repairing the battery charging circuit, avoid using spare parts that raise doubts about their quality.

