Let's consider such a problem in a Lada Priora car as a non-functioning instrument panel (dashboard). I’ll tell you a case from the practice of a car service. One Priora owner's instrument panel suddenly stopped working, the lights came on, and all the arrows were dead. He did not find out why this suddenly happened, but simply bought another one at a disassembly site and put it in place of the broken one. After some time, it also stopped working, and in the end he had to go to a car service for diagnostics.
The cause of this malfunction was found out; the individual coil was broken to ground, i.e. 25,000 volts hit the ground, and accordingly all the electronics went crazy. A similar problem occurred on the Opel Vectra A, where in addition to the instrument panel, it was still impossible to connect the diagnostic tool. The problem was not with the coils, but with the fact that the high-voltage wires have a very high resistance, their general condition was very deplorable, this led to the fact that the slider in the distributor heated up and began to “break through” to ground.
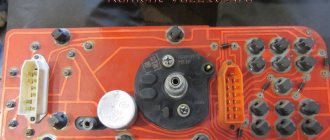
Here is a broken coil on a Priora:
How was the fault determined?
We immediately heard misfires from the exhaust, and only then began to remove the connectors from the coils and, using a rebuild method, found the problem cylinder that had misfires.
Why the instrument panel does not work on the Lada Priora
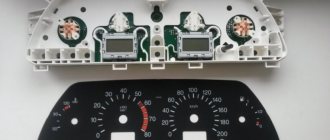
An instrument panel and several switches for various additional devices are installed on the front panel of the Lada Priora If you look at the instrument panel from left to right, then it contains: tachometer, speedometer, coolant temperature indicator, fuel level indicator in the gas tank. There is a liquid crystal display under the speedometer, and below it, along the entire length of the dashboard, there are 16 warning lights. Two more turn signal indicator lamps are located at the top left and right of the speedometer. All instruments and warning lamps operate from appropriate sensors, and an electronic control unit takes part in data transmission.
Malfunctions that cause malfunctions in the operation of the instrument panel are purely electrical and are difficult to find without the appropriate knowledge. The following case can be cited as an example. The driver wiped dust from the front panel and instrument panel glass with a microfiber cloth. After these actions, when the ignition was turned on, the instrument panel refused to work at all. All instrument needles were at zero. He searched for the cause of this phenomenon and the elimination of this malfunction for quite a long time, but still found it. Apparently, a microfiber cloth, when moving over a plastic surface, creates a magnetic field, which leads to failure of the instrument panel. And fixing this malfunction is quite simple; you just need to remove the negative terminal from the battery for 10 seconds. But how much time was wasted in order for this rag, which is the cause of this malfunction, to be thrown into the trash.
A complete failure of the instrument panel can also result from the failure of the 7.5 amp fuse F10 ; in this case, the interior lamp and brake lights will also not light up. So it’s quite easy to check it without even opening the mounting block.
If only one device does not work, then you need to start looking for the cause of this malfunction by searching and checking the functionality of the sensor that powers this device. But again, all signals from the sensors to the dashboard instruments go through the electronic control unit. And if replacing the sensor does not give positive results, then you will have to check the electronic unit and the instrument panel itself, and here you cannot do without specialists.
The only thing the driver can do on the instrument panel is to check and, if necessary, replace a burnt-out warning light bulb. Sometimes the cause of the malfunction is simply poor contact in the connecting blocks of the wires. The driver can also check their condition himself.
The more complex the filling becomes on modern cars, the more difficult it is for the driver to find the cause and eliminate any malfunctions that arise. In these cases, knowledge and fairly easy access to information about the causes of these malfunctions are needed.
Source
FakeHeader
Comments 17
My throttle went off. View the board on the non-propelled
Do you mean the throttle?) I’ll take it to another place one of these days to check
How to understand whether something works or doesn’t? With brightness everything is fine, but the LCD backlight periodically turns off and does it plow?
I turn on the ignition, and sometimes the screen lights up, sometimes it doesn’t light up. But when the screen turns black, I don’t see anything, but from the passenger side I can see what’s happening on the display
I don’t really understand this, but as I understand it, the master said the screen consists of layers and supposedly, at his own risk, he disassembled the display itself and changed the backlight, but it didn’t help.
Its version processor or cable
Well then it's definitely a train.
Is the repair suitable? Or is it all the star to him?
I read it and he took it from my hands. There's no longer there
Maybe it's enough to just solder the contacts? Carefully examine the tracks and pins that are soldered into the board, as well as the connectors for connecting to the instrument panel. 85 percent of the faults are located there.
Another plus is that the cable may fall off from the LCD contacts
By the way. Thanks for the addition. I forgot this moment.
AvtoAmper161
Maybe it's enough to just solder the contacts? Carefully examine the tracks and pins that are soldered into the board, as well as the connectors for connecting to the instrument panel. 85 percent of the faults are located there.
I gave it to the technician, he first of all soldered the contacts, changed the backlight and did something to the processor
Then either to another master. Or to the landfill. To another master, not because this handyman. There are just moments when I can’t find the reason, I myself send the client to another master.
I agree, you need to find a friend. Landfill is not an option. The cost of such a device is very expensive
Latest Visitors
- I was told 6 times
- I said 25 times
| I came across panel 2170-3801010-60 (with a can-bus) with a complaint about the lack of indication. I don’t know how this happened for the owners, it felt like they had turned down the brightness of the display to zero. I contacted Itelm specialists and they told me the display unit was faulty (I didn’t understand) and recommended that I contact them in Moscow and give the panel for repair. They didn’t give me a diagram, the same recommendations for repairs, corporate rules (to develop crap and then make a secret out of the documentation). According to the subject, I thought it was a software glitch, but after the firmware the same canoe was still left, and once it turned on a dozen times it showed brighter, it’s a pity there was no way to attach another display. |
A comment
Rating
- I've been told 145 times
- I said 55 times
A comment
- I was told 20 times
- I said 6 times
| I uploaded working dumps, but there was no result. On one of the resources I came across information that when rebooting the device after updating, you need to pull out the flash drive from it. If this is not done, we get a dark screen and then can only be restored through a Windows XP PC. Are there any working dumps? |
A comment
- I've been told 30 times
- I said 2 times
A comment
- I was told 20 times
- I said 6 times
| How to update these panels via PC? |
Age: 2022 years old
- I was told 17 times
- I said 7 times
A comment
Age: 2022 years old
- I was told 17 times
- I said 7 times
| On the “Oktya” forum, section “odometers”, Granta, Priora2, Kalina2 Itelma instrument panels |
- I've been told 30 times
- I said 2 times
A comment
- I was told 0 times
- I said 6 times
| Maybe off topic, watch the video, what could it be? video Electrical package without errors, I threw off the PP, the test passes all the rules. Everything works, but these oil lamps and emergency lights are constantly on. |
Why does the instrument lighting not work on the Priora?
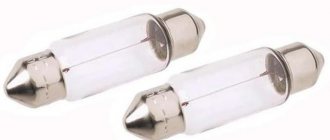
On a VAZ 2170 Priora car, lamps without base lamps . Each lamp is installed in a special socket, with which they can be removed from the socket and installed back in place. To prevent the lamp socket from jumping out of the socket while the car is moving, when installing it in the socket, it is fixed by turning it clockwise.
If only part of the instrument panel is not illuminated , then one of the backlight lamps has either burned out or lost contact with the path along which electric current is supplied to it. To eliminate this malfunction, the instrument panel will have to be removed.
In case of loss of lighting of the entire panel and simultaneous failure of the devices located on it, it is necessary to check the F10 (7.5A) fuse and the fastening of the ground wire.
Attention /1
Below are the main reasons why reverse lights may malfunction and not light up when driving in reverse gear.
- Lamp burnouts
- Fuse
- Reverse sensor
- Open circuit
- Oxidation of contacts
Lamp burnout
This is the simplest option, but it still cannot be ruled out. It is unlikely that both bulbs could fail at once, but it is possible that you may not have noticed that one of the reverse lights is not on. Therefore, first of all, it is worth checking the lamps. To do this, you need to dismantle the lamp; it is removed from the luggage compartment and is held on by three wings.
Fuse
Both reversing lamps are powered by the same circuit, protected by the same fuse. Therefore, when the fuse-link melts, the power supply circuit for the lights disappears and both lamps stop turning on. This can easily be checked by looking at the dashboard, since on the Priora the fuse responsible for powering the rear running lights is also responsible for the dashboard lighting. If the car's lights and instrument panel lights stop lighting at the same time, the fuse link has most likely failed.
This fuse is numbered F12 with a rated current of 20A or 10A, depending on the vehicle configuration. In the “luxury” configuration 20A, “standard” 10A.
You can only replace a fuse with the same rating as it was previously installed in order to avoid a fire in the vehicle's electrical wiring.
Designations for other fuses can be found here.
Reverse sensor
To turn on the reversing lamps on the Prior, a special sensor is used, which is installed in the gearbox housing (gearbox). It is he who is able to disable the lights. This sensor is reliable, but it also sometimes fails.
It is not possible to repair this electrical appliance, so it is recommended to replace it entirely.
You can get to the sensor from the inspection hole, but to do this you will have to remove the crankcase protection (if equipped). We find the sensor, circled in red in the picture.
Next, remove the chip from the sensor and close it with a jumper made of thin wire, then turn on the ignition and see if the lights come on. If the lamps come on, then you need to start replacing the sensor.
Open circuit
Checking the circuit for open circuit is done using a multimeter. It is necessary to turn on the ignition on the car and set the gearbox to reverse gear. On the device, set the switch to measure DC voltage, as in the picture below.
We check whether the plus is coming to the lamp; to do this, remove the lamp and connect the device between the two contacts; if the device shows readings from 11V to 13V, then everything is normal and the circuit is working.
If there are no readings, then we connect one of the multimeter probes to the car body and take a measurement. The readings that appear on the multimeter will mean that the “-” mass is not reaching the flashlight. You need to look for a break.
If there are no readings, then the power supply circuit “+” and “-“ is open. It is best to contact an auto electrician to fix the problem.
Oxidation of contacts
Contacts can oxidize due to a poor connection between the lamp and the contact, as well as the sensor and the chip. Most often, oxidation occurs at the contact between the chip and the sensor. We check the contacts, tighten them if necessary and clean them.
After carrying out all the manipulations described above, the rear running lights of your car will shine like new.
The backlight of the instrument panel of the VAZ 2170 does not light up
Everyone values the time of day! TROUBLE! The instrument lights do not light up. First things first. Probably half a year ago my speedometer light stopped working. Today I decided to take care of it and changed two light bulbs. I put it in place, turn on the dimensions, and then “Hello.” Only the tachometer light is on and that’s it. The rest of the instruments are not illuminated, and the arrows do not light up either. The BC monitor is on and working, the arrows are also functioning, the indicator lights are all on. Only the devices do not light up. Changed the rest of the light bulbs. the same. Zero result.
Maybe someone had something similar? What could it be? Is it really necessary to change the device?
The relay and fuse box is also called the mounting block or black box. In the event of a car breakdown related to electrical equipment, the fuses and relays are first checked. If a fuse is blown, you must first determine the cause of its blown before replacing it.
Replacing light bulbs in the Priora dashboard
Experienced and experienced people may not read further, since this entry is for “dummies” like me, who are faced with replacing light bulbs in the dashboard for the first time. My light bulb for illuminating the coolant temperature and the amount of gasoline in the tank went out. The right side of the speedometer periodically went out and then came back to life on its own.
To replace, you will need a Phillips screwdriver, a thin flat-head screwdriver and 5-7 minutes of free time. It is better to take a shortened one (cross), as it is more convenient for it to operate in a limited space. Unscrew the 2 screws on top.
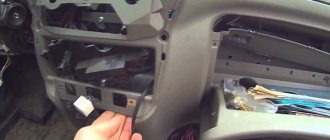
Remove the panel under the steering column (simply snap off the top, turn the 3 plastic fasteners from the bottom). If you had to change fuses, removing the panel is not difficult. We see 2 more bolts (one on the left, the other on the right). Unscrew them (be careful with the washers - they fly off quickly).
Next, remove the decorative trim that we unscrewed. Lower the steering wheel to its lowest position and pull out the trim. There is no need to remove the steering wheel!
Next we see 2 more fasteners (left and right), which secure the instrument panel itself. We unscrew them carefully, as washers and screws can fall deep into the torpedo.
Afterwards, you can pull the instrument panel towards you a little to gain access to the wiring harness and block. When you are already skilled in this matter, you will be able to change light bulbs without disconnecting the cable.
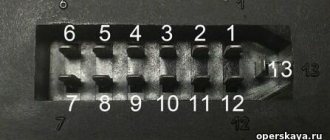
We see a green block at the back of the panel. It's easy to disconnect, but it's inconvenient the first time. Lightly press the stop tab with a screwdriver and pull the black lever up. The plug will come out of the socket on its own.
Let's take out the panel and see the mounting sockets for the light bulbs. Turning slightly counterclockwise, we pull out the burnt out light bulb. We install a new one. We reassemble in reverse order.
It turned out that the light on the right side of the speedometer was going on and off because it had burned out. But the shaking caused the filament to short circuit and burn again until the next bump “teared” it again. The lamp was replaced. I also bought some spare parts)))
Source
Where are the fuses on the Priora?
- The main mounting block of the Priora is closed with a lid and located at the driver’s left foot. To open it, you need to turn three latches 90° and unclip the lid.
- The fuse box is under the hood, which is located near the expansion tank.
- Another mounting block, which is located near the left foot of the front passenger. To gain access to the fuses and relays, unscrew several screws with a Phillips screwdriver.
Below is a description of each fuse and relay block in order.
Cooling system or motor?
Before you begin troubleshooting the heating of the furnace, it is necessary to eliminate the impact of breakdowns of the cooling system and engine. Only then can you begin to figure out why the stove mode switch on the Priora does not work. To do this, we check the antifreeze level and engine operation. First step: look into the expansion tank and determine the coolant level. Then turn on the engine and warm it up for a while. This will allow you to determine whether the thermostat is functioning correctly. Just touch the thick pipes leading to the radiator.
If you find that the top pipe is hot, this indicates that the device is functioning normally. A cold pipe is a sign that the thermostat is not working properly and you will need to replace it. This part is inexpensive, so replacement will be easy. A loose expansion tank cap is another reason why the engine remains cold. Because of this, the Priora stove switch may not work. Just replace this part.
The cooling system of Lada Priora is slightly different from the tenth model; it practically does not create an air lock. It can be caused by incomplete system insulation or antifreeze poured into an empty expansion tank. Solving the problem is not difficult. Remove the reservoir cap, stand on a hill with your front wheels and accelerate.
Priora fuse box diagram
| Fuse no. | Current strength, A | "Standard" and "Norm" | “Norma” with air conditioning and “luxury” |
| F1 | 25 | Engine cooling radiator fan | Reserve |
| F2 | 25 | Heated rear window | Mounting block, rear window heating relay (contacts). Electrical package controller, contact “10” of XP2 block. Rear window heating element. |
| F3 | 10 | Right headlight, high beam | Right headlight, high beam lamp. Instrument cluster, headlight high beam indicator. |
| F4 | 10 | Left headlight, high beam | |
| F5 | 10 | Sound signal | Mounting block, horn relay. Sound signal. |
| F6 | 7.5 | Left headlight, low beam | |
| F7 | 7.5 | Right headlight, low beam | |
| F8 | 10 | Alarm signal | Mounting block, alarm relay. Alarm sound. |
| F9 | 25 | Priora heater fuse | Reserve |
| F10 | 7.5/10* | Interior lighting, instrument panels, brake light | Instrument cluster, pin “20”. Brake light switch. Brake light bulbs. Interior lighting unit. Interior lighting. The door sill light on the right front door. Additional brake signal. |
| F11 | 10/20* | Wiper | Mounting block, high speed windshield wiper relay. Switch for cleaners and washers, contact “53a”. Wiper and washer switch, contact “53ah”. Heated rear window switch. Mounting block, rear window heating relay (winding). Windshield wiper motor. Rear window wiper motor (2171,2172). Windshield washer motor. Rear window washer motor (2171,2172). Airbag control unit, pin “25”. |
| F12 | 20/10* | Terminal 15 devices | Instrument cluster, pin “21”. Electrical package controller, contact “9” of block X2. Electromechanical power steering control unit, contact “1” of block X2. Reversing light switch. Reversing lamps. Parking system control unit, contacts “11” and “14”. |
| F13 | 15 | Cigarette lighter fuse Priora | |
| F14 | 5 | Left headlight, parking light, license plate light, trunk light | Side light lamps (left side) Instrument cluster, main light indicator License plate lights Trunk light Electrical package controller, pin “12” of block X2 |
| F15 | 5 | Right headlight, parking light | Side light lamps (right side) Glove compartment lamp |
| F16 | 10 | Terminal 15 ABS | Hydraulic unit, contact "18" |
| F17 | 10 | Left fog lamp | |
| F18 | 10 | Right fog lamp | |
| F19 | 15 | Seat heating | Seat heating switch, contact "1" Front seat heaters |
| F20 | 5/10* | Immobilizer control unit | Recirculation switch (switch on) Mounting block, relay for low beam headlights and parking lights (automatic lighting control system) Heater electric fan relay Automatic lighting control switch Windshield wiper and external lighting control unit, contacts “3”, “11” Automatic climate control system controller installation, pin “1” Automatic window cleaning system sensor (rain sensor), pin “1” |
| F21 | 7.5/5* | Rear fog lights | Light switch, contact "30" Diagnostic block, contact "16" Clock Automatic climate control system controller, contact "14" |
| F22 | -/20* | Reserve | Windshield wiper motor (automatic) Mounting block, windshield wiper relay and windshield wiper high speed relay, (contacts) |
| F23 | -/7.5* | Reserve | Windshield wipers and external lighting control unit, pin “20” |
| F24-F30 | Reserve | ||
| F31 | 30 | Electrical package control unit | Electrical package controller, terminal “2” of block X1 Electrical package controller, terminal “3” of block X1 Driver’s door module, pin “6” Threshold light of the left front door |
| F32 | Reserve | ||
Malfunctions of the interior temperature sensor
We mentioned the temperature sensor in the cabin above. It is placed in a lampshade on the ceiling. When the heating is turned on, the controller checks the readings of this device and decides whether to start or turn off.
Thanks to the sensor, an optimal microclimate is maintained inside the car.
To check its serviceability, do the following:
- Close all car windows and doors.
- Set the temperature two degrees higher than the current setting.
- Place a thermometer near the sensor.
- Wait for the fan to turn off and compare the indicators (installed and real).
If the controller does not respond to the sensor readings, it means that the latter is faulty and requires replacement.
Location of Priora fuses under the hood
- F1 (30 A) – power supply fuse for the electronic engine control system (ECM);
- F2 (60 A) – fuse for the power supply circuit of the engine cooling system fan (power circuit), additional relay (ignition relay), rear window heating, electrical package controller;
- F3 (60 A) – fuse for the power supply circuit of the electric fan of the engine cooling system (relay control circuit), sound signal, alarm signal, ignition switch, instrument cluster, interior lighting, brake light, cigarette lighter;
- F4, F6 (60 A) – generator power circuit fuses;
- F5 (50 A) – fuse for the power supply circuit of the electromechanical power steering
Relay and fuse box for Halla air conditioner
- right electric fan power supply fuse (30 A);
- fuse for the power supply circuit of the left electric fan (30 A).
- right electric fan relay;
- additional relay (sequential activation of left and right electric fans);
- left electric fan relay;
- heater fan power supply fuse (40 A);
- compressor power supply fuse (15 A);
- heater fan relay;
- compressor relay.
Panasonic air conditioner relay and fuse box
- Heater fan maximum speed
- Right fan
- Fan sequential relay (low speed)
- Left fan
- Left fan fuse (low speed)
- Right fan
- Heater fan
- Compressor
- Heater fan
- Compressor
Additional mounting block Priora
- F1 (15 A) – main relay and starter interlock circuit fuse;
- F2 (7.5 A) – fuse for the power supply circuit of the ECU (controller);
- F3 (15 A) – Priora fuel pump fuse;
- K1 – main relay;
- K2 is the place where the Priora fuel pump relay is located.
Attention!
The relay and fuse diagram may differ depending on the configuration and production date of the vehicle. Current diagrams of the mounting block are presented in the operating manual for the date of manufacture of the vehicle (download from the official website).
Let us remind you that on our website you can find detailed instructions for repairing the Lada Priora with your own hands.
Hello everyone, guys, this problem is that the instrument panel backlight does not light up, what could it be?
I'm standing in the middle of the city with a broken timing belt
by Adminrive · Published 08/05/2016
SKA is on fire today
by Adminrive · Published 03/16/2015
Possible reasons
What to do in a situation where the instrument panel backlight on a VAZ-2110 car has disappeared? First of all, you should look for the reason why this malfunction occurred. Sometimes it can be identified immediately, but in some cases this process takes some time. In fact, there may be several reasons, so you will need to check everything methodically.
The most banal and simplest option is that someone turned the rheostat knob, which is responsible for the amount of light flux, all the way to the left.
This, by the way, is often the sin of children who are placed in the front seat. “Young drivers” love to turn all sorts of knobs, press buttons and switch levers. Perhaps the adults overlooked it, and the child “corrected” the dashboard lighting. The problem, as you understand, is solved by simply returning the rheostat knob to its previous position. Therefore, before you start looking for possible reasons for the sudden disappearance of the backlight, check this particular point.
I would like to remind you of one simple rule. In a situation where there may be several possible causes of failure, when searching you need to follow the path of least resistance. In other words, test the simplest assumptions first. You may be lucky and find the problem with minimal time and effort.
If the reason is not in the position of the rheostat handle, you need to proceed to further search for the causes of the breakdown. Possible sources of problems here could be:
- fuse;
- instrument panel circuit board;
- contacts;
- wiring;
- failure of light bulbs due to short circuit.
So, let's look at some of the above reasons in more detail. After the rheostat handle, you should check the integrity of the 5-amp fuse F1. You can also usually turn on the side lights and see if they work on the left side. Everything is explained here simply. The lamps that illuminate the instrument panel, the left side lights, as well as the trunk lighting operate through this fuse. The dimensions located on the right side of the car receive power through F11, that is, they are not of interest to us in this particular case.
You may see the following situation. The left side parking lights, or trunk light, work, but the instrument panel light does not. This means that the problem is not in fuse F1. Therefore, you need to continue searching for the possible cause of the malfunction. In particular, it is necessary to check the contacts of the rheostat that illuminates the dashboard lighting. It is not uncommon for plugs to fall off. Accordingly, the lighting of the shield disappears due to lack of contact.
However, the rheostat itself can also fail. It is quite easy to check this assumption. To do this, you must first remove the rheostat, and then directly connect its contacts. If after this manipulation the instrument panel lights come to life, it means that the problem has been found, and you just need to replace the failed part. If not, then you need to continue searching further.