Don't waste your time - use the Uremont search and get offers from nearby services with specific prices!
To install new elements you will need to disassemble the “tidy”. For Lada Kalina, work according to the following algorithm:
- lower the steering wheel down (otherwise it will get in the way; the regulator is located behind the column);
- unscrew the self-tapping screws securing the cover (get from below);
- pull the part towards you;
- unscrew the fasteners with a magnetized tool;
- disconnect the wires with the block by tilting the panel.
Expert opinion
It-Technology, Electrical power and electronics specialist
Ask questions to the “Specialist for modernization of energy generation systems”
Automotive dashboard backlight controller It is noticeable only when it turns to red, but it is very impressive when the car begins to accelerate, picking up speed and goes into the red zone when overtaking. Ask, I'm in touch!
Diagnostics
- Check the panel backlight brightness adjustment slider. It often happens that the brightness adjustment is at a minimum and the backlight is very dim or does not light at all;
- Check the panel hanger fuse. On Kalina, the fuses are located under the cover of the light switch block. In the block you need to check fuse F7, it is responsible for the panel illumination. The fuse location diagram is on the light switch block cover;
- One of the most common problems is a wiring problem that causes the panel backlight to not work. This usually happens when some wire breaks. In this case, only an electrician can help you.
What to do if replacing the fuse does not help
There are additional faults due to which the device on Kalina may break. These include.
- Bad contacts. Over time or from heavy use, the connection inside the device may become compromised. Incorrect installation of devices leads to loose sockets and poor contact. The fuse trips. This can be treated by bending the metal tendrils on the cartridge, as well as by resoldering the contacts.
- With age, oxides or rust appear on Kalina's cigarette lighter, which has a bad effect on its operation. The situation can be corrected by treating the contact areas with a needle file. It is necessary to clean them and remove all traces of corrosion. Another malfunction is a burnt-out nichrome spiral. It is recommended to replace the device here.
Lamp selection
When choosing lamps, you can go in two ways:
- Install regular incandescent lamps, such as those installed by the manufacturer.
- Install LED lamps.
We recommend installing LED lamps, since their lifespan is longer than standard ones and you can also slightly reduce the load on the generator. Also keep in mind that LED lamps have pros and cons. If you install an LED lamp and it does not light, turn the socket with the lamp 180 degrees.
The instrument panel on Kalina uses a type of lamp with a W1.2W socket. In any auto store you can buy a socket with a lamp or a light bulb separately.
Sequence of replacing the backlight lamps of the Kalina dashboard
The technology is very simple. To remove cartridges, turn them half a turn counterclockwise. Remove the burnt element with your hands or pliers, picking up the shank. Install a new spare part. Install the cartridge (turn clockwise).
Tip #1 for replacing Kalina dashboard lamps from experienced car owners - change all the lamps at once.
This will eliminate the need to repeat the procedure in the near future. Although it is simple, it is still labor-intensive. Another important advantage of this advice is the uniform illumination of the entire “tidy” (the elements produce a glow of different intensities over time). The work is quite simple, but you should not lose your vigilance - there is always a risk of damaging the threads or thin elements.
Step-by-step instruction
- Before starting work, use a ten-point open-end wrench to loosen the nut securing the negative terminal of the battery and remove it. It is worth noting that when the instrument panel is removed, all readings except mileage are reset.
- For ease of operation, position the steering wheel as if driving straight.
Using a small Phillips screwdriver, unscrew the two screws securing the plastic cover of the shield.
Remove the plastic trim of the instrument panel by disengaging the two spring clips at the bottom.
Using a small Phillips screwdriver, remove the two screws securing the instrument panel.
Remove the instrument panel and go to a well-lit area to change light bulbs. It is worth noting that the lower part of the parting shield is inserted into the recess and supported by rollers on the sides.
To replace the lamp, grasp the socket with pliers and turn it counterclockwise. After turning, remove the socket along with the lamp.
Take a new lamp socket, install it in the seat and turn it clockwise until it stops. It is worth noting that if your lampshade is in good condition, the lamp can be replaced separately. You remove the lamp by simply pulling it towards you.
You can see the procedure for replacing light bulbs in the Lada Kalina dashboard in this video:
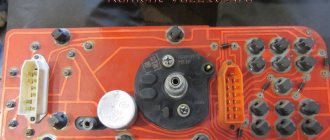
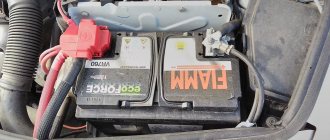
Power fuses
The main power fuses and the diagnostic connector are located under a cover next to the cigarette lighter.
We hope this article helps you solve your electrical problem. Carry spare fuses and, if possible, relays just in case, so you don't have to look for them at the worst possible time or during dealership closing hours.
You can also read about Lada Grant fuses, if you have such a model in your fleet.
If you have questions about electricity or history, you can write them down in the comments.
Why are you not logged in? Enter.
Because you are not a trusted user (the phone is not verified). Enter and confirm your phone number. Learn more about trust.
Because the topic is archived.
What for does she need a man who shoots down?
PS. Let a normal seeker be the one to fix it for me
The instrument lights on the Lada Kalina do not light up - is it time for the car to go to the dump?
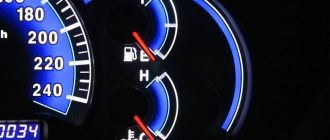
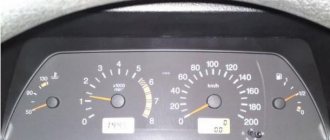
The instrument panel of any car is designed to inform the driver about the technical condition of the car. If in the daytime all sensors are clearly visible, then at night for their normal viewing it is necessary for the backlight to work. There are cases when the instrument lighting on the Lada Kalina stops functioning and in the dark it is difficult for the driver to control the readings. This not only creates inconvenience to control, but can also lead to dangerous situations when the driver is distracted to see the information on the dashboard.
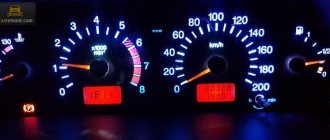
Standard on-board computer Lada Granta/Kalina 2
The liquid crystal display is an electronic device that displays trip information collected and processed by the trip computer. Depending on the configuration, three types of trip computers are installed on the car, differing in the amount of information displayed.
- line 1 displays the current time or (in a variant) the gear shift prompt indication mode, as well as the automatic transmission operation indication mode;
- Line 2 displays your choice of total or daily mileage;
- line 3 displays the outside temperature or (in an optional version) the functions of the on-board computer;
- line 4 displays the fuel level.
Expert opinion
It-Technology, Electrical power and electronics specialist
Ask questions to the “Specialist for modernization of energy generation systems”
Dynamic backlighting of the dashboard To do this, let's create a variable first_loop, which will tell the Arduino that there is no need to pay attention to the pulses yet. Ask, I'm in touch!
Why does the instrument panel backlight on the Lada Kalina not light up?
During operation of the Lada Kalina, situations may arise when the dashboard backlight disappears. If this happens, then you need to find the cause of the breakdown as soon as possible and eliminate it. There are several reasons for the backlight to disappear, but they are all related to a malfunction of the car's electrical network.
Removing the instrument panel
In most cases, before establishing the reason for the disappearance of the backlight on the Lada Kalina dashboard, you first need to dismantle it.
To remove the instrument panel you will need the following tools:
- a set of keys;
- Phillips and flathead screwdrivers of different lengths.
The procedure for dismantling the instrument panel on the Lada Kalina:
- Turn off the power to the car. To prevent a short circuit during work, you must first disconnect the negative terminal from the battery. If this is not done, there is a possibility of electrical equipment failure.
- Lower the steering column to its lowest position. This will allow you to gain easier access to the instrument panel.
- Unscrew the two screws securing the cover; this will require a short screwdriver. Then it is carefully pulled out, while it is necessary to overcome the resistance of the spring clamps. It is necessary to shake the pad and gradually pull it towards you.
When the dashboard has been dismantled, you can proceed to diagnostics and search for the reasons that caused its malfunction.
Video: removing the instrument panel
Brightness adjustment lost
One of the very first actions to take when the instrument panel backlight disappears is to check the brightness adjustment. The driver himself or his passenger can change the setting. There is a wheel on the panel with which you can set the brightness of the instrument lighting. If it is turned to minimum, the backlight may glow very weakly or not glow at all. Just turn the wheel and adjust the brightness.
Fuse problems
The next step in troubleshooting is to check the fuses. To do this, you need to use the technical documentation of the car and find where the fuse responsible for the instrument lighting is located. The fuse box is located on the left side under the cover with the light switches.
Also, the purpose of the fuses is written on the cover and if you look closely, you can find where which one is located. It is enough to replace the required fuse and if the problem is there, the instrument lighting will start working. On the cover, the fuse responsible for the instrument lighting and interior lighting is designated F7.
In addition, the socket into which the fuse is inserted may become damaged, or a breakdown may occur inside the unit itself. To diagnose, you will have to completely remove the fuse box. If the mounting block fails, it must be replaced.
Wiring problems
One of the most unpleasant options is a malfunction in the car’s electrical wiring, which leads to failure of the instrument panel backlight. This may occur as a result of a broken wire. To identify it, you need to use a multimeter to check the wires responsible for powering the instrument backlight. They can be identified on the car's electrical diagram. Once the break is found, it is removed and isolated.
In addition, the reason may be oxidized contacts of the mounting block or wire blocks. In this case, disconnect the connector near the fuse box and on the dashboard. After this, inspect and, if necessary, clean the contacts.
Problems with light bulbs
It is possible that the instrument panel lighting has disappeared due to failed light bulbs. There are a total of 5 light bulbs on the Lada Kalina dashboard.
Replacing them yourself is easy:
- The dismantled instrument panel is turned over, since the light bulbs are located at the back.
- Take out the light bulbs and check their functionality using a multimeter. The cartridge is turned counterclockwise. If you have difficulty pulling the light bulb out of the socket by hand, you can use pliers.
Video: replacing light bulbs
The board burned out
In some cases, a problem with the dashboard lighting may be due to a faulty control board. Some craftsmen try to restore it with a soldering iron, but this is a complex process and only professionals can do it. Usually, when such an element fails, it is replaced with a new one.
Checking the steering column switch
Checking the contacts in the steering column switch housing
In those cases, switching between the BC readings on the panel should be done with a switch on the steering wheel, but this cannot be done - you should make sure that it is working. This steering column switch is used on the panels: “VDO” 1118-3801010, “Schetmash” 2170-3801010-01 and “Avtopribor” 1118-3801010-02. To check whether the steering column switch is working properly, it must be removed and disassembled.
Disassembling the switch consists only of removing the cover, which is held in place by a small metal latch in the form of a bracket. There are 4 contacts under the cover, which are connected to the Reset button and to the switches. There are yellow and black wires coming from the “Reset” button. There are green and red wires coming from the top switch button. All these contacts must be checked with a multimeter for resistance.
If it is, then everything is fine with the switch and you need to disassemble the dashboard to inspect the contacts and tracks. On VDO panels with one window produced in 2006-2007, there is a factory defect - poor contact of one of the resistors, which, during driving, cracks and interrupts the connection between the steering column switch and the panel board.
Advice from car enthusiasts and recommendations from experts
There may be a break in the backlight brightness adjustment circuit. The adjustment rheostat has a soldered spring - it tends to fall off. You can simply put a jumper, that is, bypass the rheostat, then the brightness will not be adjusted, or solder it back - you will need to remove the rheostat.
Ustov
https://autolada.ru/viewtopic.php?t=100217
Lamp contacts often become loose, and they burn very quickly. I have already changed more than one.
compositor77
https://kalina-club.com.ua/forum/index.php?showtopic=6768
It is better to immediately install LED lighting bulbs for the instruments, they are not much more expensive, but on a cloudy day or when the sun sets, the instruments are readable with a bang. Moreover, no modifications are needed, the base is suitable...
maxx
https://kalina-club.com.ua/forum/index.php?showtopic=6768
You can do everything yourself, everyone basically does it, nothing complicated, the main thing is to unscrew everything and not break it, disconnect the connector. And check the bulbs to see if they are all intact, check the contacts. Maybe some of the light bulbs have burned out and it seems that the light is getting worse.
privatelex
https://kalina-club.com.ua/forum/index.php?showtopic=6768
I also had this problem. The backlight inexplicably disappeared and then turned on again. It's all about the cigarette lighter illumination. The contact shorts and the brains turn off the backlight. I unscrewed the cover under the gearshift lever and wrapped the wires near the cigarette lighter with electrical tape. All OK.
Roman Didenko
https://otvet.mail.ru/question/93393860
There's a spinner there. Adjusting the brightness of the shield. You need to twist it, it won’t help, either replace it or remove it completely and do it directly.
Taxi Osa
https://otvet.mail.ru/question/93393860
If the instrument lighting on the Lada Kalina stops lighting, then you cannot delay fixing the problem. This must be done as soon as possible. In most cases, it will take a maximum of 30–50 minutes to fix the problem.
The problem may be caused by a ground wire
Sometimes situations arise when the needles on instruments behave completely inappropriately, jumping sharply from the minimum to the maximum mark and vice versa. In the vast majority of cases, the cause of this malfunction is the lack of normal contact with ground. There is nothing difficult in fixing this problem. First of all, you should find the fastening of the ground wire connecting the instrument panel to the partition that separates the interior from the engine compartment. It can be detected by removing the car radio from its standard socket.
However, there is one caveat here. If an alarm was installed on the car, then the fastening of the mass wire could well be moved to some other place. However, as a rule, the car owner is warned about such actions. In most cases, the fastening of the mass wire is moved to the area where the driver’s left foot is located, placing it behind the interior trim.
By the way, a situation where the arrows on the instruments begin to “jump” can also arise after installing the radio. In order to do this, you need to unscrew the ground wire coming from the dashboard. It happens that it is then screwed in poorly, and subsequently, due to body vibration, the contact becomes unreliable. To solve the problem, just twist the wire normally. It is worth noting that doing this is not very convenient, so you will have to make some effort.
If this is not the problem, then you will have to look for the cause directly in the instrument panel. It should be pulled out from its standard mounting location as far as possible, but do not disconnect the wires going to the pads. Next, we measure the voltage at the contacts indicated in the diagrams by numbers 6, 9 and 10. Everywhere there should be the same indicator - 12 volts. In addition, you should also check the ground wire on block X1 (white). Also inspect for possible damage to the tracks on the back of the instrument panel that supply electricity to the appropriate consumers.
The domestic auto industry is not always pleased with the quality of the dashboard and the tenth model Zhiguli is no exception. This part often fails and sometimes requires complete replacement. To understand the cause of such troubles, you need to know the design and what can affect the occurrence of various malfunctions.
Replacing the light bulbs in the Lada Kalina instrument cluster [photo]
Today we will tell you how to replace light bulbs if the instrument panel lights on a Lada Kalina car do not light up.
One fine day on the editorial Kalina, the backlight on the right side of the instrument cluster (in the area of the temperature and fuel level indicators) went out. I had to fix this problem. We have prepared a photo report and detailed instructions on how to replace it yourself for those who encounter this for the first time.
Replacing light bulbs in Kalina's tidy is a fairly simple process, but there are some nuances. We'll tell you about everything step by step. For work we only need a short screwdriver.
To change light bulbs, the instrument cluster must be removed. To do this, lower the steering column to its lowest position.
After this, unscrew the two screws that hold the instrument cluster trim.
Next, pull the plastic cover towards you. It is flexible, so you can bend it a little to make it easier to slide it over the steering wheel and remove it.
After this, the instrument cluster remains visible.
You need to unscrew the two screws that secure it. There is very little space for this, so you need a short screwdriver. The main thing when unscrewing is not to drop the screw or washer inside the instrument panel.
After this, you need to disconnect the connector of the instrument cluster. To do this, use a screwdriver to unfasten the black lock from the green block and pull it out of the instrument cluster.
Next, carefully remove the instrument cluster from the panel.
Turning the device over, you can see 5 backlight sockets. They can be removed by turning them counterclockwise. The light bulbs themselves sit in the sockets simply due to the force of friction - to replace them you need to pull them out. Sometimes they turn sour and can only be removed with pliers.
Another feature is that the 4 upper sockets are identical, the bulbs can be removed and replaced from there. The fifth socket, located at the bottom, has a soldered light bulb, so it is most convenient to change it together with the socket.
If you change standard light bulbs to LED ones, do not forget about the polarity - if you install the LED on the wrong side, it will not light up.
In our case, one light bulb was burnt out, the rest were darkened, so the decision was made to replace them all at once. After replacing and installing the cartridges, assembly is performed in the reverse order.
After connecting the connector of the device, do not rush to fasten it in place - you need to turn on the side lights and check that all the bulbs are working. In the daytime, the backlight is difficult to see, so the instrument cluster can be covered with a bag or jacket to create darkness.
If all the lights work, replace the instrument cluster and its trim.
Relay location
The relays are located in the same block as the fuses.
K1 - headlight washers. If the washers stop working, but this relay is working properly, check their injectors. It happens that they become clogged or damaged.
K2 - electric windows. Check this relay together with fuse F2. See F2 for troubleshooting.
Short circuit - starter relay. If you turn the ignition key and the starter does not turn it, it could be due to this relay. Check its contacts and clean if necessary. Next, you need to check the battery terminals for reliable contact between them, and clean if necessary. Also check the contact group of the ignition switch; there may be no contact.
K4 - add rear window heating relay, heater switch, wiper and washer switch.
K5 - turn signal and hazard warning relay switch. If the turn signals or hazard warning group do not work, check this relay along with fuses F1 and F3.
K6 - windshield wiper relay. We check together with fuse F4.
K7 - high beam relay. Check together with fuses F14 and F15.
K8 - sound signal. We check together with fuse F6.
K9 - fog lights. Check together with fuses F16 and F17.
K10 - heated rear window. Also check relay K4 and fuses F4 and F8.
K11 - heated seats. Also check fuse F18.
K12 - reserve.
Preparation
Before you start taking immediate action, you should prepare. You will need the following tools:
- Phillips screwdriver (long and short);
- pliers or narrow-nose pliers;
- set of light bulbs.
It is recommended to purchase a complete set of 5 lamps at once. The dashboard of the Lada Kalina uses baseless incandescent lamps powered by 12 V. The factory backlight is soldered with antennae to the contacts of the sockets, and they cannot be disassembled. Therefore, you need to buy both lamps and new cartridges, otherwise you will have to run to the store again. The short blade screwdriver should be magnetized to prevent the mounting screws from falling under the dashboard during removal.
Removing the instrument panel
Dismantling the Lada Kalina instrument panel is carried out as follows:
- lower the steering wheel to the lower position so as not to interfere. The regulator is located under the steering column;
- Unscrew the two screws holding the decorative trim. They are located in the upper part, you can get to them from below;
- pull out the cover by moving it towards you;
- Using a magnetized screwdriver, unscrew the two fasteners holding the instrument panel;
- tilt the panel and disconnect the block with wires. She is there alone, no other elements hold the dashboard.
It is necessary to act carefully and ensure that fasteners do not fall inside or onto the floor.
How to install LED sources?
Quite a lot of Lada Kalina owners are fans of tuning. They are leaning towards replacing the standard lamps present in the panel with LED options. These components are significantly brighter than their traditional “competitors,” which radically changes the appearance of the panel, especially in the dark.
For installation, both the diodes themselves, which are to be installed in the mounting sockets for standard lighting components, and diode strips are used. In the second option, the products are glued around the perimeter of the LADA Kalina dashboard.
The following procedure is identical to the algorithm of actions described here. A significant difference is the need to file the tip of the diode before direct installation. This manipulation should be performed with the utmost care to avoid damage to the lighting component itself. Without the specified undercut, the diodes will not be able to provide light scattering, but will begin to direct the light beam to a point.
Step-by-step replacement instructions
Replacing light bulbs is not difficult. In order to remove the cartridges, you need to turn them half a turn counterclockwise. Procedure:
- remove the burnt out lamp. You can do it with your bare hands, but more often you carefully grab the cartridge shank with narrow pliers and easily turn it counterclockwise;
- insert a new lamp into the socket;
- install the cartridge into the socket by turning it clockwise.
Advice! Experienced users recommend changing the entire set at once in order to know exactly when to start using it. Having to repeat the entire procedure a week later because a nearby light bulb has burned out will not make anyone happy. In addition, all lamps will have the same brightness, which will provide uniform illumination of the panel. If this option is not suitable, you can arm yourself with a tester and check the lamps for functionality. After this, the burnt-out copies are replaced.
Removing the dashboard
To do this you will need a short and a long Phillips screwdriver. The removal process is carried out in several stages.
- Lower the steering wheel to its lowest position. There is a regulator at the bottom, it is located under the steering column.
The bolts are marked with arrows.
The decorative plug was removed.
Replacing lamps
The backlight is located on the back of the shield. You can remove the light element (light bulb) without using tools. If difficulties arise, pliers will help you .
Layout of the backlight lamps on the rear wall of the instrument panel.
Next, you should install new light bulbs in the vacated sockets. After that, connect the power connector and install the shield in place.
Installation of LED lamps
Most modern lighting devices have an LED design. LEDs are economical, consume little energy, and have high brightness. In addition, you can choose a different color shade of the backlight, which will diversify and decorate the dashboard of the Lada Kalina. However, you should remember some features of LED backlighting:
- LEDs are longer than regular light bulbs, so the brightness may be excessive;
- When installing, you must carefully monitor the polarity, otherwise the lamps will not light;
- The brightness control has practically no effect on LED devices.
A significant advantage of LED backlighting is its long service life. Users who install such lamps forget about the need for replacement for several years. The only condition for operation will be the need to cool the ICE devices, since when heated above 80° they lose their brightness and quickly consume their resource.
Advertisements on NN.RU - Auto
Lengthen the Kamaz under a 7.5 m body. Maz Zubrenok, Maz 9 M extension. Install the chassis of an extended truck.
The broken-type evacuation platform produced at our enterprise has high structural reliability, confirmed over many years.
In a short time and at a high technical level it is possible to: 1. Move the frame (frame) to the required wheelbase of the tow truck. 2.
Lengthen Gas 331043, Valdai-kolkhoznik 331063 for installing a skip 5.1 / 6.5 m. The frame is lengthened by increasing the wheel.
Nizhny Novgorod will soon turn 800 years old. Preparations for the celebrations are already being discussed in the region, but the authorities have decided.
At the end of July, Nizhny Novgorod and the region were struck by a rare natural phenomenon: such cold snaps had not occurred in the region for many years.
Imagine waking up in the morning, opening the curtains, sunlight entering your apartment, and a breathtaking landscape opening up outside the window.
The cemeteries of Nizhny Novgorod are littered with garbage. Townspeople who decided to visit the graves of their ancestors complain about this (and not for the first time).
Main conclusions
Replacing the light bulbs in the dashboard of the Lada Kalina is not difficult and can easily be done with your own hands. You will need simple steps:
- preparation of necessary tools and lamps;
- dismantling the dashboard;
- removing problematic elements and installing new ones;
- Reassemble the panel in reverse order.
The entire process takes from half an hour for a beginner to 15 minutes for a more experienced user. Please share your tips and replacement methods in the comments.