Replacing the outer CV joint of Lada Kalina
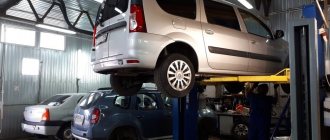
You can change the external “grenade” on a Kalina without a lift or pit, but the car must be placed on a level surface. We make the replacement as follows:
- first of all, we loosen and unscrew the hub nut - when the wheel is removed, it will be problematic to move it;
- loosen the wheel nuts, jack up the car, and remove the wheel. To prevent the car from rolling, it is necessary to put stops under the rear wheels, and in front next to the jack to secure it, place a support (for example, a wooden beam) under the threshold;
unscrew the ball joint bolts from below (2 pcs.);
remove the clamps from the boot;
move the boot closer to the gearbox, use a bronze or copper drift to knock out the outer CV joint;
we install the new part in place, fill the joint with grease, and secure the boot to the CV joint with new clamps; We assemble all the parts.
Source
Oil pump on VAZ cars, operating principle and main malfunctions
Kamaz pump
The device that supplies oil to all components and assemblies of the engine is called an oil pump.
The life of the internal combustion engine as a whole depends on the correct operation of the oil pump, so it is very important to ensure that the operation of this unit is at the proper level. At the slightest sign of a malfunction in the oil pump, it is necessary to repair it, since if you do not pay attention to this problem, there is a high risk of engine seizure. The VAZ oil pump has two types of device: one type is typical for all front-wheel drive cars (the VAZ 2109, 2110, 2112 oil pump has an almost identical design), and the other type is typical for both classics and the Niva model
If we talk about the principle of operation of the oil pump, then on front-wheel drive cars it is driven directly from the crankshaft, but on classics the system is more complicated. For example, the VAZ 2106 oil pump is driven using a chain drive
The VAZ oil pump has two types of device: one type is typical for all front-wheel drive cars (the oil pump VAZ 2109, 2110, 2112 have an almost identical design), and the other type, typical for both classics and the Niva model. If we talk about the principle of operation of the oil pump, then on front-wheel drive cars it is driven directly from the crankshaft, but on classics the system is more complicated. For example, the VAZ 2106 oil pump is driven using a chain drive.
Having understood the differences, let's talk about the technical part.
The device of the oil pump on VAZ cars
So, the oil pump consists of a housing, an oil receiver, a drive and driven gear, an oil pump pressure reducing valve and other small elements, such as an oil pump gasket, oil seal, etc.
Consequently, given the design of the oil pump on domestic cars, the weak points are the oil seal and the oil receiver. As a result of using low-quality oil, the receiver grid quickly becomes clogged and the oil pressure in the engine system drops. The oil pump itself has a service life of 120–150 thousand km, but sometimes certain problems occur that may require repair or replacement of the oil pump. Of course, replacing the oil pump on a VAZ 2109, or on any other model, is a complex and costly procedure, so it is better to carefully monitor its correct operation and, if necessary, arrange for preventive maintenance in the form of more frequent oil changes.
In addition, periodic checks of the oil pump will not be superfluous.
How to check the oil pump?
The first and main sign of a malfunction in the oil pump will be a warning light that comes on, but it already indicates the presence of a serious malfunction. In order to check the correct operation of the oil pump, it is not at all necessary to remove it, as some experts advise. It is enough just to measure the engine oil pressure and compare it with the indicators that are considered normal for your car. Having received the number, you can already know what to do next - use the car with peace of mind, or prepare for repairs.
When replacing or repairing the oil pump of a VAZ 2109, 2110, and even 2106, be sure to use only original spare parts. The problem is that for domestic cars there is a large selection of parts from various manufacturers, and, as a rule, the bulk of these parts are of very low quality.
- Repairing a muffler with your own hands If the “X” day has come in your life, when the car stopped purring like a kitten and roared like a hungry bear, do not rush to look for options for an old, burnt-out muffler, because it is quite possible that you can improve the situation with the help of repairs that , besides, you can also make your own...
- Adjusting headlights with your own hands It is believed that adjusting car headlights can only be done at a specialized service center that has the necessary equipment, stands, etc. Of course, this is preferable, but no one ruled out the possibility of adjusting the headlights with their own hands, because most of us do just that...
- Flushing diesel injectors One of the most common problems with a diesel engine is a malfunction of the fuel injectors. The design features of a diesel engine, low-quality fuel - all this eventually leads to problems associated with injectors. The engine begins to operate unstably, fuel consumption increases, the engine starts reluctantly, and puffs of black smoke come out of the exhaust pipe. All …
Buy a fuel pump for VAZ (LADA) KALINA sedan (1118)
Purpose
A fuel pump is needed to pump gasoline or diesel fuel from the gas tank to the engine.
Alternative name: fuel pump, gasoline pump.
Signs of failure of the fuel pump VAZ KALINA sedan (1118)
You should not be surprised that this spare part or its individual components systematically break down. The fuel pump is a part that is constantly in operating mode. Here are some symptoms of a poorly functioning fuel pump.
- low engine power, which will definitely be felt by a driver who knows his car
- problematic engine starting
- high-pitched sound of a running engine
There are plenty of signs and causes of failure. All the symptoms listed above may indicate other problems with the car. Therefore, do not try to self-medicate, but contact a good car service station. Replacing a fuel pump is a responsible undertaking. And repairing fuel pumps - even more so. Therefore, if you have never installed a fuel pump, do not take risks.
Where to buy a fuel pump for VAZ KALINA sedan (1118)?
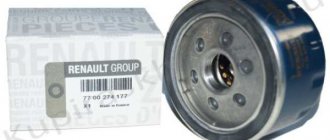
The pump is the main component of the fuel system and its quality cannot be neglected. Fuel pumps can be purchased at almost any city market. But is it necessary to make a purchase this way? City markets and small shops are where you can often find counterfeit products.
The AutoTO electronic catalog offers a fuel pump for VAZ (LADA) KALINA sedan (1118) from the best manufacturers of electronics for cars. All products are tested for safety and certified. Here you can purchase fuel pump parts such as fuel pump check valve or fuel pump relay.
Where to buy a fuel pump for a VAZ (LADA) KALINA sedan (1118) with delivery?
To order, just leave a request and wait for a call from our specialist or dial one of the numbers listed on the website.
All components presented on the AutoTO store website can be ordered with delivery to all regions of Ukraine. Delivery of spare parts is carried out by the most reputable courier services in Ukraine.
Zmicer21011 › Blog › Low oil pressure, possible causes.VAZ
I’ve been hearing too many questions about blood pressure lately; I’ve been dealing with this for a long time, and I had to spend a lot of time looking for answers to my questions, so I decided to describe everything in one place. Please add anything if you need it. Let’s make a reservation right away: the level and type of oil must correspond to the level between min/max and the type of engine. The replacement frequency is 8-10 thousand, too. So, let's start with a trivial matter:
1) If you have a gasket, there is no pan protection, or the pan hits a stump, and the terrible oil can comes on, immediately or at idle, hot or cold, it doesn’t matter - from the marks on the pan you will immediately see that the oil receiver is jammed. There is only one solution - replace the pump\ oil receiver. 2) If you started the engine, everything is as usual, let's go, the car has warmed up to operating temperature, you stop at a traffic light and the pressure lamp comes on, it goes out when you gain speed. From personal experience: In the morning the lamp was on when it was hot, 850 rpm , gave 1000 rpm - it was treated. After 2 days I had to give 1500 rpm
There are already several options: - the oil pressure sensor is lying. You can simply change it, or clean it in gasoline (it’s better to replace it, and put the old one on a shelf, and compare the washes with the new one.) If you have two sensors (for the emergency oil pressure lamp and to the oil pressure indicator (dial pressure gauge)), it’s already simpler, two sensors (
) cannot fail at the same time. If the arrow shows 4 kg/cm (for example) and the readings change depending on the speed, and the pressure lamp is on and the low oil pressure lamp sensor is lying, feel free to change it. -the oil pump/fungus/pig is worn out (flushed out). Solved by replacement.
- the filter is clogged or malfunctioning. 3) The lamp is constantly on. At the same time, the engine knocks like a tractor. -The crankshaft thrust half-rings are worn out. -Broken oil pump\fungus\piglet. -The pressure relief valve in the oil pump is open. Most likely, debris has entered. On a cold engine, give 3500-4000 revolutions, a couple of seconds will be enough. 4) The oil pressure light comes on for a couple of seconds when starting the engine. This is a filter defect. The valve does not close when you turn off the engine and the oil flows into the sump, and while the 0.3 liter pump pumps, the entire timing belt suffers from starvation. Just change the filter. When buying, you can blow into the central hole, air should not pass through.
Please add additional information, the entry will be edited. ___________________________________ Reasons without explanation: First, check the engine oil level itself. The oil level should not be below the minimum mark. If the oil level is at the correct level, the oil pump may have failed. Repair or replace it. Oil pressure could also drop due to engine overheating. The crankshaft thrust rings are severely worn. Severe wear and, accordingly, a large gap has formed between the liners and the main journals of the crankshaft. It is also possible that due to wear and tear, the gap between the journals and bearings of the camshaft has become large.
The Kalina oil pressure sensor is a fairly reliable device and rarely breaks down, but sometimes it fails. The article is dedicated to this device: what it is, where it is located, how to check its serviceability. Instructions for replacement are provided.
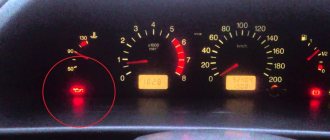
What does a burning oil pressure light indicate?
If the DDM indicator light on the instrument panel is constantly on, this indicates that the Lada Kalina oil pressure sensor is broken or the circuit is broken.
If after diagnostics it turns out that the device is faulty, it must be replaced (the author of the video is Alexander Skripchenko).
It is recommended to unscrew the old device before purchasing and take it with you so as not to make a mistake when choosing a new one. To replace it, it is better to purchase an original or a high-quality analogue. You should not buy a cheap product trying to save money on it, since a low-quality product will quickly become unusable and will have to be replaced again. If the DDM pad is in poor condition, it is worth replacing it too.
Replacement instructions
To carry out the work, you need to prepare a key for “21”.
The replacement procedure consists of the following steps:
- First you need to open the hood and remove the protective plastic cover from the power unit.
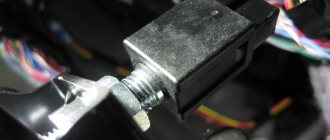
- Having found the sensor on the cylinder head, you need to disconnect the power terminal from it by pressing the latches.
- If necessary, check the power supply.
- Next, using the key set to “21”, unscrew the old device. We check it for serviceability.
- If the old device is faulty, screw a new sensor in its place.
- We connect the terminal with the power wire to the device, and return the decorative motor cover to its place.
- Let's start the engine. The light on the instrument panel should go out.
If everything works, the DDM replacement ends here.
Photo gallery “How to change DMM on Lada Kalina”
1. Motor protective cover 2. Disconnecting the terminal with the wire 3. Unscrewing the DDM with a wrench
Thus, even a novice driver can check and replace the Kalina oil pressure sensor, which will make it possible to save time and money on visiting a service station.
>Video “Replacing the oil pressure sensor”
This video demonstrates how to replace the DDM (the author of the video is the Auto_Remont channel).
Replacing the pump on a Lada Kalina (8 valves)
On an 8-valve Kalina, you can change the water pump yourself. However, if the car owner does not have minimal experience in car maintenance, many questions may arise. For example, which pump to buy, how to choose the right tool, and is it worth draining the antifreeze from the system completely?
Which pump to choose
When the time comes to change the water pump, car owners begin to look at car dealerships for a worthy replacement. But which pump to choose so that it lasts as long as possible and does not cause problems for the owner?
In contrast, it will not last long - after 10 thousand kilometers the pump will need to be changed again.
At AVTOVAZ, designers install a TZA water pump on the Kalina. It has a long service life; drivers often change the pump only after 100 thousand kilometers. As an alternative, you can install more expensive German-made Bosch pumps - they are also famous for their quality and durability.
Where is the water pump located on Kalina?
Due to the fact that the pump is driven by the timing belt, it is part of the gas distribution mechanism. That is, you need to look for the water pump on the Lada Kalina from the side of the engine itself. Visually, before removing the belt, you can only see the pump pulley, which is involved in the gas distribution system.
The pump on the VAZ is located in the timing device
Preparing tools
It is recommended to prepare a standard set of tools for removing bolts and unscrewing nuts. You will also need a 6-point hex key. To drain the antifreeze without contamination and inconvenience, it is better to immediately find a container for draining and a rag to blot up any drops that have fallen on the engine elements. To ensure reliable installation of the pump, you can use a sealant with good thermal conductivity properties.
How much coolant to drain/fill when replacing the pump
In any case, before dismantling the old pump, you will need to drain the antifreeze from the system. This is necessary in order to reduce the pressure in the hoses and not be injured during sudden releases of liquid.
If the water pump has not been changed for a long time, then it is advisable to immediately drain the entire volume of antifreeze from the system and replace it with a new one. If the car owner has recently filled in new coolant, then there is no point in completely draining it: just disconnect the hoses from the expansion tank and wait until the antifreeze comes out.
To make it easier to fill a large volume of coolant, drivers usually use funnels
Operating procedure
First of all, you will need to install the machine on a flat surface. You can drive the Kalina into the inspection hole, you can simply lift the front right part on a jack. It is recommended to make sure that the car is securely secured; it is better to place additional supports under the body beam.
When dismantling the pump, you will need to remove the timing belts.
The work of replacing the pump on the Lada Kalina is carried out according to the following instructions:
- Remove the engine splash guard.
- Disconnect the negative terminal from the battery.
- Unscrew the cap from the expansion tank and immediately remove the plug located on the cylinder block. Wait until the coolant drains out.
- If all the antifreeze is drained, then unscrew the cap from the radiator and place a container under the drainage area.
- After the antifreeze has been drained, screw all the plugs back on.
- Remove the protective cover from the timing belt.
- Loosen the belt by slightly tightening the timing pulley.
- Remove the drive belt.
- Remove the four bolts that secure the pump pulley to the cylinder block.
- After removing the pulley, unscrew the last screws securing the pump.
- Pull the water pump out of its socket along with the gasket.
- Clean the planting site from adhering dirt and antifreeze drips.
- Apply heat-resistant sealant to the edges of the hole and install a new gasket on it.
- Place a new pump on the gasket and then proceed in the reverse order of removal.
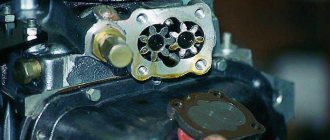
Step-by-step instructions for repairing and inspecting oil pump parts:
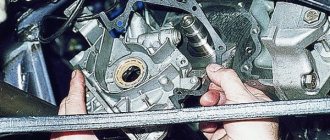
1. For a detailed inspection, it is necessary to remove the oil pump.
2. First, you need to unscrew the bolt (1) and remove the crankshaft position sensor (2), which is only available on engines with a fuel injection mechanism.
3. When disassembling the pump, you need to unscrew the six bolts and remove the pump cover.
4. Using two screwdrivers, you need to lift the pump housing so that the pins on the housing can come out of the holes located in the cover of the VAZ 2110 oil pump. Now remove the housing itself by disconnecting it from the cover.
5. We take the gears out of the cover: first the driving one, and then the driven one.
6. Now you need to unscrew the pressure reducing valve plug. An O-ring must be installed under this plug. Inspect the ring - if it is too compressed, it needs to be replaced.
7. Having unscrewed the plug, we take out the spring of the pressure reducing valve.
8. Now we take out the valve itself, gently tapping the body on a clean wooden stand. If the valve does not come out, it must be removed using a thin pointed object, preferably also wooden, so as not to damage the surface.
9. Now you need to carefully inspect the aluminum cover for visible signs of wear, mechanical damage, deep scratches in the contact areas of the gears. If found, the cover must be replaced with a new one.
11. The size of the maximum permissible diameter of the driven gear socket is 75.1 mm, so we measure the diameter, and if it exceeds the permissible one, we will also have to replace the housing.
12. Now you need to measure the width of the body segment in the middle part. If the measured value is less than 3.4 mm, the VAZ 2110 pump housing must be replaced.
13. Check the gears. The thickness of the drive should not be less than 7.42 mm. We measure: if it is less, we replace the gear.
14. The same applies to the slave. If the thickness is less than 7.35 mm, the gear must be replaced.
15. Then we check the axial clearances of the gears. It is necessary to install the drive gear back into the housing, after which we apply a steel ruler to the housing and use a feeler gauge to measure the gap between the gear and the ruler.
16. In the same way, measure the axial clearance between the attached ruler and the driven gear. For the drive and driven gears, the maximum permissible axial clearance is 0.12 mm and 0.15 mm, respectively. In cases where these values are exceeded, the gears must be replaced with new ones.
17. Through calculation, more accurate values of axial clearances can be obtained. To do this, a micrometer is used to measure the thickness of the oil pump housing along the outer surfaces, as well as the thickness in the area of the sockets for the drive and driven gears along milled surfaces in several places. The axial clearance is calculated based on the difference between the arithmetic mean of the socket depth and the measured thickness of the gears.
18. The next stage of repair is to inspect the pressure reducing valve seat to detect rough scratches and other deep mechanical damage on the inner surface. If found, the cover must be replaced.
19. If burrs and deep mechanical scratches are detected on the pressure reducing valve itself, it must also be replaced with a new one.
20. We also replace a bent, broken/broken or cracked pressure relief valve spring. The height of the spring in its free state is normally 44.72 mm; the same parameter under a load of 4±0.24 kgf is 31.7 mm. If there is a discrepancy, the spring must be replaced.
21. Assembling the oil pump. We install the driven gear with the chamfers on the teeth towards the housing.
22. Then install the drive gear in the same way - with the chamfers on the teeth facing the body. The gears must be lubricated with engine oil before installation.
23. Now you need to install the cover on the body and tighten the fastening bolts.
24. Before installing the pressure reducing valve into the seat with the bottom down, it must be lubricated with engine oil. Then you need to install the spring and tighten the plug with the aluminum O-ring of the oil receiver tube, also pre-lubricated.
25. It is necessary to pour engine oil into the pump through the oil receiver tube.
26. At the end of the repair and complete assembly of the car’s oil pump, turn the gears several turns so that the working surfaces of the gears are well lubricated.
Oil pump for VAZ engine (L1.8) Vesta, X-Ray 122 hp.
New VAZ 21179 engine for Lada Vesta / Lada Vesta, LADA XRA-Y / Lada X-Ray with a volume of 1.8 liters and a power of 122 hp. became a real discovery for Russian consumers, who had long been waiting for a modern, powerful and economical engine. Installed in cars with a robotic automatic transmission and a manual transmission.
Any internal combustion engine installed in a car has a fuel pump, an oil pump and a water pump in its design. These are three important components that affect the operation of the motor. So, without a pump, the coolant will not circulate, and without an oil pump, the lubricant will not reach the camshaft from the pan.
The engine lubrication system is as important as any other. Its serviceability is the key to proper, long-lasting operation of any engine.
Lubrication performs several important functions:
— eliminates engine overheating;
— protects parts from corrosion and removes friction products of parts from the mating area.
1 — oil pump assembly (21176-1011010-01 / 8450075132), 2 — oil pump cover gasket (8450057099), 3 — oil pump receiver assembly (8450060825), 4 — O-ring (8450053833), 5 — flange mounting bolt pump cover (8450056362), 6 — flange bolt for fastening the receiver (8450056973), 7 — flange bolt for fastening the oil pump (8450056974), 8 — oil pressure warning lamp sensor (8450051296).
Oil pump 21176-1011010 is designed to supply oil under pressure of at least 1.0 kgf/cm at a minimum engine speed of 750-800 rpm to the rubbing surfaces of VAZ engine mechanisms.
Oil is pumped through the system under pressure; its presence in the system is indicated by a lamp on the dashboard with an oil can symbol.
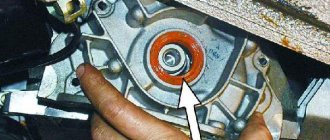
The oil pump is located just below the fluid pump, just behind the crankshaft pulley. The aluminum cover is attached with several bolts to the engine block.
The pump is installed on a vehicle designed for operation at ambient temperatures from minus 40°C to plus 45°C and humidity up to 90% at plus 27°C.
Before assembling the pump, be sure to lubricate the drive and driven gears, the housing in the gear area, the rubber O-ring of the oil receiver tube and the pressure reducing valve with engine oil.
The design of the oil pump and the materials used ensure its performance when operating a vehicle with a mileage of at least 125 thousand km.
After assembling the pump, when turning the gears by hand, they should rotate smoothly, without jamming or jerking.
The clouds of bluish smoke escaping from the exhaust pipe give the driver many unpleasant thoughts. This most often indicates an unpleasant, but inevitable moment in the life of a car - engine repair.
When the car has traveled approximately 150 thousand kilometers, noticeable wear of the piston group occurs.
Like any other Lada Vesta / Lada Vesta car, LADA XRA-Y / Lada X-Ray periodically needs maintenance and repairs. Moreover, serious work and financial costs can be avoided if the machine is operated as correctly and carefully as possible. Knowledge of operating features and rules for minor repairs can significantly save the family budget.
Technical characteristics of the Crankshaft 21177 - 1005020 - 00 for the VAZ 21179 engine with a displacement of 1.8 liters:
Piston stroke, mm 84;
Crank radius, mm 42;
Connecting rod journal diameter, mm 43;
Factory balancing.
Crankshaft for VAZ 21179 engine with a displacement of 1.8 liters with catalog number: 21177 - 1005020 - 00. Stroke 84 mm. Main journals: 50.73 - 50.817 mm. Crankpins: 42.896 - 42.984 mm. Possible installation in VAZ engines: 11183, 11194, 21114, 21116, 21124, 21126, 21127, 21128, 21129. With such a crankshaft, you can get an engine displacement of 1774 cc. cm with 82 mm piston up to 1862 cc. with piston 84 mm.
To install a crankshaft with an increased stroke, pistons with a reduced compression height or shorter connecting rods will be required.
The cylinder block of the VAZ 21179 engine is made of cast iron and has the same dimensions as the 1.6 liter version. The designers increased the piston stroke from 75.6 to 84.0 mm, for which a crankshaft 21177-1005020-00/00-00003965 was installed with an increased radius of the connecting rod journals from 47.8 to 43 mm.
For better cooling, the number of channels in the block and head has been increased. At the casting stage, the cast iron block has additional platforms for mounting the engine in the engine compartment not only across, but also along.
Aluminum cylinder head and aluminum pan. There are 16 valves per 4 cylinders. The timing mechanism is driven by a belt. The intake and exhaust camshaft pulleys are different. The actuator of the variable valve timing system is located on the intake shaft. The mechanism for changing the timing phases allows you to optimize the supply of the fuel mixture to the combustion chambers at different operating modes of the power unit, opening or closing the intake valves a little earlier or a little later.
The VAZ 21179 engine has a number of design features:
— a new automatic timing belt tensioner has been used — with two rollers;
— lightweight connecting rod and piston group;
— lightweight valves;
— new exhaust manifold with holes enlarged to 39 mm;
— fuel injectors have an optimized spray pattern;
— oil and water pump of increased productivity;
— the throttle assembly does not have a mechanical connection with the gas pedal. There is no cable from the pedal, only a wire transmitting the signal from the pedal position sensor to the throttle.
The new VAZ 21179 engine can run freely on AI-92 gasoline. According to the manufacturer, the service life of this engine of 400 thousand kilometers is not the limit. Replacing the timing belt is not required often; according to AvtoVAZ engineers, it can last up to 180,000 kilometers.
For Lada Vesta / Lada Vesta with a VAZ-21179 engine, a manual 5-speed VAZ-21807 gearbox has been developed.
LADA XRA-Y / Lada X-Ray manual with an engine capacity of 1.8 liters has a different Renault JR5 gearbox, which has an increased clutch from 200 to 215 mm.
The VAZ-21179 engine with a volume of 1.8 liters can be used not only on front-wheel drive Lada Vesta / Lada Vesta, LADA XRA-Y / Lada X-Ray (on Largus), but also on Niva, where the engine is installed longitudinally.
Other article numbers of the product and its analogues in the catalogues: 21176101101001, 21176-1011010-01.
VAZ 11183, VAZ 11194, VAZ 21114, VAZ 21116, VAZ 21124, VAZ 21126, VAZ 21127, VAZ 21128, VAZ 21129, Lada Largus, Lada Vesta / Lada Vesta, LADA XRA-Y / Lada X-Ray with engine capacity 1.8 l.
Any breakdown is not the end of the world, but a completely solvable problem!
How to replace the oil pump yourself on a Lada Vesta family car.
AvtoAzbuka Internet Store, repair costs will be minimal.
Just COMPARE and BE SURE!!!
Review of basic Lada Granta engines
Over the entire production period of the Lada Grant, the car was equipped with gasoline engines of the following modifications:
The engine of each type is a prototype of the earlier 1.5-liter version 2111. Improved designs with the “old” cylinder diameter of 82 mm by increasing the piston stroke to 75.6 mm turned out to be more powerful and productive.
The design of all types of power units is quite similar. Newer 16-valve modifications of the VAZ 21126 and VAZ 21127 engines provide good power indicators in comparison with the previous installed models. This result was achieved by investing 39% of the piston group.
On a hot engine
As the oil temperature drops, its viscosity rises. This is good for efficient pump operation. To obtain adequate measurement results, it is best to measure pressure on a warm engine. Since the oil heats up much more slowly than the coolant, the engine is allowed to run a little longer after reaching operating temperatures.
In the lubrication system of a working engine with a working pump, the pressure should be in the range of 3.5-4.5 kgf per square centimeter at a crankshaft speed of 5600. If the measurement values differ from the nominal value, then the engine will experience a lack of lubrication in some modes.
Oil pump
On VAZ 2106 cars, a gear pump is installed, on the cover of which there is already an oil receiver and a pressure-reducing valve mechanism. The housing design is a cylinder with gears installed on it. One of them is leading (main), the other moves due to inertial forces and is called driven.
The design of the pump itself is a series connection of a number of units:
- metal case;
- oil receiver (the part through which oil enters the pump);
- two gears (driver and driven);
- pressure reducing valve;
- stuffing box;
- various gaskets.
The design of the oil pump allows it to be considered one of the most reliable and durable mechanisms in a car.
The only function of the oil pump is to supply oil to all engine components. We can say that both the functioning of the motor and its service life depend on the performance of the pump.
Therefore, it is important to monitor what kind of oil is poured into the engine and in what mode the oil pump operates
Principle of operation
On the “six” the oil pump is started using a chain drive. This is a rather complex starting system, and therefore repairing and replacing the pump can cause some difficulties.
The operating principle is based on the following stages of pump startup:
- After turning on the ignition, the first gear of the pump starts.
- From its rotation, the second (driven) gear begins to rotate.
- As the gear blades rotate, they begin to draw oil through the pressure reducing valve into the pump housing.
- By inertia, the oil leaves the pump and enters the engine through the lines under the required pressure.
One gear pushes the other, due to which oil circulation begins through the lubrication system.
Thus, oil circulation is carried out through two rotating gears
In this case, it is very important that the entire pump device is completely sealed, since the slightest oil leak can significantly reduce the operating pressure in the system and deteriorate the quality of engine lubrication
Bypass (reducing) valve
The drive and driven gears rarely break because they have a simple design. In addition to oil seals and gaskets, there is another component in the pump design that can fail, which will have disastrous consequences for the engine.
The pressure reduction (bypass) valve on the VAZ 2106 is responsible for controlling the oil pressure in the system. If necessary, it is this valve that can reduce or increase the pressure so that it corresponds to the norm.
Increasing or reducing the existing pressure is carried out by simple actions: either the valve closes or opens. Closing or opening of the valve is possible due to the bolt, which presses on the spring, which, in turn, closes the valve or opens it (if there is no pressure from the bolt).
The bypass valve mechanism consists of four parts:
- small body;
- a valve in the form of a ball (this ball closes the passage for oil supply, if necessary);
- spring;
- stop bolt.
On the VAZ 2106, the bypass valve is mounted directly on the oil pump housing.
The pressure reducing valve mechanism controls the required level of pressure in the system
Functions, structure and location of the VAZ 2110–12 oil pump
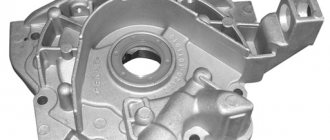
The engine lubrication system is designed to timely supply engine oil to the moving and hottest elements of the power unit. Oil is supplied from the sump and circulates through special channels inside the block and cylinder head. The oil pump ensures forced circulation of the lubricant.
On the VAZ 2110–12, the oil pump is located in the lower right corner of the cylinder block under the crankshaft gear, which drives the gas distribution mechanism.
The oil pump is located in the lower right corner of the engine under the crankshaft gear
This applies to both eight and sixteen valve engines. The pump housing is also the side cover of the power unit.
The design of the oil pump is very simple and includes the following elements:
- housing with lid;
- driving and driven gears;
- pressure reducing valve with spring;
- oil receiver
The oil pump has a simple design based on two gears
The pump is driven by the crankshaft through the drive gear. The latter rotates the driven gear, creating a reduced pressure at the input of the device and increased pressure at the output. Thus, oil from the crankcase flows through the oil receiver tube into the pump, and from it into the engine oil line. When the pressure inside the pump begins to exceed the permissible value, a spring-loaded pressure relief valve drains excess oil back into the sump.
Direct connection of the pump to the crankshaft avoids damage associated with its drive. This, however, does not exclude the possibility of other malfunctions.
Common faults
So:
- Most often, the pump of the VAZ 2112 and other VAZ models with front-wheel drive leaks through the seal, which has to be changed.
- The oil receiver also often fails, especially if you use low-quality oil, or missed replacing it in a timely manner, or the oil does not meet specifications (too thick).
- Too liquid simply will not be pumped and the pressure sensor will immediately light up.
- In this case, the oil receiver mesh becomes clogged, the circulation of oil through the engine becomes difficult, causes oil starvation, and as a result, the service life of the engine is significantly reduced.
- This includes a malfunction of the pressure reducing (bypass) valve: either it is stuck in the open position, and then the oil pressure drops. Either it does not bypass, and then the oil will squeeze out through the oil seal
DIY oil pump repair
The oil pump is considered a mechanism that can be repaired even by an inexperienced driver. It's all about the simplicity of the design and the minimum number of components. To repair the pump you will need:
- open-end wrenches "10" - 2 pcs.;
- ruler - 1 pc.;
- probes - set;
- vice.
To repair the oil pump, you need to remove it from the car and disassemble it. It is best to disassemble the part in order:
- Disconnect the oil supply pipe from the pump housing.
- Remove the three mounting bolts.
- Disconnect the pressure reducing valve.
- Remove the spring from the valve.
- Remove the cover from the pump.
- Remove the main gear and shaft from the housing.
- Next, remove the second gear.
Photo: main stages of repair work
At this point, disassembling the oil pump is considered complete. All seized parts must be washed in gasoline (kerosene or ordinary solvent), dried and inspected. If a part has a crack or signs of wear, it must be replaced.
The next stage of repair work is to adjust the gaps:
- between the axle and the second gear the gap should be no more than 0.1 mm (measure with a ruler), if the gap is larger, then the second gear must be replaced;
- between the teeth of two gears there should be no more than 0.25 mm;
- the gap between the top of the gears and the cover is no more than 0.2 mm;
- the gap between the pump casing and the outer part of any gear is no more than 0.25 mm.
After checking the parameters, you can proceed to the final stage of repair - checking the spring on the valve. You need to measure the length of the spring in the free position - it should be no more than 3.8 cm in length. If the spring is very worn, it is recommended to replace it.
Removal from engine for disassembly
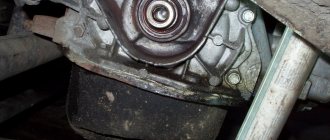
For a preliminary check, remove the distributor and remove the oil pump drive gear. If you find deep scuffs on the axle, you will most likely encounter knocked-down splines. Wedging of the drive gear is extremely dangerous, as the splines can be licked off. The consequence of a breakdown will be oil starvation, which for the engine ends at least with the crankshaft liners turned. You can also visually assess the play of the oil pump rod. On a working pump, the gap between the rod and housing pair should not exceed 0.1 mm.
The oil pump on classic VAZ cars is unscrewed from the crankcase. Therefore, to check, you will have to drain the oil and remove the pan, having first loosened the engine mounts (the engine needs to be raised a little).
To fully check the oil pump, arm yourself with a set of dipsticks. Don’t just try to judge by eye the production of parts with pretentious fitting requirements.
Troubleshooting
Clearance tolerances
- The gap between the housing plane and the gears. To measure, apply a caliper and insert a suitable feeler gauge into the gap formed. The norm is 0.066-0.161 mm. A gap of 0.2 mm is considered critical.
- Gap between gear teeth. At extreme wear, the gap is 0.25 mm. If you get values of no more than 0.15 mm, the gears are still in good condition.
- The gap between the walls of the working area of the oil pump housing and the gears should not exceed 0.25 mm; A range of 0.11-0.18 mm is considered normal.
- The optimal gap between the hole in the housing and the gear shaft is 0.016-0.055 mm. When checking the VAZ oil pump without removing it from the engine, we said that the play should not be more than 0.1 mm. As for the gap between the axle and the driven gear, it should be in the range of 0.017-0.057 mm; critical limit – 0.1 mm.
The entire troubleshooting process is clearly shown in the video.
A mandatory attribute of the lubrication system of any internal combustion engine is the oil pump pressure reducing valve (OPRN). Many car enthusiasts have no idea about such a part, although its role in ensuring the performance of the engine is very great. It is also worth understanding the structure, operation and malfunctions of this unit because its analogues are present in any systems where compressed liquids or gases are used as a working medium.
Purpose of the oil pump pressure reducing valve
As is known, lubrication of the rubbing surfaces of engine sliding bearings (main, connecting rod, piston pins, bearings, etc.) occurs with a constant supply of engine oil under pressure.
If the pressure is not enough, then wear, overheating and failure of the working parts occur, and if the pressure exceeds the norm, then the motor can suffer serious damage. To avoid this, a pressure reducing valve comes into play.
One interpretation of the term “reduction” is the reduction or weakening of something. In mechanical engineering, a valve is called a pressure-reducing valve when, at a certain peak moment (increasing to the maximum pressure, oil, water, air, gas, etc.) it opens the passage and helps normalize the pressure of the working medium. Thus, the valve mechanism is designed to protect against damage due to excessive increase oil pressure.
Valve device
The oil pump pressure reducing valve has a very simple design.
The main parts are:
- housing with a channel system;
- a valve (ball or small piston) that closes the bypass channel;
- spring;
- stop screw or bolt.
It is easy to understand the principle of operation of the design. The thrust screw creates pressure on one end of the spring, which, by the compression force of the spiral, presses the valve to the socket, which has a through hole in the channel. As soon as the pressure in the channel increases enough to overcome the resistance of the spring, the valve lowers and the oil flows. When the pressure normalizes, the spring returns the valve to its original position, closing the gap.
There are two types of RKMN according to the housing design:
- the entire valve mechanism is completely removed from the oil pump;
- the valve is built into the oil pump housing.
Valve malfunctions and solutions
There are two types of malfunctions in the operation of the oil pump pressure reducing valve:
- the valve does not maintain pressure at the required level;
- the valve does not open when the maximum value is reached.
In the first case, we can only talk about the fact that the spring creates weak pressure. This phenomenon is extremely rare, but if the engine fails to maintain oil pressure, do not forget about the valve. The spring may not cope with the work for various reasons: wear, incorrect selection, installation of a spring that is too soft or defective.
More often, clogging of the lumen or jamming of the valve occurs. This happens when the oil has not been changed for too long, and dirt particles gradually coke on the surfaces. If the engine oil channels are poorly flushed after a major overhaul, chips and debris may collect in them, which can also jam the valve.
“Treatment” of any valve breakdowns consists of disassembling, diagnosing, cleaning the channels and replacing failed elements. Experts strongly recommend replacing the oil pump and the safety valve along with it after each engine overhaul.
The oil pump plays a vital role in the engine lubrication system of any car. Even short-term operation of a car with a faulty pump will lead to failure of the power unit. Therefore, any car owner should know the main signs of oil pump failure and take appropriate measures in a timely manner.
VAZ 2106 engine lubrication system
The lubrication system of any engine is a complex of various elements and parts that allow high-quality maintenance of the power unit. As you know, the key to successful engine operation is proper lubrication so that the moving parts do not wear out for as long as possible.
On VAZ 2106 cars, the lubrication system is considered combined, since the rubbing parts of the engine are lubricated in two ways:
- through splashing;
- under pressure.
The total capacity of the entire system is 3.75 liters. The lubrication system on the “six” consists of the following components, each of which consumes or conducts its own part of the oil:
- fluid sump;
- level indicator;
- pumping unit;
- engine oil supply pipe;
- oil filter element;
- valve;
- oil pressure sensors;
- highways.
The oil pump plays a vital role in the operation of the entire lubrication system. This device is designed to ensure continuous circulation of oil throughout all components of the system.
Purpose of the oil pressure sensor
The oil pressure sensor serves to provide emergency notification to the driver. He monitors the lubricant level in the power unit.
Engine operation requires oil supply to some components under pressure. DDM has a membrane in its design. It deforms depending on pressure. When it drops below the permissible level, the contacts in the sensor close and the warning light turns on. Moreover, if the indicator lights up when starting the engine, then this is completely normal.
Checking pressure with a pressure gauge
Screwing in a mechanical pressure gauge instead of the oil pressure sensor is the only reliable way to check the oil pump without removing it from the engine. You can buy a ready-made kit for measuring pressure in the oil system or assemble the device yourself. For this you will need:
- liquid mechanical pressure gauge. The device can be easily found in almost every auto parts store for domestic equipment and tractors. Any industrial pressure gauge with an adequate measuring scale will also work;
- an adapter that will be screwed in instead of the standard oil pressure sensor. The mating part must have a fitting for a hose or a thread with a landing cone for screwing in a flexible tube. Any turner can turn such an adapter. You will need to measure the diameter of the mounting hole, the thread pitch and make a sketch of the adapter. An alternative option is to bring a standard oil pressure sensor to a turner so that he can make an adapter in its likeness. Some drivers, in order to check the oil pump, drill out the insides of the old oil pressure sensor and use improvised means to make an adapter from it. It is much easier in this regard for owners of VAZ cars, for which ready-made tees are available for sale. You can simultaneously screw in both a standard pressure sensor and a mechanical pressure gauge;
- a piece of hose that will connect the pressure gauge and adapter.
The diameter of the hose and the type of connection of the flexible tube should be selected taking into account the type of outlet fitting on the pressure gauge
It is important that during the measurement process there are no oil leaks at the joints
Measuring technique
The method for checking oil pressure will be identical for all cars. The only difference is the threshold minimum value, upon reaching which the low oil pressure warning lamp lights up on the dashboard. Information about the response threshold of the pressure relief valve and the minimum operating pressure in the engine lubrication system can be found in the repair and maintenance manual for your vehicle. The data below is relevant for VAZ classic models (2101, 2102, 2103, 2104, 2105, 2106, 2107).
- Cold pressure. Before starting, the engine and oil in the sump must cool to ambient temperature. The response threshold of the emergency oil pressure sensor is 0.33 kgf/cm2. With this value, the engine must be turned off and disassembled to troubleshoot the oil pump. When the speed increases, the pressure gauge needle should rise to 4.5 kgf/cm2. At this pressure, a serviceable pressure relief valve is activated, so no further increase should occur.
- Measurements on a warm engine. As the oil temperature decreases, its viscosity increases, which has a positive effect on the performance of the oil pump. Therefore, it is best to check the oil pump when it is hot. Since the oil warms up more slowly than antifreeze, let the engine run for another 5 minutes after the coolant temperature gauge shows 90°C.
In the lubrication system of a serviceable VAZ 2101-07 engine at 5600 rpm there should be a pressure of 3.5-4.5 kgf/cm2. If the obtained values differ significantly from the nominal values, the engine will experience oil starvation in certain modes. The low oil pressure light on the instrument panel will come on. In this case, we recommend disassembling and checking the oil pump.