What is a door switch? - This is a device that is a regular switch. As a rule, it is located at the point of contact between the car door and the body. The main part (button) is on the body, the counter part is on the door. Its main task is to inform various vehicle systems about the closing or opening of a door. Light in the cabin, alarm system, “open doors” lamp on the dashboard - all these components use limit switches in their work.
In this article we will talk about such elements as Lada Vesta door limit switches. There are 6 limit switches installed on Vesta - 4 on the doors, 1 on the hood and 1 on the trunk. The door limit switch on a VAZ is not fundamentally different from the limit switches of other cars, so the diagnostic and replacement principles described in the article can also be applied to any other cars. Any diagnostic and replacement work can be done independently, without contacting a service station.
What is a limit switch and why is it needed in a car?
The term limit switch is nothing more than a common abbreviation for “limit switch”. In it, the contacts are closed without fixation by a movable rod - this is convenient for monitoring the position of moving elements. Limit switches of various types are installed in cars on the doors or in the trunk; they control the position of the brake pedal and handbrake lever.
However, reality diverges from the factory’s conclusions, which forces car owners to independently resolve the issue with Lada Vesta door limit switches. And then they found several ways out of the situation:
- Replacing anthers;
- Dismantling;
- Spring installation;
- Sawing.
Each of these methods has the right to life, as it allows you to normalize the operation of the system.
Replacing anthers
Some go to replace the boot with some kind of analogue. One of the most popular is a product from the Toprun brand, which can be found under article number 104035756. The price of such a limit switch varies from 50 to 100 rubles. We remind you that the original boot is sold under article number 11190-3710206-00.
Analogous to the standard limit switch.
The end cap itself is the same as the standard one, but the boot is made of much more elastic rubber, which guarantees its flexibility in severe frost. Moreover, it is not worth replacing the limit switches directly, if the standard ones are working properly, of course. It is enough just to install other anthers.
The boot is installed instead of the factory one. It is not necessary to change the limit switch itself.
Dismantling
This option captivates many precisely because of its simplicity. It would seem that you just need to remove the factory cuffs and be done with it. But the problem is that this element protects the limit switches themselves from contamination, so you will have to constantly monitor their cleanliness. A compromise option is to dismantle it only during frosty periods.
You can simply remove the boot from the end switch.
Spring installation
This method of solving the problem is tempting because there is no need to waste time searching for an analogue. If you have small springs that are about 12mm in diameter and about 18mm in length, you can use them. To do this you need to place a spring under the boot.
It will prevent the cuff from remaining compressed in the cold.
Spring under the limit switch cuff.
Sawing
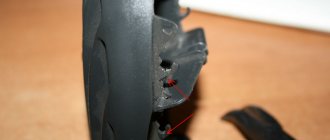
Another option for independently modifying the limit switches of the Lada Vesta. If you remove the boot and turn it inside out, you will see a small spike in the center, a couple of millimeters long. It needs to be carefully cut off, then use a file to slightly grind off the boot from the inside - this will make the edge of the cuff thinner. Afterwards, all that remains is to lubricate the treated surface with anti-silicone and put it back.
As you can see, there are enough options, so every car owner will be able to modify the limit switches of his Lada Vesta in the way that he considers optimal.
Tips from the professionals
- When installing the system on the Lada Vesta, fastening the wires together at any connection points, you should use exclusively terminals specially designed for this purpose. Conventional windings will not allow you to achieve reliable and safe contact. Remember that safety comes first.
- Do not experiment or change the design and circuit of your alarm. First of all, this will entail the immediate removal of your device from the warranty, and also - this may cause breakdowns and malfunctions in the future.
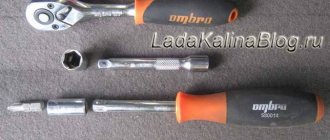
- Before working on the main attachment points, make sure you have all the necessary tools to complete the job.
Using these basic rules, you can install any simple protection system on your Lada. If you understand absolutely nothing about electrics, then it is better to contact a car service center, where specially trained people will do everything for you, it will be much safer and more efficient.
vote
Article rating
Connection rules
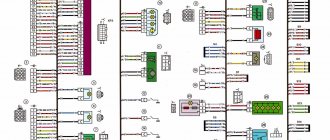
Despite the fairly simple design of limit switches, they are used in electrical equipment where there are complex electrical circuits. As a result, they must be connected by specialists who know how to work with circuit diagrams for connecting limit switches. The sensor is connected with two wires, red and black. The first is under voltage, the second is without it. They are installed in the circuit as indicated in the diagram.
When the device is triggered, a click is created. The indicator type of switch is connected in the same way as a regular mechanical one. There is also a third green wire. The LED will indicate that the switch has tripped with a click.
You might be interested in what a capacitor looks like in the diagram
Note! Operation failure may occur due to dust and sunlight. If the optical pair works, the light-emitting diode turns on.
Equipment connection specifics
AvtoVAZ's response
Despite the fact that complaints about the operation of the limit switches are far from isolated, the Russian automaker is in no hurry to admit the design defect. According to the official response to such a request, AvtoVAZ representatives indicated that at a temperature of -30 °C, the plant engineers did not observe any interruptions, and only at -40 °C was there a slight delay before turning on the lights in the cabin.
AvtoVAZ employees do not admit there is a problem.
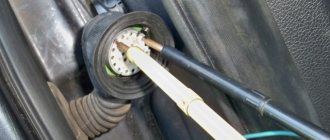
Wiring check
Instructions for cars of the B0 assembly line (XRAY, Largus, Nissan Almera, Renault Duster, Sandero). Remove the limit switch and set the multimeter to voltmeter mode. We measure the voltage at the contacts of the block with the wires:
- If there is no voltage, the circuit of the interior lamp lamp or the lamp itself is faulty.
- if the voltage is significantly less than 12 V, the wire connecting the sensor to ground is probably damaged.
We set the multimeter to ohmmeter mode, connect one probe to ground (body), and the other to the terminal of the block with the black wire. The resistance should be close to zero. If the resistance is high and tends to infinity, the connection between the wire and the body is probably damaged by corrosion or the wire is damaged (treat the connection with a product to protect electrical contacts). If the fault cannot be resolved in this way, it is necessary to remove the interior trim from the pillar, find and fix the fault.
Replacement
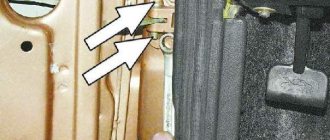
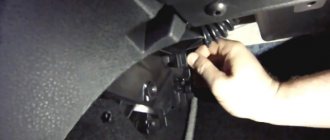
To remove the limit switches, open the doors, then:
- remove the protective cover from the sensor by simply pulling it towards you.
- pry off the limit switch with a screwdriver
- remove the limit switches by snapping off the three latches
- disconnect the block with wires.
On some Lada models (for example, Lada Priora or Niva 4x4), the limit switches are attached to the body with a screw.
On the Lada XRAY the limit switch is located in the door lock and changes along with the lock.
Installation is carried out in reverse order.
Algorithm of actions
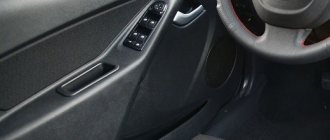
The passenger card panel is covered with material. Usually it is removed only if you want to refresh the interior trim, but the panel itself is dismantled when replacing pistons or clips, repairing electrical wiring, changing a lock or handle. Instructions for disassembling the right or left door:
- Remove the plugs by lifting them with a wrench or a screwdriver.
- Unscrew the screws, remove the cover and handle.
- Unscrew the fasteners and unclip the clips.
- Pull the structure out of the internal niche.
- Disconnect the wires and remove the speakers.
- Remove the panel to which the trim is attached.
Now you have access to the door niche. You can carry out any repair work, including removing the facing material and installing a new one.
Design solution to the problem
When replacing or connecting, you only need to restore the originally designed circuit. If no modifications are carried out, then the need to disassemble the locking mechanism and use insulating materials is immediately eliminated. Step-by-step instruction:
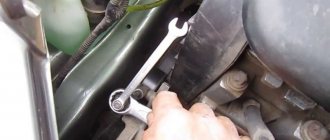
- Open the hood.
- Loosen the bolt connections and disassemble the device.
- Unscrew the terminals.
- Connect the wires from the battery.
- Pull the limit switch out of the hole.
- Pull out the switch.
- Stretch the wires and connect them.
- Bring the ends out through the hole.
It is important that the wires are no shorter than ten centimeters.
After this, you should check the functionality of the device, and then carry out final assembly.
Checking the door switch
When the rod is recessed, the contacts are open. First of all, we check the serviceability of the sensors by opening all the car doors one by one.
Check with a multimeter. We connect a multimeter to the limit switch terminals in ohmmeter mode and check the closure of the sensor contacts (the contacts must be closed, the resistance is close to zero). We press the sensor rod and check the measurements (the contacts must be open - the resistance tends to infinity).
Let us remind you that in some cases (for example, in the cold season) limit switches may work intermittently. For Lada Vesta, Grant and Kalina 2 you can use this solution, and for Priora this.
Keywords: lada xray doors | Lada Vesta doors | Lada Largus doors | Lada Granta doors | Lada Kalina doors | Lada Priora doors | doors 4x4 | interior lighting lada xray | interior lighting for Lada Vesta | interior lighting for Lada Largus | interior lighting for Lada Granta | interior lighting for Lada Kalina | interior lighting for Lada Priora | 4x4 interior lighting | universal article
Found an error? Select it and press Ctrl+Enter..
- Lada Granta Cross sedan, what it could be
- Reviews of air conditioning and climate control Lada Vesta and XRAY
- Why does Lada Vesta CNG stall while driving?
- We expand the functionality of the standard Lada Vesta MMS using software
How to close the doors without an alarm - the battery is dead
There are situations when you cannot lock the car using the key fob. Often, this happens when the battery in it is low or the battery of the car itself is low. Naturally, in this case, the central locking will not work. Therefore, you will have to close the doors using the ignition key. For this purpose, the manufacturer provides some design features in their locks.
All doors, except the driver's door, have a groove with a lock button in the locks. The ignition key must be inserted into this groove and pressed down. The button should go down. Then the door is slammed, and it should already remain closed. Such actions will have to be repeated with each door except the driver's, which is closed last simply with a key. The lock on it is located to the right of the handle and is covered with a cap, which must be pryed off and removed.
Help: The same caps are also on the handles of other doors. But they cannot serve to close them. They are used when you need to open the car from the outside using just a key, without a key fob.
You can use the lock button. To do this, press it for a few seconds with the driver's door open. After clicking, the three doors will close back and forth. The lock indicator should be on. Then the driver's door is locked with the key.
Types of limit switches
All limit switches can be divided into three main groups:
- Mechanical. They are triggered by mechanical action on a lever or wheel, and the switch contacts open or close, giving either a warning signal or a control signal.
- Contactless. This is a non-contact type of limit switch that is triggered when any metal object or other object to which its switching is configured approaches.
- Magnetic. As can be seen from the name, this device is activated if a magnet is brought close to it at a certain distance. They are also called reed switches.
What else can be improved when disassembling cards?
Most often, this process is performed to repair electrical wiring, and not to improve the car. But gradually various recommendations appear on how to improve the car and make it more enjoyable to drive. And this is worth using, because otherwise you will face troubles with a gradual deterioration in comfort. Experience in operating a car is gradually accumulating, and you can already find many interesting recommendations.
Some tips for disassembling the card include the following:
- improving the acoustics of the car to get better sounding music - it is under the maps that the main speakers of the car are located, which are not the best from the factory;
- lubricating or modifying the window lift system in the rear, if you have mechanical means installed, this is a rather important point for lovers of the general comfort of car operation;
- improving sound insulation is the most necessary and useful advice, but to complete this task you need to buy high-quality and proven materials, so it’s worth reading reviews;
- tinting - it is much easier to perform high-quality pasting of the film by dismantling the card, this will allow you to gain access to the entire glass in order to evenly stick the lower part;
- sizing with anti-creaking and vibration-proof materials - this will significantly increase comfort in the car; various unpleasant sounds will no longer be heard from the doors.
As you can see, there are quite a few options for improving the car, and each of them deserves attention. But it is worth paying close attention to the question of the appropriateness of using funds. Since you can spend several thousand rubles on one door just to replace the speakers. So the investment in upgrading your car can be quite large. It is worth immediately considering how much such changes are worth the investment.
We invite you to watch a video with the process of dismantling the door card on Vesta: