Today there are quite a few ways to clean a radiator from contaminants. There are serious doubts about the feasibility of some of them: the ingredients are difficult to obtain, and the cleaning process itself is quite labor-intensive. Therefore, it is better to choose those methods where the risk of damaging the car is minimal and there is no threat to your own health. And remember, you do all work at your own peril and risk. If you want to get the perfect result, get a guarantee for the services provided and be sure that everything is done correctly, use the services of our car service.
Make an appointment by phone +7-383-310-39-17 or follow the link:: Flushing the stove without removing
Methods for flushing the stove radiator without removal and with removal: choosing the most effective
The warmth in the car interior is not a whim at all, but a guarantee of pleasant and safe driving. Frost that forms on the glass in cold weather interferes with full visibility on the road and increases the risk of an accident. After all, with the arrival of autumn, sharp temperature changes begin between daytime and nighttime. And if the stove blows cold air or doesn’t work at all, then it’s time to clean the radiator. It is important not to delay until the last minute, but to check the operation of the stove in advance and, if necessary, eliminate all malfunctions. The heating principle is the same for all cars. Antifreeze circulates through the system, gradually heating up to a high temperature. Hot air enters the cabin using an electric motor, which is located next to the heater radiator. Gradually, plaque accumulates inside the radiator tubes. This is reminiscent of the scale that forms in teapots. The heat transfer of the stove decreases and the quality of heating inside the machine naturally deteriorates. If the thermostat and heater fan are working properly, the air ducts are not clogged with dirt, the antifreeze content is within normal limits and the system is not air-filled, then the cause of the cold inside the car is a dirty heater radiator.
Contaminants “wander” through the cooling system, slowly settling in the radiator cells. In the absence of systematic car care, car parts are subject to corrosion. Scale deposits, particles from antifreeze evaporation accumulate on the metal, and greasy oil stains appear. We are, of course, talking about cars that have been in use for at least 2 years. It is recommended to flush the cooling system once every two to three years, depending on the conditions of use of the car. For example, cars that drive on rural roads or heavily dusty areas require more maintenance. In addition, washing with caustic compounds must be carried out with gloves to avoid thermal or chemical burns. The concentration of ingredients selected “by eye” leads to excessive consumption of cleaning products, and sometimes to damage to parts. Under no circumstances should you “forget” the radiator in the solution for an indefinite period. Also, do not neglect flushing the cooling system with distilled water. And use only high-quality antifreeze. In cold weather, experts do not recommend cleaning the radiator at home. There may be frost at night, and there may be some liquid left in your car. It is better to carry out all work in special boxes or insulated rooms. The ideal option is a car service, where qualified specialists will independently carry out the necessary operations.
Risks to the engine due to improper cleaning
Where it's thin, that's where it breaks. A simple everyday law works in our case too. Let's assume that the flushing was successful and we removed all the grease and scale from the system. Naturally, with a well-maintained engine, and especially with low mileage, nothing bad will happen.
If the engine has not digested the highest quality oil and antifreeze, it is likely that something will go wrong:
- The pump is leaking. If this happens during or after flushing, it is worth remembering when the pump was last replaced. Most likely, its resource has already been exhausted. The only thing that saved the pump from leaking was the presence of dirt and scale on the bushing or oil seal.
- After cleaning, the stove started leaking. The situation is approximately the same. The scale on the honeycomb prevented the antifreeze from penetrating outside. This can also happen due to the use of suspicious cooling system sealants. We talked about the pros and cons of their use here.
- Leaks in pipes and hoses begin for the same reasons. The composition of the flushing fluid and the technology that we offer can in no way affect the integrity of the hoses and the tightness of their connection to the thermostat housing, cylinder head or radiator.
- The head gasket was blown. The most unpleasant story, but the root of the evil is also in the neglect of the system. Most likely, the gasket had already burned through, but washing removed soot and deposits, which stopped the gasket breakdown.
In general, if the engine was in good condition before flushing and good antifreeze was used that complies with the manufacturer's tolerances, there should be no side effects from such a flush.
The best option for washing and replacing antifreeze is a stand for vacuum fluid replacement.
Cleaning the stove radiator without removing it
There are several methods for flushing the heater radiator that do not involve dismantling. In this case, cleaning the car’s cooling system is not the most difficult process, but its timely implementation will help eliminate unnecessary problems and discomfort when driving in the cool season. It is worth choosing a suitable cleaning method based on the material from which the heat exchanger is constructed. For example, you cannot wash a radiator made of aluminum with alkaline solutions. Conversely, solutions containing acid should not be used when working with copper and brass parts. To clean the radiator, you can use both improvised and professional means. Also, you should absolutely not carry out the procedure for cleaning the heater radiator when it is cold outside.
FAQ
What is the best way to clean a copper stove radiator?
The simplest method for flushing a copper car heater radiator is to use a 10 percent caustic soda solution (caustic soda, mole for flushing plumbing pipes). The hot solution is poured inside for 30 minutes, then drained. If necessary, repeat the procedure two or three times.
Washing with a mixture of citric acid and vinegar also shows good results. However, for an old copper radiator, it would be best to remove, unsolder it and mechanically clean it by hand.
What is the best way to clean an aluminum stove radiator?
To wash aluminum stove radiators, it is recommended to use acid-based products. The best options are whey, citric acid (such mixtures should only be very hot - 90°C) or phosphoric acid solution (heat to 40-50 degrees). And for a copper-brass heat exchanger, only professional products designed for flushing a car’s cooling system will be safe.
How to wash and what proportions for flushing the stove radiator with citric acid?
The proportion for flushing the radiator of a car heater with citric acid is 50 grams of acid per five liters of water. If the radiator is heavily clogged, the amount of acid can be increased to 80 grams. The acid is poured into 0.5 liters of boiled water, stirred until dissolved and then the bulk of distilled water is added.
The liquid is poured into the cooling system instead of antifreeze, the engine is warmed up to operating temperature, and then left to idle for another 15 minutes. Then drain and wash the system 3-4 times with distilled water.
How can I clean the heater radiator without removing it?
Alkaline, acidic or special cleaners are used to flush car interior heater radiators. Alkaline compounds remove scale (lime), and acidic compounds remove rust.
How much does it cost to flush a stove radiator at a service center?
It is necessary to understand that different services, including in different cities, may charge different prices for the service of cleaning the stove radiator without dismantling it. However, as of the summer of 2022, on average, the price of this procedure starts from 1,500 Russian rubles. As for the procedure time, it is about two hours. If the radiator is severely clogged, it may take more time, and the payment will increase, since more cleaning products and worker time will be spent.
Cleaning with citric acid.
One of the cheapest and most accessible methods of descaling. The rinsing solution is easy to make yourself. It is necessary to dissolve 200 g of acid in warm distilled water. Sometimes it is recommended to add a little vinegar. The resulting liquid must be heated. After this, you will need to drain the old antifreeze and add flushing fluid. Next, we take a break and use the car as usual. After 3-4 days, drain the liquid, which should remove all dirt and scale particles. After that, fill in the antifreeze and the work is finished.
Simplicity: 5
Cost: 5 Time spent: 3 Quality: 5 Summary: recommended for moderate contamination.
Rinsing with Fanta, Schweppes or Sprite.
This method is also recommended by experienced car owners.
It is important not to confuse sodas, since Fanta, Schweppes and Sprite contain citric acid, and, for example, Coca-Cola contains orthophosphoric acid, which can damage the metal surface. You need to purchase 6-8 liters of soda, ideally without bright colors, and then flush the cooling system. After completing the procedure, make sure that as much liquid as possible has been drained. Then you need to rinse the parts twice with water and add antifreeze. Simplicity: 3
Cost: 2 Time spent: 5 Quality: 3 Result: recommended for moderate contamination.
Prepare everything you need
Almost everything you need for cleaning can be found in any garage, or purchased in addition at the nearest auto and household store.
- 150–200 g citric acid;
- bucket for 8–10 l;
- container for draining antifreeze;
- hose about 3 m long;
- clamps;
- wires;
- mesh, gauze or nylon;
- water;
- antifreeze for topping up;
- transfer pump;
- boiler or stove;
- spanners;
- screwdrivers.
Cleaning with lactic acid.
This method can give good results, but you won't find lactic acid in the supermarket.
Offers for sale are sometimes found on auto forums. Usually 36% acid is sold, but for cleaning you need 6%. Therefore, dilute the acid in a ratio of 1:5 in distilled water. Fill and wait until the formation of carbon dioxide stops. Then you need to drain the dirty liquid.
There are car enthusiasts who prefer to drive their car for several kilometers and only then drain the flushing fluid. However, be careful - despite the fact that this solution is not so aggressive on aluminum parts, the engine can become very hot. And, most importantly, do not forget to neutralize the acid by rinsing the parts with distilled water. The engine should run for about 15 minutes. Only after this can you add antifreeze.
Simplicity: 5
Cost: 4 Time spent: 5 Quality: 4 Result: recommended for moderate to high levels of contamination.
Washing with whey.
An old folk remedy that was used back in Soviet times.
The serum helps dissolve scale and rust. However, if the stains are too old, the serum will soften them, but will not completely eliminate them. You need to drain the coolant, then pour in two or three liters of whey, strained through cheesecloth. You need to use the machine for a couple of days. After this, it is necessary to drain the serum and rinse the system with water. Some car enthusiasts note that even after thorough flushing, foam forms in the cooling system. Simplicity: 5
Cost: 4 Time spent: 4 Quality: 4 Summary: Recommended for small to medium-sized stains.
Preparation for major flushing
To clean the interior heater radiator directly on the car you will need:
- There are two types of detergent – alkaline and acidic;
- standard set of keys, screwdrivers and pliers, funnel;
- a low-power water pump (a household circulation unit for heating and an electric pump from a Gazelle truck are also suitable);
- two hoses 2 meters long with tightening clamps;
- distilled water in an amount of 3 volumes of the cooling system of your car;
- boiler and bucket;
- old nylon tights or gauze folded in three.
Also prepare a container for draining old antifreeze and the required volume of fresh coolant. Often, car enthusiasts wash the heat exchanger of the stove without completely emptying the pipelines and engine jacket, but then all the debris contained in the old antifreeze will again flow into the clean radiator.
It is more convenient to carry out work in a garage equipped with an inspection ditch. To remove deposits without removing the heater from the car, completely drain the antifreeze from the engine in the following order:
- Allow the engine to cool to room temperature and place a container underneath for antifreeze.
- Unscrew the plug on the cylinder block with a wrench, then open the cap of the expansion tank.
- When all the antifreeze has flowed out, screw the plug back into place. If the main radiator has a second drain, repeat the operation.
- Disconnect the pipe at the highest point of the system - on the throttle valve or carburetor heating unit.
On some cars, emptying is prevented by covers that protect the engine compartment from dust from entering from below. There are 2 options to solve the problem: remove the protection or use a long hose attached to the neck after unscrewing the plug.
Washing with acetic acid
You will need three bottles of food vinegar (70%).
They are sold in almost every supermarket. Also, don't forget to drain the old antifreeze. Remove the pipes leading to the heater radiator. After this, you need to use a compressor to blow out the remaining antifreeze and rinse the radiator with water. After drying, you need to pour vinegar into it and leave for about an hour. Then thoroughly flush the radiator fluid. To understand what the result of the procedure is, it is better to drain the water into a bucket. The older your “iron horse” is, the more obvious the result. The radiator will need to be blown out and dried again. Now you need to attach the pipes back, fill in antifreeze and start the engine. Simplicity: 5
Cost: 5 Time spent: 4 Quality: 5 Summary: recommended for moderate contamination.
Useful tips
After cleaning the heat exchanger, do not be lazy to replace the underwater hoses and install new clamps. After all, it will be very disappointing when, after a few days, the cabin becomes cold again, and the culprit is a small hole in the hose or a loose clamp that leads to air getting into the heater radiator. Periodically clear the air ducts of leaves and dirt that could reduce the heating efficiency. Use high-quality coolant to prevent re-contamination of the heater with impurities found in low-quality antifreeze. Periodically turn on the fan at maximum speed to blow through the outer fins of the radiator.
Flushing the radiator with complete removal
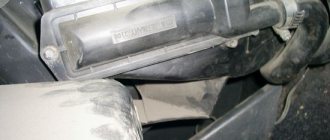
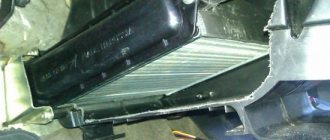
Dismantling a stove radiator is a labor-intensive process that requires good knowledge of the machine's structure. But in some cases this cannot be avoided. Car enthusiasts who do not have experience in successfully removing a radiator are better off seeking professional help. Ideally, it is better to contact a car service.
Flushing with complete removal is indicated in cases where methods of cleaning the radiator without dismantling have shown to be ineffective.
Removing the heater core will allow you to identify several types of faults at once. For example, in this way you can test the operation of the fan and, if necessary, replace its motor.
Also, during dismantling, it will be possible to thoroughly rinse and clean the heater radiator from the outside. In cars without a filter, a lot of debris and dust accumulates in the air intake. Poplar fluff is extremely dangerous, as it bakes and forms a thick crust. The result is a dirty heat exchanger that is poorly ventilated and generates heat.
It is possible to understand the condition of the pipes, assess the degree of contamination of the radiator cells and the tightness of the seal when closing the air duct dampers only by removing the radiator. The drive of the dampers and the voids in the closed position between them and the stove cause air to enter from the outside, allowing the radiator to pass through. This can happen to both budget cars and expensive foreign cars. And in this case, you definitely shouldn’t experiment with disassembling your car.
Dismantling the heater radiator will allow you to objectively assess the quality of the cooling system. If the radiator does not work, cleaning is absolutely pointless - a complete replacement of the cooling system elements is necessary. Contamination of the cooling system does not occur immediately; dirt accumulates gradually. But the moment when the radiator begins to leak and becomes clogged to the point of complete failure is always an unpleasant surprise. If it is made of a copper alloy, then the issue can be solved with small means - remove the radiator and solder it. If the aluminum radiator is faulty, it is easier to replace it. The cost of repair will most likely be equal to the price of the radiator.
To wash with removal, you do not need to use a pump. You need good pressure of hot water in a special bathroom. During dismantling, they use the entire arsenal of both homemade and professional means for flushing the stove radiator. But there are methods that can only be used by removing the radiator. At home, they pose a health hazard and are too labor-intensive.
Reasons for replacing heating radiators in Renault Logan
There may be two reasons why a car owner will have to change the heating radiator:
- The heater radiator is leaking;
- The heater radiator is clogged.
Leaks in heating radiators occur due to mechanical damage or corrosion. Most often, a leak occurs where the heat exchanger tubes are soldered to the radiator tank. But if the radiator is subjected to shock or very strong and prolonged vibration, then cracks can occur anywhere in this device.
Leaks in Renault Logan heating radiators occur from mechanical damage and strong vibration
Clogged radiator channels are the second reason for replacing the radiator. It takes a lot of time for these channels to become clogged with dirt to the point of complete obstruction, and this malfunction can only be identified by elimination. If all components of the heating system are working normally, but the stove still does not heat, then the problem is a clogged radiator, which is time to replace.
Replacing the heater radiator for Renault Logan, Sandero, Largus
Radiator replacement
heater for
Renault Logan
, Sandero, Lada Largus Great knowledge about Renault...
The reason for the poor performance of the stove on Renault Logan, Sandero, Duster, Largus
Why the stove
does not heat well on
Renault
Logan Sandero, Lada Largus, Nissan Almera G15, you can find out from this...
If the Renault Logan radiator is clogged, it is almost impossible to wash it
Washing with sulfuric acid
Dismantling in this case is mandatory to avoid damage to the rubber and plastic parts of the cooling system. In today's conditions, this is a rather exotic method, the feasibility of which is highly doubtful. Before starting the procedure, you must follow all safety regulations. It is imperative to protect your eyes with special glasses and the skin of your hands with rubber gloves. It would be a good idea to throw a special robe over your clothes. In addition, use a household respirator that will protect your respiratory tract from toxic fumes. Also use special tongs or grips to prevent direct contact with the solution. In addition, you will need a hydrometer to measure the concentration of the wash liquid. Please note that rinsing requires a 15% acid solution. Therefore, the hydrometer should show a density of 1.1 grams per 1 cubic centimeter. To obtain the solution you also need distilled water and battery electrolyte. It is important to remember that you should never pour water into acid.
On the contrary, you need to carefully add the acid to the water. Old-style radiators made of copper can be washed in a similar way. Parts made of aluminum and zinc, on the contrary, will become unusable.
Simplicity: 1
Cost: 3 Time spent: 4 Quality: 5 Result: recommended in case of high levels of contamination.
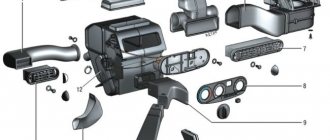
How to remove the heater radiator for Renault Logan
To perform work on removing the heater radiator you will need: a 13mm wrench and a torx t20 wrench.
- Drain the coolant from the cooling system.
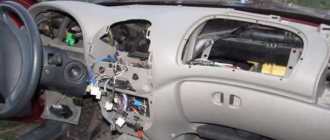
- Remove the instrument panel trim.
Then, under the instrument panel, bend the edge of the floor mat and unscrew the 2 bolts securing the panel cross member amplifier to the base of the body.- We remove the instrument cluster.
- Through the opening, in the place where the instrument cluster was, unscrew the 2 nuts of the upper fastening of the amplifier of the instrument panel cross member.
- We remove the amplifier. For clarity, all work is shown with the instrument panel removed.
- We unscrew the screw securing the pressure plate of the fluid inlet and outlet pipes to the radiator.
- Disconnect all pipes from the heater radiator. At the same time, make sure that any remaining liquid does not leak onto the mat. Damaged or hardened rubber O-rings must be replaced.
- Unscrew the screw securing the radiator to the heater housing. press out the plastic clips.
- We take the radiator out of the case.
- Reinstall the radiator in reverse order.
- Fill the coolant back.
Cleaning with hydrochloric acid solution
Another dangerous method that is not recommended without similar practical experience.
In addition, hydrochloric acid is quite difficult to obtain. Compliance with safety precautions, as in the case of using sulfuric acid, is simply mandatory. When using acid to get rid of heavy contaminants, you need to fill the cooling system with a 2% acid solution. You will need no more than 50 ml per 1 liter of water. After flushing the heating system, you need to carefully rinse it with water several times. Never use this method if the cooling system consists of parts susceptible to corrosion.
Simplicity: 1
Cost: 3 Time spent: 4 Quality: 5 Result: recommended in case of high levels of contamination.
