The bumper is the part that needs replacing most often. The fact is that it is often damaged in an accident, which requires repair and painting work. Naturally, it is not always necessary to contact specialized repair organizations to carry them out, since general skills are quite sufficient to perform such work. That is why every owner of a car of this brand needs to know how to remove the bumper on Kalina.
In addition, replacing the front bumper of a Kalina car may be required in conditions of remoteness from populated areas and, accordingly. In this case, other than replacing the failed unit yourself, there is no way to perform this repair. Also, dismantling the shock absorber may be necessary during tuning.
How to install the rear bumper
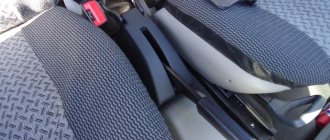
When replacing a part, you need to keep in mind that in the case of a Station Wagon, you first need to unscrew 3 bolts from the lower fastening of the bumper to the car body, and when working with a Lada-Kalina Hatchback, you need to start by removing two bolts and a pair of screws. Further operations are performed in the same way on both models.
Required Tools
To the above set of tools necessary for dismantling the front bumper, add WD40 - a technical aerosol for protecting and lubricating metal surfaces.
Removing a part from a Lada Kalina Station Wagon
A step-by-step algorithm for dismantling the part is given below:
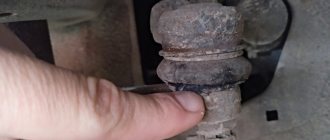
- Three bolts are located at the bottom, under the rear of the bumper. Since they can become acidic, moisten them with WD40. One of the bolts is located next to the exhaust pipe, a couple of others are slightly to the right.
- Unscrew all the bolts securing the sides of the bumper to the car body. Several bolts on each side are easily accessible from the wheel arches.
- After bending the trunk cover, remove 4 more screws.
- Now unscrew the previously wetted bolts under the rear of the body.
- Next, remove the bumper from the latches.
To do this, grab the end on the right side of the car and easily pull it towards you. As a result, the bumper should slightly separate from the car. The latch on the left side is also detachable, but since the bumper is not attached to anything else, you need to be ready to catch it if it suddenly starts to fall.
We will not dwell in detail on the removal of amplifiers. Each of them is attached to three bolts, which are clearly visible: one in the center, a pair at the edges. Unscrewing them is quite easy.
Step-by-step removal procedure for a 1st generation car
If you are the owner of a first generation Lada vehicle, to dismantle the Kalina front bumper you will need to perform the following steps:
- lift the hood lid;
- unscrew the three screws that are responsible for fastening the plastic radiator grille;
- remove the radiator mesh;
- unscrew the 2 screws located on the bottom mesh and remove it;
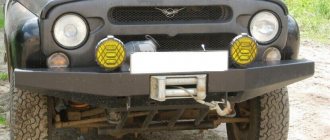
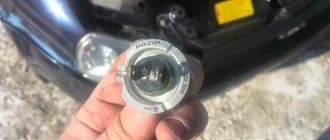
- disconnect the fog lamp connectors;
- behind the grille there are two screws that secure the bumper, unscrew them;
- lift the car on a lift or move to a special viewing hole. In this position, you need to remove 3 central and 2 side screws, as well as 2 screws located in front of the wheel arch;
Placement of lower clamps on viburnum
- with careful movements, pry up and snap off the plastic clips holding the part to the body;
- slowly move the bumper towards you, forward. This way the latches are removed from the grooves on the body. Then you can completely remove the front bumper of the Kalina.
How to remove the front bumper of LADA Kalina
Required tools: Phillips screwdriver and two keys for 10 and 13 mm. In this case, a 13 mm socket wrench is needed.
- Unscrew the three screws securing the upper radiator trim;
- And we remove it by removing the two latches (shown by arrows) of the cladding from engagement with the brackets. Below the car, in the right wheel arch;
- Using a Phillips screwdriver, unscrew the three self-tapping screws securing the fender liner to the front bumper. Similarly, we unscrew the screws on the other side of the car;
- Using a 10mm socket, unscrew the three bolts securing the front bumper to the body.
- Using a Phillips screwdriver, unscrew the two screws securing the grille to the bumper;
- And remove the Kalina grille;
- Using a Phillips screwdriver, unscrew the two self-tapping screws securing the bumper to the bumper beam;
- Use a 10mm wrench to unscrew the two outer bolts, and use a Phillips screwdriver to unscrew the two middle self-tapping screws of the upper bumper mount.
- Applying the necessary force, remove the sidewall flange of the ampere from the body bracket. We perform a similar operation on the other side of the car;
- Remove the front bumper of Kalina;
- Using a 13mm socket, unscrew the four bolts securing the energy-absorbing beam of the front bumper to the body;
- And we remove the beam.
Installation of the Kalina front bumper is carried out in the reverse order, ensuring uniform gaps between the bumper and body parts. After the bumper is secured to the body, we press the sides of the bumper to the body brackets until their flanges are fixed on the body brackets.
Requirements of legislative documents
The design features of fog lights are regulated by several laws. The most important of them are:
- Traffic Laws;
- UNECE Regulations;
- GOST 8769-75.
These documents indicate the following basic requirements regarding the settings of fog lights.
- Optical devices must be installed on the vehicle at a height of more than 250 mm from the road surface.
- The maximum distance from the fog lamp to the external dimensions of the vehicle should not exceed 400 mm.
The following requirements are imposed on the light beam:
- the beam should be directed downwards, and its upper boundary should have a clear outline;
- The horizontal dispersion angle should not exceed 700.
Therefore, the fog lights are adjusted taking into account these parameters that affect driving safety.
The rules also define the mode of use of fog lights. These are conditions of limited (sharp turns, mountain serpentines) and insufficient (fog, snow, rain) visibility.
Bumper protection may affect safety
Previously, we looked at how a strut extension is mounted under the hood of the Kalina-2. The presence of such a part cannot worsen passive safety, which applies not only to LADA cars, but to any car in principle. Can the same be said about a bracket rigidly attached under the bumper? There are no amplifiers from the factory, and the conclusion suggests itself.
There is such a characteristic as “creasability”. It is better to take this into account when choosing alloy wheels, so as not to subsequently encounter the appearance of suspension defects. Something similar can be said about the body: by strengthening one thing, we increase the likelihood of failure of everything else.
The engine compartment of a modern car is crushed during a collision, the engine goes down, and the so-called “safety capsule” remains unharmed. For station wagons and hatchbacks, this capsule is considered to be the passenger compartment. Everything that is in front of the capsule should, as it were, soften the blow. The conclusion is obvious: it is unsafe to install those parts that prevent the bumper, fenders, and front side members from collapsing. The tuning discussed here is performed at your own peril and risk. We are waiting for your comments.
PS You cannot buy part “21900-2803131” from official dealers. You can find it in auto parts stores. The manufacturer is OJSC AvtoVAZ.
Radiator grille "Priora"
Replacing an element such as a grille
The “Priora” radiator often appears in the minds of the LADA car of this model. This car's grille doesn't have the most attractive appearance. To improve the appearance of the car, car owners often resort to tuning. Designers of automobile corporations never cease to amaze us with new forms and models of vehicles. Small details play an important role in the overall appearance. The radiator grille is no exception.
There are always large holes on the bumper. They serve to keep the engine cool and the engine compartment to be freely blown and ventilated. A mesh is placed behind the radiator grille. It is designed to protect the insides of the car from various debris, insects, and small birds that can get under the hood while driving. The mesh performs a protective function. In tandem with the radiator grille, the mesh also plays a decorative role. This is why craftsmen love to experiment with this part of the body and make the car unique.
If you install a new grille on the LADA Priora, you can significantly change its appearance. Before you begin work on improving the design, you need to know how to remove the grille
. Consultation with a specialist will not be superfluous. An experienced master will give advice, make recommendations and share the secrets of performing the work.
Replacing the Priora radiator grille is a simple process that you can do yourself. The process will depend on which grille you plan to replace the old one with. Before starting work, disconnect the wires from the battery and remove the engine splash guard.
There are two ways, with and without removing the bumper. To remove the grille on a Priora, you need to press on the washer that secures the bumper, and then remove the washers that hold the grille directly.
The LADA Priora se radiator grille is attached with nine self-tapping screws, so there is no need to remove the bumper. Just open the hood and pull it out.
How to choose a front bumper for LADA “Kalina”
If you do not take into account tuning parts, there are two types of standard front bumpers for Kalina on sale: painted and unpainted. The first ones must be carefully selected by color so that they do not differ from neighboring body elements. The paintwork changes color slightly as a result of exposure to the sun, so selection by catalog number is not always effective and it is better to choose the appropriate color “on the spot.” Unpainted bumpers are suitable when painting adjacent parts of the car (fenders, hood) is required, for example, after an accident
When purchasing a new bumper, you should pay attention to the following points:
- the paintwork of the part should not have chips or cracks (they especially often appear near the fasteners);
- the plastic of the bumper must be elastic, because excessive rigidity causes cracks even with mild impacts, for example, on snow or sand;
- when purchasing a tuned bumper, you should make sure that it has holes for fog lights;
- There must be stiffening ribs inside the bumper, otherwise it may “lead” and lose its original shape.
What is needed to remove the front bumper of LADA “Kalina”
It is better to carry out work on dismantling the bumper in the inspection hole, because part of the fastenings for this part are located at the bottom of the car. If there is no hole or lift, the job will not be impossible, but you will have to unscrew some nuts by feel or lie on the ground to see the attachment points. It is better to remove and install the bumper with an assistant who can hold one side while you unscrew the fastenings of the other. If you perform the operation yourself, you may not be able to hold the part, which as a result will fall and be damaged. To remove the front bumper of LADA “Kalina” you need:
- crosshead screwdriver;
- socket or socket wrench 10;
- extension;
- wrench (preferably with a ratchet, which will make the work much easier).
Currently, two generations of Kalina have been produced, differing in the way the bumper is mounted. Accordingly, the procedure for removing this part is slightly different.
Features of dismantling
Before moving on to the question of how to remove the front bumper of the Lada Kalina, you need to do some preparatory work. The dismantling procedure is carried out in a viewing hole or using a lift, since many of the fixing elements are located below. If this is not possible, you will need to unscrew the bolts blindly. An alternative is to position yourself on the ground to visualize the fastening points.
We recommend performing the activities with a partner. An assistant will be able to hold one part while you unscrew the fasteners from the Kalina front bumper. Independent actions do not guarantee the quality and safety of the process.
For the procedure you will need:
- Extension.
- Screwdrivers - Phillips head and standard version.
- Special head for 8.
- Key for 10.
- Drive with an additional ratchet.
Today, the manufacturer supplies the market with two modifications of Kalina vehicles. They differ from each other in clamps. Therefore, there are some differences in the order of dismantling the part.
Regardless of the modification features, before removing the front bumper of the Lada Kalina, we recommend disconnecting the battery. This helps prevent short circuits when turning off electronic devices.
Removing the headlight, replacing lamps VAZ (Lada) Kalina 1117 2004 - 2013
Tools:
- Medium Phillips screwdriver
- Small flat screwdriver
- Driver for socket attachment
- 8mm wrench attachment
Parts and consumables:
- Turn signal lamp
- Low beam lamp H7
- Side light bulb W5W
- High beam lamp H1
- Headlight glass
- Rags
- Alcohol
Note:
The operation is shown on the right headlight unit. The work of replacing lamps and removing the left headlight unit is similar. You can replace the lamps without removing the headlight from the car.
1. Disconnect the wire terminal from the negative terminal of the battery.
2. For clarity, the work is shown with the headlight removed. Turn the turn signal socket counterclockwise 45°.
3. Remove the cartridge from the headlight housing.
4. Pressing the lamp, turn it counterclockwise all the way and remove it from the socket. We install the new turn signal lamp in the reverse order.
5. To replace the low beam lamp, pull off the protective rubber cover from the headlight housing. By pulling one of its three petals, we disconnect the wire tips from the lamp terminals.
6. We remove the spring clamp from engagement with the two hooks and move it away from the lamp.
7. Remove the lamp from the headlight housing.
Warning:
High and low beam lamps are halogen. Do not touch their glass bulbs with your fingers, as traces from them will cause the lamp to darken when heated.
You can remove dirt from the flask with a clean rag soaked in alcohol.
8. Install the new low beam lamp (H7) in the reverse order.
9. To replace the side light lamp in the headlight unit, remove another protective rubber cover in the same way as the cover for the low beam lamp and remove the socket with the lamp.
10. Remove the lamp from the socket. Install the new side light bulb (W5W) in the reverse order.
11. To replace the high beam lamp, disconnect the wire block from the lamp.
12. Squeezing the ends of the spring clamp, remove them from engagement with the hooks and remove the clamp from the lamp.
13. Remove the lamp from the headlight housing. Install the new high beam lamp (H1) in the reverse order.
14. To remove the headlight, press the latches. We disconnect the wire blocks from the connector on the headlight housing and the turn signal lamp socket (shown by the arrow).
15. Remove the front bumper. Using a Phillips screwdriver, unscrew the screw for the top fastening of the headlamp, and use a wrench or a 8-mm socket to unscrew three more bolts for fastening the headlamp (shown by arrows) and remove it.
16. On the housing of the right headlight unit there is a marking “RE”; on the body of the left headlight unit there is a marking “LE”.
17. Install the headlight in the reverse order. If you need to replace the headlight glass, use a screwdriver to pry up and remove the six spring brackets that press the lens to the headlight seal.
18. Remove the headlight glass. Remove the glass seal.
19. Install the headlight glass in the reverse order.
The article is missing:
High-quality photos of repairs
Installation of electrical components
More technically complex is the operation of installing and integrating electrical components into standard wiring.
To successfully complete the work, the owner must solve the following tasks:
- Correctly connect the PTF to the fuse block;
- Install a button for activating fog lights in the car interior.
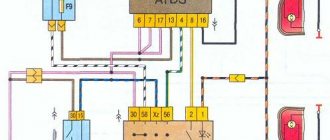
Original wiring diagram for fog lights on Kalina
If you use the wiring and the attached electrical diagram from the PTF kit, the connection will be reduced to:
- Installing a fuse in the block;
- A relay responsible for the operation of the power button is also installed there;
- Connecting the fog lights themselves and the standard electrical wiring into a single electrical network;
- Outputting control of their work to a button.
The photo shows a proprietary set of electronic components that does not require modifications. It is easy to connect to the standard electrical wiring system
Removing the front bumper of the Lada Granta liftback and sedan
How to choose and replace the front bumper on a Lada Granta car
Modern car tuning (external) involves replacing certain factory parts. So, car enthusiasts change the front bumper of the Lada Granta first of all. From a purely external perspective, the factory one looks good, but it lags behind automotive fashion trends. And any accessory does not withstand the asphalt surface for long: flying stones quickly render it unusable.
Selecting a part and the tools required for replacement
Before you buy a bumper for a Lada Granta, you should ask about its dimensions and location of attachment points. Their manufacturers are not very concerned about the problems of car enthusiasts and produce products according to their own patterns for certain brands of the most popular cars.
Alas, the front bumper of the Lada Granta does not fit every car model. Decide in advance on your wishes and go shopping.
They usually buy front bumpers for Lada of two types: “Robot” and STM. There are other models of accessories on sale that are perfect for your car.
However, the popularity of these accessories remains high, regardless of the appearance of certain new products. We will assume that you have made your choice and purchased the accessory you like. We arm ourselves with tools and begin the process of dismantling the old one. You need to have with you:
Removing and replacing parts
The bumper must be removed carefully without sudden movements or jerks.
The front bumper of the Lada Granta needs to be removed by two people. This way you will definitely not tear off the latches and damage the fastening points. This is especially true if you are dismantling the bumper on a Granta liftback (with special treatment of the metal from which the car body is made).
If you decide to remove the front bumper of the Lada Granta without outside help, you need to arrange stops under it at three points (not in one line). After removing part of the fastener, the accessory will lower slightly and the stops will keep it from sagging more and more - this way the latches will not break.
Before removing the front bumper on your car, first remove the license plate. Behind it you will see the heads of two “10” bolts; they must be unscrewed. Now we open the hood: in the upper part there are 6 bolts that secure the front bumper of the Lada to the car body. These bolts also need to be unscrewed.
The following fastening points connect the front bumper of the Lada with the fender liner. Getting to these points is not very convenient, as the wheel gets in the way. We turn the car's steering wheel until maximum ease of access to the bolts is achieved. There are two of them on each side. The bolts need to be unscrewed and lowered below, under the front bumper of the Lada Granta.
There are two more screws and three bolts that hold the part being removed. It is possible that additionally installed crankcase protection will interfere with final removal. It needs to be released (it is not necessary to remove it completely if the protection is not connected to the accessory by single attachment points).
And now the front bumper of the Lada just needs to be pulled on both sides in a horizontal plane in the direction of the intended movement of the car. The latches should come out of the holes without obstruction. If this does not happen, then you forgot about some of the attachment points where the Lada front bumper was fixed. You need to remove all screws and bolts.
The part is removed without jerking or changing the direction of movement.
The front bumper of the Lada Granta has been removed, and you can continue to carry out the planned tuning or repairs.
Optional equipment
Transforming a car is rarely complete without replacing the front bumper
As a rule, tuning the front part of a Lada car is not limited to replacing the described accessory with a more modern and durable option. That’s why car enthusiasts buy a Lada Granta bumper, which at first glance does not at all correspond to this car model. For the new model, you also need to buy the appropriate headlights, foglights, and direction indicators.
It will take longer to remake such a front bumper for a Lada Granta, since not only the mounting points may not fit the car (after all, it’s easy to do them yourself in the right places). Car enthusiasts are still trying to “finish up” even the latest new product that they managed to buy.
Frankly, such zeal and desire of car enthusiasts to remake the Lada externally only evokes a desire to create: the cars turn out to be very beautiful and unusual.
Look at or in the photo how car owners were able to remake their iron horses, and you will see for yourself.
Which ones are better?
Typically, standard optics have halogen elements; replacing them with the same ones, but more powerful, makes no sense. It is better to install LED lamps in fog lights; a good option is to replace the fog lamp with xenon (author of the video - Learning to drive a car. All the secrets for beginners.).
LEDs can be installed in PTF without restrictions, unlike xenon. Replacing a light bulb in a fog lamp does not require special equipment or specific knowledge, so you can replace it yourself. It is better to buy products from trusted brands, since cheap Chinese samples are often of poor quality and quickly fail.
Replacing the front bumper on Kalina
Welcome! The front bumper - it wears out over time (Rots), and is also deformed upon impact, and in general it takes on almost everything that flies from the cars in front, so the bumper is changed often, and if you take into account that The fact is that the bumper is made of plastic, then in severe frosts the plastic hardens and thus, even with a slight impact, it becomes deformed and cracks, but plastic bumpers have a number of advantages over metal bumpers, firstly, they soften the blow, this is especially very useful if you hit a person at low speed (He will practically not feel any pain), and secondly, they have better streamlining and at high speed the car holds the road better than metal bumpers, which is why recently they are rarely used on new cars Metal bumpers are essentially not needed; underneath the plastic there is a metal beam that will also withstand the blow in the event of a severe accident. Note! To replace the bumper, you will need to stock up on: A “10” wrench, as well as a screwdriver and a “13” socket wrench!
Note! To replace the bumper, you will need to stock up on: A “10” wrench, as well as a screwdriver and a “13” socket wrench!
Note! To replace the bumper, you will need to stock up on: A “10” wrench, as well as a screwdriver and a “13” socket wrench!
When do you need to change the front bumper? You replace it at your own discretion, but we will give you some advice on when it is best to replace it, let's start with the fact that recently there have been quite a few people driving without front bumpers, on the road when traveling by train be that as it may, this will greatly affect fuel consumption since the aerodynamics of the car deteriorate significantly, so take this into account, in addition, if the bumper is not badly damaged and you don’t have money for a new one yet, then you can drive like this, it will be ugly, but it doesn’t have any characteristics at all does not affect.
How to replace the front bumper on a VAZ 1117-VAZ 1119?
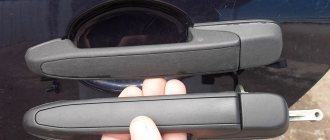
Note! When you go to a car store, think about what else you need to buy for the new bumper, for example, as we have already said, there is a beam under the bumper, it can be different depending on your car (That is, it can be plastic or metal, it will be metal if you have you need a Kalina Sport or a new model Kalina), and also if your bumper is equipped with fog lights but the linings into which they are inserted broke upon impact, then you will need to stock up on new linings (These are the mounts where the fog lights are inserted)!
Removal: 1) To remove the bumper, you must first remove the radiator grille; to do this, use a screwdriver to unscrew the three top screws (see photo 1) and then lift the grille a little and disengage its brackets as shown in photo 2 below.
2) Let's move on, now if you have fender liners installed on your car, then unscrew three screws on both fender liners and exactly in those places where the fender liners are attached to the front bumper of the car (see photo 1), then move to the lower part and there on the sides unscrew the two screws securing the bottom trim (see photo 2) and then remove it from the car bumper (see photo 3), then unscrew two more bottom screws (see photo 4) but this time these screws secure the bumper itself to plastic beam that is located under it.
3) Well, finally, take a socket wrench (They are simply convenient to work with), or if you have socket heads and a wrench, you can use them, so using the wrench, unscrew the three lower bolts as shown in photo 1 and after that the two side upper bolts and unscrew the two side central screws (see photo 2) and then bend the bumper on the sides so that it disengages from the brackets (see photo 3), and accordingly remove the bumper from the car.
Installation: The new bumper is installed in its place in the same way as it was removed, but if you also want to replace the beam or brackets (For example, if these brackets on which the beam is installed are bent, then the bumper will no longer stand straight), then this is done very easy, the beam is secured by four bolts, two of which, by the way, you can already see in photo 1, these bolts secure the beam at the edges and if you unscrew them, you can remove it from the car, and when you remove it, you can also remove the brackets and replace them with new ones, They are also fastened with two bolts. For more details about the brackets, see photos 3 and 4.
Additional video clip: You can see the process of replacing the bumper in more detail and clearly in the video below, but only there the bumper is removed to install fog lights in it, think about it, maybe you decide to install them yourself, you don’t need much there.
Installation of standard fog lights on Kalina 11183
Are additional headlights allowed by law?
Of course they are prohibited. This is not allowed according to several regulatory documents:
- Appendix to the Traffic Rules. Clause 3.1 of the Basic Provisions for the approval of vehicles for operation states that you cannot drive a car if the number of lighting devices does not correspond to the factory design.
Therefore, it is impossible to equip the car with additional headlights.
It does not matter what kind of light bulbs will be installed in them: xenon, halogen or LED. All of them are prohibited
Is it possible to change the design in agreement with the traffic police?
Some modernization of a vehicle can be officially registered with the traffic police by obtaining the appropriate permission. For example, it is allowed to install gas equipment or a tow hitch on a passenger car. Is it also possible to install additional headlights as light sources and obtain permission from the State Traffic Inspectorate? No, this is prohibited.
The question is that this modernization is not allowed, since the Technical Regulations directly prohibit equipping a vehicle with additional light sources. This includes fog lights, as well as high and low beams.
But in the Technical Regulations there is the concept of “optional lighting source”. It must satisfy certain conditions. But no auxiliary headlights for cars are specified in this document.
Additional headlights can only be installed on trucks that belong to category N3 and weigh more than 12 tons. Passenger cars are included in the M and M1 categories.
Therefore, if you decide to register the modernization of your car by installing optional light sources other than standard ones, you will have to go through a lengthy registration procedure. This will include safety tests and additional examinations. You will have to pay a lot of money for them, but as a result you will probably be denied registration.
In this case, we mean standard headlights, which are usually installed on the bumper or in the radiator grill of a car. However, in the Technical Regulations there is another concept - “spotlight”.
Installing a floodlight on the roof
It is permissible to install a spotlight on a vehicle if this device is provided by the vehicle manufacturer. The same requirements are specified for optional lighting sources.
Fog lights
If your stock car was produced without fog lights, but you wanted to install them additionally, then there may be 2 options for resolving the issue:
- If your car does have a configuration that is equipped with fog lights, then this will not be a change in the device. Moreover, if you install the factory fog lights in the standard places that were plugged, the inspector will not pay attention to this.
- If PTFs are not installed on any version of a car from the factory, then if installed independently, this will be regarded as an illegal design change. After all, the manufacturer did not provide fog lights, which means that appropriate measures will follow from the State Traffic Inspectorate.
This issue is worth considering in more detail.
Removing and installing the front body kit
Since the bumper of the Lada Kalina car is attached in many places, including from below, it is most convenient to carry out work in the inspection hole. If necessary, you can do it without it, but then you will have to look for the lower screws by touch or lie under the car to see them.
The list of tools for disassembly is quite short:
- Phillips-head screwdrivers of different lengths;
- 10 mm socket wrench or socket;
- extension cord and ratchet wrench.
Article on the topic: Clutch release bearing: signs of malfunction
At the moment, there are 2 generations of VAZ 1118 cars, and they are disassembled in different ways. Therefore, the order of work must be considered separately for each modification.
Kalina 1
If you have fog lights installed, then before starting work, disconnect the battery and follow this algorithm:
- Open the hood lid and unscrew the 3 screws holding the plastic radiator grille and carefully remove it.
- Do the same with the bottom grille, removing the 2 screws that secure it.
- Behind the grille there are 2 screws securing the bumper itself, unscrew them.
- Move into the inspection hole and unscrew the 3 lower bolts located in the center.
- Remove 2 pairs of lower screws located on the sides. They attach the body kit to the fender liner from below.
- There are 2 more pairs of screws located in the front of the wheel arches; unscrew them last.
- When all the fasteners are unscrewed, the bumper continues to be held on by plastic latches. To remove it and not break off the latches, pry the side edge of the element (near the wheel) with your hands and gently pull it to the side, disengaging the latches.
- Move the body kit forward a little and remove it from the car. At this time, the assistant must support the other end of the part, preventing it from falling.
Corrosion of body parts is often found under the removed element. To see the whole picture, remove the plastic amplifier (you need to unscrew 3 bolts) and remove the rust, then touch up these areas.
In case of corrosion of body parts, remove the plastic reinforcement and remove the rust
An important point when installing a new bumper is that you need to put it in place correctly and secure the latches.
- Put on one side of the element immediately, and pull the other side together with an assistant. He should press on the corner of the part from the front, and you - from the side, until a characteristic click is heard.
- Then screw all the screws into place.
- Connect the connectors.
- Install gratings.
Photo of the attachment points of the part
3 bolts press the bumper to the body from below 2 pairs of self-tapping screws secure the body kit along the edges 2 self-tapping screws connect the element to the fender liner Top fastening points To remove the grille, you need to unscrew the countersunk screws Access to these bolts opens after removing the grille
Front bumper on Kalina 2
On the new Lada Kalina model, the front body kit is attached differently: the lower screws are located far from the plumb line of the element, so it is very inconvenient to unscrew them without an inspection ditch. But you don’t need to dismantle the radiator grilles to get to the hidden fasteners. The removal operation is performed as follows:
- Open the hood and remove the negative battery terminal.
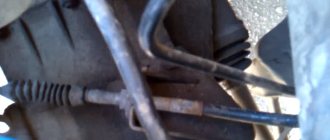
- From the inspection hole, unscrew the 3 bolts screwed to the bottom of the car. Two of them are in the center, the third is to the side (to the right in the direction of travel).
- Unscrew 2 pairs of lower screws located at the edges of the bumper.
- As in Kalina 1, unscrew 2 pairs of screws connecting the part to the fender liner and located in front of the wheel arches.
- Unscrew the 6 bolts of the upper mounting of the body kit; they are located on the horizontal panel above the radiator.
The procedure for dismantling and replacing the front body kit is carried out together with an assistant, as described above. Immediately after removing the element, disconnect the power supply connectors for the fog lights, and when installing, do not forget to connect them back.
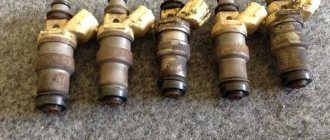
The bolts on Kalina 2 are located quite deep A pair of screws connects the fender liner to the bumper 6 upper mounting bolts Article on the topic: Diagnosis of faults and repair of fuel injectors with your own hands
Adjusting the luminous flux from PTF
A car enthusiast needs to know not only how to install and connect fog lights, but also how to adjust their luminous flux. To do this, you need to check the tire pressure, load the car with cargo close in weight to the total weight of the passengers, fill the tank with gasoline, and put on a spare tire.
Then the car (Priora se or another modification) is placed on a flat area opposite a steep smooth wall at a distance of five meters, and the fogs are turned on. Next, the distance from the center of the headlights to the ground is measured, and a line is drawn on the wall five centimeters lower than this distance. After this, you need to adjust the light spot so that its upper boundary is at the level of the drawn line.
The work is carried out for each headlight separately (with one of the headlights closed), after which the results are compared, and the position of the light spots is replaced until both are at the same level. Domestic-made headlights are adjustable only in the “up” and “down” positions; all work with them is done using a long or Phillips screwdriver.
Check and adjust the headlights on a equipped Lada Priora VAZ 2170 car: with a fully filled fuel tank, a set of tools and a spare wheel.
To adjust the headlights on a Lada Priora VAZ 2170, you will need a 6.1 hexagon. Pre-check and, if necessary, adjust the air pressure in the tires.2. Place the car perpendicular to a smooth wall (for example, a garage) at a distance of 5 m. Place an additional weight weighing 75 kg on the driver's seat. Mark the screen on the wall as shown in Fig. 4.4, and draw vertical lines on it: center line O and lines A, B, passing through the points corresponding to the centers of the low beam headlights. These lines must be symmetrical with respect to the center line of the vehicle. At a height h corresponding to the distance of the centers of the headlights from the floor, draw line 1 and 75 mm below it, line 2 of the centers of light spots.3. Turn on the ignition and low beam headlights, turn the headlight electric adjustment knob to position “0” (this position corresponds to the load of a car with one driver). Screws 1 (in the vertical plane) and 2 (in the horizontal plane) manually adjust the light beam to position the light spot for each lights on the screen if the location of the light spots on the screen does not correspond to the figure.5. Adjust the direction of the light spot for each headlight separately. During adjustment, cover the second headlight with opaque material or disconnect the wire connector from it.6. The headlight light is considered adjusted if the upper border of the left parts of the light spots coincides with line 2, and the vertical lines A and B pass through the intersection points of the horizontal and inclined sections of the light spots.
Adjusting the fog lights
Select a flat horizontal area at a distance of five meters from the screen. Any flat vertical surface, such as a wall, garage door, etc., can serve as a screen.
— Check the tire pressure.
— Load the vehicle with a weight close to the weight of the cargo and passengers during the main period of operation.
— Measure the distance from the centers of the fog lights to the ground (floor).
— Draw a horizontal stripe on the screen 50mm lower than the height from the fog lights to the ground.
— Adjust the light spot so that the upper border on the screen is at the level of the drawn strip. The position of the light spot for each headlight is adjusted separately. Close the other headlight tightly during adjustment. The adjustment is carried out by rotating the adjusting screw, which is located in the upper part of the fog lamp.
— Open the headlights. The upper boundaries of the light spots from both headlights should be at the same level. If necessary, further adjust one of the headlights.
The headlights of a new vehicle are set correctly by the manufacturer. However, during operation a situation may arise when it is necessary to adjust the direction of the headlight beams. To do this, it is not necessary to contact specialists; adjusting the headlights is not difficult with your own hands. Let's look at the features of this event using the Lada Priora car as an example.
Sports model
If you tune the bumper, the car takes on a completely different look. Kalina brand cars have been produced for quite a long time, so in stores there is a large selection of different bumpers to suit every taste of the car owner. Often a new product is bought in the color of the car body. If you can’t find the perfect color, you can paint the structure yourself. Moreover, both completely in the color of the entire car, and with an insert of a different color.
The Lada Kalina Sport design consists of several components: grille, amplifier, spoiler. A bumper cover is also added here.
The spectacular rear bumper of a car of this brand includes a beautiful and original element - a diffuser located in the central part.
The front bumper has an air intake located in the center, as well as two located on the sides. They cool the radiator and brake discs. When tuning the entire structure, you can install several stiffeners.
In order to tune the bumper on Kalina Sport, you first need to remove the standard structure. After this, installation of the tuned part is carried out in the following order:
- install bumper amplifier Kalina Sport;
- install the main element with a grill.
As a rule, there are no problems with installing this element of the car’s design, although there may be minor difficulties with replacing a regular bumper with a tuned version. For example, the “I am a robot” bumper is several centimeters lower than the factory one, so there is an increased risk of breaking it during installation. If such a bumper is attached to the wings only with the upper screw, when the lower part touches obstacles, the bumper will bend inward. For the “I am a robot” design, it is also recommended to stick a protective film on the bottom of the part so that the paintwork is not damaged.
When installing this structural element, you must remember that it is made of plastic, and it is very easy to damage it, so it is better to install large bulky bumpers using assistants, and if difficulties arise, immediately contact a car service center
In addition, you should be prepared for the fact that any tuning bumper will have to be adjusted during installation, and this should be done with caution.. Today I decided to make a few more topics on repairing the Lada Kalina and stopped at the rear bumper, I decided to prepare material on the removal and installation of this body parts. It took me personally at least one hour to complete this work, although at first I thought that I could do it faster
So, consider below the tool that you will need for this procedure:
It took me personally at least one hour to complete this work, although at first I thought that I could do it faster. So, consider below the tool that you will need for this procedure:
Today I decided to make a few more topics on repairing the Lada Kalina and stopped at the rear bumper, I decided to prepare material on the removal and installation of this body part. It took me personally at least one hour to complete this work, although at first I thought that I could do it faster. So, consider below the tool that you will need for this procedure:
- Ratchet or wrench with 10mm head
- Extension
- crosshead screwdriver
Instructions for the second generation machine
For owners of second-generation vehicles, the procedure has minor differences. We bring to your attention detailed instructions on how to remove the bumper on a viburnum, taking into account changes in the modification:
- Unscrew the 3 bolts located at the bottom.
Central lower screws for Lada Kalina
- Unscrew the two pairs of side screws.
- Remove 2 pairs of screws that secure the fender liners.
- Unscrew the 6 screws located on top.
- Using gentle and smooth movements, release the plastic clips.
- Next, we advise you to use help - carefully pull the part forward, while the latches are removed from the grooves.
- Completely dismantle the element.
How to replace the front or rear bumper on Kalina?
The times when the bumper was only the external enclosing structure of the car are long gone. For today's Lada Kalina and its later modifications, this is rather part of the appearance - an aesthetic decoration. On the other hand, when Kalina-2 appeared after Kalina-1, many owners decided to remove the front bumper and drove “as if” the second Kalina.
- 1 In what cases should the bumper be replaced?
- 2 Replacing the front bumper of a VAZ
- 3 How to install the rear bumper
In what cases should the bumper be replaced?
Only the owner of the car can decide whether to replace the bumper. The reasons for this step are as follows:
- at some point the car hit the road barrier;
- the car was in an accident;
- the owner had a desire to stand out or do some tuning.
Lada Kalina is running, but the front bumper and headlight require replacement
Changing the part itself is not so difficult; you need to be patient, time and a set of tools. And it’s also worth purchasing a new bumper in advance or agreeing with a car repair shop where they will repair your old one.
Photo gallery: tools for dismantling work
Flat screwdriver for removing screws Phillips screwdriver for removing screws Head wrench “10” for removing bolts
Before you begin dismantling the part, you need to familiarize yourself in detail with the design features of your car.
Owners of the Lada-Kalina Sport may encounter the fact that when tuning, installing a new bumper on the car will not be easy, since it is difficult to fit in its regular place. When removing the bumper in the cold, difficulties may arise due to some fastening features.
There is only one thing that can be advised to the owners of such cars: carry out repair work with the participation of an experienced auto mechanic or driver who has already carried out a similar procedure on this model.
How to remove a damaged part
To dismantle the broken bumper of the Lada Kalina Sedan, you need to adhere to the following algorithm:
- They open the hood, find bolts on the upper edge of the front grille and, being careful not to damage the paint and plastic, unscrew them. Sliding it up, remove the grill and put it aside.
- Under the grille on the bumper there are a pair of screws and two bolts. You need to unscrew them all. Green arrows indicate the mounting locations for the upper grille, blue arrows indicate the mounting locations for the bumper.
- The next step is to remove the lower part of the grille under the bumper. To do this, also unscrew a pair of screws holding it in place. Hole for the self-tapping screw holding the lower grille of the Lada Kalina
- Having removed this grille, unscrew the two bolts behind it. They are located on the lower part of the body, behind those bolts that were just removed. They are also carefully unscrewed. The bolts holding the front bumper of the Lada Kalina are usually hidden by the lower grille
- Under the lower part of the body, the bumper is secured with three more bolts, which are easy to feel by hand. They are also removed. On the left side is one of three screws that need to be removed before removing the bumper
- Since the front part of the bumper is no longer held in place, they move to any of the front wheels.
- The sides of the bumper are fixed with three self-tapping screws, a couple of which are located in the wheel arches, and one secures the fender liner. The screws connect the bumper to the body, so they also need to be unscrewed
For ease of dismantling, turn the steering wheel to the side.
Bottom bumper: this screw also needs to be unscrewed
- Crouching in front of the car, lightly “pry” the bumper with your hands along the edges and pull it towards you. The blue arrows indicate the installation locations of the mounting bolts on the front bumper of the Lada Kalina.
- If all fasteners are removed, the bumper can be easily separated from the body.
Types of punishment
In practice, for the unauthorized installation of additional headlights, 3 types of punishment are possible:
- A fine of 500 rubles for upgrading a car in the form of additional headlights without approval from the traffic police.
- Deprivation of the right to drive a car for a period of 6 months to 1 year for violating the operation of lighting devices.
- Deregistration of a vehicle.
Of the listed penalties, only 2 comply with the law. Let's take a closer look at them.
Deprivation of rights
In this case, this measure would be illegal. The issue is that drivers driving cars with factory-installed halogen headlights that have xenon or LED bulbs are similarly illegally penalized. This is considered a violation of the operating mode of lighting devices.
In a similar way, the court can make a decision with auxiliary headlights, because they are not provided by the factory, and therefore violate the operating mode. Many car owners consider this a contradictory proposition. But the same contradiction can be attributed to xenon, since according to the Technical Regulations the operating mode can be constant or flashing. This does not apply to the type of light source. Therefore, in practice it happens differently.
The Supreme Court of the Russian Federation recently prohibited the deprivation of the rights of drivers who installed xenon under this regulatory act. Therefore, it is hardly possible to apply such a punishment for additional headlights.
Flashing lights
The situation is different if not ordinary headlights are installed, but those that flash. Then the traffic police inspector can file documents against you in court to deprive you of your license. But this issue is controversial, and the court may consider it illegal. Let's figure out what the question is here.
In this case, the law provides for punishment for violating the operating conditions of lighting devices, as well as their color. If you carefully read the text of the sanction, these conditions are also connected by the conjunction “and”. This means that both conditions must be met simultaneously. If additional headlights emit orange, yellow or white light, then this is not prohibited by the Road Traffic Regulations. Only the operating mode is disrupted.
But in this case, the norm of Part 4 of the same Article 12.5 of the Code of Administrative Offenses can also be used. It indicates a possible penalty in the form of deprivation of rights for a period of 1 year to 1 year 6 months. Plus, your additional headlights that are installed on the car may be confiscated. If such headlights are used while driving on the road, your license may be revoked for up to 2 years.
Deregistration of a car
In 2022, this punishment is quite realistic and complies with the law. Many car owners know that if design changes are detected without registration, such a vehicle will be impossible to register with the State Traffic Inspectorate. The inspector will simply refuse you and he will be right.
However, not all drivers know that if a car is already registered with the traffic police, and unregistered additional headlights are found on it, it will be deregistered.
In practice, in real life it goes like this:
- You are driving along the road, a traffic police inspector stops and checks the documents for the car.
- He sees additional lighting devices that are not provided by the manufacturer.
- Checks the registration certificate and finds that the change has not been registered.
- Draws up a resolution imposing a fine of 500 rubles.
- Submits a report to a superior.
- The authorities review the documents and make a decision to deregister the car.
- You will receive a letter by mail about the decision of the traffic police to terminate the registration of the car.
- The issue can only be resolved by removing the additional headlights and presenting the car to a traffic police inspector.
If, after deregistration, you continue to drive your car (even without additional headlights), then when a traffic police inspector stops you on the road, he will take away the registration numbers, STS and put the car in a impound lot. To pick it up, you will have to go through all the procedures again, and also pay for new license plates. Therefore, it is worth thinking before installing illegal lighting devices.
Our experiment
The editorial Largus is equipped with a Multitronics C-590 trip computer, which, among other things, allows you to monitor the temperature of the engine coolant with an accuracy of one degree. The information content of a standard device cannot be compared - it shows two tiles on the display if the engine is not fully warmed up, and four at temperatures up to 100°C.
So, during the week, when the temperature in the capital hovered around zero, I collected information about the engine temperature. What happened?
The on-board computer, receiving signals from the “brains” of the engine through the OBD-2 diagnostic connector, displays them on the screen.
The on-board computer, receiving signals from the “brains” of the engine through the OBD-2 diagnostic connector, displays them on the screen.
Should I change the radiator grille on the Priora?
Lattice
The radiator on Priora is easy to tune. First you need to figure out how to remove the radiator grille.
Sequential steps for replacement
For the work you will need a screwdriver and an awl. Auto mechanics distinguish 2 methods for dismantling the grille.
- The bumper is removed.
- The bumper cannot be removed.
At the first stage, the ground wires are disconnected from the battery. Then the engine mudguard is removed. To do this, you will need to unscrew the 3 bolts from below that attach the bumper to the protective covers. The next step involves removing:
- screws securing the bumper to the front of the body;
- 2 screws for fixing the left and right headlight housings;
- 2 screws on the right and left side of the arches, they attach the bumper to the front fenders.
Kalina 1. Removing the bumper grille (top and bottom).
Removing the grille is completed by removing the bumper. If you remove the Priora se grille using the second method, then you will need to press the locking washer located near the bumper. Then the washers securing the grille are removed. Otherwise, the hood is raised and secured with a stop. After this, the screws securing the combination lights to the front panel are removed. The lights themselves are removed, the electrical wiring is disconnected from them. Using a screwdriver, turn the locking washers 1/4 turn. Then the old grate
The radiator is tilted forward, pulled up and removed.
Replacing and tuning the grille on Priora se are processes that require attention, since this unit provides maximum air flow to the radiator. The procedure will not take much time if you install a branded radiator grille. To secure it, you will need special parts. To do this, it is recommended to determine in advance the location on the bumper where this unit will be installed. In this case, a sealant is used.
Making a part with your own hands
The radiator grille from Priora se is easy to make yourself. To do this you will need the following materials:
- putty;
- fiberglass;
- net;
- dye.
First, the old unit is dismantled. The middle of the part is cut out with a jigsaw. To carry out tuning, holes are drilled in the mounting points. Then you will need a thin and bendable material - plastic or cardboard. It goes around the internal contour of the future unit. It is recommended to note how many centimeters the part will go inside. Based on the obtained dimensions, cardboard or plastic is cut.
Lattice
The radiator is well cleaned with sandpaper and degreased. A solvent is used for this. It is applied to the place where there is contact with the epoxy resin. Otherwise the connection will be loose. To obtain reliable contact and the desired thickness, you will need to repeat this process. As each layer dries, the cardboard or plastic comes off the product. This will allow you to find out whether the material is tightly glued. The next step is to level the Niva surface. For this, putty is used.