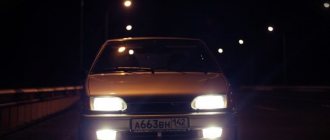
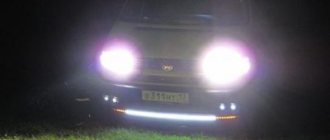
Tuning headlights on VAZ 2113, 2114 and 2115 cars is a fairly common occurrence. Those who want to resort to him improve illumination at night, and also give your car individuality. The front lights significantly affect the “facial expression” of the car, the rear lights make it more visible to drivers driving behind. There are various means and methods by which you can tune the headlights of VAZ 2113, 2114 and 2115. You can purchase already tuned products and install them on your car, or improve the headlights yourself. This will help you minimize financial expenses and show ingenuity and creativity.
In this article, we'll look at some methods you can use to make your car's headlights and taillights more attractive and functional.
Tinting headlights on VAZ 2113—2115 cars
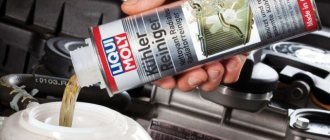
Tinting is the simplest tuning with which you can change the lights of your car with your own hands. This is not difficult to do. The film will fit well on both the front and rear lights.
You can tint your windows yourself using a special film or aerosol varnish. The step-by-step process is as follows:
- select the color and buy film or varnish;
- wash and dry the headlights thoroughly. If you plan to use varnish, it would be better to remove them. All areas that you want to protect from varnish should be covered with masking tape;
- degrease the surface of the headlight;
- if using varnish, apply it from a can from a distance of about 30 cm, make sure the coverage is even;
- after drying, polish it - it will make the coating matte;
- if you use film, first try it on and cut it to the shape of the surface;
- spray the lanterns with soapy water, remove the backing from the film and apply it to the surface to be pasted;
- use a rubber spatula to expel air and moisture, smoothing the film until you are sure that it lies flat.
This is how you treat the front and rear lights of your car. This process is quite simple, and you can perfectly perform such tuning yourself.
How to make a diode ring
Which drive is better, front or rear?
In order to make a taillight based on a diode ring, you will need the epoxy-based adhesive mentioned in this article. The basis for creating a lighting device will be the diode rings themselves or the LED strip. The headlight housing will be made from large or small reflectors, which are quite easy to find on the market if desired. You will also, of course, need paint (you can choose based on your personal aesthetic preferences). Most often, to work with VAZ 2114 cars, a coloring agent with a chrome-plated tint is used.
To make a lighting device, follow this algorithm:
- first of all, mount the diode rings in tin cylinders prepared in advance (as a rule, cans left over from drinks or food are used);
- in jars - carefully cut out the holes so that they look like wells. In this case, there should be two wells: external and internal. If, for example, a jar is suitable for an external well, then the internal one can be simply and cheaply made from a painted half-liter plastic glass;
- install one standard Soviet-made reflector in each internal well. They, among other things, must create illumination in accordance with the standard scheme: orange conductors, white reversing lights, red fog lights. After this, a large reflector may contain a certain number of elements that will look quite advantageous inside the module. The entire remaining space can be decorated with an LED ring;
- install diode ring reflectors. At the same time, in order for their adhesion to the body to be normal, you will need fixing ribs made of a substance such as epoxylin;
- glass can be equipped with additional surfaces, also secured with epoxylin.
If this algorithm is performed correctly, tuning the VAZ 2114 can be considered complete.
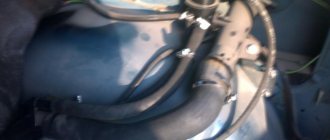
Installation of fog lights on a VAZ 2114 car
You can tune the front optics of your VAZ car by installing fog lights. They will improve visibility on the road at night, in rain or fog. This is done through the following operations:
- first you will need to either purchase a new bumper, which has holes for fog lights, or make them in the standard bumper of the car with your own hands;
- Next, place a button on the panel. To do this, remove the grille and unscrew the speaker. There will be two connectors in front of you: a small one for the power indicator, a large one for the fog lights. Take out the plug, attach the button in its place, and then connect it to the connectors;
- open the hood, take out the fuse box;
- pull the wires from the relay and fog lights to the block;
- connect the terminals to the connectors in the mounting block;
- return the block to where we removed it from and attach the relay to the body. At the same time, ground to the car body;
- connect the PTF to the car's power wiring.
Attach the headlights themselves as securely as possible so that they do not dangle due to shaking while driving on a bumpy road.
Adjustment steps
After preparing the place, equipment and vehicle, you can begin adjusting the optics on the VAZ 2114.
First stage - marking
First, a diagram is drawn up on a piece of paper, which will show how the headlights should be located. The layout is recommended by the manufacturer.
It consists of the following:
- The car is located 5 meters from the wall. This is the distance from the wall to the headlights of a VAZ 2114.
- Measuring the height of the lamp relative to the asphalt. This indicator is marked on the wall with a horizontal line.
- On the wall, a vertical stripe marks the center of the car.
- An indentation of 6.5 cm is made downward from the headlight height mark; the normal cut-off strip is located at this height.
- The center of the beam is marked with daws on the wall. The centers of the jackdaws are connected by a vertical line, the distance between them is 96.4 cm.
Second stage - adjustment
In order for the headlight levels to be in a normal state, the following steps should be followed:
- Turn off the internal combustion engine (its operation may create additional vibrations);
- Turn on low beam;
- Move the headlight hydraulic adjustment lever to position 0;
- Cover one headlight with a thick rag or cardboard so that the light comes from only one headlight;
- When using built-in screws, adjust the direction of the light according to the previously prepared diagram;
- Rock the car, inquire about the correct light correction4
- Adjust the light of the second headlight, while also covering the previously adjusted lamp.
Tuning headlights - “angel eyes”
Today, tuning VAZ optics using LEDs is very popular. It is also called “angel eyes”. Let's consider how you can make “angel eyes” yourself. We will need the following materials:
- plexiglass transparent sticks for curtains or blinds (not hollow inside);
- LEDs;
- resistors;
- jar with an outer diameter of 7 cm;
- 9 volt battery.
You can purchase ready-made LED rings and install them on your car. But there is also the opportunity to make them yourself.
Then we proceed according to the following algorithm:
- We heat the stick to a state where it lends itself well to thermal deformation.
- We bend it around the jar to make a ring and leave it to cool.
- After hardening, cut off the excess ends.
- We connect 2 LEDs with a resistor in series.
- Grind the rod at the ends.
- We make notches at equal distances from each other on one side of the circumference of the rod, gradually deepening them as we move towards the center. This is necessary for uniform glow.
- We drill recesses at the ends.
- We insulate all LED connections and insert them into the ends of the rod.
- We close the gap in the ring with foil and heat shrink tubing.
- We fasten the rings around the headlight with sealant so that the notches are facing inward.
- Connect and use.
Power supply for LEDs in a car
LEDs need stable power. With voltage surges in the on-board network, they will quickly fail. It is necessary to stabilize the voltage or current. So let's look at the circuit of the simplest linear voltage stabilizer.
To make LED tail lights with your own hands, you need to provide them with power. To do this, you need to buy a microcircuit like L7812, or a domestic complete analogue of KR142EN8V, or an adjustable LM317, from a radio parts store. Below is a diagram of the connection of the first microcircuit; for example, an LED strip was used as a load.
In this design without a radiator, the microcircuit can withstand a current of up to 1 Ampere; it is advisable to mount it on an aluminum radiator; you can find them in power supplies and on motherboards, as well as other electronic devices. An ordinary copper or aluminum plate with a thickness of 1 mm or more, the size of a matchbox, is perfect as a radiator.
Using LM317, you can get different output voltages; by the way, if you power the LEDs with a slightly reduced voltage, you will practically not lose any brightness, but will significantly extend their service life. You can see the connection diagram and resistor values below.
Tuning the rear lights on a VAZ 2114 car
The simplest solution for tuning the rear lights of a VAZ 2114 is to purchase a tuning kit. These can be taillights from manufacturers such as ProSport, Osvar or DLK. It won't take you much time and effort to simply install them on your car. Please pay attention to the following factors:
- The way the taillights are designed is very important;
- the quality of the plastic plays a big role;
- there should be no creaking anywhere, and everything should fit well;
- seals must be of high quality;
- It’s good when each light bulb has its own socket.
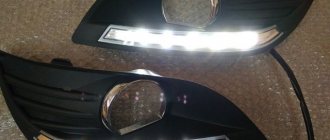
You can also do tuning using LEDs - they will give a very impressive view of the rear of your car in the dark.
To work you will need the following materials and tools:
- fiberglass;
- construction tape;
- strip with LEDs;
- resistors;
- epoxy resin;
- self-adhesive film.
We connect LEDs to the car's electrical system using a soldering iron. We install resistors at the connections, and insulate all contacts using heat-shrinkable tubing.
We install LEDs on the rear lights, following the algorithm below:
- We dismantle the rear lights, after which we separate the housing from the glass. It is fixed with sealant, which needs to be heated and cut with a knife.
- We remove reflectors and deflectors.
- It is useful to mark the attachment points on the outside with a marker. This will be convenient for subsequent assembly.
- On the inside we glue several circles of self-adhesive tape about 20 mm in size.
- Using a can of spray paint, paint the inside of the surface silver.
- After the paint has dried, remove the self-adhesive tape and place the already soldered diode strip with resistors inside.
- Then we put the rear lights back together, and the tuning can be considered complete.
Step-by-step instruction
Installing LEDs on a strip
Installation of LEDs on the rear lights is carried out in the following sequence:
- The flashlight must be removed from the car. Next, it needs to be cut into two parts - a high-quality burning device can handle this. The result should be an even and thin seam.
- Now you have access to the reflectors and reflectors - they need to be removed.
- The taillights need to be completely disassembled. It is recommended to mark with a marker the position of future LEDs on external surfaces.
- Inside you need to stick circles of self-adhesive film with a diameter of 15 mm.
- The surface of the side lights and brake lights must be coated with silver paint. When the paint is completely dry, the self-adhesive film can be removed.
- The reflectors are installed on a small layer of epoxy glue. After this, you can coat all joints with sealant as a preventative measure.
- The LED boards are attached to the wiring and placed in the headlight housing.
- A stabilization circuit is installed that will regulate the LED connections.
- The pivot blocks can now be assembled and connected to the taillight. It is necessary to place the modules on epoxy glue. If the optics are working properly, then you can glue the block together - the tuning is complete.
Material selection
You can tune your headlights using film, as well as varnishes or paints. Both methods have a number of individual advantages and disadvantages. Almost the only disadvantage of using film is its high cost. The advantages of its use include:
- quick dismantling of the film when it is necessary to replace or completely remove it;
- good adjustability of light transmittance;
- headlight protection from scratches.
Working with paint or varnish has the following advantage - this material, unlike film, is cheap. But it has several more disadvantages:
- it is necessary to dismantle the headlights before starting work;
- it is difficult to achieve uniform coating;
- it is not easy to remove paint from the surface;
- poor light transmittance;
- negative environmental influences that destroy paint.
When choosing this or that material for tinting headlights, a car enthusiast should not forget that excessive darkening can lead to emergency situations, especially at night.
Incorrectly adjusted light transmittance of car lights leads to a violation of existing standards and an administrative fine.
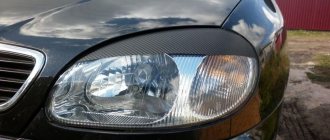
Black eyes or dimming headlights — Lada 2114, 1.5 l., 2002 on DRIVE2
Hello everyone who follows the blog posts of my quartet. I am making a new entry on the topic of tuning headlights. Since the car will be painted in two colors (red and black), it would not be advisable to leave any parts of other colors on it. And in order not to turn the car into a rainbow of different shades, it was decided to tint the gray Stock headlights to create harmony in the color design. In general, there is a single color scheme, only red and black. There will be no yellow mudguards with the inscription “Sparko”, blue writing on the hood and chrome moldings on the bumpers. And yes, you won’t see white wheels on it in the current fashion either. Of course, it was possible not to start another hack (which sometimes leads to trouble))), but to go to the store and buy pop tuned headlights like the Chinese pro-sport with lenses and angel eyes ala BMW for 6 thousand rupees, but we are not looking for easy ways and Since the old headlight glasses had already been sandblasted during use to a matte state and it was necessary to remove them to replace them with new ones, I decided to stir up this, actually not a new feature.
So here's a list of what I used. — Primer for plastic Body Plasto Fix — Body paint, glossy black — Solvent 646 — Varnish for tinting headlights (Tuningline) — Transparent silicone sealant — Masking tape — and, accordingly, new glass for VAZ 2115 (Bryansk)
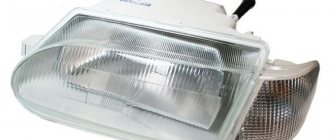
We disassemble the headlight: remove the glass, reflector and all the insides.
Disassembled headlight
We clean the inside of the headlight housing and degrease it. We cover what cannot be painted with masking tape.
Headlight housing
Apply primer, let it dry and paint the inside of the case with black paint.
Painted body
After the paint has dried, we assemble the headlight, seal the junction of the glass and the body with sealant
These are the kind of eyes you get
A small bonus: we put such lamps in the headlight.
Xenon Maxlight 5000k
Now about the turn signals, there were these.
There were whites
At first I wanted to disassemble them and also paint the body from the inside, but I didn’t bother, because... The plastic glass is firmly glued to them. Therefore, we degrease them and coat them with varnish for tinting the lamps. The number of layers is to taste, the more, the darker.
Choor steel
view of headlight assembly
Color film
Modern industry allows you to tint the headlights of any car, including the VAZ 2114, in different, sometimes the most unexpected, colors. Films and aerosols with paint or varnish for tuning represent almost the entire existing palette. Most often you can find cars with red, blue or blue, green headlights, although completely unexpected combinations also come across.
The most important thing is that sufficient light transmittance is maintained, otherwise passing the technical inspection may be difficult. Do not forget that safety should not be sacrificed for beauty.
Headlight Coverings: When is Covering Appropriate?
To be honest, tinting is an absolutely useless procedure from a practical point of view. The coating hardly protects the vehicle element in any way, but simply gives it aesthetic beauty. For example, a covered headlight harmonizes perfectly with the color of the car or, conversely, contrasts perfectly against its background. Most drivers tint their headlights not because they need to, but because they look beautiful.
Conclusion: tinting can significantly reduce the lighting function of the headlights, and this greatly affects driving safety.
Tinting with film
Let's take a closer look at the process of tuning headlights with film. The modern automotive market offers a large selection of materials of any color, quality, and cost from different brands. You can even stop at two or three colors and combine them when tuning your headlights. Having chosen the necessary material and armed with a simple set of tools, we get down to business. Tinting can only be done after the headlight has been thoroughly washed and degreased.
After the surface has been processed, a pre-cut film blank is placed on it. The glass or plastic must be wet for the material to adhere better. The film is carefully leveled from the center to the edges, pressing it against the headlight, ensuring that there are no air bubbles left. You can use a rubber spatula or work by hand.
In order for the film to fit well on the curves, it is worth heating it with a hairdryer, this will increase the elasticity of the material.
Tinting with paint or varnish
Before starting work with VAZ 2114 headlights, select a suitable color varnish designed specifically for this purpose. Most often, one can is enough. Before starting work, you should carefully read the instructions to make sure that the material is suitable for tinting headlights. They are then dismantled and carefully processed. As before working with film, the headlights must be washed, degreased and dried.
The tint is applied in several layers evenly. After the first approach, it is necessary to dry the painted surface. Then the next layers can be applied. You need to carefully ensure that specks of dust do not fall on the fresh paint.
Do not neglect thoroughly drying each layer, and when applying paint, monitor the degree of light transmittance of the headlight. If after the paint or varnish has dried, the surface becomes dull, it needs to be polished.
How to tint headlights to match the color of the car body
This can be done using paint or film. The most common color tinting is done with paint. A variety of colors allows you to successfully select the desired body shade. The procedure for painting headlights looks the same as tinting with varnish, only additional equipment is required: a spray gun and a special compressor. To tint, you need to use two-component paint, which is then varnished.
You need to prepare the work surface for tinting, as in the previous case. When it comes to applying the substance, there are several differences. You need to add paint to the varnish and mix everything well to a homogeneous consistency. Fill the spray gun flask with this liquid, and then apply it to the headlight. Two layers will be enough. The painted part dries from eight to twenty-four hours.
Incomplete tinting of headlights
There is such a thing as partial tinting of headlights. Car owners often resort to it, including the VAZ 2114. In this case, they also use paint or film. If aerosol dye is used, then the area free of tinting (or tinted with a different color) is sealed. If film is used, then after gluing the unnecessary part is cut off. Human imagination is limitless and partial tinting helps to create a unique style with various artistic images on lanterns and headlights.
One of the very common ways of tuning a car is tinting the headlights. After this procedure, the car lights look impressive and stylish. Your car will stand out among others.
But it is not always possible to find optics of a new design for a specific model. Yes, and it's expensive. In addition, tinting your headlights yourself is quite feasible. This procedure is not considered impossible. It does not require significant time or money, or special knowledge.
Craftsmen take photos or videos of the tinting process and post them on the Internet. You can find some very good advice. In addition, watching the video helps to understand the process. Therefore, before starting work, it is worth looking at the materials posted online. Of course, photos and videos vary in quality, but it makes sense to look for them.
Setting the fog lights
Adjusting the fog lights involves several steps:
- vehicle preparation;
- drawing up a diagram;
- adjustment.
The preparatory steps are no different from the actions performed before adjusting the main headlights. The fog lights should be clean, the tires should be inflated, and the trunk should be empty.
When setting up fog lights, you should use a special diagram that you create yourself. This requires:
- Place the car at a distance of 5-10 meters from the wall.
- Measure the height of the center of the headlight and mark it with a line on the diagram.
- Transfer the marks of the center of the car and the fog lamps to the wall.
- Draw a line 10-12 centimeters below the height mark of the fog lights.
To adjust the optics, you need to turn the screw until the beam reaches the level marked on the plan. If the headlight cannot be adjusted, you should clean the bolt head and inspect it for souring. You can use WD-40 aerosol to lubricate the parts. If the bolt rotates but the reflector remains in place, you will need to dismantle the fog lamp and check the integrity of the mechanism.
Pros and cons of using paint and varnish
The most common methods for tinting headlights with your own hands are: using paint, varnish or film. Each method has advantages and disadvantages. The advantage of this method as liquid tinting for headlights is that it is very inexpensive.
And now about the cons:
- the headlights will have to be dismantled and then put back in place;
- both paint and varnish apply unevenly, drips are very likely;
- low light transmittance material;
- if you want to remove the paint, it is quite difficult to do this without damaging the car lights;
- using a solvent will cause the glass to become cloudy;
- the tinting material is destroyed under the influence of sunlight, temperature changes, rain, hail, snow, etc.
If you decide to try this method, you should choose a special product for the job - tinting varnish. It's more expensive, but you can get by with just one can. Tinting headlights with varnish or paint should work well if you use special materials. First, the car lights must be carefully removed. This must be done because it is much more convenient to paint with a spray can when the headlights are lying horizontally. This way you can avoid drips when applying varnish.
Be sure to cover with film all places on the car where varnish or paint should not get in.
Before applying the tinting material, the surface of the front and rear headlights must be cleaned and then degreased. Car lights should be painted outside in dry, warm weather. The varnish or paint manufacturer's instructions must be read. Headlight tint is applied evenly in a thin layer. After applying the first layer, you need to let the varnish dry. Don’t forget to make sure that no specks or grains of sand get on the fresh varnish.
How to save on joint purchases
Hello. My name is Elena, I am 35 years old, I live in a small village in the Sverdlovsk region.
Even though our village is a regional one, there is a lot of tension with work, and the salaries are completely ridiculous. I work as a cashier in a supermarket, but at the same time I have to put out goods, look at expiration dates, and even wipe down shelves. For my work I receive 15,000 rubles a month, sometimes it’s 17,000-18,000 rubles, but this happens extremely rarely. We minus the rent, put aside money for groceries for the month, pay for the phone and Internet, buy household supplies, and there is no more than 2,000-3,000 rubles left for bows and socks. And the prices in our clothing and shoe stores are just like in the city, even though the prices on the shelves are all made in China, sewn from who knows where.
What is a joint venture?
One day, a friend boasted about a new jacket, saying that she bought it at some strange SP Products for only 600 rubles! And this is a completely new demi-season jacket! Yes, we have such a minimum of 1,500 rubles. They stand even in winter, when it’s not the season. I immediately made a stand - I want it too! I had to get acquainted with this joint venture.
There are a lot of destinations there and you can buy almost anything. There is the freshest honey, and seedlings, and jackets, and shoes, and jewelry, and gadgets, and there is plenty of everything for children. But the most important feature of the site is that all goods are purchased from wholesalers and prices there are 2-3 times lower than store prices!
Each purchase is carried out by an organizer who is in direct contact with the supplier. It is his responsibility to collect orders, check quality, and send the order to the recipient. All purchases and organizers are under the control of the site administration, and if there are any misunderstandings, you can complain and they will help resolve the situation. But in 4 years of shopping I have never had a conflict. You can always write in person and make an agreement. For their work, the organizers receive 7-15% of the amount of goods, which is added to the wholesale price.
How to buy at SP Products
First of all, you need to go through a simple registration. Then fill out your profile, indicating the phone number by which the organizer can contact you in an emergency, and your city of residence, so that it can be seen whether you are a local resident or from out of town. Register, provide the necessary information and you can go shopping.
Having selected the desired purchase, we open its page, where there is a description of what is sold here and the ordering system. Everything is extremely simple - the system indicates the lot number, a brief description of the product, a photo, and next to it there is a size range with “Order” buttons. You select the desired product, size, color and press the button. That's it, the order is completed. If something is not clear, you can ask immediately in the procurement topic. Either the organizer or the old-timers of the site will answer.
Everyone is still chasing such jackets.
In all purchases, you need to collect orders for the minimum amount for redemption - from 5,000 rubles. up to 50,000 rub. But there are a lot of people on the site, in popular purchases everything is collected very quickly, and about a week passes from the moment of order to the moment of redemption. After the ransom, a message comes with the amount that must be paid within 3 days. Next, you need to order delivery and unsubscribe to the organizer so that he can check and accept the payment. All! Then all that remains is to wait for your wealth. 14 days are given for dispatch, but responsible organizers send orders within a week.
Receiving an order
There are several ways to receive your order:
- pickup from the organizer;
- meetings near the metro;
- courier;
- logistics delivery services;
- IML and PVZ;
- Post office;
- EMS.
The first five points are suitable for Muscovites and residents of the Moscow region, and only postal delivery, regular or express, is available to non-residents.
How not to make a mistake with a purchase
Each purchase has its own boasting topic, where buyers post live photos of the purchased items, tell how accurate the product description was, how well it fits, and what the quality is. In large purchases, such topics are updated almost daily, so it’s quite easy to navigate. In addition, you can view the product on the supplier’s website, where there is often a detailed description with measurements.
Application of auto film
- if necessary, you can easily return the headlights to their original appearance;
- In addition to adding beauty to the car, the film will protect its lights from scratches and clouding;
- excellent light transmittance of the material, which, unlike paint, applies evenly;
- If you purchase a high-quality film, you can even polish it.
- film is a very expensive pleasure.
If you decide to tint your headlights with film, you should carefully study the characteristics of the material from different manufacturers and pay attention to the following:
- elasticity,
- thickness,
- light transmittance.
Next you need to choose the color of the film. It all depends on what you want: single-color headlights or two-color, solid tinting or fragmentary. Often they do two-tone tinting of taillights. Tinting the headlights also leaves room for imagination.
If you choose film, you will not have to dismantle the lights. However, they must be thoroughly cleaned and degreased. The desired shape is cut out of the film, leaving an allowance. Then you should wet the headlight, apply the film and stick it to the glass, leveling it from the center to the edges. There should be no air bubbles or folds. Tinting headlights is an activity that requires a certain amount of physical effort.
On the bend of the headlight surface, the film should be warmed up a little with a hairdryer. This will increase its elasticity, so you can easily stretch and roll the material.
Advantages and disadvantages
Tinting rear or headlights with film has a number of advantages:
- Easy to do. You can do the procedure yourself without spending money on the services of a specialist.
- Cleans up easily. This is especially true in proceedings with traffic police officers.
- The film is available in different colors. It is not difficult to choose a material to match the color of the car.
- Does not wear off during use. Retains aesthetic characteristics for a long time.
- Performs a protective function. Prevents scratches and chips on lighting fixtures.
- Forms a smooth surface. Provides uniform light dispersion.
The disadvantages include the higher cost compared to applying tinted varnish. In addition, tuning is noticeable only when the lighting is on, that is, on a sunny day the car will not stand out much among other cars.
Are there any problems with traffic cops?
The question often arises: can problems arise with the traffic police due to tinting the lights with your own hands? Not if you use factory certified headlight tint. During a technical inspection, the attitude towards the film is much more favorable, since it has higher light transmittance, which is very important for car lights. It is clear that when tinting, the brightness of the headlights will still be reduced. Therefore, you should not use exotic or too dark colors so that you do not get a fine. Although the legislative wording does not directly indicate that a fine will necessarily be imposed. After all, tinting headlights is not directly prohibited, but it is not permitted either. Fully tinted taillights will result in a warning or fine. In addition, the driver of a car with such lights may be found guilty if he gets into an accident.
On forums, car enthusiasts often discuss tuning cars with their own hands, especially the VAZ 2114. This is a very popular car. Its taillights are often tinted, resulting in a beautiful and stylish toy. The most interesting are two options for tuning the rear optics of a VAZ 2114 with your own hands.
OSVAR instead of standard lights
As for the first option, many car owners prefer OSVAR block headlights, also known as Klyushki. They can be classified as factory equipment, the distinctive feature of which is a slightly different configuration of the position of all the lighting elements of the headlight.
rear lights OSVAR VAZ 2110
So, in the standard version, all signal parts of the lamp are located only horizontally and vertically. As for the rear lights of the “sticks” on the VAZ-2110, they have one element - the reversing light is located at an angle. In general, everything looks like this: elements with a white diffuser form an L-shaped strip surrounded by red diffusers.
The rear lights of the VAZ-2110 “Klyushka” look more stylish than the standard ones, which is why many people buy them. In addition, they perform their functions perfectly.
Installing Klyushka rear lights on a VAZ-2110 is not difficult, since these headlights are completely designed for this car. Therefore, it is enough to dismantle the standard lights, and put them in their place, and then connect the OSVAR block headlights.
The only drawback of such a modernization of your car lies in the fact that “Sticks” are becoming more and more popular, so they are already seen quite often. This means there is no longer any need to talk about individuality. For those who want to get a car that is not like others, the “Sticks” on the VAZ-2110 is not the best option.
"Angel Eyes".
Use of xenon. It is prohibited to use it on headlights; you may face a fine. But it’s worth trying on the rear lights - it turns out impressive.
When tinting the headlights of a VAZ 2114, do not overdo it, otherwise the car’s lights will not shine brightly enough. This is especially important for evening and night trips. The tinting of the rear lights of a VAZ 2114 can be fragmentary - an interesting effect, but there is no danger either for you or for others.
In general, decorating the front and rear lights is voluntary. Do-it-yourself headlight tinting helps you express your creativity. But remember that car safety should not be sacrificed for beauty.
Both domestic and imported cars are tuned using tinting. Of course, you can’t miss unusual headlights, like those on a Chevrolet Cruze. “Angel eyes” in the form of two circles on the headlights of the Chevrolet Cruze are especially good. You can verify this by looking at the corresponding photos and videos on the Internet.
Step-by-step creation of diode pads
As already mentioned, the most popular type of tuning is the use of LED overlays. For independent installation and creation of elements for decoration, you will need to prepare tools and some materials in advance:
- high-quality fiberglass;
- required number of LEDs;
- a sharp knife, preferably using a stationery knife;
- special epoxy-based adhesive;
- tape and paint material.
The manufacturing and installation process should be carried out in stages:
- Using tape, you need to completely cover the surface of the rear optical devices.
- Apply the required amount of tape to high-quality fiberglass fabric and thoroughly saturate the base with epoxy adhesive. Experts recommend applying the adhesive base in several layers, making sure that the layers are not too thick, and in the future it will be possible to correctly fix all additional overlays to the base. For the epoxy base to dry completely, you need to wait 12-14 hours, but it is best to read the instructions for using the glue before starting work.
- After the base has hardened, remove the blank from it to mark the outline of the future design, using a bright marker or tape.
- The resulting outline is carefully cut out with a knife or scissors.
- The cut profile must be puttied. After the putty has dried, the excess is removed with fine sandpaper.
- Primer and paint material are applied.
- If desired, you can apply varnish to protect the surface of the lining, but only after the paint and varnish material has completely dried.
- The finished LED attachments are installed on the rear lights, which completes the tuning process.
It should be noted that such overlays are quite easy to make yourself. You can decorate not only the taillights for a VAZ-2114 or another model, but also fog lights, and even the so-called turn signals, to give originality to your faithful four-wheeled friend.