What is tuning and how is it useful?
Car tuning (from English tuning - setting, adjustment) is a modification, technical improvement of a car, making changes to the factory characteristics in order to improve its characteristics. In simple words, tuning is a modification of a car to suit individual needs and tastes.
Almost everything in the car is subject to tuning: engine, transmission, suspension, wheels, brakes, seats, steering wheel, dashboard, lights, headlights, bumpers, mirrors and much more.
Tuning the appearance of a car (painting it in unusual colors, installing cast or forged wheels, stickers, airbrushing, tinting windows, installing spoilers, changing headlights, etc.) is also called styling, as it allows you to create an individual style for the car, making it stand out in traffic.
With the help of tuning you can turn your favorite “seven” into a sports car
According to my observations on the city streets, “classics” are often subject to tuning of both external elements and the interior. There were “sevens” that were almost as good as modern foreign cars in terms of comfort: with air conditioning, electric windows, powerful acoustics, comfortable seats, and beautiful dashboard lighting. I believe that tuning offers almost unlimited possibilities that are worth using; it gives a second life to an old but beloved car.
➤ How to unfold or remove the rear seat on a Granta Liftback
Unlike the “Sport” modification, the seats of the Lada Granta Liftback are not equipped with height adjustment. For a driver of average height this is not significant. But for those who are over 180 cm or under 165 cm, this becomes a problem.
Often, owners independently install seats from Opel, Ford, Mercedes-Benz, Audi in order to increase comfort.
Driver and passenger front seat overview. Adjustment mechanism
The ergonomics of the driver's seat are good, the range of settings for the steering column and seat allows a driver with a height of 180 cm to fit comfortably. However, the longer the distance, the faster fatigue sets in; the right leg increasingly becomes numb from the limited position.
For the first time in the Lada Granta Liftback model, the seat is equipped with lateral support. This was previously installed in the second generation Kalina, Kalina Sport. Scheme for manufacturing the structure:
- metal frame;
- foam pillow;
- back.
The frame is a supporting structure. The backrest and cushion are installed on the movable hinges of the frame. In the Liftback model, the backrest is solid, the height is proportional to the height of 170 cm. There are bolsters on the sides that provide a comfortable seat for the driver and passengers.
The seat elements have a spherical structure: springs covered with special foam and polyurethane are placed on a metal base. The top is covered with upholstery fabric.
Adjusting the front seats of the car
longitudinal: to adjust, pull the lever under the seat up. Move the seat, release the lever.
Note to the driver!!! Do not adjust the seat while the vehicle is moving. Even the slightest jerk with your hand will provoke an accident.
vertical: adjustment using the handle located on the left side of the seat. By rotating your hand, you select the most optimal position for the backrest.
head restraints: by mechanically pressing your finger on the bracket on the right side, set the appropriate height.
It is important to know!!! The natural position of the head restraint is when the upper perimeter is at the level of the driver’s (passenger’s) head. Optionally, the owner can install heated seats on the Grant Liftback
The process is not complicated and will take no more than half an hour
Optionally, the owner can install heated seats on the Grant Liftback. The process is not complicated and will take no more than half an hour.
Rear seat overview. Adjustment
In the back of the Lada Granta Liftback it’s already cramped for three, but there’s plenty of space for two. The sofa is flat, without ergonomics. For tall passengers, long trips will be painful.
Adjustment of the sofa is not provided, unless you move up and down around the perimeter yourself. Don't forget about the restrictions on the back of the seat back and roof lining.
In order to increase safety and reduce the likelihood of injury to passengers, the rear row of seats is equipped with seat belts.
How to fold out the seats in a Grant Liftback
If necessary, the back row folds completely onto the floor, forming a flat platform without steps or bends. Folding the seats is easy: just press the side hinges of the upper backrest. The lower sofa is fixed with metal hinges at the base.
How to remove the rear seat on a Grant Liftback
- Lower the top back.
- Unscrew the rear seat mount - three “13” bolts at the base.
- We remove the lower sofa.
- We take it out of the cabin.
Owner reviews
| № | Positive |
| 1. | Kirill , 33 years old: I am completely satisfied with the original seats on the Granta Liftback, comfortable, ergonomic. Height is 175 cm, I don’t feel any discomfort. |
| 2. | Vitaly , 41 years old: I installed heating on the standard seats, nothing else is needed. It’s very nice that they installed lateral support, it was so lacking in Priora and Vesta. |
| 3. | Mikhail , 30 years old: my positive review of the back sofa. Comfortable, practical, good material, easy to clean. |
| 4. | Gennady , 29 years old: the quality of the seats is average, I’m satisfied, I put on the covers. I'm going to install heating. |
| Negative | |
| 1. | Victor , 24 years old: I don’t like standard seats, I bought a second generation Opel Astra at the market and installed heating. My advice to motorists. |
| 2. | Peter , 36 years old: everything is good in the Grant Liftback, except for the seats, they are not comfortable, too soft, the fabric is the cheapest. Replaced from third generation Ford. |
| 3. | Vitaly , 28 years old: my height is 185 cm, my original seats are not equipped with height adjustment, it’s so lacking. Replaced from Opel Astra. |
Anatomical seats on grant
Set of anatomical seats VS Omega for Lada Granta, Kalina 2
Anatomical chair VS - “Omega”.
The best choice for any car enthusiast. An analogue of the famous Recaro sports seat. Combines thoughtful ergonomics and beautiful appearance.
It has comfortable support for the torso, hips, and shoulder support. The seat back ensures the correct S-shaped position of the spine. This seat will be the best choice for people who prefer sports and extreme driving. This anatomical chair is suitable for both men and ladies.
Recommended for people with a height of 175 cm.
VS-Seats are highly wear-resistant, reliable and durable. Anatomical seats VS "Omega" are equipped with heating and a complete installation kit for connecting heated seats is included.
Note! The price is for two front seats, covers and rear headrests!
For your convenience, we have various methods of delivery and payment for goods:
Order of shipment to regions of the Russian Federation.
- Place an order through the website or by phone.
- The manager contacts you by phone and clarifies the order details and payment method.
- You pay the bill through the bank, after the money arrives in our bank account (usually 1-3 days after payment for the goods), when paying through electronic money systems (funds are credited within a day), we deliver the goods to the transport company.
Payment Methods:
1. Payment via SberBank Visa card. 2. Payment on Yandex.Money 3. Payment on QIWI 4. Payment to a current account 5. Cash on delivery - Payment upon receipt at the post office (Only for delivery by Russian Post)
1.Russian Post
Calculation of delivery costs (city of departure Togliatti) Tracking the parcel by track number Delivery time from 3 to 12 days, throughout Russia.
2. Russian Post courier service EMS Calculation of delivery costs (city of departure Togliatti) Tracking the parcel by track number
Delivery time from 4 to 10 days, throughout Russia, is 100% more expensive than by mail.
Which seats are suitable for Lada Kalina or Granta from a foreign car?
The standard seats of Lada cars may not be entirely comfortable. Some people lack more developed lateral support, others want height adjustment or adjustable lumbar support. All the shortcomings can be solved in one way - installing alternative seats, for example, from a foreign car.
The front seats themselves are different for Granta and Kalina (first or second generation), but the fastenings are similar. Distance between skid mounting bolts:
- width - 450 mm;
- length - 340 mm;
- diagonally 560 mm.
Luxury trim levels have similar seat mountings, which now have height adjustment. Seats from Lada Granta Sport, Kalina Sport or Kalina Cross are also perfect. The seats of sports versions of cars are more rigid (the seating position will be higher) and have little lateral support.
If you decide to choose seats from a foreign car, then pay attention to two things:
- Overall dimensions of the seats. They should not only fit in the cabin, but also be adjustable in all positions;
- The width of the slide (the distance between the fastening bolts). If the width of the seat slides of a foreign car is 45 cm, then it becomes possible to install them on a Grant or Kalina without alterations (with minimal modifications).
We analyzed reviews from owners on the Internet and compiled a list of “which seats are suitable for Granta or Kalina without modifications” (where the seat mounts for foreign cars have a similar width of the slide). The table is updated as new information becomes available:
| Automobile model | Note |
| Mazda 6 (2008 onwards) | Width 450 mm. Lumbar support, seat lift up/down, larger pillow under the knees ( source ). |
| Kia Rio | The slides are not symmetrical; the seats move inside the cabin by 1-2 cm. |
| Hyundai Solaris | The slides are not symmetrical; the seats move inside the cabin by 1-2 cm. |
| Skoda Fabia | Width 450 mm |
| Chevrolet Lacetti | Width 450 mm |
| Hyundai Tucson | Width 450 mm |
| Honda CRV | Width 450 mm |
| Opel Vectra C | Width 450 mm |
| Renault Megane | Width 450 mm |
| Nissan Qashqai | Width 450 mm |
| Mazda CX-5 | Width 450 mm |
| Volvo V40 | No fastening measurements were taken |
| Skoda Octavia | No fastening measurements were taken |
| Peugeot 308 | No fastening measurements were taken |
| Toyota Camry | No fastening measurements were taken |
| Opel Astra H | The width at the edges of the slide is 455 mm, in order to tighten the bolts you will have to cut off the edges of the slide |
Backseat
You will need: a 13mm socket.
Procedure for the Lada Granta sedan:
- Remove the rear sofa (in Fig. No. 3) by lifting it by the hinge and remove the cushion brackets from the stops. Tilt the back of the rear seat by pressing the latches (in Fig. No. 4).
- Remove the rear seat backrest by unscrewing 2 bolts (no. 2 in Fig.).
Rear seat catalog number: 21900-6820210 and 21900-6820110.
Instructions for station wagon/hatchback Kalina 2:
- pull loop No. 3.
- fold back cushion No. 4 of the rear seat, right or left.
- remove the pillow brackets No. 1 from the stops No. 2, remove the pillow.
- press handle No. 3, locking the right or left back of the rear seat.
- tilt the backrest No. 1.
- Unscrew nut No. 1, right and left fastening the right or left rear seat backrest to the bracket.
- remove the backrest (replaceable head 13, knob).
- if it is necessary to dismantle the rear seat back brackets: unscrew bolts No. 2 securing the brackets to the body, remove the brackets (replaceable head 13, knob).
Let us remind you that on the website you can read reviews about the sound insulation of the Lada Grant.
Source
Video - Installing eco-leather covers on the rear seats.
Adjusting the front seats of the car
1. To adjust the front seats of the Lada Granta in the longitudinal direction (forward - backward), pull the locking lever up (see photo below). After placing the seat in a comfortable position, lower the lever and, moving the seat back and forth a little, lock it.
Note:
It is prohibited to adjust the position of the driver's seat while the vehicle is moving. The seat may move suddenly, causing you to lose control of the vehicle.
2. The tilt of the Lada Granta seat back is adjusted smoothly by rotating the handle.
In the optional version, the front seats are equipped with electric heaters, which turn on only when the car engine is running. 3. The height adjustment of the head restraint on Lada Granta seats is carried out by direct action on the head restraint. The headrest is adjusted downward by pressing the stopper lever (see photo below) of the headrest on the right side. To remove the head restraint from the seat back, move the head restraint up and press the head restraint release lever on the right side, and then pull out the head restraint.
Read more: Cylinder head cooling
Note:
The optimal position of the headrest is considered to be when its upper part is at the same level as the upper level of the driver’s head. If this is not possible, for very tall people the head restraint should be raised to its highest position, and for very short people it should be lowered to its lowest position.
Adjusting the rear seats of a car
Note:
In the basic configuration, the Lada Granta does not have head restraints in the rear seats. In the luxury package, headrests on the rear seats are available and adjustable in the same way as on the front ones.
1. To increase the luggage compartment area, the rear seat can be folded down. This is necessary for transporting large cargo and lengths. Before folding the rear seat (or part of it), it is necessary to install the seat belt buckles in special holders on the lower part of the backrest. When returning the backrest to its working position, make sure that the shoulder branches of the side belts do not fall behind the backrest, that is, they remain in the passenger compartment and not in the trunk. After returning the seat to its working position, the seat belt buckles must be removed from the holders.
2. To fold the rear seat, pull the loop (see photo below) and place the cushion in the upright position.
Note:
If necessary, move the front seats forward.
3. Pull the lock drive handle (on both sides of the seat) and place the backrest in a horizontal position.
4. Installing the rear seats in their normal position is performed in the reverse order.
5. In a variant, each of both parts of the seat can be folded out separately if necessary.
Note:
When any part of the rear seat is folded for cargo transportation, the remaining part can seat no more than one passenger.
COMFORTABLE
Both models are equipped with spacious interiors. Nothing interferes with the movement of the driver's and passengers' legs. But Kalina 2 has modern seat materials and plastics of much higher quality. The interior of the Grants is made of low-quality materials, they are highly wearable and creaky.
The new Kalina seats have an orthopedic structure. This provides high comfort for motorists traveling long distances.
The Granta chairs are made without pronounced lateral support and cannot be called comfortable.
Leather interior and cruise control are not available in Russian cars in any of the trim levels. But Kalina 2 has climate control in the “luxury” version, as well as a heated windshield + rain and light sensor. Granta does not have all these options.
Noise insulation is poor in both models. But in Kalina 2 it is still a little better and the ride is quieter.
So, in terms of the quality of interior materials and sound insulation, Kalina 2 takes the lead
Legality of tuning
So, the question of whether it is possible to install a spoiler, bumpers, non-original alloy wheels and other body kit and tuning elements, a muffler, a guard and other parts not provided by the factory on a car is regulated by 3 regulations:
- Technical Regulations of the Customs Union on vehicle safety (hereinafter referred to as the “Technical Regulations”),
- Federal Law on Vehicle Registration (hereinafter referred to as the “Order”),
- finally, traffic rules.
And we will start with the latest legal act - the Rules clearly tell us that if changes are made to the design of a car without registering them with the traffic police, then we cannot operate such a car.
From June 1, 2022, Government Decree No. 413 comes into force. The procedure for making changes to the design has not changed, but the procedure itself has become clearer and more regulated.
But why should the above tuning elements be changed?! And since this is exactly what the Technical Regulations say. It has a clear definition of making changes:
All that remains is to understand what the components of the car are. And here the regulations have a clear answer to the question:
What does not apply to tuning?
Thus, in order to answer the question about the legality and fine for a muffler, bumpers, alloy wheels, roof fairings, tow bar, roof rack and other tuning elements, we need to understand 2 things: are they provided for or not by design, do they influence they are on road safety.
But there is another important auto subtlety - the Technical Regulations contain an exhaustive list of components regulated by it. Does this mean that if some component is not regulated by this legal act, then it can be installed in any case, and it is no longer a component according to the letter of the law?
This is where disputes often arise between car lawyers. And the logic should still be followed: the regulations clearly prescribe what a design change is and that the components must pass tests as part of the car and be certified, and even if, for example, a spoiler is not regulated by the regulations (and also, on the one hand, is not component, since it is not included in the list of components; on the other hand, by definition of a design change, it is still prohibited), this still does not mean that it can be installed.
You will also be interested in:
- Is athermal tinting prohibited according to GOST and what is the fine?
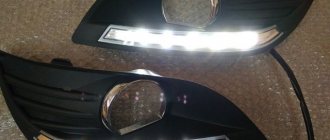
- Is it possible to install eyelashes and DRLs on headlights according to traffic regulations and what is the fine for this?
- Is it possible to knock out the catalyst? What are the consequences: fine and technical inspection?
How to remove the rear seat back on a Grant
So, I welcome everyone who came here. Sobsna would like to talk about replacing dry cleaning, because... I don’t know about others, but the toad is choking me, but I have to. Fortunately, you can easily complete this washing procedure with your paws. Since I had no experience, I decided to start from the back sofa. Because my friends managed to spill 300 grams of cognac there ( quite good I must say) and the upholstery frankly smelled.
In general, my sofa is in this condition
All the upholstery is held on by similar rings that need to be loosened (in principle, it is quite possible with ordinary pliers).
Having removed the external fastening, we are faced with the internal one. It works on the same principle
Well, in the end, after half an hour, the upholstery was removed, in this state, however, it looks even worse.
Well, we put it all in the washing machine, I added some kind of fabric softener, you can add a woman and then the washing process will be absolutely amazing.
As a result, washed upholstery looks like new
My own 20 rubles and half an hour of wasted time, I think the result is great.
Tools:
- Ratchet wrench
- 10 mm head
- Open-end wrench 10 mm
- Medium flat screwdriver
1. Remove the rear seat cushion hinge plugs.
2. Lift the front part of the airbag up and remove the airbag hinges from the holders on the body.
3. Remove the rear seat cushion.
4. To remove the rear seat back, use a 10 mm wrench to unscrew the backrest mounting bolts from the trunk side: on the right (see first photo), in the center (see second photo) and on the left (see third photo).
5. Then unscrew the rear seat backrest bolt, located centrally in the passenger compartment.
6. Remove the rear seat back from the passenger compartment.
7. Install the rear seat on the car in the reverse order of removal.
How to remove upholstery from Granta seats?
The information will be useful to those who are planning to wash the seat upholstery, replace it with a new one, replace foam molding or install heated seats.
For work we will need: - Needle nose pliers - Side cutters - Plastic clamps
The front part of the casing is attached to the frame using metal elements marked in green:
Orange indicates the plastic removable seam of the back. And blue - elements that do not require dismantling when replacing or removing the upholstery.
But let's start with the headrest. We remove it and remove the rubber decorative washers.
Next, applying force, we disconnect the plastic seam (training before disassembling the backrest).
And we tighten the upholstery, squeezing the foam.
We turn the chair over and begin to disassemble the seat. From below, the upholstery is attached to the springs with metal rings.
Don't even try to remove them carefully. Even if you succeed, you’ll waste a lot of time, and you still won’t be able to put them back on. Therefore, we simply take the wire cutters and destroy them.
It is convenient to hold and remove these rings with thin-nose pliers. As a result, nothing holds the upholstery underneath.
We begin to pull off the upholstery from the front of the seat...
... and we rest against the fastening element that tensions and creates the relief of the front part of the upholstery.
A fastening element in the form of a wire rod is sewn into the casing (places highlighted in green) and tightened with the same rings to the foam casting reinforcement.
We take wire cutters and remove the rings...
... first releasing 2 longitudinal fastening elements, and then 1 transverse one.
When all 7 rings are removed, remove the upholstery.
And, if necessary, foam casting.
Having completely folded the backrest, we see a plastic seam like on the headrest. Let's disconnect it.
And we begin to roll up the upholstery until we come across the same fasteners...
We remove the same 7 rings as in the seat and tighten the upholstery.
The upholstery remains on the two headrest guides. You can either simply pull it off or remove the guides.
Well, the foam casting is not secured in any way...
The chair is disassembled. It took an hour to disassemble one seat, but if I had these instructions, it would have taken about 20 minutes. In the second part, I’ll tell you how to put the trim back in place.
So, the seat is disassembled...
If you did it like I did, you destroyed all the mounting rings. Well, after you have washed/replaced/repaired the upholstery, you need to somehow secure it to the seat. This is where plastic ties come to the rescue. By the way, I used polyamide ties from DKS - a reliable thing...
We find reinforcement in foam casting...
... and thread the ties through it.
Then we begin to tighten the upholstery until the fastening element coincides with the corresponding part of the foam casting. Next, we attach the fastening element with ties.
... and tighten them.
We remove the tails of the clamps with pliers.
We do the same with the rest of the fasteners on the back and seat.
We fasten the plastic seam of the back and fasten the seat straps.
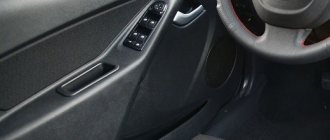
Replacing the electric window
If the window lift cable on a Lada Kalina car has become unusable or the motor has burned out, the ESP must be changed. We carry out the replacement operation in the following order:
- dismantle the power window control unit;
- remove the door trim;
- to disconnect the window regulator from the glass, the latter must be raised all the way up;
- unscrew the four bolts that secure the glass to the ESP (two in the front and two in the back). The glass is held on by seals, but it can also be secured so that it does not fall down;
- unscrew the black metal strip (three screws);
- unscrew the eleven window regulator fasteners (10 bolts), disconnect the power plug from the electric motor;
- We begin to remove the power window from the rear, first removing one half of it;
- then we take out the front part along with the motor from the door cavity;
A burnt-out electric motor on a lift can be easily replaced. For this:
- unscrew the three studs on the mechanism body, then four more screws;
- dismantle the motor, holding the cable spool with your hand, install a new part;
- We install the window regulator in the door, connect it to the glass guides, and put the trim in place.
Removing seats Grants
| If you decide to tune the interior, install seat covers or install seats from a foreign car, then read the instructions on how to remove the front and rear seats of a Lada Granta with your own hands. |
Removing the front seats of Lada Granta
Necessary tool: key “8”. The front seats of Lada Granta are installed on skids that are attached to the floor.
- Move the seat all the way forward.
- Unscrew the two rear mounting bolts for the guide slides and remove the spring washers.
- We move the seat all the way back, and similarly unscrew the two front bolts with washers.
- If seat heating is installed, then disconnect the block with wires. Raise the seat and disconnect the seat belt sensor wiring harness connectors.
Removing the rear seat of Lada Granta
Required tools: 10mm wrench, flat screwdriver.
- Pull the front part of the rear seat cushion up.
- Remove the pillow loops from the holders on the body.
- Remove the rear sofa of Grants.
To remove the backrest:
- Bend the edge of the carpet and remove the 3 bolts securing the backrest to the body.
- Tilt the backrest forward and remove the 3 rear bolts securing the backrest to the body.
- Remove the seat back.
Relocating seat adjustments
Hi all. Because I want to install an armrest in this supercar, so I decided to move the seatback adjustment to the opposite side of the seats. The procedure is not complicated, you do not need to remove the seats. Now I will try to describe in detail for those who have not yet done this due to lack of knowledge.
The whole process took about 40-50 minutes, I’m happy with the result, now I’m looking for a suitable armrest, if anyone has an excellent armrest in mind, please voice it in a comment or write me a personal message, I would be very grateful. Thanks everyone for watching.
Lada Granta 2015, petrol engine 1.6 l., 106 l. p., front drive, manual transmission — styling
Cars for sale
Lada Granta, 2015
Lada Granta, 2021
Lada Granta, 2015
Lada Granta, 2013
Comments 17
Why didn’t you write about the lock washers on the rod? Tapping it is fine, but how can I move this puck back?) It sits dead.
I just placed a screwdriver at the base of the washer and hit it with a hammer
How did you remove the original knobs?
He used a screwdriver to pry it up and slowly pulled it off.
No, it doesn’t rattle or wander, the kit comes with a metal leg on which the whole thing stands. Oddly enough, it doesn’t even squeak
Now I have an idea why the spinners were placed between the seats. This was done for safety reasons in the following case: a car accident, severe deformation, the center pillar is pressed against the seat, the driver is pinned under the steering wheel and unconscious, to get him out, you first need to tilt the backrest with a twist. Now imagine if the spinner is on the left, it will be jammed and you won’t be able to tilt the backrest.
Those. all foreign cars are more dangerous than AvtoVAZ)))) You can just move the seat back)))
Now I have an idea why the spinners were placed between the seats. This was done for safety reasons in the following case: a car accident, severe deformation, the center pillar is pressed against the seat, the driver is pinned under the steering wheel and unconscious, to get him out, you first need to tilt the backrest with a twist. Now imagine if the spinner is on the left, it will be jammed and you won’t be able to tilt the backrest.
In such an accident, the body of the car will be opened like a tin can and the victims will be taken out. They certainly won’t look for where the backrest tilt adjustment is...
Not a bad option. Thank you.
Somehow the price is fabulous, there haven’t been such prices for a long time))) but he’s cool. I suspect that I won’t find it in the city, they don’t carry these and there are no catalogs for ordering. It would be better to order the option from the Internet.
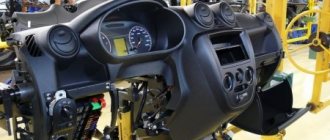
Torpedo tuning
The “Seven” is known for its interior, which is very modest by modern standards. Therefore, VAZ 2107 owners change the internal structure of the car in various ways, trying to make it stylish and ergonomic.
The dashboard (colloquially referred to as a dashboard or dashboard) is the part of the car that both the driver and passengers see most often, so it is the part that receives the most attention when tuning the car’s interior. The dashboard of a car is a set of arrows and light indicators that allow the driver to monitor the technical condition of the car, control the performance of devices and systems, as well as the speed of movement.
The dashboard of a car is a set of arrows and light indicators that allow the driver to monitor the technical condition of the car, control the performance of devices and systems, as well as the speed of movement.
The standard “seven” torpedo looks quite simple and mean. In addition, it has a serious drawback - very weak backlighting, which is why at night the driver has to be distracted from the road, looking closely at the numbers. This is extremely unsafe when driving on the highway at high speed.
The standard VAZ 2107 torpedo has an outdated design and a small number of functions
Directions for improving the “Seven” torpedo could be as follows:
- purchasing tuned elements and installing them instead of standard ones;
- introduction of additional mechanisms and systems (thermometer, parking sensors, on-board computer, etc.);
- independent installation of instrument scales, lighting, etc. - both “native” and from other car models.
Any tuning option begins with dismantling the car’s dashboard.
Before any work related to the electrical circuits of the car, including removing the dashboard, it is necessary to de-energize the car, that is, remove the negative terminal from the car battery.
After removing the torpedo, you can begin to remake it. For this you will need:
- multi-colored LEDs (purchased at electrical stores);
- instrument scales (sold in a large assortment at car markets);
- arrows (you can choose from other cars at auto repair shops or in stores);
- hand tool.
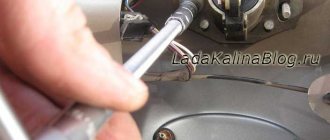
Tuning of the instrument panel is carried out according to the following algorithm:
Remove the instrument panel from the dashboard.
Remove the arrows very carefully without damaging the pins on which they are attached.
Remove old stickers.
Degrease the surface with an alcohol-containing liquid, cut out and install new stickers.
Install new arrows and install the panel in place.
When replacing the hands, you need to take into account the main point: it is very important to install the hands correctly. In the zero position, the speedometer needle is between the 0 and 20 km/h marks
The new indicator must be in the same position after installation is complete, otherwise the speedometer readings will be distorted. To do this, at the beginning of work, you need to mark the location of the arrow on the dial, and during the installation of a new one, align it with the mark.
When replacing pointers, it is important to note the place where they are in the zero position to avoid distortion of instrument readings
You can improve the backlight by installing additional LEDs.
The dashboard of the VAZ 2107 after installing LED backlighting becomes much brighter than the standard one
Front seat slides: features of removal and installation
Today I decided to write a short article about replacing the front seat slides, since I found practically no information about this on the Internet, and I think that the material will be useful for many beginners and others. I’ll immediately write about the devices that will be needed for the most convenient dismantling and installation of these mechanisms.
- Large wrench, E10 torx head, extension - this is for removing the seats themselves.
- Head for 8
- Small ratchet and crank
- Extension
How to remove the skids on Kalina
- First of all, we will need to completely remove the front seat of our Kalina, which requires intervention and replacement of the runners. Read about this in this section.
- Next, turn the chair over to a comfortable position and perform the following steps, which are described below.
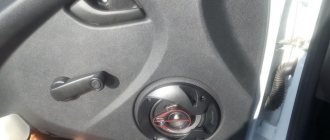
- The removal procedure will be shown using the example of one slide, which is located next to the adjustment lever, since this is where certain difficulties may arise. By pressing the lever, we set the position of the runners so that the fastening bolts are in sight and can be freely unscrewed. From one edge:
And on the other hand, where there are two more fastening bolts, so that they become visible, it is necessary, with the adjustment lever pressed, to move the skids in the desired direction so that the bolts are visible through the holes, as shown in the photo below:
After all this has been done, we move the sled a little to the side, as is clearly shown below:
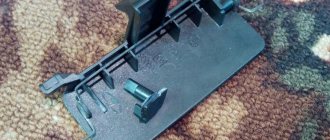
Next, you need to pull this part up with a little force and it will come out without difficulty:
On the other side, everything is made even simpler, since there are only two bolts securing the runners to the seat and there is no spring that will get in the way.
Subtleties when installing the slide
When replacing these parts, a slight difficulty may arise, and this applies to the side where the chair position adjustment lever is located, since there is a spring there, which will then need to be installed in place. To do this as simply as possible and without unnecessary problems, you must first put the slide on the edge of the spring and the end of the lever, approximately all of this will be at an angle of 30 degrees. The picture below shows it more clearly and is marked with arrows:
When everything is hooked, holding it in the same horizontal position, we bring the runners closer to the seat and put this edge (there is a special hole there) on the lever rod:
Immediately after this, we attach the fastening bolts and tighten everything conscientiously, as it was from the very beginning. It is better not to twist the ratchet, as you will ruin the tool and will not achieve the required tightening. The procedure on the other side is carried out exactly the same, only you will not have problems with the spring and therefore everything can be completed much faster. If you have any questions, please contact us and we will sort it out together.
Knock in the front suspension of Lada Kalina
Many motorists dread the day when strange knocking noises appear in the suspension, especially the front suspension, which increases with increasing speed. Of course, there is reason to worry, but at the same time, a car’s suspension is a strong and reliable unit that will clearly withstand a few more kilometers to a service station or garage, where it can be diagnosed.
There are four main reasons for the occurrence of knocks and squeaks in the front suspension of the Lada Kalina. Of the three possible causes of knocking, two of them can be eliminated independently.
So, the first reason why a knocking sound may occur in the suspension is the quality of the road surface. Yes, suspensions, even the most ideal and new ones, can squeak and knock on a bad road, even if this has not been observed before. To test this theory, you should drive onto a well-paved road and drive a few hundred meters; if there is no knocking, everything is fine with the suspension; if not, look at the second reason.
The second reason for the knocking sound, if it is accompanied by vibration in the steering wheel, is a malfunction of the steering, or rather the steering rack, or thinning of the brake discs. If the discs can be replaced independently, then in the case of steering, if you are not a level 80 mechanic, it is better not to flirt with it right away bring the car to the service station.
The third reason is the springs that have lost their tone, as a result of which the car body practically hits the suspension. You should not deal with this problem on your own - it is better to immediately take the car to a service station or service center, since self-repair may seriously damage the front suspension strut.
The fourth reason is a worn-out silent block, which is designed to dampen vibrations and knocks when driving. You can replace the silent block yourself; see the step-by-step replacement of the silent block in the Lada Kalina mono in the next paragraph.
Replacing front suspension silent blocks
Replacing the silent blocks of the Lada Kalina front suspension is necessary after 15-17,000 km, otherwise noises and knocks may be observed when driving. In most cases, the loss of its functions is observed after 15-17,000 km; knocking noises that appeared during this period of kilometers are a problem of faulty silent blocks.
Silent block
The silent block replacement diagram looks like this:
- The machine is placed above a hole or ditch in order to be able to comfortably see the entire suspension. The movers are fixed by the wheels, we put the car itself on the handbrake, then it’s worth checking again that the car is stationary.
- Use a jack to lift the car and remove the front wheel.
- After this, you should fix the bolts of the ball joint with your hands, after which its fastenings are removed.;
- The SPU nut is unscrewed, before this the ball-type support is knocked out into the lower part, after these manipulations the bolts are removed.
- After removing the bolts, the sleeve blocking the lever is pulled out. After pulling out the bushing, the lever is pulled out.
- There are marks on the lever that indicate the direction of installation of new silent blocks; this should be taken into account when installing new blocks.
- The silent blocks must be lubricated at the point of contact with the lever. Using a vice or pliers, apply pressure to the blocks until they fall off.
The diagram is approximate and is for informational purposes to understand how many manipulations need to be made to replace silent blocks.
Adjusting the front seats of the car
longitudinal: to adjust, pull the lever under the seat up. Move the seat, release the lever.
Note to the driver. Do not adjust the seat while the vehicle is moving. Even the slightest jerk with your hand will provoke an accident.
vertical: adjustment using the handle located on the left side of the seat. By rotating your hand, you select the most optimal position for the backrest.
head restraints: by mechanically pressing your finger on the bracket on the right side, set the appropriate height.
It is important to know. The natural position of the headrest is when the upper perimeter is at the level of the driver’s (passenger’s) head.
Optionally, the owner can install heated seats on the Grant Liftback. The process is not complicated and will take no more than half an hour.