Most spontaneous car fires are associated with short circuits in electrical wiring. Electricians call this problem “shorty.” In their opinion, this is a really serious problem that can lead to unpredictable consequences.
When electrical wiring malfunctions occur, many motorists begin to panic and look for a car electrician. In fact, you can diagnose an electrical circuit yourself using a multifunction tester.
How to find a short circuit in a car wiring
What is a short circuit? A short circuit is a connection between two points (wires) having different potentials (plus and minus), which should not occur during normal operation of the device. We are talking about a car (motorcycle, ATV, snowmobile), so we will consider ways to find a short circuit for a car. The article is intended for novice auto electricians and advanced car owners; if you don’t know what a multimeter is, it’s better to contact a service center, it will be faster and cheaper, in the end everyone should mind their own business. The article contains several fictitious examples of searching for short circuits and links to real examples of finding and eliminating short circuits in cars from my practice.
As you know, all electrical circuits in a car (with the exception of the starter power circuit) are protected by fuses. A short circuit will always cause the fuse protecting this circuit to burn out, and there is nothing wrong with the short circuit itself. The danger arises when people, without understanding the cause of the fuse blowing, replace the fuse with a higher rating, or install fuses of unknown manufacture at a cost of one hundred rubles per bucket. Such fuses are made of unknown materials and may not burn out at all.
To find a short circuit, we use an electrical circuit, a multimeter, and sometimes we use a light bulb as a tool. Finding electrical diagrams is not a big problem now; in the simplest cases you can do without a diagram, but I advise an electrician to always look at diagrams to improve their skills.
For example, a Nissan Qashqai came to us with the heated mirrors not working. First of all, we check the fuse for the heated mirrors in the interior fuse box, it is working, we check whether there is power to it when the rear window heating is turned on, there is no power. Let's look at the diagram.
The mirror fuse is located in the interior fuse box. And in the IPDM block there is a relay for turning on the heated rear window and mirrors and two 15 amp fuses connected in parallel. Nissan always puts two fuses in parallel. Check the fuses for blown ones. Our task is to find and eliminate the short circuit with minimal time and minimal disassembly of the car. The weak point in this case is the corrugation, the transition from the body to the trunk door, open and look, it takes a couple of minutes, we look - the wires are intact. Next, you need to, with as little disassembly as possible of the interior, determine the section of the wiring where there is a short circuit.
We have excellent access to the mirror fuse, so we’ll start measuring from there. We take out the fuse so as not to measure the mirror circuit and use a multimeter in ohmmeter mode, or continuity measurements, measure the resistance
Let's assume a resistance of 0.5 ohms - there is a short circuit. Next, you need to decide in which part of the wiring to look for this short circuit; using the connector layout diagram, we will find where the connection E101 - B11 is located.
The connector is located quite conveniently; you only need to remove the sill trim and kick panel. We disconnect the connector and measure the resistance on both sides of the connector.
Let's say there is a short circuit in that part of the wiring that goes to the rear of the car. We already checked the wires in the corrugation at the very beginning, there are no more connectors, so all that remains is to disassemble and look. Damage to the wiring is almost always visible; we remove the rear sill trim and see the damaged wires and the consequences of body repairs.
Hurray, we made a lot of money without destroying half the car. This situation is fictitious, all coincidences are random. Yes, and this cannot happen, do bodybuilders ever make mistakes, no, this simply does not happen).
I recommend conducting such training regularly, open the diagram of any car, come up with a fault and ways to diagnose and eliminate it, gain experience in reading electrical diagrams and troubleshooting. The time spent will definitely pay off when repairing real cars.
Here the ignition switch fuse on the MMC Pajero burned out https://aelectrik.ru/stati/ne-zavoditsya-micubisi-padzhero-sport/ the car accordingly did not start
Electrics, sensors, battery Lada Vesta
Products from the Dustershop77 range on the topic of the article:
| Name | Manufacturer | Price | Availability | Add to cart |
| intro iso ant-1 | Antenna adapter Intro iso ant-1 | INTRO | 500 / 350 rub. Discount: 300 rub. | 1 |
| OBD-BT01 | Bluetooth OBDII - adapter for diagnostics | China | 1500 / 1000 rub. Discount: 700 rub. | >10 |
| DC1711 | Renault Duster engine temperature sensor digital indicator with screen | 2300 / 1900 rub. Discount: 1650 rub. | >10 | |
| multi-vc731 | On-board computer Multitronics vc731 | Multitronics | 9500 / 8700 rub. Discount: 8400 rub. | 1 |
| multi-c590 | On-board computer Multitronics C590 | Multitronics | 7500 / 7200 rub. Discount: 6900 rub. | 2 |
| multi-vc730 | On-board computer Multitronics vc730 | Multitronics | 8000 / 7300 rub. Discount: 6900 rub. | 1 |
| DC1250 | Set of small fuses (10 pcs) | Analogue | 200 / 150 rub. Discount: 100 rub. | 8 |
| OBD-WF01 | Wi-Fi OBDII ELM327 - adapter for diagnostics | China | 1500 / 1000 rub. Discount: 700 rub. | >10 |
| DC691-LA6-V003 | Anti-theft protection of the electronic control unit (ECU) for Duster 2015, Largus, Logan 2, Sandero 2, Vesta, Xray, Arkana | 4900 / 3900 rub. Discount: 3400 rub. | 3 | |
| PU-4TC-BLACK | Multitronics PU-4TC parking sensors for on-board computers (sensor color: black) | Multitronics | 4000 / 3800 rub. Discount: 3400 rub. | 2 |
| DC954-8200719629 | Manifold absolute pressure sensor MAP sensor for 2.0 and 1.6 engines - F4R/K4M original 8200719629 | Original | 2500 / 1900 rub. Discount: 1700 rub. | 3 |
| DC1143 | Renault mirror control button (joystick) original 255706283R | Original | 700 / 500 rub. Discount: 450 rub. | 4 |
| DC1949 | Fuel level sensor Duster, Largus, Logan, etc. | ASAM | 1900 / 1300 rub. Discount: 1000 rub. | 2 |
| DC1728 | Horn from Volga - sound signal (set of 2 tones) | 3000 / 2400 rub. Discount: 1950 rub. | 3 | |
| DC190 | Monitor for rear view camera, foldable | China | 2500 / 2000 rub. Discount: 1700 rub. | 1 |
| DC990-8200060049 | Seat heating switch original 8200060049 | Original | 800 / 700 rub. Discount: 600 rub. | 3 |
| DC1195 | Fuse set 180pcs in a plastic box | China | 1000 / 800 rub. Discount: 700 rub. | 1 |
| DC1913 | Seat heating connector (4-pin male connector analogue 98822-1045 Molex with wires) | Analogue | 300 / 200 rub. Discount: 150 rub. | 2 |
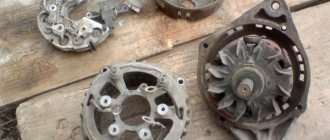
| DC1999 | Brushes for VALEO generator | Analogue | 300 / 150 rub. Discount: 100 rub. | 8 |
| DC997-255678753R | Steering column switch right analog 255678753R (MODIS) | Analogue | 2800 / 2700 rub. Discount: 2400 rub. | 1 |
| DC1998 | Contact rings for VALEO generator (1 piece) | Analogue | 800 / 600 rub. Discount: 400 rub. | 7 |
| DC485-497612479R | Power steering fluid pressure sensor original Renault 497612479R | Original | 2000 / 1600 rub. Discount: 1300 rub. | 1 |
| DC2034-593546 | Voltage regulator Duster, Terrano, Logan, etc. VALEO 593546 (2 contacts analogue 7701055052) | Analogue | 4300 / 3300 rub. Discount: 2900 rub. | 1 |
| DC1754-104035756 | Door limit switch Lada Vesta HANS PRIES TOPRAN (1 piece) 104035756 | Analogue | 300 / 200 rub. Discount: 100 rub. | 6 |
| DC1736 | Additional cigarette lighter socket with cover | 800 / 500 rub. Discount: 300 rub. | 1 | |
| DC1750 | Oil change pump via dipstick | 2800 / 2100 rub. Discount: 1800 rub. | 1 | |
| DC1360-7711238598 | Rechargeable battery original Renault 7711238598 | Original | 15000 / 12000 rub. Discount: 10900 rub. | 1 |
| PU-4TC-GRAY | Multitronics PU-4TC parking sensors for on-board computers (sensor color: gray) | Multitronics | 4000 / 3500 rub. Discount: 3200 rub. | 2 |
| DC1027-8201167988 | Left steering column switch with PTF article number 8201167988 / 255400337R | Original | 6000 / 4700 rub. Discount: 4000 rub. | 1 |
| DC1826-35372201 | Pin fuse 7.5A 35.3722-01 (1 pc.) | Original | 10 / 7 r. Discount: 6 rub. | 5 |
| DC1833 | 6.3 series female tip with locking (without wire) | 10 / 7 r. Discount: 5 rub. | 5 | |
| DC1945 | Lubricant for electrical contacts and battery terminals Liqui Moly | Analogue | 600 / 400 rub. Discount: 300 rub. | 2 |
| DC1827-35372202 | Pin fuse 10A 35.3722-02 (1 pc.) | Original | 10 / 7 r. Discount: 5 rub. | 1 |
| DC1828-35372203 | Pin fuse 15A 35.3722-03 (1 pc.) | Original | 10 / 7 r. Discount: 5 rub. | 1 |
| DC1830-35372205 | Pin fuse 25A 35.3722-05 (1 pc.) | Original | 10 / 7 r. Discount: 5 rub. | 1 |
| DC1881 | Headlight connector block H4 with wires Duster, Vesta, Terrano, Logan, etc. universal (1 pc.) | Analogue | 100 / 60 rub. Discount: 50 rub. | 4 |
| DC1950-172024388R | Fuel pump Largus, Logan, etc. (one fitting) 172024388R original | Original | 2500 / 2100 rub. Discount: 1800 rub. | 3 |
| DC1737 | Sound signal 2 tones (Airline kit) | 1600 / 1200 rub. Discount: 900 rub. | 2 | |
| DC1404 | Trunk lid and door lock activator (Asam/MANOVER analogue 7700712901) | Analogue | 1400 / 900 rub. Discount: 700 rub. | 1 |
| DC1520 | Solenoid relay 1.6 H4M analogue 233003999R | Analogue | 1900 / 1600 rub. Discount: 1400 rub. | 1 |
| DC1812-6001547488 | Heater resistor Duster, Logan, Terrano, Sandero, Kaptur, etc. original 6001547488 | Original | 1500 / 1200 rub. Discount: 950 rub. | 1 |
| DC1829-35372204 | Pin fuse 20A 35.3722-04 (1 pc.) | Original | 10 / 7 r. Discount: 5 rub. | 2 |
| DC1914 | Seat heating button connector analogue 98172-1003 Molex with wires with wires | Analogue | 250 / 200 rub. Discount: 150 rub. | 2 |
| DC2132-110678071R | Relay control unit for glow plugs K9K Renault original 110678071R | Original | 6500 / 5900 rub. Discount: 5500 rub. | 1 |
| DC2167-172024388R | Fuel pump module assembly Largus, Logan and other analogue 172024388R | Analogue | 6100 / 5600 rub. Discount: 5000 rub. | 2 |
| DC1729 | Pneumatic horn - pneumatic sound signal (set) | 2200 / 1800 rub. Discount: 1500 rub. | 1 | |
| DC1742-723377705 | Windshield wiper relay with pause adjustment with rain sensor (723.3777-05 with rain sensor) | 2300 / 2000 rub. Discount: 1700 rub. | 2 | |
| DC634-601986892R | Speed sensor (plug) for cars with ABS original 601986892R | Original | 1900 / 1300 rub. Discount: 1000 rub. | 2 |
| DC1793 | Ignition coil connector Duster, Terrano, Captur | Original | 600 / 500 rub. Discount: 450 rub. | 7 |
| DC1825-353722 | Pin fuse 5A 35.3722 (1 pc.) | Original | 20 / 10 rub. Discount: 5 rub. | 8 |
| DC1831-35372206 | Pin fuse 30A 35.3722-06 (1 pc.) | Original | 15 / 10 rub. Discount: 5 rub. | 8 |
| DC1927 | Connector socket for baseless lamp T10 W5W with wires | Analogue | 120 / 80 rub. Discount: 60 rub. | 3 |
| DC1935-255404709R | Left steering column switch (without front PTF, horn on steering wheel 2015-) original 255404709R | Original | 8500 / 6500 rub. Discount: 4900 rub. | 1 |
| DC1944 | Quick-detachable negative battery terminal with clamp (1 pc.) | Analogue | 1100 / 950 rub. Discount: 700 rub. | 3 |
| DC1958-793710 | Glove box limit switch 1118,2170,2180 Vesta, Handbrake 2123 - 79.3710 original | Original | 200 / 120 rub. Discount: 100 rub. | 2 |
| DC2002-8200194414 | Windshield washer pump Duster, Logan, Sandero, Largus original 8200194414 | Original | 1700 / 1400 rub. Discount: 1100 rub. | 2 |
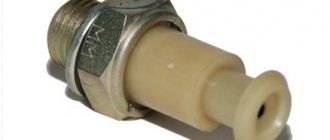
| DC2135-8200671275 | Oil pressure sensor Duster and others original 8200671275 | Original | 2500 / 2100 rub. Discount: 1750 rub. | 2 |
| DC1773-983747 | Automotive relay 12V 5-pin 98.3747 | 250 / 180 rub. Discount: 120 rub. | 1 | |
| DC996-255675128R | Steering column switch left article number 255675128R | Original | 4700 / 4300 rub. Discount: 3800 rub. | 2 |
| DC2067-7700712901 | Door lock activator (solenoid) Duster, Logan, Terrano, etc. original 7700712901 | Original | 3500 / 2600 rub. Discount: 2200 rub. | 2 |
| DC1665-21800141301000 | Manifold absolute pressure and temperature sensor MAP sensor 1.6l VAZ 21129 original 21800141301000 | Original | 2800 / 2200 rub. Discount: 1900 rub. | 1 |
| DC1816-284375765R | Parking sensor 284375765R original (1 piece) | Original | 2000 / 1400 rub. Discount: 1100 rub. | 2 |
| DC1841 | Ring lug 8.2mm (without wire for crimping) | 10 / 7 r. Discount: 5 rub. | 4 | |
| DC1867 | Seat back heater connection connector for Largus, Vesta, X-Ray | Analogue | 100 / 60 rub. Discount: 45 rub. | 1 |
| DC1900 | Seat heating connector Vesta, Largus, X-Ray, etc. Renault, Lada, Nissan | Analogue | 250 / 200 rub. Discount: 150 rub. | 6 |
| DC1919 | Door limit switch Lada Vesta, VAZ 2190, 1118, 2123 original | Original | 150 / 80 rub. Discount: 60 rub. | 4 |
| DC1933 | Flat fuse holder with cover and wire from 1 to 30A | Analogue | 190 / 120 rub. Discount: 90 rub. | 2 |
| DC1946 | Lubricant protection of terminals and contacts 210 ml LAVR aerosol in a bottle | Analogue | 600 / 400 rub. Discount: 300 rub. | 2 |
| DC1947 | Electrical contact cleaner aerosol 0.2L | Analogue | 500 / 300 rub. Discount: 200 rub. | 2 |
| DC1960 | Tray for the battery (mat tray for the battery) Largus, Vesta, etc. | Original | 300 / 200 rub. Discount: 150 rub. | 3 |
| DC2100-251451432R | ESP switch off button Duster, X-Ray, Renault, Lada 251451432R original | Original | 2500 / 1900 rub. Discount: 1500 rub. | 2 |
| DC2118-7700844253 | Yellow fan relay, fuel pump Duster, Logan, Sandero, Terrano, etc. original 7700844253 20240077 | Original | 1300 / 1000 rub. Discount: 800 rub. | 1 |
| DC2122-8200351489 | Relay gray 5 contacts 35A Renault original 8200351489 | Original | 900 / 600 rub. Discount: 400 rub. | 1 |
| DC2130-8200351488 | Relay blue 4 pin 70A Renault original 8200351488 | Original | 600 / 400 rub. Discount: 250 rub. | 1 |
| DC2136-8200680689 | Knock sensor Duster and others original 8200680689 | Original | 3000 / 2200 rub. Discount: 1800 rub. | 1 |
| DC2139-8200177718 | Reversing sensor Duster, etc. (3 contacts, rectangular connector) original 8200177718 | Original | 2000 / 1700 rub. Discount: 1500 rub. | 1 |
| DC2253-7700427640 | Door limit switch (switch) analogue 7700427640 AVTOGRAD | Analogue | 600 / 400 rub. Discount: 300 rub. | 6 |
| DC2434-ZD172289 | Heater fan for cars with air conditioning. Sontian ZD172289 analog N109986D | Analogue | 5800 / 4500 rub. Discount: 4500 rub. | 1 |
| DC2124-7701418358 | Antenna adapter JASO - ISO original Renault 7701418358 | Original | 400 / 250 rub. Discount: 200 rub. | 2 |
| DC1743-75377710 | Automotive relay 12V additional 75.3777-10 | 250 / 150 rub. Discount: 100 rub. | 2 | |
| DC623-8200547283 | Speed sensor original Renault 8200547283 / 6001548870 (without ABS) | Original | 1600 / 1100 rub. Discount: 900 rub. | 1 |
| DC2181-7701044743 | Throttle position sensor 7701044743 (original AvtoVAZ) | Original | 1600 / 1200 rub. Discount: 800 rub. | 1 |
| DC2033-8200671272 | Oil pressure sensor Duster, Terrano, Captur F4R, K9K, etc. original 8200671272 | Original | 2200 / 1800 rub. Discount: 1300 rub. | 1 |
| DC1832 | 6.3 socket series tip with fixation (crimped with wire) | 15 / 10 rub. Discount: 8 rub. | >10 | |
| DC1844 | Pin lug series 6.3 with fixation (without wire for crimping) | 20 / 10 rub. Discount: 6 rub. | >10 | |
| DC1842 | Ring tip 8.2mm (with wire) | 45 / 30 rub. Discount: 20 rub. | 3 | |
| DC1843 | Pin lug series 6.3 with fixation (crimped with wire) | 45 / 30 rub. Discount: 15 rub. | >10 | |
| DC1847 | Split corrugation for cable with a diameter of 6.8 mm (corrugated tube with a cut) price per 1 meter | 50 / 30 rub. Discount: 25 rub. | >10 | |
| DC1848 | Split corrugation for cable with a diameter of 11.5 mm (corrugated tube with a cut) price per 1 meter | 50 / 30 rub. Discount: 25 rub. | >10 | |
| DC1850 | Corrugation for cable, cut with a diameter of 9.4-9.8 mm (corrugated tube with a cut) price per 1 meter | 50 / 30 rub. Discount: 25 rub. | >10 | |
| DC1892 | Connector for crankshaft sensor Vesta, compressor, turn signals Renault, Lada, Nissan | Analogue | 100 / 70 rub. Discount: 50 rub. | 2 |
| DC1907-12010996 | Connector for retractor relay Vesta 12010996 | Analogue | 110 / 80 rub. Discount: 70 rub. | 1 |
| DC1915 | Fuse holder connector with wires | Analogue | 110 / 80 rub. Discount: 60 rub. | 2 |
| DC1916 | 5-pin relay connection block with wires | Analogue | 110 / 80 rub. Discount: 60 rub. | 2 |
| DC1917 | Automotive wire PVAM 1.0 sq. mm, 5 m. | Analogue | 190 / 130 rub. Discount: 100 rub. | 1 |
| DC1918 | Connector for lambda probe, oxygen sensor, fuel pump | Analogue | 300 / 240 rub. Discount: 200 rub. | 1 |
| DC1943 | Quick-detachable positive battery terminal with clamp (1 pc.) | Analogue | 900 / 700 rub. Discount: 550 rub. | 1 |
| DC1959 | Cigarette lighter connector Largus, etc. | Analogue | 300 / 200 rub. Discount: 150 rub. | 1 |
| DC2034-0272220736 | Voltage regulator Duster, Terrano, Logan, etc. BOSCH 0272220736 | Original | 3100 / 2300 rub. Discount: 1900 rub. | 1 |
| DC2119-7700414484 | Relay black 5 pin 20A Renault original 7700414484 | Original | 900 / 600 rub. Discount: 500 rub. | 1 |
| DC2120-8200766093 | Relay blue 5 pin Renault original 8200766093 | Original | 900 / 600 rub. Discount: 400 rub. | 1 |
| DC2123-7700639864 | Turn signal relay Renault original 7700639864 | Original | 3000 / 2500 rub. Discount: 2200 rub. | 1 |
| DC2125-8200263345 | Relay brown 4 contacts 20A Renault original 8200263345 | Original | 1200 / 900 rub. Discount: 800 rub. | 1 |
| DC2126-8200766081 | Relay blue 4 pin 35A Renault original 8200766081 | Original | 700 / 400 rub. Discount: 250 rub. | 1 |
| DC2128-8200308271 | Relay pink 4 pin 40A Renault original 8200308271 | Original | 800 / 500 rub. Discount: 350 rub. | 1 |
| DC2129-7700844253 | Relay yellow 5 pin 40A Renault original 7700844253 | Original | 1500 / 1000 rub. Discount: 800 rub. | 1 |
| DC2131-8200859243 | Relay control unit for glow plugs K9K Renault original 8200859243 | Original | 7000 / 6300 rub. Discount: 5900 rub. | 1 |
| DC2133-8201279378 | Side impact sensor for Duster airbags, etc. original 8201279378 | Original | 1100 / 800 rub. Discount: 600 rub. | 1 |
| DC2134-497610324R | Power steering pressure sensor Duster and others original 497610324R | Original | 1400 / 1100 rub. Discount: 800 rub. | 1 |
| DC2137-7700422630 | Reverse sensor Duster, etc. (2 contacts, oval connector) original 7700422630 | Original | 1500 / 1200 rub. Discount: 1000 rub. | 1 |
| DC2138-8200209496 | Reversing sensor Duster, etc. (2 contacts, rectangular connector) original 8200209496 | Original | 1400 / 1100 rub. Discount: 800 rub. | 1 |
| DC2221-438285 | Starter Vesta, Largus, X-ray, Granta, etc. VAZ-2190,1117,1118,1119,2170 (manual transmission with cable drive) VALEO 438285 | Analogue | 5200 / 4900 rub. Discount: 4500 rub. | 1 |
| intro iso fr-12 | Adapter for connecting a radio | INTRO | 500 / 450 rub. Discount: 400 rub. | 0 |
| multi-cl590 | On-board computer Multitronics CL590 (without voice synthesizer) | Multitronics | 7000 / 6300 rub. Discount: 5900 rub. | 0 |
| DC689 | Anti-theft protection with lock for OBD2 connector | 5000 / 4000 rub. Discount: 3500 rub. | 0 | |
| DC1134-7700427640 | Door limit switch (switch) original 7700427640 | Original | 800 / 500 rub. Discount: 400 rub. | 0 |
| INTRO-PT-04 | Parking sensors with rear view camera included (black) | INTRO | 5200 Discount: 5200 rub. | 0 |
| Incar-VDR | Rear view mirror with DVR and monitor | INTRO | 25000 / 19900 rub. Discount: 19,000 rub. | 0 |
| INTRO-PT-05 | Parking sensors with rear view camera included (gray) | INTRO | 5200 Discount: 5200 rub. | 0 |
| DC2219-407009322R | Tire pressure sensor Renault 407009322R original | Original | 2200 / 1900 rub. Discount: 1500 rub. | 0 |
| VR-518 | DVR VR-518 | INTRO | 3600 Discount: 3600 rub. | 0 |
| DC1739 | Digital multimeter with dial (tool) | 1000 / 800 rub. Discount: 700 rub. | 0 | |
| DC129 | Rear view mirror with DVR and rear view camera included | China | 8500 Discount: 8500 rub. | 0 |
| DC2121-8200263342 | Brown relay 4 contacts 20A PTF, washer, etc. Renault original 8200263342 | Original | 900 / 600 rub. Discount: 400 rub. | 0 |
| DC1775-VDC118 | Rear view camera SWAT VDC-118 / in standard place LADA Vesta, X-Ray, Kalina | 3000 / 2700 rub. Discount: 2500 rub. | 0 | |
| DC1821 | Adapter for steering wheel and joystick buttons for Lada/Renault and radios with built-in steering interface | 2300 / 1800 rub. Discount: 1400 rub. | 0 | |
| DC2127-8200841587 | Relay blue 4 pin 40A Renault original 8200841587 | Original | 1300 / 900 rub. Discount: 700 rub. | 0 |
| DC653 | On-board computer Ancel (Ankel) | China | 3800 / 3200 rub. Discount: 2700 rub. | 0 |
| DC642 | 2.4G Wireless RCA Video Transmitter-Receiver (Camera to Monitor Kit) | China | 1700 / 1300 rub. Discount: 1000 rub. | 0 |
| VCO-2-02 | Headrest with monitor for Renault Duster (black) | China | 8800 Discount: 8800 rub. | 0 |
| VCO-1-02 | DVR VICO-TF2 PREMIUM for Renault Duster | VICO | 5900 Discount: 5900 rub. | 0 |
| VCO-1-01 | DVR VICO-SF2 for Renault Duster | VICO | 4700 Discount: 4700 rub. | 0 |
| VCO-1-03 | DVR VICO-TF2+ PREMIUM for Renault Duster | VICO | 6700 Discount: 6700 rub. | 0 |
| VCO-1-04 | DVR VICO-WF1 for Renault Duster | VICO | 8000 Discount: 8000 rub. | 0 |
| VCO-2-01 | Headrest with monitor for Renault Duster (gray) | China | 7800 Discount: 7800 rub. | 0 |
Another way
Also, when searching for a short circuit, auto electricians often use a regular incandescent lamp. In this case, instead of a blown fuse, we connect a lamp to the circuit, I usually use H4, there are a lot of them lying around with a burnt-out low beam filament.
For example, we have an MMC Pajero 4 with non-working reverse lights and a blown fuse. You can look for a fault as in the previous case, but it will be easier and faster to connect a lamp instead of a fuse, turn on the ignition, reverse gear, and this lamp flashes at full intensity, but there are no reverse lights. This means that there is a short circuit in the reverse lamp circuit. Our lamp limits the current in this circuit; it will not be more than what the lamp consumes and at the same time serves as an indicator that a short circuit is present.
At the same time, we immediately note that the lamp lights up only after we engage reverse gear, that is, there is definitely no short circuit in the area from the fuse to the gear selector (and by the way, there are two connectors and branches there, quite a few have already been cut off). Next we go and disconnect the connectors from the rear lights. The lamp continues to light, that is, the short circuit is not in the lamps. Next, working from simple to complex, we climb under the car and find the gear selector connector S-05 on the box (let’s say we have an automatic).
And we begin to actively move the wiring on the box, and at the same time we see that our lamp has started to blink, that is, the short circuit disappears, then everything is simple, we find the place of damage and repair it. It will look something like this
Of course, you will say, it’s easy to look for such short circuits, just try to find a short circuit that appears once a week, or even less often. It happens, in this case, we check the most likely places and if we find nothing, we separate the different circuits hanging on one fuse with our own fuses, as in this Lexus, by the way, that Lexus is still driving to this day, the short circuit no longer appears.
Successful repairs and no harmful clients to all. If you have interesting cases from practice, write in the comments.
Source
Second hands
New cars are a separate category: all automakers, without exception, pay maximum attention to the cars they sell.
Therefore, their share in fire chronicles is negligible, because:
And it’s a completely different matter for cars that have been in use - who did what with them, how correctly they followed all the instructions, etc. no one can guarantee .
It is quite possible that the car's wiring was treated this way
But even without the “playful hands” of the previous owner, there are a lot of places in a used car that require control:
- High-voltage wiring of older cars often suffers from problems associated with violation of the integrity of its insulation. If in the evening under the open hood in the area of the wiring you notice bright flashes of electrical discharges, replace all high-voltage wires, including the tips, as quickly as possible.
Note! Simply replacing these wires will improve engine stability. Don't forget about the center wire. The instructions will tell you the order of execution and warn against erroneous actions.
Recommendations
First, decide on the type of short circuit:
For example, let's take a simple car. You noticed that the left front parking lamp began to spontaneously go out and light up. Find the wiring diagram in the instructions and familiarize yourself with it. Now look at what wires are connected to your lamp. Start disassembling the problematic circuit, disconnect the lamp itself and check the power. If the problem is not power, then look for the adjacent connector in the circuit; in your car it is located near the left fender of the car. Disconnect this connector, if the power to the light bulb disappears, then connect the connector and after the lamp lights up, it will become clear to you that a short circuit of two phases occurs between the next connector and the lamp.
Now take care of the connector on the left wing, open the circuit and remove the winding from the wiring, take a close look at the wire leading from the connector to the lamp, if you notice a burnt spot on it after a short circuit, start replacing this section of the wiring with a new one, you should have a soldering iron and just solder the required section and insulate it, protecting it from condensation, check the operation of the car.
A self-powered test lamp helps to detect a short circuit. You just need to disconnect the wiring from both ends of the circuit and also inspect the wires to visually determine the place where the burnt wire is. This lamp can detect a ground fault if you disconnect the battery.
Testing multi-core cables for the purpose of marking them
When marking multi-core cables, you can use the methods described above, but there are ways to significantly simplify this process.
Method 1 : use of special transformers that have several secondary winding taps. The connection diagram for such a device is shown in the figure.
Using a transformer for marking
As can be seen from the figure, the primary winding of such a transformer is connected to the power supply network, one end of the secondary winding is connected to the protective shield of the cable, and the remaining terminals are connected to its conductors. To mark the wires, it is necessary to measure the voltage between the screen and each wire.
Method 2 : Use a block of resistors with different values connected to the cable wires on one side, as shown in the figure.
Resistors connected to cable terminals
To identify the cable, it is enough to measure the resistance between it and the screen. If you want to make such a device with your own hands, then you should select resistors in increments of at least 1 kOhm to reduce the influence of wire resistance. Also, do not forget that the value of the resistors has a certain error, so first measure them with an ohmmeter.
When checking a multi-core telephone cable, installers often use a dialing headset, for example TMG 1. Actually, these are two telephone handsets, one of which is connected to a 4.5 V battery. Such a simple device allows you not only to check the cable, but also to coordinate your actions during installation and testing.
Calling with a telephone handset
Short circuit in the car
To answer the question of how to find a short circuit in a car, first check all the fuses and relays - as a rule, if there is a short circuit, one of them should fail. After finding such a fuse or relay, find out from the description (on the cover of the fuse box) which unit it belongs to. Next, start examining this unit - visually inspect all the wires running from it to the fuse box.
If external signs of a short circuit are not found in the car, then set the multimeter to resistance measurement mode, and then disconnect the “plus” of the unit being tested from the fuse box and from the device powered by it. Then connect one contact of the multimeter to the positive wire, the second contact to ground. If there is no short circuit, then the resistance on the multimeter will be equal to one. Otherwise, the “plus” somewhere touches the “minus”.
How to check a car battery with a multimeter
If you suspect that the battery is not working well, then again, a multimeter will help you. So, arm yourself with a multimeter configured to measure voltage (20V):
- Disconnect one terminal and connect the red contact to the positive and the black to the negative. Normal voltage should be between 12.4 - 12.8 Volts. It is important to take measurements at least an hour after stopping the engine.
- Measure the voltage under a load equal to twice the capacitance. For example, if the capacity is 75 Am/hour, then the load should be 150 Am. If the voltage drops below 9 Volts, it means something is wrong with your car’s battery (undercharging or failure). After disconnecting the load, the voltage should be restored within 5-10 seconds.
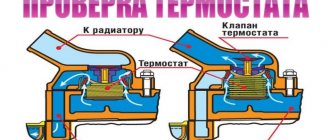
The principle of operation of the electrical circuit of a car
There are many ways to transmit electricity through a car's electrical system. A short circuit can interrupt the necessary flow of electricity. We can conditionally divide the electrical system of a car into circuits of sensors and drives (actuators). The first group includes oxygen sensors, light sensors, speed sensors, etc. Drives include motors, lighting devices and similar consumers.
A typical sensor circuit, such as engine coolant temperature, is the wiring between the electronic engine control unit (ECU) and the coolant temperature sensor (ECT). The ECU can be installed behind the glove box, and the DTOZH can be installed on the engine. The ECU sends a 5V reference voltage to the DTOZH, the resistance of which varies depending on the coolant temperature. If the DTS is cold, it has a higher resistance, so less voltage is returned to the ECU. As the engine heats up, the sensor's resistance drops proportionally, sending higher voltage back to the ECU.
A typical consumer circuit, such as a headlight, consists of wiring from the battery, fuse, relay, switch, bulbs, and wiring back to the battery. The headlight switch always receives power, but it does not direct it to the headlight until the driver turns the switch inside the car.
Any of these circuits operate correctly as long as the wiring is not damaged. There are many ways to interrupt any circuit. Damage from rodents, physical wear and tear of wires, unprofessional installation, moisture ingress and mechanical damage - all this can lead to a break in the car's electrical circuit. A carelessly screwed screw through a wiring harness is a great way to cause a short in your vehicle's wiring to ground, to power, or both.
Technological instructions of AVTOVAZ
Below are general methods for checking electrical continuity, checking for shorts using an ohmmeter and a voltmeter.
Electrical continuity check
Loss of electrical circuit integrity can be caused by the following reasons:
- disconnecting the harness block;
- weak connection of the harness block;
- contamination, oxidation, corrosion of contacts;
- deformation of contacts;
- wire damage.
Check the continuity of the circuit in the following sequence:
- Disconnect the earth wire terminal from the battery.
- Visually check that the harness connectors are connected on both sides of the electrical circuit and that the locking latches are latched.
- Disconnect the pads, visually check the contacts for dirt, corrosion, and deformation.
- By pulling the wires next to the block, make sure that the wire and the terminal are tightly pressed together and that the terminal is fixed inside the block.
- Using a probe of a given diameter and length corresponding to the size of the contact in the mating block, make sure that the terminals of the harness blocks provide a reliable connection (the terminals are not recessed in the block, the probe fits tightly into the terminal).
- Using an ohmmeter, measure the resistance of the circuit between the pads. The resistance of a working circuit should be less than 1 ohm. To avoid damage to the terminals, it is allowed to use probes of a given diameter for measurements that correspond to the size of the contacts in the mating blocks.
Checking the circuit for short to ground
Perform the check in the following sequence:
- Disconnect the connectors on both sides of the electrical circuit.
- Connect the probe, one end connected to the “+” of the battery, to the terminal of the circuit being tested. If the probe lights up, it means that the circuit being tested is shorted to ground.
To avoid damage to the terminal, the probe must be connected using a probe of a given diameter that matches the size of the contact in the mating block.
Checking the short circuit to the on-board network
Perform the check in the following sequence:
- Disconnect the connector on one side of the electrical circuit.
- Connect the probe, one end connected to ground, to the terminal of the circuit being tested. If the probe lights up, it means that the circuit being tested is closed to the on-board network.
- Reconnect the disconnected block.
- Disconnect the connector on the other side of the electrical circuit. Perform check 2.
To avoid damage to the terminal, the probe must be connected using a probe of a given diameter that matches the size of the contact in the mating block.
Measuring voltage at wiring harness contacts
Perform the check in the following sequence:
- Disconnect the connector on one side of the electrical circuit.
- Connect the positive cord of the voltmeter to the terminal of the circuit being tested, the negative terminal to the vehicle ground. Record the voltage value.
To avoid damage to the terminal, the positive cord of the voltmeter must have a probe of a given diameter that matches the size of the contact in the mating block.
Let us remind you that it is more convenient to carry out wiring diagnostics when you have the car’s electrical circuit diagrams at hand (for Lada XRAY, Vesta, Largus, Granta, Kalina, Priora, Niva 4×4).
Key words: universal article
0 0 0 0 0 0
Share on social networks:
Finding broken wiring in a car
In order to check a car for current leakage with a multimeter, you will need to perform the same steps. Measuring resistance is an indicator of the presence or absence of contact. In the absence of contact, the resistance tends to infinity (or the number “1” on the device). If there is contact, the resistance should ideally tend to zero (the lower the better). So, to check for a break in the wiring, you need to connect a multimeter to two contacts suspected of a break and measure the resistance; we repeat - a unit on the multimeter screen will indicate a break.
Thanks for subscribing!
To avoid a repeat break, do not twist the wires with your hands. Use only a soldering iron and special heat shrink. If there is a break in the terminal, be sure to clean it before repairing.
Crankshaft sensor
An important element - without it, the car will not start at all, or you will not be able to drive it. If visually it seems to be working, take a multimeter. Connect the device to the sensor and measure the resistance. The norm is usually from 550 to 750 ohms. But be sure to check if these numbers are accurate for the car you're looking at.
Determines whether oxygen remains in the exhaust gases. Before taking measurements, also inspect it - it may be damaged and a multimeter will not be needed at all. Then the element just needs to be replaced.
If everything is in order, measure the voltage and resistance as with the ABS sensor. The algorithm is the same. Start the car and watch the device. After start-up, the numbers 0.1-02 volts will appear on the screen. When the car warms up, the device will show up to 0.9 volts. If you didn’t notice that the indicator has changed, the sensor is most likely faulty.
If the voltage test is successful, find out the resistance readings. The norm ranges from 10 to 40 ohms.
Useful tips Connection diagrams Principles of operation of devices Main concepts Meters from Energomer Precautions Incandescent lamps Video instructions for the master Testing with a multimeter
Features of automotive wiring
Indeed, all these wiring harnesses that encircle the car from top to bottom perform the only task - to ensure the uninterrupted transmission of electrical impulses between the components of a particular system. And if one of the wires has poor contact, or even worse, the terminal is burnt out or oxidized, then the operation of the circuit will be disrupted or even fail.
Replacement is simple; it’s more difficult to find the location of a break or short circuit with your own hands, especially if you don’t know how to do it.
In this article we will try to answer many questions, including:
Troubleshooting wiring requires basic knowledge and precise tools.
What's under the hood
In the engine compartment there are many wires that perform a wide variety of functions:
The wiring of the ignition system deserves the greatest control.
What's in the cabin
Inside the car, intended for the driver and his passengers, there are even more wires, since there are:
Replacing the wiring in a car will necessarily require disassembling the instrument panel.
Note! Wiring harnesses run through the interior to the rear of the car. Therefore, there is a maximum concentration of electrical wiring inside the machine.
Homemade contactless dialing
Below is a diagram of a simple non-contact break detector; it can be assembled within one evening. Considering the small number of parts, you don’t have to bother making a printed circuit board, but use wall mounting.
Detector circuit
List of required radio components:
- variable resistance R1 – 100 kOhm;
- resistor R2 – from 4 to 8 MOhm;
- electrolytic type capacitors: C1 and C3 – 220 µF, C2 – 33 µF;
- ceramic capacitor with a capacity of 0.1 μF;
- D1 – LAG 665 chip (preferably in a DIP package);
- SP is a regular earphone from a telephone headset.
The circuit can be powered from a source with a voltage of 2 to 5 volts.
The dipstick (P) is made on the basis of a regular spoke from a bicycle wheel.
Probe for a homemade break detector
Properly assembled contactless cable testing does not require adjustment.
Video: Do-it-yourself cable testing. How to test wires using a light bulb and battery
If you calculate the cost of all the necessary parts, it is easy to see that the result obtained will be an order of magnitude less than the cost of services for detecting a broken wire, indicated in construction estimates.
The electrical network (wiring) of modern cars is single-wire, the second conductor is “ground” - the car body and the engine. During the operation of the vehicle, you may encounter some wiring faults (for example, a short circuit or break). Next, let's look at the instructions on how to find them yourself.
All electrical circuits (except for the starter and generator power circuits) are protected by fuses. And the power circuits of powerful electricity consumers (headlights, power windows, heated mirrors or seats, etc.) are switched through a relay. Therefore, you should start troubleshooting the electrical wiring in the following sequence:
- if a lighting device does not work (for example, a headlight or a lampshade), then first we check whether the lamp has burned out;
- check the serviceability of the fuse;
- check the serviceability of the relay;
- check the reliability of the contacts in the circuit connectors (they may oxidize, in which case they need to be cleaned).
Optional equipment
During operation, car owners often install additional electrical equipment:
Integrating them adds wiring to the vehicle and also puts stress on the electrical system. Moreover, a number of “new” electricity consumers cannot be switched off, for example, alarm systems, which means that the likelihood of rapid battery discharge becomes very important.
Current leakage is also determined using a multimeter
If your car begins to have difficulty starting after a long period of parking, then you should determine the cause of the current leak. A multifunctional device switched to ammeter mode will also help you find a leak.
Tip: Don’t forget to set the measurement range to 10 Amps, since the current in the car’s on-board network is constant.
Checking the wiring with a multimeter
To avoid mistakes, the electrician’s work must be checked in a timely manner using the dialing method. This is done using a multimeter set to AC voltage.
You should start with the junction box. It contains a bunch of unmarked wires. First you need to find the phase wire at the output and mark it with electrical tape. Then they find zero: touch the phase with the probe of the device, and alternately touch the remaining ends of the beam with another probe. A value of about 220 V appears on the indicator - the neutral conductor has been found.
Conductor integrity check
To check the integrity, you need to disconnect the conductor from the power source. The multimeter is set to Ω. Its probes are connected to the ends of the conductor. An entire conductor will show zero resistance. You can call your home electrical network without involving specialists. To do this, you need to look at the position of the machines.
If the machines don't work
If the circuit breakers do not work, you need to ring the circuit breaker. When turned on, the multimeter will produce a beep. After this, the voltage at the input and output terminals of the machine in the house is checked. If there is voltage, the light bulb is unscrewed from the lamp socket. One measuring probe touches its central contact, the other touches the base. If the lamp is working properly, a signal will sound from the device. A burnt-out lamp should be replaced. If the lamp is working, check the socket, then the switch in the room.
The wires and contacts in the switch are inspected. If all parts are in good condition and free of carbon deposits, the probes of the device are installed on the contacts. A sound signal will notify you that the equipment is working properly. Eliminating detected faults solves the problem.
If the machine worked
When the circuit breaker is turned off, they look for the cause of the short circuit between the phase wire and the neutral or protective wire. Use a screwdriver to disconnect it and move it to the side. The lamp is unscrewed from the socket. The probe of the device is connected to the neutral conductor and to the phase. An audible signal will indicate a fault in the circuit. In this situation, you need to open the box near the ceiling and disconnect all the wires in it. Each is checked for short circuits.
Replacing car wiring
When replacing wiring in a car, be sure to turn off the power, including disconnecting the battery. Of course, this is not a precaution against electric shock, but protection of the vehicle’s electrical equipment from possible short circuits that may occur during repair work.
Sometimes the replacement can be completed in 10-15 minutes - for example, if the wires of the “battery-generator” supply circuit are damaged. If the integrity of the wiring in the cabin is damaged, there are problems with grounding, or a short circuit in the on-board computer circuit, then the work will take much more time. And the main thing here is not to make a mistake, since incorrectly connecting the wires (for example, if the polarity is reversed) can cause a short circuit, damage to expensive electrical equipment and even a fire. If you do not have experience in electrical engineering and electrical installation work, it is better to contact a specialized service for the services of a professional auto electrician.
History of development
The appearance of wires in cars is directly associated with three inventions:
- High power rechargeable battery;
- Electric starter;
- Battery ignition.
For reference: The battery and electric starter are a trial-and-error solution for easy engine starting. They simultaneously brought each other under the hood of the car, paving the way for battery ignition and other consumers of electric current.
The modern generation of car enthusiasts, who start the engines of their cars with a half-turn, are unfamiliar and incomprehensible to the problems of age-old motorization. And for the first car owners, the main difficulty was starting the engine.
Today's engine starts at the touch of a button
To say that these were temporary difficulties means to hide a century-old layer of history.
In particular:
- Starting the engine took longer than the trip itself;
- All proposed easy starting schemes - springs, flywheels, compressed air, etc. only made the structure heavier;
- A “crooked starter” caused more injuries to drivers than road accidents.
A popular automobile magazine in the 19th century covered all the more or less noteworthy inventions for starting an engine.
Note! The first component in a car that had wires in its design can be considered a magneto, which was installed on the internal combustion engines of the first cars.
Magneto-electric ignition (magneto in the photo below), discovered in 1864 by inventor Marcus, combined:
- Generator;
- Ignition coil;
- Relay interrupter.
Single spark magnetto
Moreover, in 1875, Marcus himself assembled a car with a gasoline engine and electromagnetic ignition. Today, its only surviving copy is considered the oldest car in Europe, having competed for this role with the car of Karl Benz, which was considered the first-born.
In general, the inventors of those years had to solve a lot of questions and problems. For example, Henry Leland, CEO, also needed to replace the wiring in the car with a more functional one.
Short circuit, methods for finding it
Consider the case where your fuse blows. There are several types of short circuit, in the first case your fuse burns out instantly, immediately after its installation in the fuse block or during a short period, in a matter of moments after installation, but not instantly. This means that in the first case, the conductor through which it goes “plus” has direct direct contact with the “ground” of the car body, this option is a little easier in troubleshooting. It is always more difficult to identify the cause of a malfunction when it is weak or spontaneous in nature, with a tendency to appear and disappear.
When searching for a short circuit, the most important thing is to determine in which part of the circuit the short circuit occurs. When searching, I recommend that you arm yourself with a test light, a long piece of wire, a book or an electrical diagram of the electrical equipment of your car. If your fuse blows, then the short circuit is located in the section of the circuit from the fuse block to the device that is powered by this fuse.
I wrote “if possible” because not all electricity consumers are easily accessible, and many are located in places where this procedure can only be performed by a specialist or a person who has already encountered this. For example: if you determine that you have a short circuit in the direction indicator or hazard warning circuit of a VAZ 2105 car, you will need to disconnect the plug from the hazard warning switch, which is located on the right side of the steering column; if, when you turn it off and install the fuse, the short circuit disappears, you need go further along the wiring, and the relay for the turn signals and hazard warning lights is located under the dashboard, which I do not advise you to remove alone if you have not had such experience.
Insulation check
To test insulation with a megohmmeter or multimeter, the principle of continuity is the same as when searching for an electrical connection between the cable cores.
The testing algorithm is as follows:
- set the maximum range on the device – 2000 kOhm;
- connect the probes to the wires and see what the device display shows. Considering that the wires have a certain capacitance until it is charged, the readings may vary. After a few seconds, the device display can display the following values:
- one, this indicates that the insulation between the wires is normal;
- zero – there is a short circuit between the cores;
- some average readings, this can be caused either by a “leak” in the insulation or by electromagnetic interference. To determine the cause, switch the device to the maximum range of 200 kOhm. If the insulation is faulty, the display will display stable readings; if they change, then we can confidently talk about electromagnetic interference.
Attention! Before checking the insulation of the electrical wiring, it must be de-energized. The second important point is that when taking measurements, do not touch the probes with your hands, this can introduce errors.
Video: Wire continuity check - integrity check.
School physics course
Any consumer of electric current, powered from an outlet, be it a kettle, an iron or a TV, represents a certain source of resistance, which simultaneously converts the electrical energy of the circuit, which it closes when the plug is plugged into the outlet, into thermal or mechanical energy. If for any reason the circuit closes without the participation of the above devices, a condition will arise for the operation of the so-called Joule-Lenz law, according to which in the section of the circuit where the short circuit occurred, an instantaneous release of thermal energy of enormous magnitude will occur, significantly exceeding the strength of the current flowing through the circuit. damaged area. It is this thermal energy that leads to mechanical and thermal destruction of the area under discussion.
Among other things, serious reasons for a short circuit may be damage to the electrical wiring, the device itself.
A short circuit will be caused by failure to take precautions in time, negligence, or improper use of devices.
Source