Almost all modern cars are built on injection engines, the VAZ 2114 is no exception. This type of engine made it possible to increase power and reduce fuel consumption of the vehicle as a whole. As you know, for the injector to work, you need many different parts and sensors involved in the operation of the engine. The fuel in such an engine is supplied under pressure, and then atomized and mixed with air, then enters the combustion chamber in the form of an air-fuel mixture. To spray fuel, fuel injectors are used, which operate under a certain pressure.
This article talks about VAZ 2114 fuel injectors, namely their purpose, design, signs of malfunction, methods of cleaning and self-replacement, as well as cost and much more.
Symptoms of injector malfunction
Before replacing injectors on a VAZ 2114, 8 valves, it is recommended to diagnose them.
It is not necessary to contact a service center, just pay attention to the following signs:
- The engine has difficulty starting and runs intermittently.
- The engine stalls at idle.
- The engine revs hard.
- There are failures when moving.
- Fuel consumption increases.
- The toxicity of the exhaust gas increases.
Injection cars and their main features
VAZ 2114 cars in any version are equipped only with an injection-type engine. Therefore, there is no doubt about the reliability of the devices. But it cannot be without problems, especially when they use insufficiently high-quality fuel or do not change the filtration elements in a timely manner. The appearance of the Check Engine sign indicates the need to check the engine for performance.
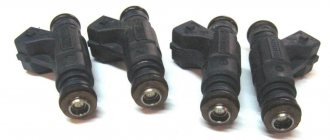
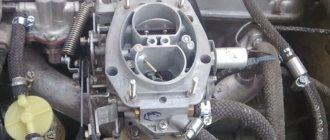
The mechanical part of the injector includes the following parts:
- Injectors.
- Air type pipe.
- Air filters with housings.
- Throttle units.
- Fuel ramp.
- Intake manifold.
Most often, these are the parts that people are faced with purchasing in the event of repairs and replacements. When repairing a VAZ 2114, the injector must remain intact.
Injector diagnostics
How to check the injectors on a VAZ 2114 without dismantling them? This is done quite easily and simply. The engine starts, and the communicator connectors are removed from each injector one by one. When the next connector is removed and the engine starts working differently, the injector is in good condition, and if it works the same, you need to clean the injector or replace it with a new one. These are signs of a malfunction of the VAZ 2114 injectors, 8 valves.
Tool
To replace you need the following tools:
- A multimeter that measures the resistance of a VAZ 2114 injector.
- Phillips screwdriver and flathead screwdriver.
- Hex wrench 5.
- Open-end wrenches for 24, 17 and 10.
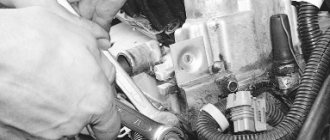
Removing injectors on a VAZ 2114 - operating procedure
Now let's look at how to remove injectors on a VAZ 2114, 8 valves:
- Put the car on the handbrake.
- Relieve pressure in the fuel system.
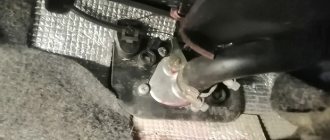
- Remove the cushion from the back seat.
- Remove the hatch and remove the connector from the fuel pump block.
- The pump will turn off and the pressure will drop.
- Start the engine until the fuel is completely exhausted.
- Turn the crankshaft 3-4 times using the starter.
- Remove the negative terminal from the battery.
- Then remove the air filter housing.
- Remove the hose from the power system pressure regulator.
- Squeeze the plastic latch and remove the connector that is connected to the damper regulator.
- Disconnect the connector from the idle speed control in the same way.
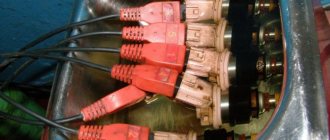
- Unhook the connector block from the injector wiring.
- Unscrew the fuel supply pipes with a 17mm wrench.
- Unscrew the fuel rail.
- Move the ramp itself and the injectors will come out of their mounting sockets.
- Remove electrical wiring from all injectors.
- Then remove the safety bracket.
- All that remains is to remove the injectors from their place on the ramp and install a new one.
- Observing the sequence, assemble in reverse order. From the above we can conclude that replacing an injector on a VAZ 2114 is not as complicated and time-consuming as it seems at first glance.
Cleaning inside
This is one of the most important points when working with devices. Among the main devices are tubes and syringes, and delivery cartridges. Cleaning agents get inside through tubes. First, they test the composition on a small area, because it is very aggressive. Work begins if nothing happens.
After cleaning, new rings are installed. It is not recommended to put the old ones back, even if they are cleaned. The filters and fuel pump mesh are also removed and replaced with new ones. Their location is easy to find out if you study the VAZ 2114 diagram; the injector rarely changes its position.
Diagnostics of removed injectors
- Activate the battery by connecting the negative terminal.
- Connect the fuel supply pipe and power supply block to the removed ramp.
- Install the ramp in such a way that equal containers can be placed under each nozzle.
- An assistant is needed to turn the starter. The containers will be filled with fuel and poorly functioning injectors or those that are completely out of order will be revealed as the containers are filled.
- It is better to immediately replace a nozzle that is not working with a new one; washing the old one will not eliminate the problem for a long time. The same goes for sealing gaskets and power supply terminals.
- If the block is faulty, the injector will not function.
When diagnosing yourself, do not forget about fire safety!
Important information
First you need to find out exactly what kind of fuel the car is fueled with. Turning to unfamiliar gas stations is likely to interfere with stable operation. Negative consequences are associated with carbon deposits inside the combustion chambers. The service life of the injectors does not even reach 120 thousand kilometers if you regularly choose low-quality materials for refueling.
It is recommended to replace it at least every 90 thousand kilometers.
Troubleshooting an injector with a multimeter
- Remove the negative terminal from the battery.
- Remove all connectors from the injectors.
- Connect the multimeter probes to the injector contacts.
- 11-15 Ohms on the multimeter indicate that the injector is working, and if it is more or less, it needs to be replaced.
The reason for the loss of injector performance is most often foreign impurities in the fuel. The quality of Russian gasoline is not at a high level and the sprayers do not work as expected. Repairing them is not effective due to the design features. Therefore, replacing all injectors and sealing gaskets is the only alternative option.
Extending the service life
Removing VAZ 2114 injectors, 8 valves, and the same process on a 16-valve engine is no different, as well as the washing and cleaning procedures.
To extend the service life of sprayers, you must follow these rules:
- It is recommended to add special additives to the fuel that improve the quality of the working mixture.
- After 40,000 km. mileage, clean the injectors with ultrasonics at a service station.
- At service stations they clean sprayers with solvent, but this is a very expensive process.
Cleaning injectors at home
Cleaning injectors at home
- Several bottles of cleaning liquid for cleaning injectors or carburetor.
- 15-20 cm of rubber hose.
- A pair of metal clamps.
- 12 volt light bulb.
- Not fixed breaker (button).
- Connecting terminals in the amount of 4 pieces.
- Needle or pin.
- Keys that are used when dismantling injectors.
The operating procedure is as follows:
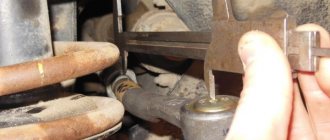
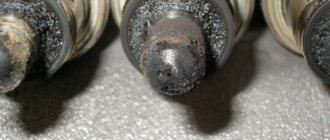
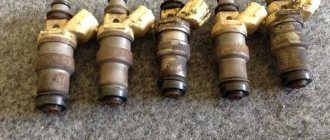
- Remove the nozzles and inspect each one very carefully. Where traces of fuel leakage are noticeable, replace with new ones.
- Remove the O-rings from the body and injectors.
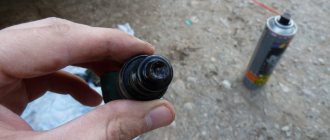
- Place the nozzles in a container for a while and fill them with solvent or acetone so that only the nozzles are in the cleaning liquid.
- Use a piece of hose to connect the can and the nozzle inlet. Secure the hose with clamps. To drain the used liquid, you can use any convenient container.
- You will need a phone charger. Connect the positive end of the wire to the breaker (button), and fix the negative end to the injector contact. We sequentially power a 12-volt light bulb to the other contact of the breaker. We connect the wiring from the light bulb to the second terminal of the atomizer.
- Plug in the phone charger. By pressing the breaker button, the circuit is closed. The light should light up and the injector should open, as indicated by a click.
- Then feed the cleaning liquid from the can into this system.
- Close the breaker, the nozzle will open and the cleaning liquid will pour into the container provided for this purpose.
- Repeat this action several times and with all nozzles.
- The spray nozzle is cleaned of carbon deposits with a pin or needle.
- Having washed and cleaned, we sequentially reassemble everything in the reverse order.
How to clean everything outside?
It is assumed that actions will be performed in the following order:
- First, assess the condition of the device. It is better to buy a new part if there are signs of leakage, even the slightest.
- The O-rings are removed when they realize that cleaning gives at least some result. Their location is nozzles, housings.
- The elements are cleaned using acetone. Next comes the complete immersion of the nozzles into the solution. This process improves the overall quality of cleaning.
- A simple vacuum cleaner is used to remove dust from the surface of the fuel rail.
- Coke is likely to accumulate on the surface of the nozzle; this is also completely removed.
After cleaning is completed, the system is put back together. Connect all the wiring, then check the operation. The main thing is that in the future you should only contact proven gas stations, where the quality of the fuel raises a minimum of doubts.
It is important to ensure that filters are replaced in a timely manner. This also affects the quality of operation of other parts in the future. It is the filters that often cause the injectors to become clogged. Carrying out flushing work is permissible, but its effect will remain temporary.
If necessary, the condition of the system is also checked when the engine is warm. It is enough to turn off the injectors themselves one by one and loosen the nuts securing them. If the part does not work and turns off, the operation of the engine should not change.
Source
Replacing injector seals for VAZ 2114
Replacing injector seals on a VAZ 2114.
The sealing rings must be lubricated with a liquid that repels water or just regular oil. And after changing the injectors, you need to check all the gaskets, and it is better to replace them with new ones. They can be easily removed from the fuel rail and nozzle with a screwdriver. New O-rings, pre-lubricated with engine oil, are installed very carefully, without using any tools, so as not to damage them.
After finishing the work, you need to check its quality. Is everything done hermetically? To do this, turn the crankshaft with the starter 4-5 times.
How to check, replace and how to remove injectors on a VAZ 2114 was discussed in detail in this article. By carefully reading and following all the recommendations, you can easily cope with this work yourself.
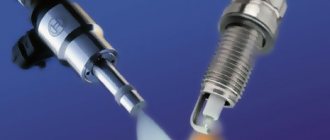
Design
The fuel injector of the 14th Lada model is an electromechanical part that acts as a valve and atomizer. In the closed position, the injector is a valve that holds fuel and does not allow it to leak, thereby reducing the pressure in the system, and in the open position it is a sprayer, spraying this fuel into the engine system.
The nozzle has:
- Mesh filter;
- O-rings;
- Electromagnet winding;
- Core (acting as a valve);
- Return spring;
- Power connector;