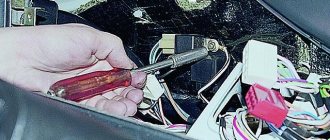
Leaving the parking lot in the morning, I noticed this: after starting the engine, the voltage on the battery drops to 10 volts on the voltmeter. The battery charge sensor arrow is almost in the red zone. As soon as you turn on the turn signals or wipers, the tidy lights start flashing. I checked the belt tension - everything is fine. Well, I think the simplest thing is to change the brushes and relays. If there is no effect, then dig deeper. Fortunately, it costs 180 rubles (brushes and relay assembly). I bought everything and went to the garage. I’ll describe the process in a nutshell, maybe it will be useful to someone). We disconnect the mass, it is better to remove the battery completely, it will be easier to unscrew the tension nut. We unscrew the tension nut, I used a 17 mm socket and a long wrench.
Next, we climb under the car, remove the protection and under it we see the bracket that holds the generator.
We unscrew the nut, remove the belt, disconnect the chip from the generator and unscrew the two terminals with a 8mm wrench.
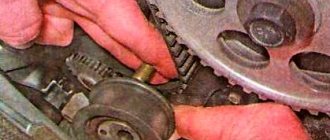
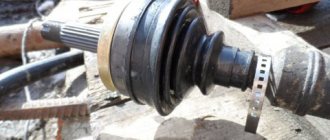
Carefully, so as not to break the pulley, we pull the generator down (the Rubik's cube resembles the procedure...) and climb out of the hole))
we unscrew the relay together with the brushes, install new ones, assemble everything in the reverse order, tighten the belt and everything works))
Replacing the VAZ-2107 generator brushes is perfect as a training demonstration for those who do not yet consider themselves specialists, but are just learning the basics of car repair and maintenance. This information can be used not only to repair the “Seven”, but also for other models (VAZ-2110 and 2114). Now let's proceed to a more detailed study of the issue.
Replacing generator brushes on a VAZ 2107
If the battery icon lights up on the dashboard of a VAZ 2107, this indicates that the car needs to replace the alternator brushes, relay, fuse or belt. The first component on the list wears out quite quickly, so experts recommend changing it every 50 thousand kilometers. Regular failure of brushes is due to the fact that during operation they constantly come into contact with the rotor shaft. Signs of wear on the mechanism are:
- rapid battery discharge;
- dim and flickering headlights;
- interruptions in the operation of electronics, stove, cigarette lighter.
Replacing the entire assembly and brushes is not difficult; do-it-yourself repairs are quite possible here. But first you need to familiarize yourself with the mechanism and its contact diagram.
Tips and recommendations for replacing brushes on a VAZ 2107
Welcome, friends, to the DIY car repair website. Despite the large number of foreign cars, cars of the VAZ family are still in demand and find their use among motorists who know a lot about technology and appreciate the advantages of the domestic automotive industry.
As you know, operation and repair are inseparable concepts, and in the event of failure of any component, identifying and repairing the fault can be done on your own. Let's look at a simple repair using the example of a VAZ 2107 car generator.
Tools required for repairs
To work, the master will need a few tools:
- set of nozzles;
- set of spanners;
- Phillips and flat head screwdriver;
- ratchet;
- rags and penetrating liquid.
The average price for these works in car repair shops as of November 8, 2019 is 500 rubles. Not much, but self-repair will allow you not to waste time traveling and inspect the condition of the generator, battery and other related components.
On-board network problems are indicated by the battery charging arrow.
Work order
It is more convenient to replace the brushes of the VAZ 2107 injector generator in the inspection pit. First you need to fully study the instructions on how to repair the unit in order to carry out the work without stopping to read the next step. If you are absolutely sure that it is the brushes that need to be changed, the repair can be done without dismantling the generator. The unit on the VAZ 2107 is located under the hood (on the right, next to the headlight on the passenger side). You can find it by the drive belt stretched over the flywheel. The brush assembly is located on the rear of the unit, and is secured with bolts.
Let's get started without removing the generator:
- Disconnect the negative terminal from the battery.
- Unscrew the fasteners and remove the assembly.
- We check the mechanism for integrity, measure the protruding part of the brushes.
- We change the brushes or the entire assembly.
But if this procedure is difficult, or there is a suspicion that other parts are faulty, the generator needs to be changed. Here the procedure is as follows:
- We disconnect the battery by removing the negative terminal and remove the battery.
Now you need to remove the adjusting bar; to do this, first unscrew the nut.
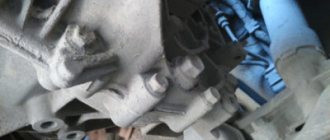
Next, access is blocked by a protective casing; you need to move it aside, then unscrew the fastening nut of the wires at the outlet of the unit, and disconnect the wires.
The block is disconnected from terminal 61, and the nut of the lower fastening of the unit is unscrewed.
Remove the belt from the pulley, remove the bolt and bushing. The unit is now supported only by a bracket.
We lower the generator between the front axle beam and the bracket and remove it from the car.
We unscrew the brush holder bolts and remove the unit. Let's check it out. If only the brushes have become unusable, we replace them. If the whole unit is installed, install a new brush holder. Installation of brushes into the holder must be done carefully and accurately. They should fit freely into the nests.
For greater clarity of work on a VAZ 2107 to replace alternator brushes, watch the video:
Let's start the replacement process
We are gradually approaching how to carry out the replacement. The procedure is much more complicated than, say, replacing a windshield, so you initially need to protect yourself from possible electric shock. To do this, you need to disconnect the ground terminal on the battery. Despite the fact that the voltage in the electrical circuit of a car is not as high as, for example, in an electric train, even one random spark that hits you can become quite noticeable.
The location of the generator on the VAZ-2107 model and its other “colleagues” (2110 and 2114) is almost the same - it is installed in the right half of the engine compartment. In other words, it is located next to the main light on the passenger side. Moreover, there is absolutely no difference whether the car has front-wheel drive or rear-wheel drive - the developers of the Zhiguli do not change their style, adhering to their own traditions. The metal body is attached to the engine with several fastening nuts. You can recognize the generator by the flywheel and the drive belt stretched over it.
Now you need to decide on the choice of replacement procedure. For those who are not in the know, replacing generator brushes can be done in two ways:
- with removal of the generator;
- without removal.
The main difference between these methods is that after replacement you will need to adjust the tension of the drive belt. But if for the VAZ-2110 and 2114 the adjustment will not be any difficulty, then the owners of the VAZ-2107 will encounter difficulties due to the poor layout of the mechanisms. Choose the method that suits you best.
Next you need to adhere to a certain order.
Step 1. Remove the protective cover installed on the generator housing.
Remove the protective cover
Step 2: Remove the power terminal from the female connector.
Disconnection is important for safety reasons!
Step 3. In order to remove the parts of interest in this case, you need to unscrew the 2 fastening bolts. Then remove the brush holder with holder.
Don't lose the mounting bolts. They will still be useful to you.
Step 4. Conduct a visual assessment of the condition of the brushes: the protrusion from its socket should be no more than 5 millimeters. After this, make a replacement.
Visual inspection of old brushes
Step 5: Reassemble.
The final stage is reinstallation
Important! Install the brushes into the holder with extreme care and precision. They must “sit” freely in the nest.
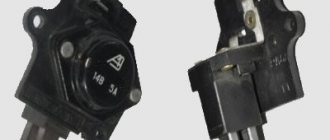
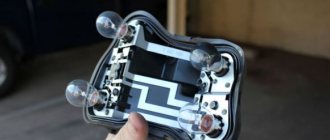
Representatives of the automotive industry have long decided to meet drivers halfway by creating a special holder, which includes brushes and a voltage regulator. Its cost is about 150-200 rubles higher than the cost of the kit. Of course, everyone tries to save money whenever possible, but before making a purchase, think about how much you can save this way? In addition, you will not carry out such a replacement very often (in some cases, brushes are replaced only a few times during the entire period of use of the car).
The voltage regulator may also be the cause of the malfunction. Before installing the unit into the generator, connect the battery cable (positive) to the plug connector of the unit, and the negative lead to the housing. After connecting the wires, you need to connect a rheostat and a 3-volt light bulb to the brushes. If connected correctly, the light should light up. Change the voltage little by little, moving its indicator from 12 to 16 V. After you reach 16 V, the connected light bulb should go out. If the light is still on, the voltage regulator is most likely faulty.
VAZ 2107 generator brushes - do-it-yourself check and replacement
The VAZ 2107 generator brushes, like any car parts, very often fail. Quite often the reason for this is: wear or freezing.
Those who are familiar with the principle of operation of a generator know that an excitation voltage is supplied to the armature through the brushes, which not only starts the electric machine (generator) into operation, but also regulates its output power.
The regulation itself occurs due to a special device, a relay-regulator, which can be implemented directly on the brush holder or installed separately (on earlier models).
The device of the VAZ 2107 generator
As a rule, such a malfunction manifests itself gradually, initially accompanied by short interruptions in the operation of the generator, gradually leading to its complete failure, but other options are also possible, for example, a sudden failure.
Tips and tricks
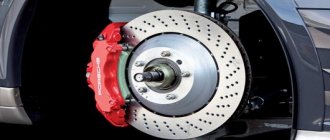
If, before repairing the generator brushes of your car, you noticed noise in its operation, this may indicate that the bearings of the VAZ 2107 generator may be worn out, and in this case, it is necessary to remove and disassemble the VAZ 2107 generator.
A worn bearing has increased play of the rolling elements and must, in this case, be replaced with a new one. You should know that premature bearing failure is not only due to lack of lubrication.
Often an over-tightened generator drive belt contributes to this, and an over-tightened belt can damage the cooling system pump bearing.
Therefore, check this unit regularly in accordance with the manufacturer's recommendations. It is better to get into the habit of regularly inspecting the engine compartment with the engine running, this will allow you to detect and eliminate the problem earlier and at minimal cost.
Correct diagnosis will help you avoid additional work and unexpected breakdowns.
Generator brushes.
How to determine that the generator brushes need to be replaced?
Generator brushes are a part that is found in almost every generator.
The more modern the car, especially a foreign car, the more electrical consumers it has, which in one way or another make life easier for the car owner. Accordingly, an increasingly important role among automobile units is played by the autogenerator, which supplies electricity to all consumers in the car.
What are generator brushes used for?
Using the generator brushes, the voltage from the regulator relay is supplied to the excitation winding - the rotor. The rotor has commutator rings attached to it - the rotor commutator to which the brushes fit tightly. To transfer current from the voltage relay to the rotor winding, the brushes must be in a certain position and pressed against the commutator rings with a certain force. To do this, they are installed in the seats of the brush holder and are pressed by a spring on the reverse side.
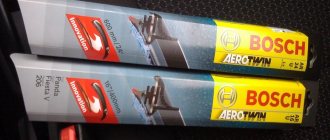
The material from which the brushes of foreign manufacturers' generators are made - a mixture of copper and graphite - differs from domestic ones in better wear resistance and conductivity. For this reason, it is not recommended to install this element on foreign cars from domestic cars.
How do you know when you need to replace your generator brushes?
- Car mileage, 150-200 thousand km. is the period when the part is worn out.
- The battery charging indicator light comes on and goes off again. This may continue for several days until the icon lights up completely.
- Loss of power or voltage drop due to a loose fit of a worn part.
- Voltage surges in the vehicle's on-board network may indicate a faulty part.
- If a lot of motor oil or other technical fluid gets on the generator, then the part is subject to increased wear.
How to check whether replacing the generator brushes is really necessary?
To determine the causes of the malfunction, it is necessary to disassemble the generator and inspect the generator brushes - they must be long enough and in contact with the slip rings.
If the remaining length of at least one element is less than 3 mm, replacement is necessary in any case. Also, the generator brushes must be well movable in their seats, have approximately equal residual length, must not be dirty, and the springs must press with the same force.
How to replace brushes on a generator? Procedure.
On many modern autogenerators, the brushes are integral with the voltage regulator relay, for example, this is true for Valeo, Bosch, Mitsubishi, Magneti Marelli; for Denso, the relay regulator is made separately from the brush assembly.
To replace the generator brushes , if they are built into the regulator relay, the tools you will need are a 40-100 W soldering iron, solder, flux, a 1.5-3 mm drill, a drill or screwdriver, as well as a tool for removing the regulator.
- Remove the protective cover
- Remove the voltage regulator relay (or brush assembly)
- From the side where the brush harness is attached, we drill out the contact so that the remaining parts come out. We try not to damage the spring, which is located inside the brush assembly.
- We take new brushes and check whether they move freely in their seats
- We insert the spring and insert the harness into the hole so that the required working length remains.
- We solder the contact point and cut off the remaining strands.
- We assemble everything in reverse order.
On some relay regulators it is possible to replace the generator brushes , but on some it is not possible to replace the part; you can replace the relay regulator assembly.
For example, on Bosch generators since about 2000, the relay regulator comes complete with brushes; replacement is not possible.
Where are the brushes of the VAZ 2107 generator
The generator brushes on the VAZ 2107 car are located in the rear half of the device (generator) and are held in place by one bolt.
The brush assembly itself is located next to the slip rings and is connected to the voltage regulator. The brushes are held in place by springs next to the rings. Knowing the circuit diagram of the generator, it is not difficult to find the brushes. To replace, you will need a standard set of tools:
- Several wrenches;
- A pair of screwdrivers;
- New brushes;
- Liquid WD-40 (in order not to strip the threads of the bolts).
Monitoring the performance of components
To perform this operation, it is necessary to remove the device from the vehicle and clean it of dirt. The verification procedure is as follows:
- We switch the multimeter to resistance measurement mode. We install the positive probe on terminal “30”, and the negative probe on ground. Readings close to zero indicate that the bridge or generator stator has failed.
- Positive diodes are checked by installing a positive probe on the terminal of one of the rectifier unit mounting bolts, and a negative probe on ground. Zero or close to zero instrument readings indicate that the diode bridge is faulty.
- To check the rotor, it is necessary to measure the resistance between the slip rings. In working condition it should be within a few ohms. If the resistance is near zero, then a short circuit has occurred in the winding.
The diode bridge and other faulty elements of the generator must be replaced with new ones from spare parts.
The generator is a miniature electrical station that supplies power to many components of the car: ignition, cooling, electrical wiring. Therefore, its failure will certainly entail other malfunctions. To prevent problems, you need to have this part diagnosed and repaired from time to time.
It will be useful for any motorist to know how to check the operation of a generator in a car, but first you need to understand the possible signs of a breakdown.
How to determine the malfunction?
If, while warming up the car, you begin to notice strange actions on the dashboard (the voltmeter readings change greatly with minimal engine load or the battery charging light lights up), then this can only mean one thing - the alternator brushes are worn out and need to be replaced.
How to determine a generator malfunction
In some cases, a good warm-up of the engine allows you to “extinguish” the indicator. At the same time, the car drives on the autobahn quite calmly and normally, without any signs of malfunction. But you shouldn’t be such an optimist, because your car may break down at the most inopportune time. Don't forget to check the condition of the alternator winding and belt, although the absence of sparks and smoke suggests that the brushes are the cause of the breakdown.
How to remove alternator brushes on a VAZ 2107 - step-by-step instructions
You can remove the generator brushes on a VAZ 2107 car as follows:
- The first thing you need to do is disconnect the negative terminal of the battery.
We check the protrusion of the brushes and their uniform wear. The working surface (length) of the brushes must be at least 12 mm; if less, then the VAZ 2107 generator brushes must be replaced. In addition, you should check the ease of movement of the metal structures in the holder; they should not rub or jam. If free movement does not occur, then it is recommended to also blow the generator rotor with compressed air.
Restoring an electric motor at a VAZ
Let's first look at how to replace the brushes of a VAZ 2107 generator. For work, we will be equipped with the following tools:
- set of spanners;
- screwdrivers - set;
- rubber hammer.
So, we begin work on changing the generator brushes on the VAZ 2107.
- We disconnect the terminals of the battery, and also unscrew the cables from the terminals of the electric motor, dismantle it by unscrewing the fasteners. Loosen the belt and remove the electric motor.
- Unscrew the pulley mount while holding the rotor with a tool.
- Disconnect the traction relay.
- After unscrewing the nuts, remove the front cover of the assembly unit using a rubber hammer.
- We also use a rubber hammer to push the rotor out.
- We detach the back cover from the stator.
- We remove the brush holder from the stator and reinstall the worn parts.
- The electric motor is assembled in the reverse order.
This process, if something is not clear, you can also visually study the video called “replacing VAZ 2107 brushes.” Replacing brushes in a VAZ 2106 generator is done in exactly the same way.
If we turn to VAZ models with front-wheel drive, then there are not so many differences in the procedure. For example, let’s first consider how to replace brushes on a VAZ 2110, for which we first take this:
- spanners;
- Screwdriver Set;
- hammer, block, or rubber-tipped mallet.
- Having loosened the belt, disconnected the wires and unscrewed the three bolts, we dismantle the electric motor.
- Having taken the unit out of the car, remove the pulley, holding the rotor with a screwdriver. In principle, the traction relay and rotor do not need to be dismantled; for the “seven” we did this for ease of work.
- Next, unclip the latches on the back of the electric motor, and then remove the plastic casing.
- We immediately see the voltage regulator assembly along with the brush holder.
- Unscrew the two screws and remove the brush holder.
- We renew worn parts.
- We do the assembly in reverse.
By the way, changing brushes on the VAZ 2112 is carried out one by one according to the same instructions.
Now let’s figure out how to replace an element on a VAZ 2109.
We will need to prepare:
- set of spanners;
- Phillips and slotted screwdrivers;
- rubber hammer.
Here's what we do (this is an option without removing the traction relay).
- After loosening the belt and removing the tensioner bar, we dismantle the entire unit.
- On the dismantled unit, unscrew the pulley.
- After unscrewing the nuts, remove the front cover of the electric motor.
- Push the rotor out with a rubber hammer.
- We detach the stator from the back of the electric motor.
- We unfasten the diode bridge, take out our failed graphite tips and install new ones.
- Assembly is done on the way back.
It must be said that the work of replacing brushes on a VAZ 2114 takes place in exactly the same sequence. The same applies to work on the VAZ 2115.
In general, all VAZ electric motors for generating current have almost the same design. We have only discussed different methods of how to get to the treasured details.
There is even a way without dismantling the unit. Let's say, to replace the alternator brushes on a Priora, without removing the alternator, you need to do this: take a screwdriver and wrenches and open the hood.
- Disconnect the battery.
- Unfasten the wires from the electric motor.
- Remove the field circuit terminal.
- Remove the rear plastic casing of the electric motor by unscrewing the screws.
- Unfasten the voltage regulator, and then remove it complete with the brush assembly.
- Now we can reinstall our parts.
- Then you need to assemble everything in reverse order.
So, changing the alternator brushes on a Priora can be done directly on the car by opening the hood.
At the same time, it is better to change the Lada Kalina by removing the electric motor from the car. After all, it is compact and is attached to the bracket with just two bolts. Taking the same tools as in the previous case, you need to reproduce the following steps.
- Disconnect the battery and electric motor wires.
- Loosen the belt and unscrew the two fasteners and remove the electric motor.
- Remove the rear casing.
- After unscrewing the screws, remove the brush holder with the regulator and reinstall the parts.
- Put everything back together.
These are the simple steps you need to perform to change the generator brushes on the Lada Kalina.
Repairing an electric motor at Renault
And now, in order to get a complete picture of such an important operation, let’s consider its production on a foreign car.
To replace an element on a Renault Megane 2 car, we will need:
We start by dismantling the electric motor.
- Having loosened the belt drive, unscrew the three fastenings of the unit.
- On the removed assembly unit, remove the connector and unscrew the cable.
- Remove the plastic cover.
- After unscrewing the two bolts, remove the relay with the brush holder.
- We update defective parts.
- We do the assembly, moving back point by point.
Basic problems
There are several main problems specific to a generator. If you study them, it will be quite possible to carry out repairs even on your own.
We will list them and also tell you about the necessary additional actions to eliminate them.
Your actions
To fix this problem, simply replace the old fuse with a new one. But be sure to determine the reason why the problem arose
The circuit supplying the devices has broken
In this situation, be sure to make sure that the neutral wire is connected securely to the other contacts
Having problems with the ignition switch
Check if the ignition switch board is working
The control lamp has failed
Just change the device to a new one if the lamp just burns out
You will have to change the brushes themselves, as well as their holders. Check the contacts for oxidation. They can be treated with WD40 or cleaned with gasoline
Voltage regulator does not work
This unit must be replaced. It is impossible to repair it
The alternator belt is damaged or faulty
Questions from readers related to replacing the brushes of the VAZ 2107 generator
And now I would like to answer the most common questions that readers send me related to replacing the VAZ 2107 generator brushes.
How much do brushes cost for a VAZ 2107 generator?
Alternator brushes for the VAZ 2107 are not expensive; in specialized Lada spare parts stores they can be purchased for only 50 rubles.
What brushes to buy for the VAZ 2107 injector generator
It is noteworthy, but motorists who are far from the design of the vehicle are sure that the brushes that are installed on generators of models from the same manufacturer correspond to each other, so it does not matter which models they are intended for. And this is absolutely correct, especially for the VAZ-2107, 2110, 2114 models. Therefore, do not worry if you managed to find brushes that are not for your model - they will definitely fit. Moreover, generator brushes for VAZ cars can be easily installed on BMW or Audi cars - they are a perfect fit. Therefore, if you need to purchase brushes for your VAZ, don’t worry, finding and replacing them will be very easy.
Useful tips
If, before replacing the brushes, you begin to notice noise when the generator is running, then this malfunction may indicate wear on the generator bearings.
Increased play may indicate premature bearing wear. In this case, you need to replace it.
Important! Premature bearing wear can occur for many reasons, not just due to insufficient lubrication.
Often, an overtightened alternator belt leads to bearing failure.
To prevent breakdowns of vehicle systems, it is advisable to regularly check components according to the manufacturer’s recommendations. Try to create a habit of periodically inspecting the engine compartment for noise. This will avoid serious damage and solve existing problems with minimal financial costs. It’s better to do everything right than to do it “as always.” Good luck on your journey!
Video - Replacing generator brushes on a VAZ-2107
Replacing brushes on VAZ-2107, 2110, 2114 - is there a difference?
Brushes are the part that most often requires replacement, and therefore all car manufacturers design generators in such a way that no difficulties arise in such a process. If you purchased the car not so long ago, there will be no problems with replacing brushes. Their abrasion is a long process, depending on the intensity and service life of the machine. When purchasing a vehicle with a fairly high mileage, it is better not to wait for these parts to become unusable, but to replace them immediately. Fortunately, brushes are not in short supply, and their price is quite reasonable.
Drivers, who rarely go into the details of the structure of their cars, think that in the case of cars from the same plant there is no difference in the process of replacing brushes on generators, for example, in the popular models VAZ-2107, 2110, 2114. This is a correct guess, moreover, such an operation is the same on almost all brands of cars with an internal combustion engine. There’s even a little secret: alternator brushes from VAZ are perfect for BMW and Audi units of some modifications! The processing, however, is somewhat rougher than that of the Germans, but they work! And this is the main point.
Source