Features of foglights
All “Seven” car owners know that the main light of this car reaches the average level, but for some drivers this is not enough. The situation is especially frightening when it is raining: at such moments the road surface is not visible at all, which is why thoughts arise about how to increase the illumination of the road.
The main purpose of fog lights is to provide acceptable illumination of the road during fog, which is achieved due to their close location to the road. Many car owners install an additional light next to the main one, which is incorrect. In order for the fog lights to perform their functions correctly, they need to be placed as close to the ground as possible, in our case in the front bumper, or even better under it. This is due to the physical properties of fog (closer to the ground there is practically no fog, and light travels much further there). If you install good quality fog lights, you can significantly improve the visibility from the car in bad weather.
In addition to the fact that fog lights increase the safety and comfort of driving a VAZ 2107 in bad weather, they also decorate the design of domestic Zhiguli cars. The useful equipment of the car allows for small but very pleasant tuning.
What to choose for installation
Before installing fog lights on a VAZ 2107, you need to purchase them. Which ones are better to choose? Today there is a wide variety of not only manufacturers, but also the shapes and designs of additional headlights.
It is recommended to install rectangular fog lights on the VAZ-2107, which allows them to organically fit into the angular design of the car. In addition, fogs can shine with both white and yellow light. Yellow light does not mean that these are weak bulbs. The fact is that yellow light copes much better than white with illuminating the road during fog and rain. No other shade illuminates the road surface in bad weather as well as yellow.
As for the company, you can choose from any models: Oswar, Osram, Hella, Wesem. Pay attention to the cost, since cheap foglights have low-quality optics, on which the quality of light depends. When purchasing fog lights, do not forget to purchase bulbs of the appropriate sockets and wattages.
What you need to install foglights yourself
In addition to the set of fog lights, you will also need the following list of materials:
- wires;
- relay;
- power button;
- female connectors;
- circuit breakers.
Below is a photo showing the entire list of materials required for installing fog lights.
You can purchase a special kit for installing fog lights for the VAZ 2107, which is called that. It is also important to take into account that according to GOST, additional road lighting must be installed on the car below the main headlights, but not lower than 25 cm from the road.
It is important to know! On the VAZ 2107, it is recommended to embed the headlights into the bumper, since this is where GOST is observed. You can install them below the bumper, but the distance to the road will be less than 25 cm.
Features of installing fog lights
You can start from either side: some install headlights right away, while others find it more convenient to install electrical wiring. First you need to remove the bumper, even if you mount the headlights on it. It is also necessary to remove the washer reservoir, which will greatly facilitate further actions and, of course, remove the negative terminal from the battery. Next you need to do the following:
- First you need to install the relay. It is recommended to place it under the hood on the right mudguard. For installation you will need one self-tapping screw.
- Under the car dashboard you need to find the Ш9 terminal block. You need to insert the pre-crimped end of the wire into the block, which is then routed to the right fog lamp.
- Another crimped wire is inserted into the block, the other end of which is connected to the relay, or rather to its contact “87”.
- The Ш9 block can be returned to its place. Now you need to find the block Ш11, which is yellow. Another pre-crimped wire must be inserted into contact number 8. The second end of this wire should be connected to the relay (pin 86). The block comes back.
- Now you should find the red block Ш6. In this block you need to find one free cell (it is numbered 8), and then insert another crimped wire into it. Connect the second end of the wire to relay contact number 30. Return the block to its place.
- The next block that is required is green in color or number Ш7. In the green block, in place number 1, you need to insert another crimped wire, the second end of which should be brought out to the left fog lamp.
- The remaining contact on the relay (85) must be screwed to the vehicle ground. The contact must be good, otherwise the system will not work.
- At the next stage, it is necessary to lay the wiring to the fog lights themselves. This is not difficult to do, but it is better to lay it in those places where the standard wire line runs.
- Now let's start installing the headlights. They can be embedded into the bumper, but this will require cutting out the plastic base. You can also attach them to the bottom of the bumper. The second option is not considered according to GOST, but this is what the majority does. In addition, the resulting light is no worse than if the fog lights were located in the bumper. To install fog lights, you need to mark their installation location, and then drill or cut holes.
- When all the main work on installing the wiring, relays and headlights has been done, you can begin connecting the foglights.
It's important not to forget! Before installing the headlights, you need to install light bulbs in them, if they are missing.
Connecting the fog light circuit
The most interesting point is how to connect the fog lights? For a person who is familiar with electrical engineering, this question will not be difficult, but is it really possible to connect the fog lights yourself? Of course it's real. The connection diagram for fog lights is presented below.
The diagram shows our blocks by color, on which the wires are displayed. Now we need to install fuses that will protect the fog lights from overloads. To do this, you need to open the cover of the mounting block, and then turn on the main power through fuse F1. It is recommended to replace the fuse installed in place F1 with a 15A one. In place of F3 and F4, install 7.5A fuses, which will power each headlight separately.
Now there's just a little bit left to do. It is necessary to install a button to which to draw the wires and connect them according to the diagram presented above.
If the diagram presented above is quite complex, then you can make the connection according to this diagram:
This circuit is very simple, and there is no need to bother with terminal blocks. Everything is simple and clear. One contact on the relay from the PTF, one contact on the relay is connected to the power supply for the side lights via the power button, and through another we supply power to the relay from the battery through a 10A fuse. After this, you can turn on the PTF and admire your work. It is worth noting that the connection according to the first scheme is the most correct. If one fuse fails, the second fog light will work. In any case, it’s up to you to decide how to do it, and all the necessary information is right in front of you.
Didn't find the information you are looking for? on our
forum
.
If you find an error, please select a piece of text and press Ctrl+Enter.
PTF VAZ 2101, 2106, 2107 CLASSICS
Detailed installation and connection of fog lights on VAZ classics
I bought components: 1 - relay. 2 — block for the relay assembly. 3 - fuse holder. 4 - PTF 2105 switch.
Installation
We pull the wiring where possible so that it is not visible and hide what is not needed. We pull the wires into the interior.
pull-pull... pulled out
everything is already connected... below you will see the diagram
Relay circuit
here she is - my dear!
By the way, I found 2 male terminals just on the PTF.
Installing the PTF on the bumper and checking I drilled the bumper with a No. 10 drill. Screwed it directly to it. I retreated 170 mm on each side and attached it.
well yes... they stick out
everything is installed!
turned on... checked
PTF DLAA LA-333T W and rear PTF VAZ 2106
In connection with the law on driving with the neighbor always on, it is reasonable to install less voracious lighting. During the day, driving is allowed with the PTFs turned on. I decided to install this device for myself.
Rear parking with a tinted rear window is problematic; this problem is partially solved by installing a rear PTF.
I bought Chinese fog lights DLAA LA-333T W. I bought the fog lights, and not the additional low beam ones, maybe it will help in rain, fog or snow. I took the Chinese ones because I spent 1.5k rubles on normal ones and they are kind of huge, they won’t fit under the bumper, and it wouldn’t be a shame to kill them on a curb or a snowdrift.
PTF.
According to GOST, front PTFs should be located at least 25 cm from the ground and no further than 40 cm from the edge of the vehicle. I got it right off the ground. I placed the mount exactly in the middle between the fang and the corner of the bumper. I screwed each PTF onto one bolt, and hung the negative wire on it. For wiring, I used a suitable drill to drill a hole in the front panel on the left under the L-shaped corrugation of the door.
Corrugation for wiring.
Front PTF.
It was logical to fasten the wires under the bumper to the wiring clamps, which are under the bolt, and screw them to the license plate on that side, but I didn’t have them at hand, I’ll install them later.
Extract from GOST on installation of front PTF
Front fog lamp
1). Installation Optional on vehicles, prohibited on trailers. 2). Number Two. 3). Installation diagram There are no special instructions. 4). Placement - Width - That point on the visible surface in the direction of the reference axis which is furthest from the median longitudinal plane of the vehicle shall be no more than 400 mm from the edge of the overall width of the vehicle. — In height - no less than 250 mm above the ground surface and no more than 800 mm above the ground surface for vehicles of category M_1. For vehicles of other categories, the maximum height is not limited. However, no point on the surface visible in the direction of the reference axis shall be higher than the highest point on the surface visible in the direction of the reference axis of the low beam headlamp. — Along the length — in front of the vehicle. This condition is considered to be satisfied if the emitted light does not interfere with the driver either directly or indirectly through reflection from rear-view mirrors and/or other reflective surfaces of the vehicle. 5). Geometric visibility Determined by vertical alpha and horizontal beta angles (2.13): alpha = 5° up and down, beta = 45° outward and beta = 10° inward. 6). Orientation The orientation of the front fog lamps should not change depending on the steering angle. Headlights must be directed forward, but not dazzle or create unnecessary inconvenience to drivers of oncoming vehicles and other road users. 7). Functional electrical circuit Must be capable of turning the front fog lamps on and off independently of the high beam, low beam or any combination thereof. The functional electrical circuit must be such that the high beam, low beam and front fog lamps can only be switched on if the lights referred to in 5.11 are also switched on. However, this requirement does not apply to high and low beam headlamps when the emission of light warning signals is achieved by periodically or alternately switching on the headlights for short periods of time. 8). Tell-tale The tell-tale is mandatory. Functions as an independent non-blinking warning signal. 9). Other requirements None.
I bought the rear PTF at a disassembly for a VAZ 2106, factory-made, screwed it into a regular place, there are already holes in the bumper for it. I put the wiring into a tube and used the cap from the 2106 choke button to attach it to the body.
Rear PTF wiring.
Rear PTF.
“Extract from GOST on installing rear PTF.”
Rear fog light
1). Installation Required. 2). Number One or two. 3). Installation diagram There are no special instructions. 4). Placement - Width - If there is only one rear fog lamp, it must be located on the left side of the vehicle's median longitudinal plane, and the origin may be located on the vehicle's median longitudinal plane. - Height - not less than 250 mm and not more than 1000 mm above ground level. For vehicles of category N_3G (all-terrain), the height can be increased to 1200 mm. - Length - behind the vehicle. 5). Geometric visibility Determined by the angles alpha and beta (see 2.13). Vertical angle alpha = 5° up and down. Horizontal angle beta = 25° right and left. 6). Direction Back. 7). The functional electrical circuit must be such that: - the rear fog lamp(s) can only be switched on if the high and low beam headlights or front fog lamps are switched on; - the rear fog light(s) could be turned on independently of any other light; — one of the following provisions applied: a). The rear fog light(s) may remain on until the side lights are turned off, after which the rear fog light(s) must remain on. turned off until it is turned on again; b). If the rear fog light switch is in the "on" position, then regardless of whether the lights mentioned in 6.11.7.1 are turned on, in cases where the ignition is turned off or the ignition key is removed and the driver's door is open, in addition to the mandatory warning light (6.11 .8) at least an audible warning signal must be given; — Except as provided in 6.11.7.1 and 6.11.7.3, the operation of the rear fog lamp(s) shall not be affected by the switching on or off of any other lamp. 8). Tell-tale The turn-on telltale is mandatory. It provides an independent and non-flashing warning light. 9). Other requirements In all cases, the distance between the rear fog lamp and each brake light must be at least 100 mm.
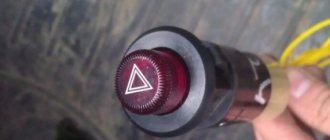
Now the first two buttons on the dashboard are used to control the lights. Both buttons have 3 positions. The first is dimensions and light. The second is front PTFs and front PTFs with rear ones. Wiring according to GOST, i.e. Do not turn on the devices in this way, so as not to comply with the rules. PTFs are turned on only when the dimensions are turned on, and the rear PTFs must be used in conjunction with the near/far or front PTFs. All OK.
Dashboard
Connection diagram for front and rear PTFs.
Repair of fog lights Wesem HOz for VAZ 2107
I was driving along, enjoying my fog lights, and suddenly I caught a pebble from under the wheel of the vehicle in front of me. I see a hole in the fog with a radius of 100500 mm.
It was decided to repair these, but even the manufacturer of these fog lights does not have such glasses separately. The size was approximately the same as a VAZ 2106, I took 2 glasses because... A long time ago both my fog lights burst, but that didn’t stop them from shining, and I didn’t worry about it. As a result, 2 VAZ 2106 high beam glasses and a tube of transparent sealant were purchased, at home I wrapped the fogs in a rag so that they would not see their death, finished off their glass with a hammer, cleaned the surface of the reflector, degreased the surface for applying the sealant, poured the sealant, laid the glass and centered it is accurate to within hundredths of a nanomillimeter by eye. The glass turned out to be clearly centered. I poured another layer of sealant on top. Everything dried out in a couple of days. I removed the excess sealant, checked the fog lights - they shine, almost as before.
The operation was very successful. Now I don’t have to be afraid of breaking them on curbs. The repair budget was 40 rubles for a pair of pieces of glass and 60 for sealant = 100 rubles
Installation of PTF on VAZ 2107
I've wanted fog lights for a long time. Or rather, additional light for a more comfortable ride in autumn and winter. The standard Zhiguli headlights cannot be called particularly powerful, but I live in a small provincial town, where the roads are sane for a couple of months after the next repair, only the central streets are illuminated, and starting in October everything becomes black and wet. I started digging through the forums. Why the “correct” installation? Because I like everything that is done to have a “factory” appearance and an acceptable level of quality. This is especially important when working with wiring. You know the statistics, right? So that at a crucial moment you don’t have to remember how to pull the pin off a fire extinguisher, you need to do everything according to science. And very consistently. First I bought everything I needed:
Young fogman set
-Wesem HM3 headlights - 246 UAH. Polish products of good quality with real corrugated glass, strong, airtight, the right shape, and three times cheaper than Hella. True, they come without light bulbs. - H3 lamps Osram AllSeason - 63 UAH (with shipping). I bought them almost new from a guy from Kirov for half the price than in the store. He didn’t like the yellowish light—that’s exactly what I needed. All-weather lamps, just right for wet roads, fog, rain. - any 4-pin relay, for example, for turning on the low/high beam (with an eyelet for fastening) - 14 UAH. -2-position button 2105/2107 — 15 UAH. - pads for relays and keys, just for ease of installation - 3 and 5 UAH. respectively. - fuses 7.5A - 2 pcs., 15A - 1 pc. Price 1 UAH. a piece. - female terminals, 15 pieces, and 2-3 clamp terminals for ground - about 10 UAH. - assorted wires). There’s no need to hustle here, the currents are considerable, let them be at least 1.5 sq.m. in cross-section, and even 2.5 sq.m. for the relay power circuit. I took 5 meters of all kinds at once, UAH. for 40, and of course I still have most of it, so I don’t know about the money. -fasteners: M4 bolts, nuts for them, washers - another 5-6 UAH. The total revision budget is less than 400 UAH. In Russian rubles it will be about 1500. I started with the mounting block.
For convenience, remove the washer reservoir and place it on the battery. Oh, by the way, don’t forget to remove the ground terminal... We fix the relay where it’s convenient, I have this place on the right mudguard:
Let's estimate the ratio
We take out the white block Ш9. Into empty pin 1 we insert the pre-crimped end of the wire, which will go to the RIGHT fog lamp.
Ш9/1
In the same block we insert a thicker wire into contact 3 (nearby).
Ш9/3
We connect the second end of the thick wire to contact 87 of the relay. Voltage will appear on this wire when the relay winding is closed. We return the Ш9 block to its place. We take out the yellow block Ш11. It's almost empty. We need pin 8. Insert the wire. In the photo it is already inserted.
Ш11/8
We connect the second end of the wire to contact 86 of the relay. This will be the control line. We return the block Ш11 to its place. We take out the red block Ш6. We plug another thick wire into the place for contact 8, and the other end - to terminal 30 of the relay.
Ш6/8
Please note that in the photo I am holding the terminal at pin 1 - the 8th one we need is on the opposite end of the block. This wire, which supplies both PTFs, will be energized all the time when the ignition is on. We return the red block to its rightful place. Finally, we pull out the green block Ш7 and connect 1 wire from the LEFT fog lamp to the contact, as in the photo:
Ш7/1
We put the block back into the connector. Now open the cover of the mounting block itself. We look at it with a smart look :). This circuit uses 3 fuses: the general power supply to the PTF will go through F1. Its rating is 10A, but since other devices are already hanging on it, and we are going to add more load to it, it is advisable to replace it with 15 A. Fuses F3 and F4 are initially backup. Now power will go through them to each headlight individually. There they are set at 10A, well, I replaced them with 7.5A, just in case, for one 55 W light bulb this is enough. Here is a photo of the mounting block after the changes were made:
Mounting block with new fuses
We screw the remaining contact of relay 85 to ground. All other wires from the relay are already plugged into the block.
Connected relay on the mudguard
Now we pull the free ends of the wires to each headlight. How to lay them is everyone's business. I dragged along the existing harnesses, carefully grabbing them with computer ties.
Wire going to the right PTF
There are technological holes in the radiator area. After thinking, I enclosed the last piece of wire in a corrugated piece, since there would be hot metal nearby. Just in case. The ends of the wires are pulled into the holes in the apron by 25 cm, and for now we leave them hanging like that.
Corrugations with wires
Who said: “Why are there 2 headlights and 4 wires?”))) Don’t forget about MASS! For those who don’t mind the wires, you can look for the mass for the fog lights on the bumper itself, but I decided not to risk it and spent an extra meter, but screwed the mass onto the mudguards, there are convenient bolts there just for this purpose.
Installing headlights
There is no consensus here on where to put them, because... There are no regular places for them in the sevens. Most put them under the bumper, some on it, but I decided to embed them into the bumper itself. This is an extremely dreary matter, I’ll say right away, but in principle, it’s justified. Firstly, it looks beautiful (if the PTFs are of the right shape). Secondly, in this case it is difficult to break them and simply... steal them. In general, it depends on the taste and color. For those who want to kill the day, but do it beautifully, read below. We remove the bumper, trying not to knock off our fingers, as I did technically. Carefully, with a ruler, we define the boundaries of the glass, leaving a millimeter in reserve. There is no need to leave much, since we will then finish it with a file, and the bumper is sawed very slowly, even though it is plastic. We drill along the contour with a thin drill and cut out rectangles with a hacksaw blade or jigsaw.
Cutting out holes...
Next, as mentioned above, we roughly polish the edges with a file and bring them to the exact size. You'll have to sit here for a couple of hours, you won't get anywhere.
...and finish the edges with a file
We try it on, look, if it doesn’t fit, we adjust it again
The manufacturer from fraternal Poland provided brackets for my headlights, for which I thank him very much. Under them I drill 2 holes into which I insert M4 bolts with countersunk heads. This case will be closed from above with a chrome saber on the bumper. You can mount it any way you like, you just need to remember that the headlight should be adjustable, at least within small limits (a minus of this option), and it is desirable that you do not have to remove the bumper each time for this. We return the bumper to the car.
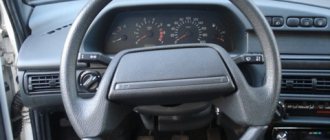
Connecting a button in the cabin
I placed the button in an unoccupied place in the beard. I had a suitable button (from an MTZ tractor), however, it had melted. I bought one for the heated rear window and replaced the button arm itself with the pictogram. The two-position button for heating or turning on the PTF with 2105 is perfect for our evil plans. If the switch has a light bulb, like mine, you need to decide whether to connect it and how best to do it. AvtoVAZ’s logic regarding the indication on these buttons is, of course, strange. On some, the indicator lights up when the dimensions are turned on (like, here I am, press me), on others it signals that the consumer is turned on, on others there is no light at all, although it would not hurt... Well, since I don’t yet have a separate indicator light for turning on the PTF, I decided to do the second option, but we’ll still consider both.
From left to right: exterior lighting block, fog light block, ZPTF block
1.Connecting the key, “indication” mode (like the non-locking key for the rear PTF lights): -contact U of the key is connected to contact T (black wire) on the rear PTF button - this will be the ground of the light bulb. -contact H of the block is connected with a jumper to contact L - “plus” of the light bulb. - contact V is connected to contact V of the three-position lighting key (yellow wire with a red stripe) - here “+” will appear when the side lights are turned on, as prescribed by GOST (PTF can only be used with the light of the main headlights) - from contact L we lay the control wire behind instrument panel to the blue block Ш4, pin 5. To do this, you will need to unscrew the beard, the glove compartment and even the controller.
Ш4/5
We check, put everything back together, and enjoy. 2.Connecting the key, “backlight” mode (like the heated rear window key) - contact U of the key is connected to contact T (black wire) on the rear PTF button - ground of the light bulb. -contact H is connected to contact V of the three-position lighting key (yellow wire with a red stripe) and from the same contact H we connect a jumper to contact V of our new button - when the dimensions are turned on, the indicator will light up and current will appear in the “working” circuit (“ready”) . -from contact L we lay the control wire to the blue block Ш4, contact 5.
Scheme
Everyone is exhausted, this is what it looks like:
Keys on the beard
Of course, there is plenty of fuss, but everything will look neat, without unnecessary “snot” and “collective farm”. Relays and fuses, in case of replacement, are conveniently located. Well, and a demo photo:
Result
I remember the first time I sat in the seven, I really liked that the buttons were all on the beard at the bottom - convenient! Even in the dark, while walking, I lowered my hand and immediately felt it. The icon on my button appears to mean "side lights" rather than "fog lights," and that's exactly what it ended up being. Due to the design features of the bumper and the PTFs themselves, they shine with a narrow and very wide beam, while having an upper limit and not blinding oncoming drivers. If, with one headlight on, you drive as if along a narrow corridor of light (there is darkness on the sides), then when you turn on the new headlights, the situation changes greatly: the full width of the road becomes visible, including the side of the road and the asphalt “under the nose” of the car. PTFs alone are, in principle, not enough for driving on dark streets, but they, apparently, are not designed for such use. The packaging indicates “additional headlights”, that is, the range of their use is wider than just in fog (which, by the way, does not happen very often.).
https://www.drive2.ru/l/288230376152467647/, https://www.drive2.ru/l/5749877/, https://www.drive2.ru/l/4899916394579202269/, https://www .drive2.ru/l/288230376152394540/#post
next article:
Side lights VAZ 2101, 2106, 2107 CLASSIC
Contents of the article: American dimensions in the VAZ 2107 Dimensions in the turn signals of the VAZ 2104 Transfer of side lights
Rating 5.00 [2 vote(s)]
What it is?
Already from the name it becomes clear that these headlights were invented specifically so that motorists could clearly see the road in fog or, for example, snowfall. The fact is that they are located very close to the road surface, where the fog is not very thick. Thus, they can easily penetrate it with their light and improve visibility around. They are not afraid of the most unexpected vagaries of nature, so those who often drive a car simply need them.
It is worth noting that such headlights will not only improve your car, but will also make it look different from other VAZ 2107, since fog lights were not intended by the manufacturer as standard elements on this car. Such tuning greatly decorates the car and makes it noticeable.
Connecting fog lights VAZ 2107
1. In principle, there is nothing special to describe, the circuit is quite standard, the only thing is that in my car 12V is supplied to the button only when the dimensions are turned on.
2. I have a torpedo from the “five” and a beard from a VAZ 2107, so there is more than free space. If you want, you can come up with something of your own.
So the exciting moment is the performance check. If you, like me, have everything working, you can rejoice and safely assemble the instrument. You may need to adjust the headlights upon completion.
Expert opinion
It-Technology, Electrical power and electronics specialist
Ask questions to the “Specialist for modernization of energy generation systems”
In addition, to complete this work you will need: I marked with an orange line in the photographs the distance from the middle of the fog lamp to the opening for the number, it is about 15 cm. Ask, I’m in touch!
Requirements of regulatory documents and legislation
Since there are no standard places for installing fog lights on the VAZ 2107, you need to select them (places). In order not to have problems with traffic police officers in the future and to pass a technical inspection, when choosing, we will be guided by GOST R41.48-2004, paragraph 6.3. There is no point in citing it verbatim, but the general gist is this:
- The distance from the side of the car to the edge of the fog lamp is no more than 400 mm.
- The distance between the headlights from their inner edges is at least 600 mm. Can be reduced to 400 mm for vehicle overall width less than 1300 mm.
- The height above the ground surface is not less than 250 mm and not more than 1500 mm.
- PTFs should not be located above the headlights.
General requirements for installing PTF according to GOST R41.48-2004
Video
The wiring diagram for installing fog lights is shown in a video filmed for the “Car Lover” channel.
Bright headlights are the motorist's main assistants in the fight against bad weather and evening twilight. They should illuminate the road well so that you can be confident while driving even in the thickest fog. But if the light provided by standard headlights is not enough for you, we recommend installing fog lights on the VAZ 2107 for better visibility. You can do this yourself without resorting to the help of specialists. We will describe in detail below how to install correctly and how to choose “lanterns”.
Why are fog lights needed on the VAZ 2107?
The headlights on your car are designed for clear weather, so during heavy rain or fog their effectiveness is greatly reduced. The light beam is reflected from water droplets in the air and forms a “backlight”, which makes it seem as if there is a “white veil” in front of the car. In this situation, the light of the fog lights helps, evenly illuminating the road and side of the road in front of the car. Fog lights direct the luminous flux lower than standard headlights. The layer of fog near the ground is less dense, so there is a kind of illumination under the fog that does not create the effect of a “white veil”.
In addition, fog lights provide a wider beam of light, which helps to maneuver at night in yards, on winding roads and allows you to see what is happening behind the roadside or curb.
To ensure lighting efficiency, the upper light limit of the fog lights is extremely sharp. The vertical dispersion angle does not exceed 5 degrees, but the horizontal beam angle is 60 degrees. The reflector is designed so that the maximum light intensity is close to the upper light limit of the beam.
Correct adjustment of the fog lights is extremely important. Small deviations lead to a narrowing of the line of sight and blinding drivers of oncoming vehicles. Adjustment of fog lights is carried out on a special stand, similar to low beam headlights. The luminous flux is set lower than that of standard car headlights.
Fog lights are automotive lighting devices that have their own waterproof housing. They are mounted in special holes in the car bumper or suspended from it. Built-in fog lights are advantageous in an aerodynamic and stylistic sense, but the design of a VAZ car suggests the possibility of installing only mounted fog lights.
The yellow color of some fog lamps does not play any role in the effectiveness of visibility in foggy conditions, which depends only on the focal length of the reflector and the power of the lamp.
Installing fog lights on a VAZ 2107 allows you not only to improve visibility in difficult weather conditions, but also to tune your “classic”, giving it individual features. Additional low-set headlights look very good on the car, especially at night. A car with fog lights looks more attractive. Of course, this is a matter of taste.
So, how can you independently install fog lights on a VAZ 2107 and connect them to the vehicle’s on-board network?
Tools and materials
To install and connect the fog lights you will need:
- Drill.
- Female connectors.
- Standard relay (like on headlights or signal).
- Switch.
- Some skills and free time.
- Self-tapping screws for metal.
- "Fog lights"
Installation procedure for fog lights
- Remove the bumper (this will make further work easier).
- Check the functionality of the fog lights by dialing or connecting them to the car battery.
- Using a drill, drill holes to which the VAZ 2107 fog lights will be attached. The distance between the center of the fog light to the opening for the license plate in the bumper should be about 15 cm. In this case, the headlights will be spaced far enough apart and will not be interfered with by body parts.
- Lay the electrical wiring wires from the fog lights to the installation location of the electromagnetic control relay. The line of wires runs under the mudguard near the battery, through the pipe and the “fang” of the bumper to the mounting location of the right fog light. This arrangement is optimal when the control relay is located on the right under the hood. In other cases, other wire paths may be used.
- Drill holes along the path of the wiring harness connecting the left and right fog lights.
- Secure the wiring harness using copper wire or special plastic clamps.
- Mount the fog lamp mounts on the bumper.
- Install the bumper on the car.
- Disassemble the fog lights, secure the rear part to the mount and insert the power wires into it.
- Strip the ends of the wires and secure the connectors to them using the crimp method.
- Assemble the fog lights in the prescribed manner.
Price list
- Special offers
- KAMAZ spare parts
- Spare parts KAMAZ-5490
- Spare parts MAZ, YaMZ
- ZIL spare parts
- Spare parts ZMZ, for GAZ vehicles
- Spare parts for Volzhanki cars
- Spare parts for Gazelists
- Spare parts for trucks Lawns
- Spare parts for GAZ-71 caterpillar
- Spare parts UAZ, UMZ
- Spare parts KrAZ, BelAZ
- Spare parts URAL
- Spare parts BUSES
- AMAZ spare parts
- IKARUS spare parts
- KAVZ spare parts
- LAZ spare parts
- LIAZ spare parts
- NEFAZ spare parts
- PAZ spare parts
- Other buses
- Tractors, computer equipment, attachments
- Tractors and walk-behind tractors
- Municipal vehicles
- Attachments and trailed equipment
- Spare parts for TRACTORS and SPECIAL EQUIPMENT
- JCB - spare parts for special equipment
- Truck crane (KS-3577, KS-4517, etc.)
- AMZ (A-01, A-41, D-440, D-442, D-447, D-461, D-467)
- Amkodor (TO-18, TO-28, TO-30, etc.)
- ATZ (T-4A, TT-4M)
- VgTZ (DT-75)
- VMTZ (D-120, D-144, D-130, D-145T)
- VTZ (T-25, T30A-80, VTZ-2048)
- LTZ (T-40, LTZ-55, LTZ-60)
- MKSM, UNC, DETVAN
- MTZ - spare parts for tractors
- OTZ (TDT-55)
- PTZ (K-700/701/702/703/704)
- KhTZ (T-150, MT-LB)
- ChTZ (T-130, T-170, B-10, B-12, B-170, T-10M, DET-250)
- YuMZ - spare parts for tractors
- Other special equipment and tractors
- RVD - high pressure hoses and sleeves
- MMZ spare parts and engines
- Spare parts for MMZ engines
- MMZ engines: D-242, D-243, D-245, D-246, D-260
- VAZ spare parts
- Spare parts OKA VAZ 1111
- Spare parts VAZ classic 2101 - 2107
- Spare parts VAZ front wheel drive
- Spare parts VAZ Granta and Largus
- NIVA spare parts and all-wheel drive
- Spare parts Moskvich, IZH
- Spare parts for Korean trucks
- Spare parts for Starex, H-1
- Spare parts for Porter, H-100
- Spare parts for HD65,72,78, County
- Spare parts for HD120, AeroTown
- Spare parts for HD160,170, . ,700,1000
- Spare parts for HYUNDAI, KIA buses
- Spare parts for Korean passenger cars
- Spare parts DAEWOO, CHEVROLET
- FOREIGN CAR spare parts more
- BMW spare parts
- DAF spare parts
- FIAT spare parts
- FORD spare parts
- Spare parts HONDA, ACURA
- IVECO spare parts
- MAN spare parts
- MAZDA parts
- MERCEDES spare parts
- MITSUBISHI spare parts
- Spare parts NISSAN, INFINITI
- OPEL spare parts
- Spare parts PEUGEOT, CITROEN
- RENAULT spare parts
- SCANIA spare parts
- SHAANXI spare parts
- SSANGYONG spare parts
- SUZUKI parts
- Spare parts TOYOTA, LEXUS
- VAG spare parts: VW, AUDI, SEAT, SKODA
- VOLVO spare parts
- Other foreign cars
- Trailers and semi-trailers
- SEMI TRAILERS foreign
- Domestic SEMI-TRAILERS
- TRACTOR TRAILERS
- Passenger TRAILERS
- Towbars and spare parts for passenger trailers
- Car audio and navigation
- Antennas
- DVRs
- Automotive video equipment
- Memory cards, flash drives
- Speakers, subwoofers, acoustics
- Accessories
- Radio tape recorders
- FM modulators, MP3 players
- Navigation, parking systems
- Radar detectors, antiradars
- Radio stations and accessories for them
- Sound amplifiers
- Auto chemical goods, filters
- Car cosmetics, paints, care products
- Auto chemicals, liquids, additives, antifreeze
- Household chemicals, gas
- Oil
- Lubricants, liquid wrenches
- Other means and fuels and lubricants
- Filters and elements
- Rechargeable batteries
- Batteries for motorcycles (up to 30 A/h)
- Batteries for cars (up to 125 A/h)
- Batteries for trucks (from 125 A/h)
- Accessories and tuning
- AvtoLady - products for women
- Breathalyzers
- First aid kits, fire extinguishers, emergency signs
- Car racks
- Gas equipment
- Car mirrors and elements for them
- Air ionizers
- Carpets, trunk mats
- Steering wheels, covers and gear knobs
- Compressors, pumps, hoses
- Seats, cushions, belt adapters
- Literature, catalogs
- Organizers, luggage securing
- Alarms, blockers, sirens
- External tuning
- Tuning internal
- Car refrigerators
- Anti-skid chains
- Seat covers, headrests
- Windshield wiper blades and strips
- Velo, moto, quad bikes
Which ones to choose?
As we have already said, fog lights are not only an important part of the car, but also its decoration. Thus, their choice must be approached responsibly.
First decide on the design and color of the light. You can choose round or square, yellow light or white. A wide range is offered by such companies as Osvar, Wesem, Hella, Catz and Osram.
The pricing policies of these brands are different, but you should assume that the more expensive the headlights, the better they are. Please note that the larger its surface, the brighter it will shine. That is why it is best to choose the largest size models from all those presented in the store.
In addition, we advise you to immediately purchase bulbs for them of the required category (H1, H2, H3, H7 or others) with a power of no more than 55 watts, so as not to blind drivers of oncoming cars and not to overheat the relay.
How to connect fog lights to a VAZ 2107, installation features, which ones are better to choose, connection diagram
The domestic VAZ 2107 car is not equipped from the factory with fog lights, which serve not only to illuminate the road during fog and to identify your vehicle. Many motorists seek to install additional headlights in order to increase the efficiency of road lighting in addition to the main light. If fog lights are not installed on the VAZ 2107 from the factory, then you can install them yourself. This is not difficult to do, and even an inexperienced driver can cope with such a task. In this material we will look at how to install fog lights on a VAZ 2107, which PTFs are best to choose, and how to connect them correctly.
Preparing for work
Once you have purchased the headlights you like, you can begin installation. Materials we will need:
- Female connector.
- Wiring.
- Four-stroke standard relay.
- On/off button.
If possible, it is best to purchase a special kit for connecting fog lights on a VAZ 2107.
To make the work more convenient, we recommend removing the bumper from the car before starting the process, since the fog lights should be installed under it. Please note that according to GOST, the lamps must be located under the low beam headlights and no lower than 25 cm from the road surface.
Location and installation of fog lights
We've sorted out the light bulbs, now we need to decide where to install the fog lights. Here we have two options:
- Install under the bumper.
- Hit the bumper.
The first option is quite simple and will not take much time, but, alas, it does not shine with aesthetics. In addition, such fog lights are quite easy to remove, for example, if parking is unsuccessful. Yes, and GOST (see section “Requirements of regulatory documents and legislation”) in height from the road surface may not be maintained.
Installation of fog lights on a VAZ 2107 under the bumper
Embedding fog lights into the bumper is, of course, more difficult, but it will look much more aesthetically pleasing and is safer for the headlights themselves. Therefore, let’s do the insertion, especially since the middle part of the bumper in the VAZ 2107 is plastic.
Fog lights embedded in the bumper of a VAZ 2107
First, let's select and buy fog lights. On sale you can find lanterns of various shapes and sizes, but in order, as they say, to fit into the overall design of the VAZ 2107, we will choose rectangular ones. For example, fog lights made in Poland. A special charm of this model is the convenient mounting bracket, which allows you to adjust the angle of the lights, albeit within small limits.
Polish-made PTFs will suit us in design, fastenings and price
Healthy! In principle, the choice of headlights is a purely individual matter. If you wish, using the given method, you can embed anything into the bumper of a VAZ 2107.
We remove the bumper, put the headlights from the inside in their future places and mark the windows. Their size should ideally match the size of the PTF glass, but we will leave a small margin: we will make it smaller, then we will finish it with a file.
Window markings for fog lights of the VAZ 2107 bumper
We drill the future windows around the perimeter with a small diameter drill and cut them out using a jigsaw or a regular hacksaw blade.
Cutting out a window for a fog light
We bring beauty with a file, constantly trying on the headlight. It should fit freely, but there should be no noticeable gaps that spoil the appearance.
Finishing the window under the PTF with a file
All that remains is to attach the fog lights to the bumper. This can be done in any way. The author of the photo used a standard bracket, drilling two holes for countersunk bolts. The gap between the bracket and the bumper can be eliminated by installing a spacer of a suitable size or even regular washers. The bolt caps on the outside will be covered with a chrome plate, so the appearance will not be spoiled.
Light and sound devices of the car and their location
We should start with the basics, or rather with what types of headlights and lanterns modern cars are equipped with.
Low beam headlights - designed to illuminate the road and surrounding area in a relatively small area.
High beam headlights are powerful lighting devices that illuminate the roadway over a fairly large area. Due to its high brightness, high beams can blind oncoming drivers.
Front fog lights - installed lower than conventional headlights, create a wide beam of light that well illuminates the road and the surrounding area in conditions of fog, snowfall and rain.
Daytime running lights are a separate type of headlights that are turned on during the day, regardless of weather or visibility, and are designed to increase the visibility of vehicles. Most models turn on immediately when the engine starts.
Tail lights - designed to identify the vehicle at night or in poor visibility conditions. The color of the lamps is red.
Brake lights are red lights that come on when a vehicle slows down. They burn much brighter than the side lights. Some cars are additionally equipped with a central brake light.
Rear fog lights - indicate the vehicle in fog, rain or snowstorm conditions. Not to be confused with brake lights.
Reversing lights are white and are designed to inform pedestrians and other motorists that the vehicle will be moving (or is already moving) in reverse.
Rear reflectors - used for the same purpose as side lights, they reflect the light falling on them from the headlights of passing cars. May also be known as retroreflectors.
License plate lighting – several white bulbs designed to illuminate the rear license plate of a vehicle.
Turn signals, or “turn signals,” are amber lights that are used to inform you that the vehicle is turning or otherwise maneuvering. Installed in the corners and on the sides of the car.
Wiring diagram for fog light in the rear lights of VAZ 2107
On a VAZ 2107 car, the fog light lamps are located in the rear lights (one in each light).
Connection diagram for fog light in the rear lights of a VAZ 2107 car
Description of connection diagram
The fog lamps in the rear lights of the VAZ 2107 are located next to the side light lamp (in one socket) and are turned on in cloudy and foggy weather in addition to the dimensions to ensure greater brightness of the rear lights in poor visibility conditions.
The voltage in the electrical circuit for turning on the fog lamps in the rear lights is supplied from terminal “30” of the generator.
They are turned on by the fog light switch key at the bottom of the instrument panel, after turning the key in the ignition switch and pressing the three-position exterior lighting switch key to the third position (low beam headlights are on).
The electrical elements are as follows: terminal "30" of the generator - block X10 (pin 1) of the mounting block - block X2 (1) of the mounting block - contacts "30" and INT of the ignition switch - terminals "H" and "V" of the external lighting switch - contacts " U" and "D" of the external lighting switch - fuse - block X3 (3) and X13 (1) of the mounting block - orange-black wire through the entire interior to the taillight lamps.
The “ground” of the fog light lamps is common to the rear light (the black wire from the block is attached with a lug to the body near each light).
In addition, until 1988, a warning lamp in the instrument panel (15.3708) came on when the fog light was turned on. An orange-black wire goes to it from block X3 (3) of the mounting block to the middle chip in the instrument cluster. After 1988, the activation of the fog light is indicated only by the illumination of the fog light switch key in the “beard” of the front panel.
Notes and additions
— In addition to the fog light lamps in the rear lights on a VAZ 2107 car, it is possible to connect fog lights (FTL) in the front of the car (for example, installed on the front bumper). Details of such an installation are in the article (Connection diagram for front PTFs on a VAZ 2107).
— Fog light bulbs in the rear lights of the VAZ 2107 — A12-21-3 (P21W).
— Until 1988, the electrical circuit for turning on the fog light was protected by fuse No. 17 (8A) in the mounting block; after 1988, it was moved to a wire break next to the exterior lighting switch in the “beard” of the front panel of the car.
Connecting fogs
All necessary actions should be carried out strictly according to this scheme.
At the end, we install the power button on the dashboard inside the car, and also check how everything works.
As you can now see, the installation did not take much time, and the result exceeded all expectations.
| See all advertisements in the archive |
Also check out
It is likely that the headlights will need to be adjusted upon completion of the work.
In the following photographs you can see how to connect fog lights on a VAZ 2107.