11.08.2021
You can often see cars on the street equipped with two exhaust pipes at once, often of an unusual type and size. We are talking not only about powerful cars with rear-wheel drive, where this is justified, but also about ordinary VAZs and other cars in the middle segment. Let's figure out what the point is in making a double exhaust, what are the advantages of this, and whether it is possible to carry out this improvement yourself.
When to install a split exhaust pipe
The main reason for tuning the exhaust system is the desire to increase engine power, while maintaining a balance between performance, wear and fuel consumption. This cannot be done by changing only one part or assembly of the car. More serious intervention needs to be considered. The bifurcated exhaust is an integral part of cars with V-twin engines, increasing their throughput.
However, similar systems are often used in vehicles with standard four-cylinder engines. Installation occurs in exactly the same way using row wiring. And in order not to install two catalysts, a system is used that includes a flame arrester (the catalyst is removed at the physical and software levels). When reworking the exhaust system, first of all, the type of engine and its design features are taken into account, and only then additional parameters, such as pipe bending angles or resonator dimensions.
Why do they split the exhaust?
A properly designed dual exhaust pipe will provide the owner with the following benefits:
- Increased engine power and torque. The fact is that the level of resistance at the exhaust gas outlet decreases. The exhaust system can be configured as direct-flow or non-direct-flow.
- Change in sound of exhaust gases. At the same time, you can adjust the sound as you wish - make it louder, quieter, softer, lower, or make it “growl”. It all depends on the selected system components and how sound will be absorbed in it.
- Improved appearance. From the side of the bumper, the car will look aesthetically pleasing due to its symmetry. The look is reminiscent of a racing car and can transform even an old Russian model or foreign car for the better. The owner can choose the appearance of the pipes in his own way.
To summarize, a dual exhaust pipe, provided the right design solutions are used, can improve an ordinary car both visually and in performance. With all this, the alteration is considered one of the simplest; the process does not require intervention in other components and mechanisms of the car.
Workflow Stages
Types of Dual Homemade Silencers
Let's consider the simplest and low-budget method of installing a dual exhaust on a Lada Priora with the installation of outlets from the muffler pipe under the rear beam of the car. Note that here you can choose one of two options:
Distribution of pipes of different lengths with welding of branches to the main muffler.
This is interesting: Rating of the most stolen cars in Moscow for 2017-2018
Welding two pipes with similar lengths, angles and number of turns to the main muffler pipe.
Preparing for work: tools and materials
To carry out a full cycle of work, we will need to prepare a set of simple tools and a number of inexpensive materials:
- wrench (socket, open-end, socket) to “13”;
- electric drill with 1.5 mm drill;
- Phillips screwdriver;
- self-tapping screw 4 mm - 2 pcs.;
- standard exhaust system fasteners (clamp + ring);
- muffler cushion - 2 pcs.;
- fastening bracket (holder - bracket).
Clamp with O-ring, homemade bracket, muffler cushion
At the preparatory stage of work, you need to take the necessary measurements and draw up a simple diagram of the design of the double exhaust. There is simply no universal drawing that would be suitable for each individual project. Professional craftsmen advise taking all measurements at the place of work, transferring the data onto paper in a form convenient for you.
Note that the exhaust system of the Lada Priora sedan and station wagon differs from the same equipment installed on hatchback cars in the length of the main muffler pipe. Installing a dual exhaust on a car with such a body for the first two modifications will result in the system pipes protruding from under the bumper by 150–160 mm.
How to make it yourself
Let's look at the process of installing a bifurcated muffler using the example of a finished sample - all the steps we performed are suitable for installing any structure of this type. The only nuance that can affect the progress of work will be the possible deviation of the pipes of the independently manufactured system from the fastening elements of the original muffler. However, this is not a problem, since all brackets can be easily made and mounted with your own hands.
We install the car on a lift or inspection hole, prepare all the necessary tools, be patient and get to work:
- We dismantle the original main muffler by disconnecting the clamp at the point of its attachment to the resonator (additional muffler).
- We will hang the right part of the new structure on its seat, installing it on the existing cushions (replacing them in case of critical wear).
We do not attach the left side of the muffler yet, but only connect the common terminal of the dual exhaust to the resonator, slightly “baiting” the clamp and the O-ring. Installation of a part of the structure on the seat of the original muffler - Let's attach the left bend to the side member on the bottom of the car, mark the attachment point of the bracket-bracket.
Left part of the structure, mounting bracket and muffler cushion - Using a drill, drill two holes and securely fasten the bracket with self-tapping screws.
Preparing holes for installing the bracket-holder - We hang the muffler outlet on the bracket using a fastening rod, after inserting the cushion into the holder bracket.
Installing an additional muffler outlet - In our case, the elements of the dual exhaust need to be connected to each other using a clamp with O-rings (do not tighten too much).
We exclude this stage of work when installing a solid structure. Connecting the branches to each other using a clamp - It remains to check the angle of the dual exhaust outlets relative to the ground. After making sure that they are at the same level, tightly tighten the clamps at the junction of the inlet pipe with the resonator and at the junction of the two pipes (if such an element is in the design).
This is interesting: Checking ventilation and air conditioning systems
Types of bifurcated exhausts
The specific features of the device depend on what type it belongs to. The following main categories can be distinguished:
- H-shape. Two autonomous pipelines, which are connected by a jumper of the same cross-section and come from the exhaust manifolds. This option provides a sound “like a Harley”, which is why it is popular. The jumper distributes pressure waves well in both circuits.
- Y-shape. At first the pipelines are separated, but in the center they are united. Such a system will operate quite quietly, but the engine power will also be reduced.
- X-shape. The exhaust gas flows intersect in the center. At the same time, they go very quickly, providing an even sound and increased power of the machine.
- Double. Complete absence of intersections of flows from the right and left cylinders. The option is optimal for V-shaped engines, as it allows you to freely position other elements of the car.
We must not forget that the purpose of the exhaust system is primarily to reduce the sound level, and not to increase it. Therefore, a car with a 4-cylinder inline engine will never sound like a V-8 does. However, you can adjust the sound timbre in one direction or another.
How to choose?
It’s worth figuring out how to choose the right double exhaust for a VAZ 2114; to do this, you can use the following tips:
- It is necessary to take into account the sequence, the greater the weight of the product, the better. That is why the main attention should be paid to the choice of weight and quality of material.
- It is also important to evaluate the quality of the seams; they should not be too thin, but they should be even.
- The length of the product, as well as the attachment point to the body, needs to be assessed whether it is sufficient.
- Evaluate how thoroughly the areas of the product are painted; if the paint chips, it is better to refuse the purchase. This is a sign that the product is susceptible to corrosion and will not last for a long time.
A thorough assessment of the build quality and reliability of the fasteners will save you from unpleasant surprises on the road in the future and guarantee a long service life of the exhaust.
Making your own dual exhaust
Without the appropriate experience and special equipment, it is not recommended to make such radical changes to the design of the car - despite the apparent simplicity, there are a lot of pitfalls and nuances known only to specialists. For information, we will talk about the general principles of how the process is carried out.
The simplest method, which is often used: bifurcation at the very end of the exhaust tract. You can remove either two pipes without a muffler, or take one pipe to the side from the muffler. We must admit that this is not the most effective option, and it doesn’t look the best. It will not change the sound in any way, and may also lead to a decrease in power and increased fuel consumption. But if you install a well-executed dual exhaust system, it will really make positive changes in the performance of the vehicle.
Experienced motorists, especially owners of VAZ (Priors or other models), distinguish two main types of design:
- With different angular indicators.
- With equal angular indicators.
When installing a homemade structure, you need to pay attention to the deviation of the new pipes from the location of the old holders - difficulties often arise with this. However, new holders can also be made, then the problem disappears. It is important to wrap the homemade exhaust with asbestos cord: it provides high-quality thermal insulation and helps to avoid fire when heated by a fuel system located nearby.
By contacting the Muffler Master service with any questions related to exhaust systems, you will receive a competent answer, fast and high-quality service. We have been working in this area for many years and have achieved perfection in it.
Hyundai Solaris Fail Project › Logbook › Exhaust. Stage 228
This post will be very voluminous and informative. Lots of photos. Be patient. After the program was sewn up for E2, it was decided to remove the catalyst. Why is it there if the ECU no longer sees it? Now this is an extra node.
Having lit the drive, it became clear that this topic has been described and touched upon quite little. No descriptions of the process or reviews of the consequences of removal as such. And by the way, they are not very small, but more on that later.
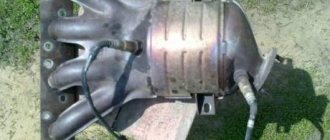
Well, OK. Having experience in knocking out a catalyst on a pre-Restayl car, we decided to get down to business. There is nothing complicated about removal and installation. We unscrew the nine nuts from the plate near the block, one bolt securing the can itself to the block and two nuts from the exhaust pipe studs. Accordingly, the heat shield casing and lambda also need to be removed. The lambda can be easily unscrewed with a regular 18mm open-end wrench.
Let's look at the skate. Mileage 4 and a thousand kopecks. Nultsevy.
We take a longer screwdriver and dig the whole thing out from there.
We put everything in place and go test it. The sound of a fart rustling into a tin can appeared. But you can live with this quite calmly and it only appears under load at low speeds or when driving the gas to the floor. Not intrusive, doesn't hurt the ears. You can only hear it if you turn off the music completely. Another side effect appears. The catalyst works as a heat condenser in winter. I turned off the engine, the engine took a long time to release heat, and as a result the engine cooled down slowly. After removing the cathode, the engine cools down much faster. Tested on two machines. I was very surprised that the exhaust does not smell like a catless exhaust. But somehow I didn’t give it any importance.
Binge on butter? He is. But I will not undertake to say that this is precisely from the skate. Perhaps the oil burns away due to frying. I use Petro Canada supreme synthetic 5v30. I won’t say anything about the baby in top hats and the badass. This is an eternal topic and one can argue a lot. And that’s not what this post is about.
There are clearly changes in dynamics. The car rolls easier. At the top I didn’t feel the arrival. But at the bottom and in the middle it is there. Not exactly wah wah, but there.
And now, after a while, riding and thinking that I’m the most fashionable and cool, I find out that there is a second skate. WTF? What x? It can not be. Back then I didn’t know that I would end up with a lot of money and this was just the beginning of the journey.
