The transparency of the headlight glass must be ideal, since a powerful luminous flux passes through it, which, if there are deviations in the optics of the deflector, can both reduce the driver’s visibility and blind oncoming cars. Cleaning and polishing the outer surface of the headlight, removing dirt from the inside, differ in the method and complexity of implementation, but their importance is the same.
Selection of detergent composition
The aggressive components of most products can damage the surface of the headlight and the reflector
When choosing, it is important to pay attention to the composition, as you can purchase a low-quality product without a degreaser
Distilled water does not leave streaks on the surface of transparent plastic and reflector, but is not able to wash away stagnant dust or haze from burning lamps.
How to wash internal headlight parts:
- soap composition;
- dishwashing liquid;
- shower gel.
Cosmetic micellar water to remove makeup will also help to wash the headlight from the inside.
When choosing, you should pay attention to the absence of alcohol, which can easily wash off the coating and render the optics unusable.
Removing the headlight
To clean the reflector, plastic and auxiliary parts from the inside, you will need to remove the headlights from the car.
To remove the optics, on some models you will need to remove the bumper. To do this you need:
- Turn out the wheels and remove the fender liner clips that are attached to the edge of the bumper.
- Remove the radiator grille.
- Unscrew the screws and remove the clips that hold the bumper.
- Carefully remove the part without damaging the headlight glass or lens.
How to clean car headlights with toothpaste
Of the many ways to clean headlights, the method of cleaning headlights with toothpaste occupies a special place. There are many options for cleaning dark, oxidized and dirty headlights with toothpaste. It's fast, affordable and cheaper than using a dedicated repair kit. To clean, you only need a toothbrush, toothpaste (with baking soda if possible), and a cloth.
Cleaning car headlights with toothpaste:
- Rub toothpaste into the headlight cover using a toothbrush
- Keep rubbing until you see the headlight getting cleaner
- Spray the headlight with warm water and wipe the toothpaste with a cloth.
- For deeper cleaning, repeat this procedure several times.
Great! Your headlights should now be cleaner.
How to Clean Headlights Using Baking Soda and Vinegar
Household cleaners are often the easiest and best way to clean many items. Some people promote the use of vinegar and baking soda, alone or in combination, to clean headlights.
Using a microfiber cloth or even a toothbrush, rub vinegar, baking soda, or a combination of both into the headlights.
Then rinse and repeat as necessary. Once the plastic has dried, you can add a layer of wax mixture to polish the headlights.
The naturally abrasive quality of baking soda can release dirt, but this method may not meet the demands of highly oxidized plastic. You can try this inexpensive alternative and see how well it works, just know that any results will be temporary and that you'll have to do this type of cleaning regularly to maintain the appearance of your headlights.
Video on how to wash the inside of a headlight. We recommend viewing
How to clean the inside of a headlight without disassembling it
Cleaning your headlights will be much easier if you can remove the glass and take them apart piece by piece. Unfortunately, many modern car models are equipped with non-removable lenses. But even they require cleaning from time to time.
headlights need to be cleaned not only from the outside, but also from the inside
Over the years of operation, an impressive layer of dust and dirt accumulates on the optical elements. This negatively affects the quality of lighting: the headlights become dimmer and more diffuse.
Glass cleaning
Even if you don’t want to completely disassemble the headlights, you still have to remove them from the car. This process will be different for different cars: in some cases you need to remove the radiator grille, in others you need to remove the bumper. Most likely, you yourself know how to properly remove headlights from your car, but if not, take a look at the owner’s manual.
- After you remove the headlight, you need to remove all the low and high beam lamps, turn signals, and dimensions from it.
- Pour a small amount of your chosen cleaning agent into the holes.
- Now you need to temporarily seal the holes with adhesive tape and shake it properly. Usually after these manipulations, the liquid acquires a dirty yellow color. This means that you didn’t start cleaning in vain.
- Open the holes and drain the water.
- Repeat steps 2 and 3 until the water runs clear.
- If you poured soapy water into the headlight, rinse it with clean distilled water at the end.
- Use a household hairdryer to dry the inside of the headlight. Do not set the temperature too high to avoid damaging the optics. You must get rid of all the small droplets.
- Make sure the inside of the headlight is completely dry and reinsert the bulbs.
To wash away dirt from the inside of the headlight, pour the cleaning solution into the housing and shake it
There is another unusual way to clean glass from the inside. It is not suitable for serious stains, but it can help if you need to quickly remove a small stain.
You will need two small magnets, which you need to wrap in a soft cloth. Lightly moisten the fabric of one of the magnets in the cleaning agent, secure it to the fishing line and place it in the headlight housing through the hole for the lamp. Using the second magnet, control the internal one and clean the glass in the right places. When you are satisfied with the result, simply pull the line and remove the magnet from the housing.
Video: cleaning the headlight from the inside using magnets
Cleaning the reflector
The reflector inside the headlight collects the light from the lamp into a single beam. Constant exposure to a light source may cause it to become cloudy. If you notice that the light has become dimmer and more diffuse, the problem may be caused by the reflector.
To clean this part from the inside without completely disassembling the headlight, use the following method.
- Remove the car headlight.
- Remove the low and high beam lamps.
- Take a strong piece of wire about 15 cm long and wrap it halfway with electrical tape or tape.
- Place a soft, lint-free cloth over the electrical tape.
- Lightly dampen the cloth with glass cleaner.
- Bend the wire so that it can reach the reflector through the lamp hole.
- Use a cloth to gently clean the reflector. Do not make sudden movements or use force! If handled incorrectly, the protective layer on the part may peel off.
- If after finishing work there are still drops of moisture on the reflector, dry them with a regular hairdryer.
- Replace the lamps and install the headlight on the car
using such a device you can clean the reflector through the lamp hole
Materials and tools
In order to clean your headlights as much as possible from dust, water droplets and dirt, both outside and inside, prepare the following set of tools:
- cleaning agent;
- toothpaste;
- a soft cloth made of microfiber or other fabric that does not leave fibers;
- household hair dryer.
- Screwdriver Set;
- insulating tape;
- adhesive tape;
- hard wire;
- two small magnets;
- fishing line;
- stationery knife and scissors.
It’s worth taking a closer look at the headlight cleaner. Not every liquid is suitable for these purposes, especially when cleaning lenses and reflectors from the inside. There is an opinion that alcohol or vodka removes dirt best. This is true. However, alcohol can corrode the coating on the reflector and ruin the optics forever . Therefore, you should not use heavy artillery. Distilled water with dishwashing detergent will clean the headlight a little more slowly, but no less efficiently. Some people use a regular glass cleaner for these purposes.
Another interesting method is to use cosmetic micellar water to remove makeup. It is sold in all cosmetics stores. You should not choose an expensive option; most importantly, make sure that the composition does not contain alcohol.
To remove dirt, try using makeup remover
How to clean the inside of a headlight without disassembling it? Magnet to the rescue!
The complex design of the optics, oddly enough, is not the main obstacle to cleaning it with Mister Muscle. The main disadvantage of the first method is that no one is immune from damage to the reflector. Under a certain set of circumstances, chrome literally “peels” off the plastic, causing the product to lose its former aperture ratio. The puzzling thing is that this can happen not even through the fault of the detergent: there have been precedents when chrome peeled off from the slightest exposure to ordinary tap water. Therefore, if you have not found experienced confirmation of washing the headlights of a certain car on the vastness of forums and social networks, do not take risks.
Use an alternative. Cleaning headlights from the inside with a magnet requires a minimum of disassembling the product, does not harm the reflector, does not require long-term drying and is relevant for almost any car. The only thing, keep in mind that the magnet inserted inside the headlight must be securely fastened, otherwise complete disassembly of the product will become inevitable. We will now tell you how to do this.
First you need to prepare the components:
- Microfiber towel.
- Two magnets. There is no specific requirement for these components: who takes magnets from the refrigerator, who buys neodymium products... The only note is that do not buy large magnets - 12x3 or 15x4 mm tablets with an attractive force of up to 3 kg are quite enough.
- Glass cleaner or micellar water from a woman's cosmetic bag.
- Wire.
- Insulating tape.
- Scissors.
The essence of the technique is that one magnet is inserted inside the headlight, the second is located outside the product, right on the glass. All that remains is to connect the two magnets, and then smoothly move what is located outside along the glass, periodically wetting the rag in the cleaning liquid.
The main difficulty is preparing the internal magnet for work. Let us repeat that the main condition is that the product should not remain uncontrolled inside the optical device. For reliable fixation, a magnet wrapped in microfiber is attached to a wire:
- Strip the end of the wire from insulation.
- Wrap the magnet in microfiber and place a bare piece of wire on the side.
- Wrap the structure with electrical tape, leaving a small piece of bare wire and a piece of microfiber that will be in contact with the glass.
- Bend the open end of the wire and additionally wrap it with insulation. This will reduce the risk of wire detachment from the microfiber to zero.
The opposite magnet is similarly placed in a rag, and the end, for convenience, is wrapped with insulation. In general, on the vast forums there are various systems for attaching a magnet placed inside the headlight. For example, sew microfiber thread with a magnet wrapped inside, etc. We have provided the most convenient method of fixation. The practicality is that the wire can be bent to direct the magnet to the desired location on the optical device.
Question
Doctor48 6 565
Doctor48 6 565
- local
- OPC Club
- 6 565
- 16,464 messages
- Lipetsk
- 5D
- DRIVE2
So that this process does not get lost, I decided to separate it into a separate topic. Maybe it will be useful to someone
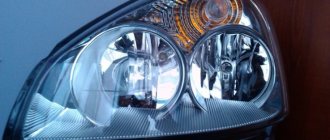
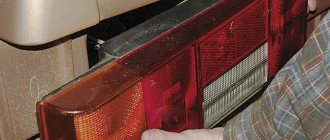
I decided to change the light bulbs. We got unsuccessful ones, and after six months the light went out.
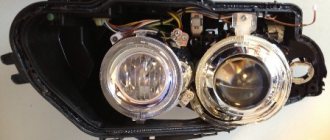
More precisely, there was light, but it looked like 5000K, and not 4300. And 5000K is hard to see on wet asphalt. Having removed the headlights, I thought, maybe the lenses are just dirty? And it was decided to dismantle them. There were no major problems other than assembly. The frame does not simply fit onto the lens. I solved the problem by inserting a wire and pulling it, the frame, to the lens. There are 5 latches
I always take Philips light bulbs, but they still have a difference
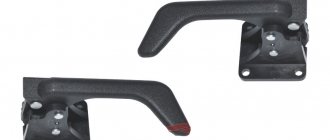
The lens is secured with 3 nuts
The frame does not allow you to remove the lens, so you will have to apply a little force
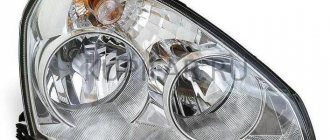
Lens
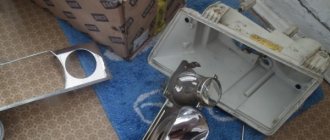
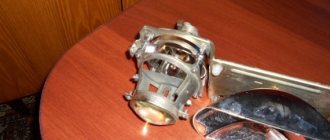
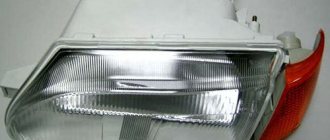
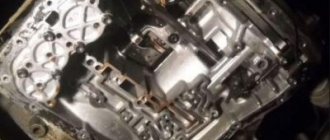
Burnt reflector (on both headlights)
Eliminate with a piece of aluminum tape Receive Assemble
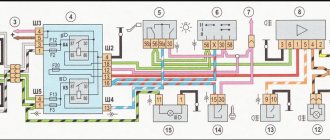
Differences in light bulbs (bottom number, new on the left)
The light has become an order of magnitude better, all that remains is to resolve the issue with the headlight glass. The report will be
Source
How to clean the lenses inside the headlights
Often, car enthusiasts clean their headlights only from the outside, while dirt on the lenses also settles inside the lighting fixture. It also needs to be cleaned on time, otherwise it will lead not only to a decrease in the quality of road lighting, but also to the rapid burnout of headlight bulbs. Experts recommend cleaning the lenses inside your headlights at least once every six months.
The problem with cleaning the lenses inside is due to the inability to disassemble them on modern cars. If the design of the headlight allows you to remove the lens and clean it, and then put it back in place, then the procedure will not take much time, but it is often necessary to remove the headlight unit and clean it.
To clean the headlight, you must:
Remove it from the car and twist the bulbs;
Pour water mixed with glass cleaning liquid into the headlight. After closing the holes for the bulbs, shake the headlight so that the water in it clears out any clogged dirt, then drain the water; Then repeat the procedure 3-4 more times by pouring water with glass cleaner and shaking the headlight; When all the dirt has been removed from the headlight, you need to take a rag or piece of cotton wool and wipe the inside of the headlight
Depending on the design features of the headlamp, it may be necessary to wrap a cotton swab on a wire to clean hard-to-reach areas. It is important not to scratch the lens during cleaning. Please note: You can achieve greater cleaning results by moistening the used cotton swab in alcohol.
After completely cleaning the headlight, dry the part. To dry, you can use a hair dryer with a minimum air flow rate and low temperature.
Once cleaning and drying are complete, reassemble the headlight and install it on the vehicle.
Rubber harness trailer suspension: device, how it works, pros and cons
- remove the headlight housing;
- take out all the light bulbs from there;
- take a wire about 15-20 cm long;
- wrap electrical tape around it to the middle;
- secure a soft, lint-free cloth on top of the electrical tape;
- soak in glass cleaner;
- insert a wire into the hole in the headlight housing;
- carefully begin cleaning the reflector;
- only without sudden and strong movements;
- Dry any remaining moisture with a hairdryer;
- put everything back together.
Cleaning the headlight using a flexible grip and sponge/microfiber
This method involves using a flexible gripper and a sponge or microfiber cut to the desired size. You need to remove the light bulb, install a sponge (preferably with open cells) or microfiber on the grip and insert it into the opening for the light bulb. Next, you need to carefully move the sponge or microfiber along the transparent part of the headlight, removing dirt. The flexible grip can be bent at different angles, allowing access to all areas of the transparent part of the headlight. Also, as in the previous method, a sponge or microfiber can be used either with or without a cleaning agent (non-abrasive).
Deciding on the approach
It would be more logical to remove the glass, wash it properly and put it back in place.
The practical side of the issue causes rejection. Removing the front panel and then re-seating it with sealant is quite a task. For comparison: many people prefer to buy a used headlight, wash it inside and polish it, rather than remove the glass and fix any significant defect in the existing optics. It's easier to wash from the inside, but how? There are two technologies used in this regard:
- Classic. Fare is given a bath - a cleaning solution is poured inside, they wait, drain, wash out the remains and dry for a long time.
- Magnetic. A cloth is placed inside with a magnet wrapped in it. There is also a magnet on the outer surface. One pole attracts the other and the device located inside the product begins to slide along the glass, ensuring proper cleaning.
Methanol for electronics and polycarbonate parts
This product has gained popularity due to its rapid evaporation, after which no traces remain. The advantages of methanol also include safety in relation to the internal components of the headlight.
It is important to remember that care must be taken when working with this toxic and flammable substance.
To begin with, dismantle the headlights, remove the light bulbs, and then pour in 200 ml of the substance. The headlight is turned over and rocked from side to side for several minutes. The liquid is poured out and the procedure is repeated several more times. The remains are dried with a hair dryer.
Cleaning the headlights yourself is not difficult, the main thing is to follow some rules: do not use acetone for plastic, and alcohol for the reflector.
DIY headlight polishing process
The process of polishing headlights using toothpaste can be divided into several stages:
- Protect metal parts and rubber seals from exposure to abrasive agents;
- Preliminary cleaning of headlights from dust and dirt.
- Apply toothpaste to the surface and rub with a brush, felt or medium-hard towel. You need to do this with vigorous circular movements until the scratches are completely removed. If necessary, add toothpaste or goyim paste. By the way, it is more efficient to polish using an electric drill, which is equipped with special attachments. The speed should be maximum.
- Cleaning the polished surface of glass from dental residues.
The first stage of polishing glass headlights is to prepare the field of activity. To do this, you first need to carefully tape all metal surfaces and rubber seals with tape to prevent them from being damaged during polishing. Then clean the surface from dirt, grease, oils and other things. It is advisable to use a degreaser, soap solution or washing powder.
Technology for polishing headlights using toothpaste
After completing the preparatory work, you can proceed to the main process of polishing glass headlights. This is done in this way: the paste is applied either to the surface of the headlight itself or to a brush (felt or towel).
Polishing is carried out with very vigorous and fast circular movements. It is best to use special tools, such as an electric drill, hammer drill or grinder. To do this, they are equipped with special grinding wheels, onto which goi paste or regular toothpaste is applied; you can use a special polish based on diamond dust
When processing glass headlights, as well as plastic ones, it is important to prevent the surface from overheating. Since this can lead to cracks or the plastic may “float” at high temperatures. To prevent this, you need to control the degree of heating of the glass surface; this is done by hand - the glass should not be very hot. Therefore, you need to take short breaks all the time.
Therefore, you need to take short breaks all the time.
If you have certain skills and use abrasive pastes with different abrasiveness ratings (from 400 to 1000), you can achieve a smooth change in the haze of the glass.
Cleaning the outside of the headlight
Many drivers, when washing their car themselves, forget to pay due attention to the headlights. However, their cleanliness is much more important than the cleanliness of a bumper or car door, because safety depends on the quality of lighting.
Video: cleaning headlights from dirt
From yellowness and plaque
Sometimes an unsightly yellow coating forms on the outside of the headlights. It not only spoils the appearance of the car, but also makes the headlights dim.
Regular toothpaste will help remove yellow plaque from the surface of the headlight.
Today on the car cosmetics market there are a large number of products designed to combat this plaque. However, the most effective of them is already in your home - regular toothpaste. After all, if a product can remove plaque from teeth without corroding them, then it will cope with plastic just as well.
Apply a small amount of paste to the headlight and polish it
To clean a headlight with it, apply a small amount of paste to a towel or toothbrush, then buff the yellowed area in a circular motion. When finished, rinse the headlight and evaluate the result. If the plaque is very strong, repeat the procedure.
After polishing with toothpaste, the plaque disappears
Video: how to clean plaque with toothpaste
From sealant, glue or varnish
After carelessly gluing the headlights, a small amount of sealant may remain on the plastic. It does not affect the operation of the device, but spoils the appearance of the car. To remove the sealant, it must first be softened.
But what exactly to soften it with is a big question. The fact is that different compounds are removed using different substances. Unfortunately, you are unlikely to know what type of sealant was used at the factory. In this case, you will have to try all these means one by one.
Very often, the remaining substances can be dissolved using ordinary vinegar. If vinegar doesn't work, try White Spirit. In some cases, treatment with gasoline, alcohol, oil and even very hot water helps.
If none of the products gives the desired effect, warm up the contaminated area with a regular hairdryer. When exposed to heat, the sealant will become a little softer, which means it will come off easier.
In some cases, the headlight can be cleaned using a special silicone sealant remover. You can buy it at almost any store that sells car cosmetics. However, this product is not universal and is suitable, as you might guess, specifically for silicone compounds.
Once you have managed to soften the sealant, take a straight screwdriver and wrap it in a cloth soaked in the softening compound. Clean the desired area centimeter by centimeter. Then wipe the headlight with a clean cloth and enjoy its appearance.
Causes
It is much more important to understand why oil is flowing through the breather in the engine, since this will allow us to establish the cause and eliminate it. On your own, or with the help of specialists, is no longer of fundamental importance.
It is interesting that some reasons may not be directly related to the ventilation system at all.
Among the main causes of oil in the breather are the following:
- Severely worn piston rings and piston rings. This leads to the fact that a large volume of gases enters the crankcase of the power unit, and standard ventilation does not have time to cope with them. As a result, increased pressure in the internal combustion engine and squeezing out oil through the breathing valve.
- The oil separator drain channel has become clogged over time. As a result, the separated oil has no choice but to mix with the gases passing by it.
- Problems with the air filter. Or rather its pollution. When operating, the motor requires a large volume of air. If the filter becomes clogged, the engine senses a lack of air and begins to suck it in from other available sources. This is basically a ventilation system.
- Excessive oil volume in the system. A common mistake made by beginners who change the oil themselves for the first time and fill in more than required. The excess ends up in the ventilation.
- Valve jamming. The breathing valve itself, that is, the breather, may jam. It ceases to perform its functions fully. Hence the oil.
- Worn timing belt or valve burnout. Because of this, gas from the crankcase may end up in the space above the valve. Then it enters the crankcase, the pressure increases, and the oil is squeezed out.
As you can see, you shouldn’t immediately blame the breather for all the troubles.
How to wash the inside of a headlight using the classic method
In its pure form, classic involves non-contact washing of the insides with a cleaning solution. The method is excellent for headlights of budget-class cars, where a minimum of electronics is used for optics. Dismantle the headlight, remove all lamps, lenses and valves of the ventilation system and that’s it - the product is ready for washing.
The cleaning solution is prepared manually. There is no universal recipe; some use glass cleaner, some use dishwashing detergent, and some even prefer household products of a more aggressive class. The safest thing to do is use a glass cleaner, not necessarily a car one.
You should purchase at the rate of one bottle of detergent per headlight. Container volume – 0.8-1 liter. Let us repeat that glass cleaner is not used in its pure form here: you should make a solution - 60% detergent, the remaining 40% tap water.
Rinse the insides with running water
This is especially important if there is sand or other abrasives in the housing. It must be washed, otherwise when rinsing with a soapy mixture, grains of sand will scratch the inner surface of the glass. Place the optics in the container
Use a plastic bowl to avoid damaging the front of the product. Pour the cleaning solution inside the headlight so that the liquid completely covers the glass when the part lies face down.
- Leave the headlights in this position for 10-15 minutes so that serious dirt has time to soak off.
- Rinse the insides with a cleaning solution. Pour the poured chemical from one corner to another (along the glass), shaking the headlight periodically.
- Drain the detergent. The most convenient way to do this is through the ventilation holes, which allow you to remove up to 98% of the contents poured inside the product.
- Rinse the insides with running water. Do not save water; not a single trace of detergent should remain.
- Rinse the headlights with distilled water. This will remove drops of tap water that leave marks after drying. The number of repetitions must be at least two.
- Dry. At the first stage, a household hair dryer is usually used to dry hair. Barely warm air is directed into the headlight through the hole for replacing lamps and flows inside for about 20 minutes, with pauses so that the product does not overheat. At the second stage, natural drying is carried out. The parts are placed in the sun, and to speed up the result, a bag of silica gel is placed inside, covering the holes with lids.
Are the headlights bad? We clean them from the inside indiscriminately. Sharing in the easiest way
Many drivers are faced with the problem of insufficient performance of the car's front optics. This phenomenon leads to discomfort when driving at night and significantly reduces the level of safety. Often the problem of poor headlight light lies in the internal part of the optics. You can return the flashlights to their factory settings by completely cleaning them.
Will the article be useful? Don't forget to give a thumbs up and subscribe to the channel!
During the operation of the car, the front optics inevitably receive microdamage. The plastic becomes cloudy, which entails a decrease in the efficiency of the lighting system. Initially, the headlights of the car are quite sealed; air circulation is ensured through special valves. Over time, the body of the flashlights can also become damaged, so dust gets inside and settles on the lamps and reflector
.
Complete cleaning of headlights with disassembly is a complex procedure that requires the use of specialized equipment. The lanterns are heated and disassembled, allowing access to the internal elements of the structure. I will tell you about a method for cleaning car optics without disassembling them
. This approach is much simpler and allows you to achieve excellent results.
The main reason for the deterioration of the light of the headlights is dirt on the reflector. The scattering of rays directly depends on the state of this element. It is almost impossible to clean it by direct mechanical action without disassembly.
. The holes for the light bulbs are small, so you won’t be able to reach the reflector by hand.
To clean the inside of the headlights, they must be removed from the vehicle. On some models this is done in several movements, sometimes you have to spend more effort and time. After dismantling the headlight, you can begin cleaning it. At the first stage we will need a large amount of warm tap water, some detergent and microfiber
, it is advisable to take the softest one possible.
Water is poured into the headlight through the hole for the lamp, 3-4 drops of dishwashing detergent are added there, and microfiber is placed there. If necessary, the fabric can be cut, but not into too small pieces
, otherwise they may become clogged in the corners of the headlight.
Let's start washing the optics, shaking the flashlight in different directions for several minutes. You will immediately see how dust and dirt are removed from the internal parts. Drain the water, remove the microfiber and evaluate the result. If necessary, repeat the procedure
.
After washing using tap water and household detergent, immediately pour distilled water into the headlight
. For two lanterns we will need about five liters. Distilled water will get rid of dust residues and avoid streaks.
We thoroughly rinse the headlight with distilled water and leave it to dry. You can speed up the process using a regular or hair dryer in the minimum temperature mode. It is recommended to dry the headlight with the reflector facing down and not change its position.
. After the flashlight has dried, install it back on the car.
How to clean the inside of a headlight without disassembling it
Cleaning your headlights will be much easier if you can remove the glass and take them apart piece by piece. Unfortunately, many modern car models are equipped with non-removable lenses. But even they require cleaning from time to time.
headlights need to be cleaned not only from the outside, but also from the inside
Over the years of operation, an impressive layer of dust and dirt accumulates on the optical elements. This negatively affects the quality of lighting: the headlights become dimmer and more diffuse.
Glass cleaning
Even if you don’t want to completely disassemble the headlights, you still have to remove them from the car. This process will be different for different cars: in some cases you need to remove the radiator grille, in others you need to remove the bumper. Most likely, you yourself know how to properly remove headlights from your car, but if not, take a look at the owner’s manual.
After you remove the headlight, you need to remove all the low and high beam lamps, turn signals, and dimensions from it. Pour a small amount of your chosen cleaning agent into the holes. Now you need to temporarily seal the holes with adhesive tape and shake it properly. Usually after these manipulations, the liquid acquires a dirty yellow color. This means that you didn’t start cleaning in vain. Open the holes and drain the water. Repeat steps 2 and 3 until the water runs clear. If you poured soapy water into the headlight, rinse it with clean distilled water at the end. Use a household hairdryer to dry the inside of the headlight. Do not set the temperature too high to avoid damaging the optics. You must get rid of all the small droplets. Make sure the inside of the headlight is completely dry and reinsert the bulbs.
When working with halogen and xenon lamps, do not touch the bulb itself! Due to the high internal temperature, traces of oil from your fingers will remain on it, even if your hands are perfectly clean. This will significantly reduce its service life. Try to hold the lamps only by the base. If this is not possible, wear medical gloves.
To wash away dirt from the inside of the headlight, pour the cleaning solution into the housing and shake it
There is another unusual way to clean glass from the inside. It is not suitable for serious stains, but it can help if you need to quickly remove a small stain.
You will need two small magnets, which you need to wrap in a soft cloth. Lightly moisten the fabric of one of the magnets in the cleaning agent, secure it to the fishing line and place it in the headlight housing through the hole for the lamp. Using the second magnet, control the internal one and clean the glass in the right places. When you are satisfied with the result, simply pull the line and remove the magnet from the housing.
Cleaning the reflector
The reflector inside the headlight collects the light from the lamp into a single beam. Constant exposure to a light source may cause it to become cloudy. If you notice that the light has become dimmer and more diffuse, the problem may be caused by the reflector.
To clean this part from the inside without completely disassembling the headlight, use the following method.
Remove the car headlight. Remove the low and high beam lamps. Take a strong piece of wire about 15 cm long and wrap it halfway with electrical tape or tape. Place a soft, lint-free cloth over the electrical tape. Lightly dampen the cloth with glass cleaner. Bend the wire so that it can reach the reflector through the lamp hole. Use a cloth to gently clean the reflector. Do not make sudden movements or use force! If handled incorrectly, the protective layer on the part may peel off. If after finishing work there are still drops of moisture on the reflector, dry them with a regular hairdryer. Replace the lamps and install the headlight on the car
using such a device you can clean the reflector through the lamp hole
Never use alcohol to clean the reflector! Under its influence, the reflector will delaminate, and you will have to purchase a new optical system.
European protocol for road accidents: how to register in 2022, where
- remove all the light bulbs that are there;
- after this, a technological hole is formed in the housing;
- pour a solution of water and dish soap or micellar water into it;
- seal the hole with tape;
- shake the headlight thoroughly;
- open the hole, drain all the water;
- repeat the same steps 2-3 more times until the water coming out is clear;
- after the soap solution, pour in plain clean water;
- Dry the interior surfaces with a hairdryer.
Only when you are sure that the inside of the optics housing is dry, can you return all the dismantled light bulbs to their place.
If you have halogen or xenon, you cannot touch the bulb itself. Otherwise, fingerprints will remain, which will lead to rapid wear of the lamps.
That is, it is better to hold the light bulbs by the base itself. If possible, use medical gloves while working.
But that is not all. The lenses and reflector need to be cleaned.
Self-recovery methods
To get to the reflector, the headlight removed from the car must be disassembled. The first option involves repeatedly passing the hot air of a hair dryer over the seam. The second option involves leaving the headlight in an oven preheated to 100°C for 20 minutes. After opening, all parts are cleaned of sealant residues, washed without using alcohol-containing liquids and dried.
Using metallic tape
Let's start with how to restore the reflector on a headlight using tape foil. All you need is metallized tape, purchased at a hardware store for about 30 rubles. Its adhesive base copes well with high and low temperatures, and the aluminum film is very wear-resistant. In order to obtain a smooth surface with a minimum of seams after gluing the tape on the reflector, first, pieces of the most suitable shape are formed from several strips. Then remove the protective film and carefully stick it on. The whole procedure takes about half an hour.
Advantages of the method: durability, low cost, ease of implementation.
Disadvantages: when gluing, irregularities and seams remain, which impair the properties of the reflector.
Using metal foil
Aluminum foil is highly reflective, which allows it to be used in the restoration of headlight reflectors. You will also need some epoxy resin. To maintain a perfectly smooth surface of the foil, the entire pattern is made from plain paper. Then the parts are duplicated from aluminum sheet, a thin layer of resin is applied to the reflector and glued, removing excess resin.
Advantages: withstands any temperature changes.
Disadvantages: being between the metal foil and the plastic base, epoxy glue lacks air and takes a very long time to dry. It is almost impossible to remove dried glue. Therefore, such a reflector is not suitable for repeated restoration. With the advent of tape foil, this method is practically not used.
Using chrome paint
Headlight reflector repair using chrome paint is the most popular. No need to cut and glue anything. Paint is sprayed onto the degreased surface of the reflector from a can of white chrome until a uniform, uniform layer is obtained. After painting, the headlight is dried according to the instructions on the can.
Benefits: Provides a smooth surface. You can even spray paint onto metal tape, thus increasing the reflective effect.
Disadvantages: does not tolerate high temperatures. You should try to find heat-resistant chrome paint.
Using mirror film
No less effective is the restoration of the reflector by applying a metallized self-adhesive film of the Oracal brand. Films from the Oracal 351 and Oracal 352 series can withstand temperature changes from -40 to +120°C and, according to the manufacturer, can be used outdoors for two years without deterioration in performance. Since the headlight is a hermetically sealed space, the service life of the self-adhesive film increases.
It is necessary to make templates from paper or ordinary tape that exactly replicate the shape of the reflector. Then cut out the polyester film of a similar shape. Using a hairdryer, glue it onto the prepared surface of the reflector, smoothing it out and preventing the appearance of bubbles. The joints and edges can be additionally treated with chrome paint.
Advantages: reliable manufacturer, excellent reflective effect.
Disadvantages: the price of 1 m2 starts from $5.
As you can see, restoring headlight reflectors is a simple procedure and quite feasible in a garage. Considering the fact that auto repair shops charge an order of magnitude more money for similar work, it always makes sense to try to return the headlight to its previous brightness with your own hands using one of the proposed methods.
We fight yellowness and bluish bloom
Plastic headlight polishing and protection kit includes cleaning abrasive paste, protective spray and microfiber cloth
To quickly eliminate cloudy deposits and yellowness, just pop into an auto chemical store and choose a DIY headlight polishing kit. Various manufacturers have been offering something similar in retail for a long time. For example, the German brand Autosol has in its arsenal a convenient kit called “Set for polishing and protecting plastic headlights.” It includes a cleaning abrasive paste, protective spray and a microfiber cloth.
In the end, everything is done right in the parking lot. First, as mentioned above, the contact surface must be isolated with masking tape from adjacent parts. Headlights that have been cleaned of dust and dirt (an important point, since remaining debris can severely scratch the surface when wiped) should be carefully coated with restoring paste and polished by hand using a napkin.
By applying some effort for 10-15 minutes, you will be able to notice that the picture changes and the body becomes more transparent. At the end of this stage, the plastic is thoroughly washed with a stream of water or cleaned with a napkin so that no abrasive particles remain on the surface.
Ideally, the headlights should regain their original appearance, as if the car had just come out of the showroom. But to consolidate the result, a mild spray is used. This preservative is applied to the cleaned surface, after which, if necessary, it is wiped to a glossy shine with a microfiber cloth.