03/02/2022 1,674 Fuel system
Author: Victor
Correct operation of the idle speed sensor allows you to reduce wear on the piston group, as well as the crankshaft of the car. If signs of incorrect operation of the device appear, the controller can be checked manually, with a multimeter or using a homemade stand.
[Hide]
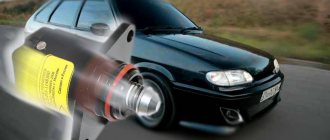
Purpose of the idle speed sensor
Purpose of IAC in vehicles equipped with an electronic ignition system:
- The microprocessor module determines the ratio of air and fuel when creating the air-fuel mixture in the injection power unit.
- The control unit measures a certain volume of gasoline or diesel fuel.
- The electronic type of systems is equipped with controllers for the crankshaft, throttle position, knock and flow meter. In accordance with the readings of these devices, the fuel pump is activated. The ignition is distributed to specific cylinders of the internal combustion engine.
- If the driver releases the gas pedal, the fuel valve closes completely. This leads to the fact that the proportions of the combustible mixture are violated. Combustion products move into the chamber when there is a difference in pressure between the exhaust and intake manifolds.
The idle speed sensor in electronic ignition systems performs the function of adjusting the composition of the combustible mixture during engine starting. Using the signals sent by the controller, the microprocessor module makes a decision about fuel enrichment. In doing so, it ignores the readings sent by the throttle control. The sensor transmits signals along the line. If necessary, a free channel opens in it through which air passes. This leads to equalization of engine speed while driving or idling.
User Roman Lozovoy presented a detailed review of the controller from the manufacturer General Motors for the Daewoo Lanos.
Eventually
The F14D4 engine has many advantages. This includes an improved timing belt that lasts a long time, a high-quality pump, and the absence of an EGR valve. The crankcase ventilation is well thought out, allowing gases to escape from the throttle area. Therefore, the damper rarely becomes dirty, which is a big advantage for an electronic drive. It is also easy to replace the oil filter on this engine - this is done from above, without a hole.
This is where the advantages end. Fragile intake manifold that can break easily. Poor traction at the bottom. The performance of the oil heat exchanger installed under the exhaust manifold is not impressive. The seal on it often breaks and antifreeze gets into the oil. Low-grade fuel easily damages the catalyst - it is made integral with the exhaust manifold.
Definitely, the manufacturer has eliminated some previous errors of the F series engine, but new ones have been added.
Source
Principle of operation
The operating principle of the valve is as follows:
- The control unit calibrates the sensor readings if it is detected in the system.
- The controller itself is a stepper electric motor. It is equipped with a conical needle, which is located in a special hole in the throttle valve channel.
- The regulator does not transmit information to the microprocessor module, but receives it from it. Therefore, it is more correct to call it not a sensor, but an actuator - a valve.
- The control unit determines, based on a signal from the flow meter, that there is no air in the combustible mixture. It then compares these impulses with those transmitted by the TPS.
- The regulator device receives voltage. This causes the needle to move out of the canal. the missing volume of air is supplied to the combustible mixture for mixing.
The microprocessor module also receives pulses about the temperature level of the coolant and engine fluid. If the engine starts at low negative temperatures, it must be warmed up, which will reduce wear on friction elements and units. To enrich the mixture, the idle speed sensor channel opens slightly; for this, the driver does not need to press the gas.
At the beginning of the device operation, the action algorithm is as follows:
- The key turns in the lock and the ignition is activated.
- The rod extends all the way. Thanks to this, the needle closes the bypass channel.
- When the rod rests against the calibration hole, the control unit begins to count steps backward.
- Voltage is applied to the windings. As a result, the valve returns to its original open state.
The number of reverse steps is adjusted when flashing the control unit; this indicator may vary depending on the device model. For example, on a Bosch ECU it is 50 steps, and on January modules it is 120.
User Dmitry Shark spoke briefly about the principle of operation, as well as about diagnosing the idle speed controller.
Injector
A throttle valve is used at the input of the collector device in injection engines. It is equipped with an individual controller for determining the position at a specific point in time.
When the engine starts or the powertrain stops, the following occurs:
- The microprocessor module receives data on rotation speed.
- Then the control unit analyzes the operation of the power unit and specifies its intended purpose.
- Readings from the throttle controller and air are compared. The control unit determines whether the damper is closed or not. He can also “understand” which mixture is supplied to the cylinders of the power unit - lean or enriched.
- The IAC valve opens. The air flow bypasses the damper. This makes it possible to maintain speed at a certain level, programmed in advance.
In fact, several ignition system devices are involved in this process. If the car engine stops or stalls due to problems, the operation is checked manually. This is due to the fact that there is no feedback from the IAC and the diagnostic system.
Diesel power units are not equipped with a throttle valve, so they do not use idle speed sensors, they are useless.
User Alex ZW spoke in detail about the principle of operation of the IAC controller in a car.
Flaws
As for the minuses, there are quite a few of them left over from its predecessor. Certain problems are associated with the system for changing GDS modes, although it is considered as an innovation and advantage. The fact is that the solenoid valves of the phase regulator quickly deteriorate. The car starts to run noisily, like a diesel engine. Repair in this case involves cleaning the valves or replacing them.
There are no hydraulic compensators on the F14D4, and it is now possible to adjust the gaps by selecting calibrated glasses. On the one hand, no one has canceled the advantages of the automated process, but in reality the predecessor F14D3 (with hydraulic compensators) had many more problems. As a rule, the need to adjust the valves arises after the 100,000th mileage.
Another weak point of the new engine is the thermostat. The GM concern is in first place among other manufacturers in this matter. He can’t make thermostats properly, they don’t hold up, that’s all! After 60-70 thousand kilometers, the part must be checked and replaced if necessary.
| Production | GM DAT |
| Engine make | F14D4 |
| Years of manufacture | 2008 – our time |
| Cylinder block material | cast iron |
| Supply system | injector |
| Type | in-line |
| Number of cylinders | 4 |
| Number of valves | 4 |
| Piston stroke | 73.4 mm |
| Cylinder diameter | 77.9 mm |
| Compression ratio | 10.5 |
| Engine capacity | 1399 cm3 |
| Engine power | 101 hp /6400 rpm |
| Torque | 131Nm/4200 rpm |
| Fuel | gasoline 92 (better 95) |
| Environmental standards | Euro 4 |
| Fuel consumption | city 7.9 l. | track 4.7 l. | mixed 5.9 l/100 km |
| Oil consumption | up to 0.6 l/1000 km |
| What kind of oil to pour into F14D4 | 10W-30 or 5W-30 (Low temperature areas) |
| How much oil is in the Aveo 1.4 engine | 4.5 liters |
| When replacing, pour | about 4-4.5 l. |
| Oil change is carried out | once every 15,000 km |
| Resource Chevrolet Aveo 1.4 | in practice – 200-250 thousand km |
| What engines was it installed on? | Chevrolet Aveo, ZAZ Chance |
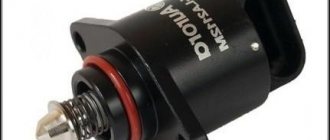
Design features
The valve structurally consists of:
- electric stepper motor;
- four-position rod;
- spring element;
- needles.
When IACs first appeared, they were rotary or solenoid mechanisms. Such devices had two positions - open and closed. This contributed to a decrease in the efficiency of engine speed control. Today, cars use four-step sensors, characterized by the possibility of stepwise feed through the bypass.
The idle air control itself is classified as a consumable item and is therefore considered non-repairable. It can be repaired if it malfunctions, but it will be cheaper to replace it completely.
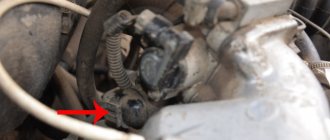
Where is RXX located?
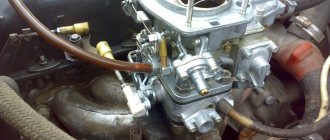
The device should be located next to the throttle valve and TPS. In some cars, the sensor can be fixed directly to the damper body using varnish. Sometimes the device is mounted using two bolts equipped with special mounting holes. The main thing is that the distance from the needle to the mounting flange on the installed device is 2.3 cm.
Connection diagram
Idle air controller connection diagram
One harness consisting of four cables is connected to the idle speed sensor; it comes from the microprocessor module. As a result of this connection, diagnostics may cause certain difficulties. The car owner will not be able to simply apply voltage to the terminals of the device, since the microprocessor module does this pulsed.
Signs of incorrect IAC operation
Symptoms of a regulator failure in a car:
- The car engine stopped running. When driving or standing at a traffic light, the speed of the power unit can arbitrarily increase or fall, and then return to normal. They may freeze.
- The car's engine began to idle. Detonation is heard - a metallic knock from under the hood.
- While driving, there is no compensation for the increased load on the car's engine.
- Difficulties arose in starting the power unit. If the driver has to press the gas additionally when starting, this indicates wear and the need to replace the idle speed sensor.
- Warm-up speed is absent or maintained at an insufficient level.
- The car engine may randomly stall for no apparent reason. This occurs when idling, releasing the gas pedal, or shifting the transmission lever.
- The crankshaft speed may drop randomly when energy consumers are activated. For example, air conditioning or heating systems, windshield wipers, optics, etc.
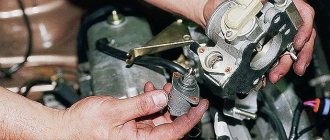
Cleaning
The presence of dirt deposits on the sensor connectors or throttle valve is one of the main reasons why, even if the part is in good condition, the body can vibrate, the engine does not run smoothly, and the speed fluctuates. The cleaning process consists of several stages:
- The air filter under the hood is detachable;
- The first to be removed is the pipe located under the throttle valve;
- Then the sensor and damper connectors are disconnected;
- The throttle valve is dismantled;
- The installation site is cleaned with special means;
- The regulator is disassembled and its components are cleaned;
- The structure is assembled in the reverse order.
If after such work the speed continues to jump or float, the engine gets very hot, and braking is uneven, then most likely the sensor should be replaced.
Find out more about the new Logan
- Replacing the Renault Logan generator bearing (Video)
- Comparison of Lada Kalina 2 with Renault Logan
- Buy a release bearing guide for Renault Logan, sale of release bearing guides for Renault Logan - prices, descriptions and photos on the Avto.ru website.
- Replacement of Renault Logan dimensions. Video, instructions on how to change the bulbs in the Logan headlight
- Features of the Renault Logan brake systems | New Logan
- Repair Renault Logan: Removing and installing starter
- How many liters of oil do you need for a Renault Logan engine?
- Renault Logan front and rear suspension: repair, diagram and device
Main breakdowns and malfunctions of IAC
Causes of problems with the idle speed sensor:
- Power supply circuit interrupted. This malfunction may be related to the wiring in the car, oxidation or damage to the contact elements on the block. If the connection is of poor quality, then this problem will appear periodically. It may be difficult to diagnose the device.
- Contamination of the rod, which leads to its incorrect movement. This problem is the most common and manifests itself as a result of the accumulation of dirt deposits in the channels of the throttle assembly. If the damper is not cleaned for a long time, then the reason should be looked for on the sensor rod.
- Failure of the electric motor. It is unlikely that such a device will be repaired; the engine must be replaced as an assembly with the regulator.
- Destruction of the sealing element due to wear. The problem may appear immediately after replacing the sensor if an old ring is installed instead of a new one.
- Rod wear. If the regulator is working properly, then the shutter should move without snagging, and slipping in the worm gears is not allowed. To determine the condition of the structural elements, you will have to disassemble the device.
The channel “Sdelaj Sam!” spoke about the causes and signs of malfunctions in the idle air valve! Pljus interesnoe!
Preventive measures
In order not to encounter a complete malfunction of the regulator in the future, it is worth periodically carrying out the cleaning process described above. How often to carry out the cleaning process depends on how actively you use your vehicle. If the car is a work vehicle, it is recommended to check and clean the sensor once a year; if you use it only for yourself, once every two years will be enough. But, of course, do not forget about the signs of a part malfunction; if they appear, do not delay. This will help you avoid complete failure of the part and enjoy a quality ride.
Together with you, we come to the conclusion that the part is unpretentious, simple in its functionality and use. Don’t forget: timely detection of a malfunction is the key to overall vehicle productivity. The full operation of the engine depends on the serviceability of each of its components, and if you neglect any part, including the idle speed sensor, this can lead to more labor-intensive repair processes and failure of the entire car.
Restoring the performance of the DXX
After testing, the question arises of eliminating the causes of malfunctions or replacing the part. It should be noted right away that this part is initially considered consumable. Breakage, wear or deformation requires replacement of the sensor rather than repair. Fortunately, the low price of the part allows you to do this without much damage to the family budget.
So, restoration means thoroughly washing the channels and voids in the part and restoring the integrity of the electrical circuit - this means sealing the loose pins (and then covering them with protective varnish), eliminating breaks in the winding and wires.
During dismantling, each element of the part should be carefully treated with a special aerosol reagent WD-40. In this case, there is no need to disassemble the part itself into parts; it is enough to process all accessible parts with a directed jet, not forgetting about the bypass channel, which also often becomes the reason for the incorrect operation of the DXH.
There is no need to adjust the regulator after replacement or testing; this is handled by the on-board computer. However, do not forget to check the distance between the needle head and the screw seat (should be 23 mm).
Regular preventative cleaning will help avoid serious problems and significantly increase the service life of not only the idle speed sensor, but also the entire fuel system of the car.
Diagnostics
Before checking the operation of the controller, perform the following steps:
- The parking brake lever is tightened. Wheel chocks must be placed under the wheels of the vehicle.
- The engine compartment of the car is opened and the negative terminal is disconnected from the battery. To do this, use a key to loosen the fastener on the lock.
- The engine compartment is being inspected. You need to find the idle air control.
- The block with the wire is disconnected from the device.
Manual check
This diagnostic stage is considered the simplest in terms of implementation:
- The block with wires is disconnected from the device.
- Two bolts are unscrewed and the regulator is removed.
- The sensor is connected to the microprocessor unit. The controller must be held in your hands.
- The engine is being started, it is advisable that an assistant do this. At this point, the rod should be pulled into the coil all the way. This occurs as a result of receiving an impulse from the control unit. Then it should move out a short distance.
Manually checking the idle air control valve allows you to determine the functionality of the rod. When performing this, you can make sure that the part does not bend or jam inside the device.
But this verification option does not give a 100% result. It is possible that the modification of the idle speed sensor installed on the vehicle does not match the firmware of the microprocessor unit. The rod extends, but the required amount for its extension is unknown. Therefore, the block and plug are checked, and only the latter is marked.
During a visual inspection, it is necessary to diagnose the integrity of electrical circuits and coils. You should also check the condition of the bypass channel and needle for wear.
User Igor Belov spoke in detail about performing a manual check, as well as other methods of testing the idle air valve.
Diagnostics with a multimeter
You can check the operation of the controller using the tester like this:
- The connector with the wire is disconnected from the regulator in the engine compartment. If the car is equipped with a 1.6 liter engine, then it is necessary to unscrew the two fastenings of the throttle mechanism to the receiver in advance. Then it moves away from the end of the latter by about 1 cm.
- First, the tester diagnoses the controller's electrical circuit to make sure whether voltage is supplied to it or not. The negative terminal of the multimeter is connected to ground, that is, the body or engine of the car. The positive contact should be connected to pins A and D, they are marked on the connector.
- The ignition is activated and the tester readings are read. The multimeter must first be set to ohmmeter operating mode. The resulting voltage value should be at least 12 volts. If this parameter is lower, then there is a possibility that the problem is a low battery. In the event of a complete lack of power, you must ensure the integrity of the electrical circuit or control unit.
- The ignition is turned off. The next step will be diagnosing the controller itself.
- The multimeter is reconfigured into resistance measurement mode, its terminals are alternately connected to contacts A and B, and then to C and D. The resulting diagnostic value should be about 53 Ohms.
- Then the resistance is measured between pairs A and C, as well as B and D. On them, the working value should tend to infinity. If the values obtained are different, the sensor must be replaced.
Pulse testing on a homemade stand
You can assemble a homemade device without chips; its diagram is shown below:
- The equipment uses 6 volt charging. It can be taken from a mobile phone.
- Connector pads can be purchased at any specialty store.
- During diagnostics, the sensor is first disconnected from the microprocessor module. The rod stroke is checked. If the light indicator of a homemade stand lights up brightly, this indicates that the regulator rod is faulty. If the light is on at half power, then the mechanism is working.
Scheme of a simple homemade diagnostic stand
The price of such equipment is at least 1,500 rubles. Considering the low cost of the idle speed sensor, using a proprietary stand is not economically profitable.
How to clean the idle air control?
Cleaning a proven IAC is considered using the example of a Chevrolet Niva:
- The engine compartment is opened and the battery is disconnected. To do this, you need to dismantle the cover of the air filter device, which is removed and put aside.
- The block is disconnected from the air controller. The connector is located on a thick rubberized corrugation connecting the intake manifold and the air filter cover. This block is attached using a special U-shaped bracket. During dismantling, it may jump out, so you need to be careful.
- Then the corrugation is disconnected from the intake manifold, it is fixed with a clamp. The same must be done with the rubberized pipe; it connects the corrugation to the valve cover of the power unit. The hose is fixed with an iron bracket.
- The thin pipe connected to the intake manifold is disconnected and removed along with it. This hose is pulled onto the fitting.
- Inside the pipes you can notice contamination in the form of carbon deposits and traces of engine fluid. All hoses must be cleaned and washed, after which they must be blown out. To complete the task, it is recommended to use a special cleaning agent or WD-40 liquid. The main thing is that there is a tube included with the cylinder.
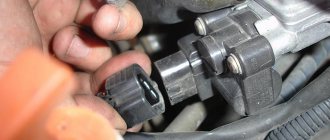
- The idle speed sensor itself is made in a black plastic case and is installed in the intake manifold. The plug is disconnected from it and the two bolts that secure the device are unscrewed. The procedure is performed using a short screwdriver with a Phillips head; first, traces of sealant must be removed from the bolts. When dismantling the device, you must also remove the O-ring.
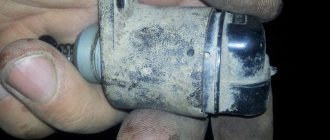
- The IAC is being cleaned, and fuel can also be used for this. The procedure is carried out using rags and cotton swabs. You cannot pour a lot of liquid into the mechanism so as not to damage it. After each cleaning, the sensor should oxidize and dry.
- It is recommended to remove dirt from the intake manifold; dirt is removed using rags. The idle speed sensor seat is cleaned throughout its entire depth. Contaminants are also removed from the device fitting.
- After cleaning, the entire structure is reassembled in the reverse order. A new rubber ring is installed on the idle speed sensor, after which the controller is mounted in place and fixed. The connector is connected to it, and the air filter device is installed back.
Dismantled corrugation with hoses
Removing the IAC from the seat
Cleaning the sensor with WD-40
Cleaning Rules
It often happens that cleaning the idle speed sensor can solve the problem of device inoperability. In general, this procedure is quite simple. Therefore, almost anyone can cope with it.
So, how to clean the idle air regulator:
- First of all, the IAC must be disconnected from the wiring.
- Next, take the WD-40 liquid and apply it to a Q-tip. This stick is used to clean contacts.
- Next, take a small Phillips head screwdriver and unscrew the controller latches, there are two of them. If the fastenings are completely missing, this indicates that the IAC is mounted on varnish; if this is the case, then, most likely, the entire throttle will need to be dismantled.
- Dismantle the DXX and inspect it. If there is dirt or traces of motor fluid on the device, then in addition to the regulator itself, you will need to clean the entire throttle assembly.
- Now take a cleaning fluid (you can use carburetor cleaner instead of WD-40) and apply it to the cone needle and spring. Although carburetor cleaner is better for cleaning! Having done this, you need to dry the controller and put it in place. Before installation, make sure that the distance from the device body to the needle is 2.3 cm. If cleaning does not help fix the problem, then most likely you will have to change the DHC.
Controller connection diagram
What do you need to know when replacing the IAC?
To change and install a controller that allows you to regulate idle speed, you need to pay attention to the position of the rod. It must not be allowed to be pushed forward too much. This can happen if the device is connected to the block and the ignition is activated before installation. It is not allowed to push the rod in by hand.
If the valve is installed with the needle extended and the retaining screws are tightened, damage to the unit may occur due to shearing of the worm gear. It is impossible to repair such a sensor. Depending on the vehicle model, after installing a new regulator, it may need to be calibrated. In some cars, this procedure is carried out using special equipment or a stand.
On VAZ cars, calibration is performed as follows:
- A terminal is connected to the negative output of the battery.
- The key is turned in the lock to turn on the ignition for ten seconds. There is no need to start the power unit.
- The ignition is turned off.
User Ovsyuk talked about replacing the idle air valve on his own using the example of a Lada Samara car.
Removing the logan 2 throttle assembly (16 valves)
The set of tools used to dismantle the Renault Logan throttle body with 16-valve engines consists of:
- Key size 8 mm;
- 10mm wrench;
- TORX E8 heads;
- TORX T25 heads;
- Flat screwdriver.
Algorithm for dismantling the unit:
- Remove the negative terminal from the battery.
- We move the lock that is installed on the block of the wiring harness leading to the throttle.
- Press the pad holder and remove it.
- By prying the tip of the hose responsible for purging the adsorber, we disconnect it from the throttle fitting.
- We proceed to dismantling the air filter housing.
- Remove the air intake hose from the holder.
- We remove the fixing bolt and move the resonator from the cover, which dampens the intake noise.
- We lift the resonator up and dismantle it.
- Squeezing the fasteners, disconnect the brake booster vacuum hose and the intake manifold receiver.
- After removing the fixing screws, we get rid of the filter cover.
- We unscrew the bolts securing the air filter housing on the right and left.
- The rubber sealing ring will prevent the body from moving, so remove it from the throttle pipe with force.
After removing the throttle body, you can remove the Logan idle air valve.
Tips for extending the service life of IACs
To increase the service life of the sensor, you need to follow simple rules:
- The air filter device must be replaced on time.
- You cannot park your vehicle for long periods of time in winter. At low negative temperatures, the car owner must periodically start the power unit, warm it up and perform gas changes. This will allow the valve to be designed to prevent it from sticking.
- Do not allow foreign liquids to enter the throttle mechanism area. Sprays for quick starting of the engine usually do not pose a danger to the sensor, but it is better not to overdo it.
Nuances of choosing a sensor
The original idle speed controller is marked as XX-XXXXXXXX-XX. The last two characters define the compatibility label.
More details about them:
- odd characters (03 and 01) are interchangeable, as are even characters (04 and 02);
- device group data cannot be replaced, that is, even ones cannot be replaced with odd ones.
You can identify a fake low-quality idle speed sensor by several criteria:
- there are no distinctive marks on the device packaging;
- the tip of the rod has a dark shade;
- the yellow sticker on the device body has no frame;
- original sensors are equipped with a thin black seal, while counterfeits are equipped with a thick red ring;
- the body of a low-quality device will be 1 cm shorter;
- non-original sensors are equipped with a white spring instead of a black one, its turns are sparser;
- There are no caps with a diameter of 3 mm on the case rivets.
Articles
SIEMENS VDO D95177 Here are the catalog numbers of Logan idle speed sensors with different engines.
Engine 1.4 with eight valves - original RENAULT article number 7701-206-370 or SIEMENS VDO D-95-177; analogue of ERA 556-038.
Engine 1.6 with eight valves - original RENAULT part number 7701-047-909 or SIEMENS VDO D-95-174; analogue of ERA 556-012.
1.6 engine with sixteen valves - original RENAULT part numbers 7700-102-539, 8200-299-241, 8200-692-605 or SIEMENS VDO D-951-66; analogue of ERA 556-037.
RENAULT 8200-692-605
The article number of the lower RENAULT sealing ring is 7701047579. The catalog number of the upper one is 7701069213.
The sensor can be purchased either original or a high-quality analogue.
Video “Self-calibration and removal of the rod from the IAC”
User Ruslan K talked about how to remove the needle from the regulator at home and calibrate it without special equipment.
Do you have any questions? Specialists and readers of the AUTODVIG website will help you ask a question
Was this article helpful?
Thank you for your opinion!
The article was useful. Please share the information with your friends.
Yes (100.00%)
No
X
Please write what is wrong and leave recommendations on the article
Cancel reply
Rate this article: ( 2 votes, average: 5.00 out of 5)
Discuss the article: