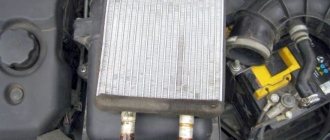
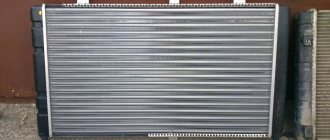
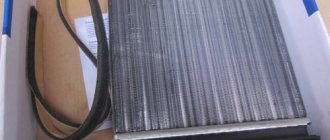
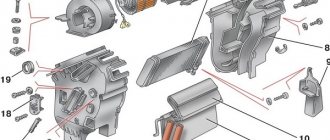
The quality of heater radiators on VAZ SUVs is a fairly relevant topic and worries many car owners; the interior of these cars with a standard heating system is not always warm. In addition, the “native” heater radiator of Niva cars may leak over time, and then it has to be replaced.
- 1 Types of radiators for the Niva stove
- 2 (adsbygoogle = window.adsbygoogle || []).push({}); Removing the radiator of the Niva stove
- 3 Replacing the Chevrolet Niva heater radiator
- 4 Heater radiator with air conditioning Niva Chevrolet (replacement)
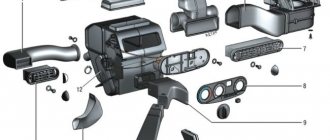
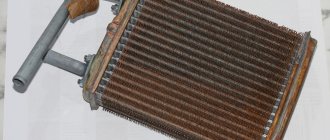
In this article we will look at what types of heater radiators (HR) there are on VAZ 4x4 cars, how you can replace the RF on the VAZ 21213 and Chevrolet Niva models.
How to replace the heater radiator on a Chevrolet Niva without air conditioning
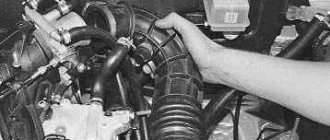
Before you begin dismantling the radiator, you will need to drain the antifreeze from the cooling system. To do this, unscrew the bolt on the cylinder block and remove the expansion tank cap. Another option is also possible, in which you open the tank lid and disconnect the cooling tube of the throttle assembly. Instead of this tube, another hose is inserted, through which the liquid is removed. To speed up the process, you can carefully blow out the tank to drain any remaining antifreeze. In addition, it is recommended to disconnect the negative terminal from the battery.
To replace the heater radiator, you need to unscrew the bolt on the cylinder block and the expansion tank plug to drain the coolant
Tools for work
To dismantle the radiator you will need:
- screwdrivers (flat, Phillips);
- pliers;
- wire cutters;
- socket heads of different sizes (8, 10, 14).
How to remove a stove radiator
It is worth taking into account that the manufacturer’s recommendations for car repair are not always the simplest and most accessible for the average motorist. Therefore, quite often you have to rely on the experience of owners who carry out repairs with their own hands using improvised means and tools, resorting to various tricks
Let's start the disassembly procedure:
- We dismantle the glove compartment, for which we unscrew the corresponding fasteners.
We unscrew the screws securing the trim on the right and left sides in the passenger's feet, and remove the terminals of the lighting bulbs. To remove the glove compartment, you will need to unscrew the corresponding screws and remove the side decorative trim in the legs - We loosen the clamps of the rubber pipes from the radiator and carefully tighten them, pouring the remaining antifreeze into the prepared container.
After removing the hoses from the radiator, drain the remaining antifreeze into a prepared container. - After removing the hoses, unscrew the fasteners of the heat exchanger itself and push the part towards you until it rests against the air duct.
- We unscrew the nut securing the relay cover with the “8” head and remove the element.
It will be seen that the subsequent dismantling of the radiator is hampered by a corner of the frame. To solve this problem, use pliers to remove the interfering part of the plastic and remove the heat exchanger itself. To remove the radiator from the seat, you will need to cut off a piece of plastic - On a new radiator, it is recommended to glue the outer edges with foam rubber to avoid air penetration due to leaky connections.
- We also cut off a piece of plastic on the frame of the new heat exchanger, and then insert the part into its seat.
On a new stove radiator, it is necessary to cut off the corner of the frame, which will allow the part to be installed in place - We perform assembly in reverse order.
Improvement No. 1. We take air from the cabin
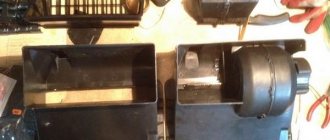
The main disadvantage of the Niva heater is that all the air into the heater radiator comes from the street, and when the air intake flap is closed, air circulation and heating stop completely. To eliminate this drawback, I disassembled the heater (I had to drain some of the antifreeze and disconnect the heater radiator pipes), and in the side wall of the heater housing, opposite the wall where the radiator tubes exit, I made a hole in the shape of a rectangular trapezoid. I did it in such a way that there was 1.5-2 mm of the body wall left to the boundaries of the plane in which I made the hole, and 6-8 mm from the side of the stiffener for attaching the petal valve. I made the hole using a drill, marked it, drilled along the contour of the small diameter holes, then connected the holes using a knife, then filed the edges of the resulting hole, giving it its final shape. The area of the resulting hole was approximately 25 square centimeters. It is through this hole, when the heater air intake flap is closed, that air is drawn from the passenger compartment.
Heater radiator with air conditioning Niva Chevrolet (replacement)
There are two ways to replace the RP on a Chevrolet Niva with air conditioning, each of them has its own pros and cons:
- the first method will take a lot of time, and you will have to disassemble almost the entire instrument panel;
- the second method is relatively fast, but it is necessary to cut and adjust some parts, as the common people say - this is the “collective farm” method.
In order to replace the stove radiator according to the instructions, we perform the following work:
- First of all, we drain the antifreeze - so that it all flows out, we blow into the expansion tank;
- remove the ground terminal from the battery;
- dismantle the glove compartment, it can be easily removed;
- remove the center console, including the radio;
- unclip the front body panels from both A-pillars;
- remove the decorative panel on the side of the center console (driver's side);
- disconnect the instrument cluster;
- loosen the fastenings of the gearshift lever panel, completely unscrew the two screws closest to the panel;
- dismantle the steering column covers and steering column switches;
- unscrew the bolts securing the panel itself (4 fasteners near the windshield);
- remove the air conditioner control knobs;
- dismantle the heater control unit;
- unscrew the four steering column fasteners (two on each side), lower the steering column onto the driver’s seat;
- remove the air duct located behind the torpedo;
- disconnect all the cables;
- remove the instrument panel frame;
- unscrew the bolts securing the iron frame of the panel, remove the “piece of hardware”;
- we separate the housings of the evaporator and the radiator of the stove from each other, dismantle the air ducts (central, as well as on the left side);
- we approach the clamps of the stove pipes, loosen them, and remove the hoses;
- We remove the stove, change the radiator, then put everything back in place.
The heater radiator on a car with a Chevrolet Niva air conditioner can be changed in another way, but here you will have to heat the plastic and cut out its pieces. The easiest way to use this method is to install a “original” radiator or a copper radiator from a Volga car - it will fall into place more easily. It’s not worth experimenting with copper RP from a “penny” - it won’t fit in size. You will also need long L-shaped stove pipes, they will fit from the VAZ Nine, but you will need adapter tubes and additional clamps - the 2109 pipes are thinner than the Nivsky ones.
The principle of this installation:
- remove the glove compartment, dismantle the air duct on the passenger side;
- after removing the steering column casing and the heater protection in the heater radiator housing (on the driver’s side), we cut out or burn with a soldering iron a rectangular hole for removing the RP; by the contour of the plastic you can understand where exactly the heater radiator is installed;
- We unscrew the clamps of the stove pipes not at the radiator, but under the hood;
- we pull off the stove pipes, drain the antifreeze from them (tilt the hoses down), all the coolant does not need to be drained;
- so that the remaining antifreeze does not interfere with further work, we drill a hole in the old RP;
- Using a soldering iron on an old radiator, we anneal the furnace fittings for the pipes, pull out the control panel to the left (towards the driver);
- on the new stove radiator we install pipes 2109, adjust them to size, assemble the structure with adapter tubes, install the entire assembly in place, secure the RP using a homemade clamp.
To make it easier to carry out all this work, it is better to remove the front seats.
There are many disputes about which replacement is better for a Chevy Niva with air conditioning, but the second method has one serious advantage - the quality of Russian parts often turns out to be unimportant, and if the new heater radiator leaks, you will have to disassemble everything again. In the “collective farm” version, it will be possible to replace the RP a second time very quickly, but disassembling and reassembling the entire instrument panel may take a whole working day.
The quality of heater radiators on VAZ SUVs is a fairly relevant topic and worries many car owners; the interior of these cars with a standard heating system is not always warm. In addition, the “native” heater radiator of Niva cars may leak over time, and then it has to be replaced.
- 1 Types of radiators for the Niva stove
- 2 (adsbygoogle = window.adsbygoogle || []).push(<>); Removing the radiator of the Niva stove
- 3 Replacing the Chevrolet Niva heater radiator
- 4 Heater radiator with air conditioning Niva Chevrolet (replacement)
In this article we will look at what types of heater radiators (HR) there are on VAZ 4x4 cars, how you can replace the RF on the VAZ 21213 and Chevrolet Niva models.
How much does a new stove faucet and labor to replace it cost?
In Moscow and the Moscow region the average is . Moreover, the prices for factory, ball or ceramic valves are practically the same.
Replacing a faucet in a car service costs 400 rubles and more.
We recommend changing the heater tap yourself. First, you will save money and gain experience in car repairs. Secondly, this operation will not take much time (about 1 hour), and all the necessary information is given in this article.
Reg.: 01/02/2008 Threads / Messages: 1 / 13 From: Ukraine. Kharkov Age: 60 Car: VAZ21211982
Reg.: 07/15/2008 Messages: 39 From: Donetsk Age: 33 Car: 21214i 2007 color: deep sea.
Reg.: 03/15/2009 Messages: 1310 From: Odessa Age: 30 Car: 21213. 2003 130 thousand passed. HBO Lovato.
Reg.: 08/23/2007 Threads / Messages: 5 / 4030 From: Dnepropetrovsk, Ukraine Age: 34 Car: 21213 96
31″ tires, ShNiva clutch, subframe, expedition vehicle, Gen 80A, air filter 3302, linted bi-xenon, Weber 32DGAS carb, SRPM, wide welded bridge, vertical shock absorbers ShN, ZDT, VUT Omega-B, etc.
Reg.: 03/15/2009 Messages: 1310 From: Odessa Age: 30 Car: 21213. 2003 130 thousand passed. HBO Lovato.
Reg.: 06/27/2007 Messages: 1765 From: Moscow Age: 51 Car: 21213, 1999
Reg.: 08/23/2007 Threads / Messages: 5 / 4030 From: Dnepropetrovsk, Ukraine Age: 34 Car: 21213 96
31″ tires, ShNiva clutch, subframe, expedition vehicle, Gen 80A, air filter 3302, linted bi-xenon, Weber 32DGAS carb, SRPM, wide welded bridge, vertical shock absorbers ShN, ZDT, VUT Omega-B, etc.
Reg.: 03/15/2009 Messages: 1310 From: Odessa Age: 30 Car: 21213. 2003 130 thousand passed. HBO Lovato.
Reg.: 08/23/2007 Threads / Messages: 5 / 4030 From: Dnepropetrovsk, Ukraine Age: 34 Car: 21213 96
The ball one (it comes with 2108999 from the factory) suffers from a leak along the axis, the ceramic one with two slots does not leak, does not sour, but there is an opinion that it has a smaller cross-section, etc. But I washed the stove with a faucet under the water supply and I can say with authority that a ceramic faucet easily passes such a pressure that a standard pump will not create, not an ATE-1 electric pump with 1800 hp.
The standard pipe from the water supply created a stream of 3 meters in both directions and the tap was not a hindrance, although I read about reducing the cross-section and thought about removing it when flushing, now I’m sure that this tap is more than complete, especially since Luzar says that the maximum design quantity is in the slurry pumped through the stove is equal to = 1000 lch, for comparison, I checked how a new pump from a gazelle pumps, produced by KZATE (which is 1400 lph) and a short-circuiting one, produced by ATE-1, and so both hit about 30 cm, and the water supply by 3 meters, with the same diameter of the pipes, the difference, as they say, is obvious.
31″ tires, ShNiva clutch, subframe, expedition vehicle, Gen 80A, air filter 3302, linted bi-xenon, Weber 32DGAS carb, SRPM, wide welded bridge, vertical shock absorbers ShN, ZDT, VUT Omega-B, etc.
Reg.: 03/15/2009 Messages: 1310 From: Odessa Age: 30 Car: 21213. 2003 130 thousand passed. HBO Lovato.
READ How to change the battery in a Volkswagen 2019 key
Drain the liquid from the cooling system with the heater tap open (see Replacing the coolant).
For clarity, operations carried out in the engine compartment are shown with the engine removed.
In the engine compartment on the front panel, using pliers, loosen the clamp securing the hose to the lower radiator pipe and remove the hose from the pipe (the hose from the upper heater radiator pipe was removed when dismantling the engine).
Using the “7” head, unscrew the two self-tapping screws securing the seal to the front panel
and remove the seal. In the cabin we remove the storage shelf
Using a “7” wrench, loosen the bolt securing the crane drive rod clamping bracket...
The heater valve is attached to the radiator mod. 2105 (aluminium) with two bolts, to the radiator mod. 2101 (brass) - two nuts.
Using a 1/4-inch square socket with a cardan joint, unscrew the two bolts securing the valve to the radiator
Using a 10mm wrench, unscrew the two bolts securing the pipe to the tap
Install the faucet in reverse order
During disassembly, the lower nut securing the faucet to the aluminum radiator may fall out of the radiator tank socket.
When installing the nut in place, secure it in the socket with plasticine.
Lada 4×4 3D Karabas › Logbook › Moving the radiator to Niva 2121
Well, I finished this upgrade on my war horse! Moving the radiator to the place of the spare tire (under the hood). Many of you will say that this is complete nonsense, why, etc. Let's consider the advantages (if you disagree, speak up! 1) When moving the radiator, space is freed up for the winch. 2) In the event of an impact (against a tree, stump, stone, etc.), the radiator will not be damaged and you can at least sit in a running, warm car (waiting for help if your car cannot move on its own). 3) It doesn’t get clogged with dirt (and if you managed to get it clogged with dirt), then it’s easy to wash and blow out. 4) The radiator in this position becomes higher than the heater radiator (due to this, it is hot in the cabin when the heater is on). 5)… ITD…
Application area
- Polypropylene pipes: technical characteristics and simple installation allow these pipes to be used in water supply systems as a distribution mechanism in administrative, industrial, and residential buildings for process and drinking water pipelines.
- The technical characteristics of polypropylene pipes make it possible to use them in the agricultural sector.
- Polypropylene fittings and pipes of 3 types are intended:
Polypropylene pipes and fittings
DIY tuning of Niva 2121 for off-road
Like many parts in the Chevrolet Niva, we change it ourselves, the radiator is no exception.
Points by which you can diagnose a breakdown of the Chevrolet Niva heater radiator:
- the amount of antifreeze in the tank has sharply decreased;
- reduction in the quality of heating of the car interior;
- the appearance of a thick, greasy film on the inside of the glass;
- there was a clear smell of antifreeze in the car;
- accumulation of antifreeze under the driver's mat.
Having discovered any of them, you need to diagnose the Chevrolet Niva heater radiator in order to determine the next steps for repair or replacement.
Before replacing a spare part, the system is completely emptied of coolant. Replacing a Chevrolet Niva heater radiator without air conditioning will not cause any difficulties and does not require special skills. You can carry out the work of replacing a Chevrolet Niva heater radiator even on a simple overpass.
If you cannot adjust the position of the regulator, the cable may have broken. For replacement, a typical set of wrenches or ratchets and a flashlight will suffice. It is most convenient to use a headlamp; this will allow you to repair the stove without difficulty.
Sequencing:
The driver's seat moves back as far as possible. Unscrew the bolts and handles located on the control panel. The panel is dismantled from the driver's side, i.e. at the bottom left. The latches that secure the cables are disconnected. To remove the cable, the fan damper is dismantled. When installing a new cable, pay attention to the fact that its ends on both sides must be twisted into a ring and securely fastened.
Assembly is carried out in reverse order
At the end of the work, it is important to make sure that the cable is working properly by checking
A little lower you will find a bracket holding the shell of the damper drive rod. You need to carefully pry it off with a screwdriver. Do the same with the other rods, ensuring that the control unit is completely disconnected.
You also have to disassemble the control unit when you discover that the heater of your Chevrolet Niva does not work or works with serious problems.
Very often the electronic control unit for the stove installed on your Niva fails. In this case, you will still have to turn to qualified electricians for help, since you can remove the unit, but you cannot identify the cause of the problem. To carry out such work, it is very important to have various tools, instruments, testers and devices, and it is also important to have good knowledge of electrical engineering.
So, if you are unhappy with the way the stove works on your Chevrolet Niva, you don’t like the fact that the car’s interior warms up slowly, then act boldly, look for the reasons, solve problems, armed with tips and necessary instructions, and enjoy the good performance of your car.
Replacing the interior heating control unit
A malfunction of the unit will lead to system malfunctions.
Procedure:
- You need to remove the negative terminal from the battery.
- All knobs are removed from the mechanism control panel. You need to slightly pull them towards you. Then, using a screwdriver, pull out the lever responsible for the circulation. After this, use the same screwdriver to disconnect the lining.
- Unscrew the screws located under the facing panel and remove the control unit.
- then you need to remove the connector with the wires responsible for switching speeds and disconnect the block with the wires responsible for the backlight.
- If the heater has air conditioning, you must also disconnect all pipes connected to the vacuum switch.
- The brackets holding the cable braid and the remaining fixing elements are removed, and the existing rods are also removed.
Removing the radiator of the VAZ-2121 stove
The procedure for removing the heater radiator on a VAZ Niva does not require special skills and abilities
It is important to prepare the necessary materials and tools in advance. Most instructions for repairing car heaters contain a recommendation to drain the coolant before starting work.
In practice, many car enthusiasts limit themselves to draining only that part of the antifreeze that is located in the radiator itself and the nearby pipes of the cooling system.
Preparing tools
To replace the radiator, you will need the following tools:
- pliers;
- slotted screwdriver;
- Phillips screwdriver;
- a set of markers for identifying wires;
- spanner set to “7”;
- socket wrench set to “10”;
- socket wrench set to “7”;
- socket wrench set to "10".
Procedure for dismantling the radiator
All operations must be performed in the following sequence:
Unscrew the left self-tapping screw securing the storage shelf. The self-tapping screw is unscrewed with a Phillips screwdriver. Unscrew the two self-tapping screws for the right shelf fastening. The right side of the shelf is attached to the interior upholstery. Unscrew the central fastener of the shelf from the front panel
The central part of the shelf is unscrewed from the front panel. Carefully lower the right side of the shelf. The right edge of the shelf moves down freely. Move the left side of the shelf out of the center console panel
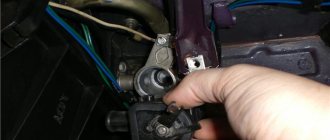
There is a special spike on the left side of the shelf. Unscrew the self-tapping screw securing the floor tunnel lining to the radio mounting panel. The lower part of the panel is also fixed with a self-tapping screw. Unscrew the screws for the left and right fastenings of the central panel. The process is shown on the right side, the left side is similar. Remove the radio panel. The panel is moved to the side. Disconnect the wire connectors from the radio panel. The wire blocks are disconnected to completely remove the radio panel. Completely dismantle the panel. After disconnecting the wires, the panel can be easily removed. In the engine compartment, loosen the clamps securing the hoses to the radiator pipes. Loosening the clamp is shown using the example of the lower pipe; a similar operation is performed with the upper one. Unscrew the screws securing the seal from the front panel. The screws are unscrewed with a socket wrench with a head set to “7”. Remove the seal. The removed seal allows you to remove the radiator pipes from the engine compartment. In the passenger compartment, loosen the nut securing the crane drive rod. The fastening nut is unscrewed with a “7” key. Remove the heater tap drive rod. The rod is removed from the valve lever. On the right side of the fan casing, remove the heater tap rod from under the bracket. The rod is disconnected from the fan casing. Disconnect the spring brackets securing the casing. The brackets are pryed off with a slotted screwdriver. Remove the casing and fan. The casing with the fan is moved to the side. Remove the radiator. After removing the fan, the radiator is carefully removed from its compartment. Unscrew the faucet fastening from the radiator. The tap and pipes are turned off with a key to “10”. Remove the heater tap. The removed tap is checked for leaks. Remove the lower nut securing the tap to the radiator. The lower nut often falls out and is lost. Disconnect the outgoing pipe. The two fastening nuts are unscrewed with a “10” wrench
After dismantling, you should carefully inspect the radiator for blockages in the grille and leaks from the tubes. Based on the results of the inspection, a decision is made on the possibility of repair or installation of a new radiator.
Video: installing a radiator
The process of replacing the heater radiator on a classic Niva has been studied far and wide by many car owners. In fact, the procedure is similar to the entire family of AvtoVAZ classics
However, caution and safety precautions should be observed when working. After completing the repair, before driving on public roads, you must make sure that all components and mechanisms of the vehicle are operating normally.
Only then should you begin daily use of the machine.
- 5
- 4
- 3
- 2
- 1
(11 votes, average: 4.4 out of 5)
Do-it-yourself repair and replacement of the Niva Chevrolet car heater
Diagnosis of faults, repair and replacement of elements of the VAZ 2113-15 stove with your own hands
Diagnosis of faults, repair and replacement of the Chevrolet Lanos heater radiator with your own hands
Typical radiator malfunctions
There are two main radiator malfunctions:
- Clogged grille and radiator tubes.
- Radiator leakage.
Since the Niva is often operated in difficult road conditions, the likelihood of contamination of the grille from dusty outside air is very high. Clogging of the cells reduces the heat transfer area of the radiator, and as a result leads to a decrease in the heat released from the air ducts into the passenger compartment. In such cases, the stove radiator is dismantled and washed under high pressure.
Clogged radiator tubes are also common. If the outlet pipe is barely warm or cold, then the radiator tubes are clogged. This happens for various reasons, including the entry of foreign objects into the cooling line during repair work. In such cases, the tubes themselves are also washed. To do this, it is not necessary to remove the heater radiator. It is enough to separate the radiator pipes from the cooling system and supply water under pressure into one of the radiator pipes.
Possible heater malfunctions and ways to eliminate them
Cherry Niva Chevrolet
If the stove in a VAZ 21214 has stopped working, then, in principle, repairing it yourself is not a particularly difficult task.
The reasons for the malfunction why the Niva stove refuses to work are given below:
- Failure of the additional resistor. This element of the system is located behind the glove box and is designed to control the ventilating device for pumping warm air into the cabin. The problem is solved by replacement.
- Wear of pipes. Over time, the pipes begin to wear out, and temperature changes especially contribute to this. To detect worn hoses, each line must be carefully inspected. Wear may be indicated by cracks and other damage to the pipes through which antifreeze can escape.
- The heater valve is faulty. A breakdown of this component may be indicated by traces of a coolant leak in the vehicle interior. If the heater tap is being replaced, it is better to use a ceramic device; its service life is usually several times higher than that of traditional metal devices.
- Problems in the operation of the control unit. It is best to have this part repaired by a qualified electrician.
- The heater radiator has failed. On Niva 21213 you can easily replace it with your own hands, we will talk about this below (the author of the video is the OWNER G channel).
