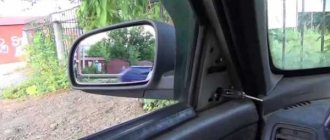
Good visibility is essential for safe vehicle travel. During the process, the driver must constantly “keep his finger on the pulse” so as not to accidentally get into an accident. The manufacturer took care of the side mirrors on the Priora. The viewing angle is large enough to not move even when reversing, overtaking or changing lanes.
Visibility like in luxury cars. Drivers note that in other cars comparable to the Priora, you have to strain to see what is happening on the sides and behind the car. There are mirrors on the market for Priora with turn signals or repeaters.
This is a device for a special version of luxury cars. Naturally they cost more. The price difference is about 900 rubles. Mirrors from the luxury Priora can be installed on a standard car. Turn signals located in mirrors are quite a fashionable topic. They give the car an attractive look and also add safety while driving.
IMPORTANT : The side mirrors of the Lada Priora of the first version were improved during the restyling of the car. In the most complete configuration of the car - SE Luxury - the side mirrors have been improved to improve the driver's convenience. Many drivers who bought a car with a simpler configuration install such mirrors.
You can install the accessories yourself. You just need to properly disassemble the device and understand how the electrics work. There is an option to simplify the work. To improve the appearance, you can install mirror covers. The car will look much more solid.
Former owners of “classics” definitely get a thrill from driving a heated car. You no longer need to freeze your car in winter. The manufacturer implemented heated mirrors by installing spirals. If you turn it on in rain, slush or snowy weather, a mark “appears” on the glass. The spirals do not deteriorate even after 5-7 years of use.
Mirror elements of Lada Priora
Set of old-style mirror elements (glasses) with neutral anti-reflection and heating for Lada Priora
Set of old-style mirror elements (glasses) with blue anti-glare and heating for Lada Priora
Old style mirror element (glass) with neutral anti-reflection and heating for Lada Priora
A set of mirror elements (glasses) of a new type with heating and blue anti-glare for Lada Priora 2
Mirror element (glass) of a new type with heating and neutral anti-glare for Lada Priora 2
Mirror element (glass) DAAZ with heating and neutral anti-glare for Lada Priora
Old-style mirror element (glass) with blue anti-glare and heating for Lada Priora
Heating element in the side mirror on Lada Priora
Set of DAAZ mirror elements (glasses) with heating and neutral anti-glare for Lada Priora
A set of mirror elements (glasses) of a new type with heating and neutral anti-glare for Lada Priora 2
Mirror element (glass) of a new type with heating and blue anti-glare for Lada Priora 2
How to change a side mirror on a Priora
Instructions for disassembling the side exterior mirror on a Priora.
| Removing the mirror from the car |
Next, you need to remove the mirror element, for which you need to unclip 4 latches.
We press on the inner part of the mirror, while a gap will open on the outer part of the mirror - pull the outer part of the mirror element away from the mirror body (a fairly large force must be applied) and unclip the latches
Tags: how to disassemble a mirror on a Priora, how to remove a mirror element on a Priora, how to remove a mirror on a Priora
To add comments you must log in or register on the site
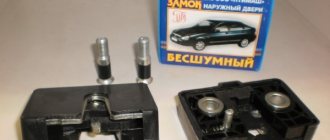
I think many will find my photo report of how the mirror is disassembled useful. It all started with the sound of a clatter coming from these mirrors when the music was turned on - the door was taped with noise. And this rattle got to me. It turns out that without knowing, you can easily break the mirrors during disassembly.
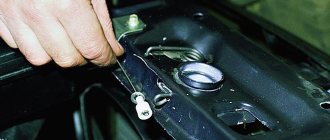
1. Using the handles, tilt the lower part of the mirror away from you until it stops. A gap appears at the top. You need to insert a screwdriver into it, see photo
2. There are latches inside that fasten the mirror to the electric drive.
Having reached the mounting spring, I decided to tighten the nut tighter - the breakpoint probably appeared from its loosening.
And just in case, I laid a noise between the connection of the mirror and the mounting base.
Then I reassembled everything and installed it back. THE RATTLE DISAPPEARED.
There is an idea to add repeaters to these paws like the deluxes. I’ll post a separate report on how to do it.
For those who find it useful, click (like)
Issue price: 0 ₽ Mileage: 25,000 km
Lada Priora, 2011
Comments 26
I want to buy additional heating on mine and put it in. But I don’t know how to take it apart)))))
Thanks for the instructions. Today I will glue ferns behind the mirror, it will be interesting - come visit
Heh) it's a vibration, not a noise)
Tell me how you put the plastic ring in place with the mirror element back into the mirror? I'm talking about the one in the 3rd photo, there is the caption “different angle”. When I removed the mirror element, this ring remained in the mirror itself, but for some reason one side of this ring is fixed and the other dangles freely and does not want to be fixed to the body where the motors are located. Does it unscrew?
To be honest, I don’t understand which ring we are talking about; on the mirror, only the latches should remain as in the 2nd photo
Tell me how you put the plastic ring in place with the mirror element back into the mirror? I'm talking about the one in the 3rd photo, there is the caption “different angle”. When I removed the mirror element, this ring remained in the mirror itself, but for some reason one side of this ring is fixed and the other dangles freely and does not want to be fixed to the body where the motors are located. Does it unscrew?
By any chance, did you break the stick that holds the ring on both sides from the inside? It has two more eyes on the sides
Broke, but everything is already done)
Thank you! And then I took it off and didn’t know which side to approach it from. Everything worked out, but all 8 latches had to be unhooked in a circle.
I had to fiddle with the latches, especially when I have a flashlight in one hand and a screwdriver in the other, and I also have to bend the mirror with my finger, but everything worked out, I changed the element! Thank you! And the service center said we need to install new mirrors! Thanks for the detailed instructions!
The most common reason why many people replace the exterior mirror on a Priora is its failure due to the so-called impact “on the mirrors” from another car. This can happen on the highway when the road is too narrow, when two cars can hardly fit on the roadway. If you and your car are unlucky and the mirror breaks, then replacing it will not be difficult.
To perform this simple repair of the Lada Priora, we will need two screwdrivers, a flathead and a Phillips.
First of all, you need to pry off the “triangle” plug from the inside of the door with a flat screwdriver, as is clearly shown in the photo below.
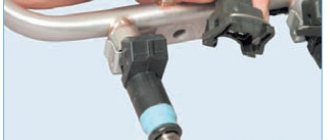
Underneath it are all the fastening screws, as well as the power wires for the electric drive and the heating of the mirror element.
Disconnect the wires by lightly pulling the edges in both directions:
And after that, you can unscrew the three screws securing the exterior mirror using a Phillips screwdriver.
Now all that remains is to thread the wires through the door hole and completely remove this part from the car.
Installation is carried out in reverse order. Replacement will not take more than 10 minutes. The price of a set of new Lada Priora mirrors starts from 1800 per pair - with electric drive and heating. But the same option can be found at a disassembly site for almost half the price.
Connection diagram for turn signals and side markers in Priora mirrors: method 1
First, let's look at a simple way to connect turn signal indicators (RF) in Priora mirrors. To implement it, you will need two five-pin relays, as well as 3 meters of wire and heat shrink. The implementation diagram of this method is shown in the photo below.
Connection diagram for turns and dimensions on Priora
The photo shows a diagram of connecting turn signal indicators for one mirror. For the second one it is done in the same way. If you plan to implement a connection using this scheme, then you need to know that both dimensions and repeaters will work. However, repeaters will function by breaking the dimensional chain. To put it simply, the mirror LED will be supplied with power from the dimensions. When turning on the rotation, the power supply circuit of the LED will be interrupted, which will cause it to blink. However, it will not flash synchronously with the turns, but will light up at the time when the turns go out. This is not entirely correct operation of repeaters, however, it is quite appropriate, and especially does not require major modifications. It's very easy to implement.
The principle of implementing such a scheme is very simple. First, you will need to take a five-pin relay (it is important that it is five-pin, not four), and buy a terminal block for it. Next, based on the diagram above, make the connection. A wire from the mirror is supplied to contact “87A” of the relay, which is responsible for supplying power to the turn signal. This is a white-red wire on a chip from the mirror. To power it, you will need to run a single-core wire from the passenger compartment into the door niche, where it will be connected to the chip.
Contact “30” on the relay must be connected to any wire or contact that receives power when the dimensions are turned on. This could be the LCM (light control module), wiring in the sills, or a contact on the glove compartment light. However, it is important to understand here that when you connect this wire to the power supply of the dimensions, the repeater will work when the dimensions on the car are turned on
. If you want the repeaters to work when the ignition is turned on (in this case, the dimensions on the mirrors will work), you need to connect this wire (from the “30” relay contact) to the positive of the ignition switch.
It is important to know! Since today many people drive almost constantly on the dimensions, it is better to connect the wire from contact “30” of the relay to the power supply of the dimensions.
The further connection process involves connecting pin “86” on the relay with the wire from the side turn signal. Usually the repeater light on the wing is dismantled and a chrome “SE” trim is attached in its place, the cost of which is about 100 rubles. The positive wire from the repeater must be connected to contact “86”, and the negative wire to contact “85” of the relay (it is possible and vice versa, there is no difference here). At this point, the circuit is considered assembled, and is carried out similarly for the second mirror. It is recommended to insulate all connections with heat shrink (better than electrical tape).
The most interesting thing is how it all works. Everything is very simple. When the headlights are turned on, power will be supplied to the mirror LED. When the corresponding turn is turned on (the “guitar” lever is moved up or down), power will be intermittently supplied to the relay coil. As a result, the contact on relays “30” and “87A” will be broken, which will cause the LED to blink.
The video below shows how this method is implemented and how the marker/repeater will function.
Installation and connection of SE side mirrors on Priora
Category: Do-it-yourself external tuning of Priora
| The mirrors on the VAZ 2170 can be considered a gift from AvtoVAZ, because they are heated on all trim levels. Despite this, many car enthusiasts replace them with mirrors from Lada Priora Second Edition (SE). Most often, difficulties arise only during connection. |
Mirrors on the Priora SE and the old model, what is the difference?
1) The presence of turn signals on the mirrors. SE has them, old ones don't.
2) Visibility, it is greater on the SE mirrors.
3) Mirror mounting triangle. On the SE mirrors it fits better without any gaps.
4) Protection from rain. SE mirror housings provide less protection from rain and snow.
5) The external differences of the mirrors can be seen in the following photos:
At the moment, the price of SE mirrors on Lada Priora is about 3,300 rubles.
Installing SE mirrors on Priora
How to remove a mirror on a Priora. We follow these instructions, dismantle the old-style mirrors and install the SE mirrors in the reverse order.
Connecting rear view mirrors Priora (SE)
Old style mirrors have 2 connectors with wires:
Block No. 1: mirror control:
Block No. 2: heated mirrors:
SE mirrors have 3 connectors with wires (an additional plus (6th wire) is for the turn signal). Connecting new mirrors is carried out in the same way, all colors are the same, except for one - +12V mirror heating, brown is used instead of Gray.
Block No. 1: mirror control:
- red connects to red-blue.
- blue with blue-black.
- green with green-black.
Block No. 2: heated mirrors:
- Instead of gray there is brown, we combine it with blue-red (black-red).
- black with black (used for heating and for turn signals).
Block No. 3: direction indicators:
For those who haven’t figured it out, here’s a diagram for connecting the SE side mirrors on a Lada Priora:
The main thing is not to confuse the red-blue and blue-red wires. They are almost the same, so before connecting it is better to check them with a tester (multimeter or + 12V light bulb), connecting the minus of the tester to the body, and the (+) to the wire. If the lamp lights up after turning on the heated mirrors, then this is the correct wire that needs to be connected to the brown mirror wire.
Connecting the SE mirror turn signals: You can take the plus for the turn signals from the direction indicators in the car's wing.
- Left wing - blue-black and black wires.
- Right wing - blue and black.
By the way, for the VAZ 2172 the VAZ 2112 Coupe also borrows some body elements, for example, a spoiler.
The most common reason why many people replace the exterior mirror on a Priora is its failure due to the so-called impact “on the mirrors” from another car. This can happen on the highway when the road is too narrow, when two cars can hardly fit on the roadway. If you and your car are unlucky and the mirror breaks, then replacing it will not be difficult.
Classic side mirrors - article number and cost
For the Lada Priora car, standard electric mirrors have the following article number: 2170-8201017. Cost: 3,100 rubles per pair.
IMPORTANT : There is one drawback compared to the SE version. The surface does not completely cover the mirror. This minus was corrected with SE. The mirror elements were made much larger.
For heated parts, the Lada Priora has a significantly larger mirror element. This allows the driver to keep the mirrors on while reversing. All blind spots are clearly visible. For SE version mirrors, the manufacturer has added repeaters. Priora with all the improvements (electric drive, repeater and heating) began to cost significantly more than its earlier counterparts.
Mirrors are often sold unpainted or painted to match the color of the car. If you don't like the look, paint the piece before installing. Automotive stores almost always offer painting only the upper part of the body. You can color the element yourself however you like. The rear view mirror for Lada Priora is simple. The mechanism is as follows: it is attached to a holder installed under the casing.
Replacing mirror elements
To replace the mirror elements of the Priora side mirrors, you will need a flat-head and Phillips screwdriver. Use a Phillips screwdriver to unscrew the side mirror from the door. Next, press on the bottom side of the Priora mirror element, a gap will appear. Insert a straight screwdriver into the resulting gap and unclip the lock of the mirror element. Then, disconnect the block with wires from the heater of the mirror element of the Lada Priora. Finally, you can unscrew the side mirror adjustment mechanism. Another replacement option is to simply break the mirror element with a hammer. Installation is carried out in reverse order.
Owners of a Priora in an old body can install turn signal indicators on the mirrors. Of course, you'll have to tinker with the wiring. On mirrors with turn signals, in addition to the adjustment and heating pads, a third pad is mounted. Turn signal block. On the Internet you can find a wiring diagram for the kit for installing a turn signal in the Lada Priora mirrors.
After all the manipulations with replacing mirror elements and installing repeaters. Mirrors should be adjusted to minimize blind spots. There is a universal way to adjust the mirrors, taking into account the body structure of the Priora. All you need to do is ensure that all mirrors do not reflect the same objects. If a car is visible in the left mirror, then it should not be visible in the interior mirror. Thus, the car behind will move from one mirror to another until it overtakes.
Mirror elements of the Lada Priora are a fragile part of the car, without which driving becomes dangerous. Mirrors must be kept clean and tidy. Moreover, you can replace the mirror elements yourself, with just a couple of screwdrivers on hand.
Types of mirrors on Priora
It would not be fair to analyze the mirrors on the Priora and not mention what variants of these products the car was produced with. There are five types of mirrors for Priora:
- Autocomponent (Nizhny Novgorod plant) - mirrors that were installed on the first Prioras, transferred from the VAZ-2110. They have an electric drive, as well as a removable cover that can be removed for painting into the car body.
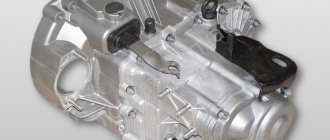
- The Dimitrovgrad plant is the next type of mirror that was installed on the Priora. They are distinguished by their simple design (they do not have a removable cover, so they are not intended for painting), as well as their heavy weight. Options were offered, both with electric drive and with cable drive.
- The third version of mirrors is from, which are equipped not only with electric drive, but also with heating. They have two connection blocks to the electrical circuit, and it is these options that are most often found on the restyled Priors of the “Standard” and “Norma” versions.
- The fourth option is with cable-driven adjustment. Installed on basic versions of the pre-restyling Prior. They are extremely rare.
- The fifth option is heated mirrors, electrically adjustable and a turn signal. It is these options that have become very popular. They were installed from the factory only on Prioras of the Luxury version (SE), but many car owners installed them on their cars of the budget “Standard” and “Norma” trim levels.
All of the above types of mirrors on Priora were installed from the factory. Today there are about 5 different versions of mirrors, so-called copies, which are produced by different companies, including Chinese ones. These are mainly modifications with turn signal indicators, which are in great demand and are popular among car owners.
Mirrors for Lada Kalina
Rear-view mirrors in the Lada Kalina are installed to ensure safety during the trip, providing the driver with information about moving objects behind the car. The mirror system consists of an internal mirror in the shape of a regular rectangle located in the cabin and two external mirrors that provide visibility to the right and left while driving. Mirrors consist of a direct mirror plane, a housing and a mechanism for adjusting their placement. The exterior mirrors have additional colored trim to match the car's shade.
Types of car mirrors
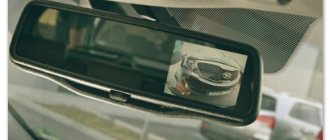
External and internal mirrors have different designs and different functions in viewing the area from the rear of traffic. For a long time now, mirrors have transformed from simple inconvenient rectangles into real innovative viewing devices. So the Lada Kalina can already be equipped in the cabin with a rear-view mirror with a DVR, GPS, WiFi, FM transmitter and a camera on Android 4.04 OS with a 5-inch monitor. Such mirrors are simply irreplaceable in those cars that do not have standard navigation. They are especially effective when parking and reversing. Also inside the Kalina's cabin you can install an automatically dimming, electrochromic or tinted mirror.
Exterior rearview mirrors are located on the sides of the vehicle, increasing the field of view to the rear of the road. The visual properties of both mirrors are different. The right mirror is equipped with a flat surface, the left one has an aspherical surface, expanding the viewing area, but slightly distorting the real distance to a moving object. To protect mirrors from snow and icing, an electric heating system with various types of heating is used - with wire, film, etc. elements. The position of the mirrors is adjusted mechanically (using a cable) or remotely using electronic control. In both cases, the mirror position is adjusted by the driver from inside the Kalina. The electronic system that controls the exterior mirrors can provide additional visual information when parking or maneuvering. Thus, when engaging reverse gear, the mirrors tilt and rotate slightly, reducing the driver's blind spot. And when the turn signal is turned on, the corresponding mirror turns away from the car, minimizing the blind section of the road. If an emergency occurs and the car is armed, both exterior mirrors fold automatically.
How to select and install an external side mirror on a Lada Kalina
If during operation the car’s exterior mirrors become unusable or the owner decides to replace the old mirrors with more functional ones, then this will be quite simple to do. To remove and install the exterior side mirrors on the Lada Kalina, you will need flat-head and Phillips-head screwdrivers, as well as pliers. From inside the cabin, at the place where the side mirror is attached, you need to remove the plastic decorative cover. It can be removed quite simply; you need to pick it up with a flat screwdriver and, coping with the resistance of the latches, pull it towards you. Once the cover is removed, the locking mechanism can be removed. Using pliers, you need to clamp the edge of the plate and pull it to the side. Now, using a Phillips screwdriver, you can unscrew the 3 bolts securing the mirrors to the Kalina body, while additionally holding the structure from the outside. The mirror is removed from the outside and replaced. The new mirror is mounted in the reverse order, not forgetting to install the lock in its place. Replacing the side mirror on a Lada Kalina on the other side of the body is done in a similar manner.
Original and non-original mirrors
Original left mirrors for Mitsubishi have different part numbers, depending on its type. For example, an aspherical mirror without installed heating has the article number 7632A535, and with heating - 7632A537. The same can be said about the right mirrors for Lancer 10. For example, MN175014 is the article number for an aspherical type mirror without heating, and MN175016 is the article number for a heated part.
You can also purchase non-original parts that will be no less suitable for the Lancer 10 model. The price of such mirrors can be half that of the original. When purchasing a non-original mirror, you should carefully ensure that it fits. Sometimes you may encounter that the mirror does not have the same shape or seat.
Most modern Mitsubishi Lancer 10 cars have heated mirrors, which is an excellent option, especially in severe frosts.
It is worth noting that if it is necessary to change not the entire mirror, but only part of it, then you can purchase a mirror element or a cover separately.
How to disassemble a side mirror? 4 ways
There are many reasons for the question to arise: how to disassemble a side mirror? The reasons that most often arise with mirrors are minor road accidents, the desire to repaint, and so on. To repair a mirror, you first need to remove it from the car, and only then disassemble it. If you lack experience, the mirror can be very easily damaged, and this will lead to the purchase of a new one. But the following question may arise: after all, there are a lot of cars and these devices differ on them, so they can be equipped with a mechanical and electric drive, folding and others. Therefore, the article will provide several general points on removing a mirror from a car. Removing a mirror device from a car How to disassemble a side mirror? First you need to remove the mirror from the car, and only then start disassembling it. If the device is equipped with a mechanical drive, then at the initial stage it is necessary to remove the bracket that acts as a stopper. It is located on the adjusting mechanism. Then we unscrew several screws that secure it to the car body, and then remove it. If it is a power mirror, you will first need to remove the terminals from the battery. After this, we disconnect the contacts going to the device drive, and also unscrew a couple of screws and remove the mirror from the body. Step-by-step disassembly of the mirror Now you have the mirror in your hands and you can continue to work with it. In general, there are several ways to disassemble mirrors. The first method, which requires only a flat-head screwdriver, is implemented as follows: Press slightly on the mirror from the back side and snap it off with a flat-head screwdriver. We carry out the operation carefully without much effort or sudden movements. If you press on one edge of the mirror, it can be damaged or broken; distribute the force evenly. To avoid scratches, wrap electrical tape around the screwdriver or work it through a napkin or rag. Second method Press on the top edge of the mirror, without much effort. Place a screwdriver on the raised edge and pry out the hooks. The mirror element must be removed. Third method: Hit the massive part of the car mirror against a hard surface, but not too hard. With sufficient force, the internal grooves open and the mirror flies out. But here you need to be very careful so as not to accidentally break it. Removing the fastening to the body is done like this: remove the spring and unscrew the adjustment rod from the fastening side. All assembly work on the mirrors, if everything went without damage, is carried out in the reverse order. The last method is to remove the rubberized pads. Unscrew several screws that regulate the position of the mirror. Before further disassembly, we sketch (remember) the position and colors of the cables, since each of them works in a certain direction and performs its own function. Then unscrew several screws on the bottom of the mirror. We pull out the glass (using one of the methods indicated above). There will be about four screws located under the reflective element; unscrew them. Conclusion The easiest way to remove the side mirror device and disassemble it is to go to a car service center. But it is better to do this type of work yourself than to pay money to a specialist. We described the technique: how to disassemble the side mirror. Choose in one of 4 ways. Feel free to do everything yourself. AutoFlit.ru
Replacing side mirror glass using the example of Priora, 2110, Ford Focus and Honda Fit
Download PDF
You can solve the issue of replacing the side mirror glass without contacting car service specialists, who will require a tidy sum for such repairs. Often, due to careless driving or ill-conceived construction of narrow lanes and driveways, the problem of damage to the side mirrors, as the most protruding elements of the car, arises. Sometimes you have to change the mirror completely, but there are times when you can limit yourself to replacing the mirror element of this block. There are also other reasons that can affect the disassembly of the side mirror.
This could be preparation for painting or a desire to repair this part of the car. How difficult it is to carry out this operation on your own on cars of popular brands will be discussed in today’s article. So, number one of our patients today is Lada Priora.
- 4. Then, in strict reverse order to the previous one, install the mirror element in its place.
All. The operation is completed.
Dismantling the mirror element of the people's car VAZ 2110 can be done in two ways.
The first of them is carried out in two stages:
1. Press down the lower part of the surface of the mirror element until a gap forms at the top between the glass and the side mirror housing; 2. Then, using a curved object, or if there is none, a screwdriver through the resulting gap, apply pressure to the center of the mirror from the inside. With this impact, its retaining clips should become detached. It is highly not recommended to press on the side with a screwdriver, as there is a possibility of damaging the mirror.
Replacing a Lada Priora mirror (VAZ Priora)
Mirrors on the Priora SE and the old model, what is the difference?
1) The presence of turn signals on the mirrors. SE has them, old ones don't.
2) Visibility, it is greater on the SE mirrors.
3) Mirror mounting triangle. On the SE mirrors it fits better without any gaps.
4) Protection from rain. SE mirror housings provide less protection from rain and snow.
5) The external differences of the mirrors can be seen in the following photos:
At the moment, the price of SE mirrors on Lada Priora is about 3,300 rubles.
Installing SE mirrors on Priora
How to remove a mirror on a Priora. We follow these instructions, dismantle the old-style mirrors and install the SE mirrors in the reverse order.
The process of disassembling mirrors on a Priora car
Replacing devices on a Lada Priora in the “Norma” or “Standard” configuration with the SE version is a good tuning option. In order to disassemble the mirrors, you need to remove the interior trim. Work algorithm:
- Unscrew the screws securing the A-pillar trim.
- Pull the trim towards you.
- The part is attached with three bolts. The first step is to lower the window, and then slowly unscrew the bolts. Hold the mirror with your other hand.
- Do not make sudden movements under any circumstances. First you need to disconnect the wires - there should be two blocks. One is for heating, the other is for position adjustment.
- Install the new part in place of the old one and tighten the bolts.
Basic faults
Additions to the conventional mirror element make driving even more comfortable. Just in case, the repeater makes it clear to inattentive traffic participants where the driver is going to go. Heating will promptly evaporate moisture - raindrops, and will not leave stains that distort the image. The following malfunctions may occur during operation of the machine:
The fasteners have become loose. Each part is held in place by several fasteners at different points. They may become so loose that tightening them will be useless. Everything will depend on the severity of the damage. In some cases, replacing the fasteners will be sufficient. The heating does not work. Check the connection of the wire blocks. Perhaps it is enough to strengthen the wire connections so that they no longer come loose. The electric drive does not work. Adjusting the position of mirror devices while sitting in your seat is much more convenient than doing it manually. Check the wiring. Turn signal repeater. If the repeater does not work, it means the signal is not reaching it. The problem, again, is the wiring. Broken mirror element. It will be enough to replace it with a new part, but during replacement you should be extremely careful
It is important to prevent splinters from getting under the cover.
Features of removing turn signal indicators on Priora
The wings of the Priora in the “Standard” and “Norma” configurations are equipped with turn signal indicators, which cause difficulties if they need to be dismantled.
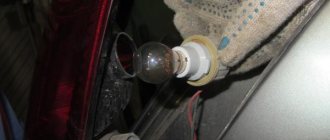
The need to remove them arises if the light bulb burns out, and also if you plan to dismantle the device completely when installing repeaters in the mirrors, replacing it with the “SE” label. The process of removing the repeater on the Priora wing is very simple, and to implement it you only need a plastic card.
To remove the turn signal on the Priora's wing, you should carefully insert the card under the lampshade and press until the bracket disengages from the car body. After this, the lampshade will snap off, and all that remains is to remove it from its seat.
How this process is suggested to be performed by the manufacturer is indicated in the instructions below.
This process is shown in detail in the video below.
It remains to summarize and say that the process of replacing mirrors may seem simple at first, but in reality you will need to take a responsible approach to its implementation. And be that as it may, you should not install additional lights and other electrical appliances that will shorten the life of your generator, battery and other devices. In general, is it necessary to install new mirrors on the Priora? If this is possible with minimal cost and rework, then why not.
How to change the rear view mirror on a Kalina?
Tool:
- Medium flat screwdriver
- Medium Phillips screwdriver
- Pliers
Parts and consumables:
Note:
The work is shown on the left outside mirror. Removing the right mirror is similar.
1. Use a flat-head screwdriver to pry off the exterior mirror trim.
2. Remove the lining.
3. Using pliers, remove the locking bracket of the ball joint housing of the handle rod.
4. Using a Phillips screwdriver, unscrew the three screws securing the mirror.
5. Remove the mirror along with the cables and the ball joint.
6. Install the outside mirror in the reverse order.
The article is missing:
- Photo of the instrument
- Photos of parts and consumables
- High-quality photos of repairs
If suddenly, due to unsuccessful parking or, God forbid, your Kalina’s exterior mirrors were damaged during an accident, then the instructions below will be quite useful for replacing these parts yourself. I tried to describe everything in the most accessible language, and the process itself is very simple, so you should not have any difficulties when performing this work.
Removing and installing exterior rear view mirrors on Lada Kalina
- We will need the following tools: a flathead and Phillips screwdriver, pliers.
- First of all, from the inside, from the passenger compartment, you need to remove the plastic trim, the so-called decorative casing. It is very easy to remove; just pry it off with a flat screwdriver and, overcoming the resistance of the latches, pull it towards you.
Now that the cover has been removed, we proceed to remove the metal retainer plate. To do this, take pliers and, holding the edge of the plate, pull it to the side, as shown in the photo below:
Next, use a Phillips screwdriver to unscrew the three bolts securing Kalina’s exterior mirror, and when you unscrew the last bolt, hold the mirror on the back side, since nothing else will hold it.
And holding it, carefully remove the mirror from the outside, as shown in the picture:
We carry out the replacement in the reverse order and most importantly, do not forget to insert the fixing plate back.
The instructions were given using the example of the right mirror, the driver's side is removed in the same way, there is no difference.
Mirror for viburnum
The viburnum mirror often requires replacement. This is due to the difficulties of the first years of driving and the desire to install a more beautiful part. Replacing a side mirror is not a complicated process; the main thing is to be careful and follow a certain algorithm.
Useful tips
You need to place a small piece of soft cloth under the spatula or screwdriver, this will help avoid damaging the outer part of the mirror.
When removing the mirror surface from the fastenings with a screwdriver, it must be wrapped with electrical tape. This reduces the risk of damage to other elements.
side rear view mirror
If the mirror was attached using glue as well, it is necessary to return this layer. It is important to use the correct, suitable adhesive. For these purposes, there are three types: chemically cured, light-cured, and epoxy compounds. The latter will work as it should only if it dries well. In other words, the part must be pressed in the desired state for ten hours. Light-curing adhesive mixtures must be exposed to ultraviolet light. It will require a lamp; sunlight is not enough. An adhesive mixture that has the ability to harden using chemical processes is ideal.
Under no circumstances should you use regular super glue and adhesive tape. These products do not have the necessary properties, and the mirror will definitely fall over time.