Replacing antifreeze is a routine procedure that must be carried out when operating any car. Should I use the services of a workshop or replace it myself? This question arises for every novice driver. After reading this article, you will be able to independently select the necessary coolant, prepare the car for replacement and safely replace antifreeze. Instructions for flushing the cooling system are also provided.
Replacing the coolant on a Lada Granta VAZ 2190 car
To replace the coolant on a Lada Granta VAZ 2190 car you will need: a 13 mm spanner, a screwdriver, coolant, a clean wiping cloth. According to the manufacturer's recommendation, the coolant should be replaced for the first time after 75 thousand kilometers or 5 years of operation (whichever comes first).
WARNINGS Use ethylene glycol based coolants (antifreeze) that are free of silicates, amines, nitrates and borates and manufactured using long-life hybrid organic acid technology. Check with the dealer who sold the Lada Granta VAZ 2190 car about the brand of liquid poured into your car. Replace coolant only when the engine is cold. Coolant is toxic, so be careful when handling it. When starting the engine, the expansion tank cap must be closed. Close the expansion tank cap tightly. The cooling system is under pressure when the engine is running, so if the expansion tank plug is loosely closed, coolant may leak from under it.
1. Place the Lada Granta VAZ 2190 car on a flat horizontal platform. If the site is sloped, position the vehicle so that the front is higher than the rear. 2. Remove the engine protection from the car (see “Removing and installing the engine mudguard (protection) on a Lada Granta car”).
3. Remove the expansion tank cap.
4. Place a container under the engine and remove the drain plug on the cylinder block. After draining the coolant, wipe any traces of it from the cylinder block.
NOTE In order to gain access to the drain plug on the cylinder block of the VAZ 11183, VAZ 21116 and VAZ 11186 engines, remove the ignition coil along with the bracket (see “Removing and installing ignition coils”).
5. Place a container under the radiator, unscrew the drain plug on the radiator and wait until the coolant has completely drained from the system.
WARNING Antifreeze is deadly poisonous to all living things. In order not to pollute the environment, drain it from the radiator and engine through a funnel (for example, made from a plastic bottle).
NOTE The radiator drain plug is sealed with a rubber ring. Replace a heavily compressed, hardened or torn rubber ring.
6. Screw the plugs into the cylinder block and radiator. 7. Fill the engine cooling system by pouring coolant into the expansion tank until its level is 25-30 mm below the “MAX” mark on the wall of the expansion tank. Close the expansion tank cap. 8. Connect the wire to the negative terminal of the battery. 9. Start the Lada Granta engine and let it warm up to operating temperature (before turning on the radiator cooling fan). After this, turn off the engine and, if necessary, add coolant to the “MAX” mark on the wall of the expansion tank.
NOTE When the engine is running, watch the coolant overheat indicator light in the instrument cluster. If the light comes on but the radiator fan does not turn on, turn on the heater and check what air is passing through it. If the heater supplies heated air, the engine cooling fan is most likely faulty, and if it supplies cold air, it means that an air lock has formed in the engine cooling system. To remove it, turn off the engine of your Lada Granta car, let it cool and unscrew the expansion tank cap. Start the engine, let it run for 3-5 minutes and close the expansion tank cap.
USEFUL TIPS For better filling of the system without air locks, periodically squeeze the radiator hoses by hand. After a few days of using the Lada Granta after replacing the coolant, check its level. If necessary, top up the coolant level. If after a very short time the color of the fresh coolant turns brown, it means that you have poured a fake into the engine cooling system, to which you added corrosion inhibitors. In addition, one of the signs of counterfeit coolant is sudden complete discoloration of the liquid. This “antifreeze” needs to be replaced quickly.
useful tips for motorists
Instructions for replacing antifreeze on Lada
First of all, you need to purchase the necessary consumables. To replace antifreeze on a Lada Grant, as well as to replace antifreeze on a Lada Kalina, 10 liters of refrigerant is enough. To replace the Lada Largus antifreeze you will need 7-8 liters. The brand of antifreeze (antifreeze) is usually indicated by the manufacturer on the expansion tank or in the service book. It is advisable to change the brand of coolant only when flushing the cooling system, since manufacturers add various impurities that can precipitate when stirred. Thus, the cooling system will quickly become clogged, the pump may fail, and the car will begin to overheat.
After purchasing the necessary coolant, we drive the car onto an overpass and let it cool, since the operating temperature of the engine reaches 80-90 degrees and any interaction with it will lead to burns. After making sure that the engine has cooled down, remove the expansion tank and radiator caps and inspect them. The rubber seals should not be dry, as these covers must fit tightly.
Instructions for replacing Lada antifreeze:
- Remove the crankcase protection to gain access to the engine. Substituting a bucket, unscrew the drain bolt, which is located at the bottom of the engine block. On domestic cars, you will need a key “13” for this;
- After all the liquid has escaped, tighten the bolt and begin to drain the liquid from the radiator;
- On vehicles without air conditioning, there is a special drain plug in the radiator. If it is installed on your car, you need to loosen the clamp, remove the lower hose from the radiator fitting and install it back after draining;
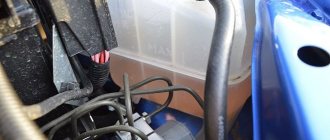
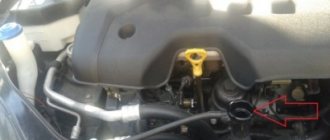
- After the liquid has been drained, use a Phillips screwdriver to loosen the clamp on the throttle body heating hose (the highest point of the car's cooling system). After loosening, disconnect the hose from the fitting;
- Now pour coolant into the expansion tank until liquid begins to flow from the disconnected hose;
- After this, quickly attach the hose back, carefully tighten the clamp and add fluid to the required level (the “max” mark on the tank).
Now you can start the car and check all the places where the fluid was drained. If tightened correctly, there should be no leaks, but if they appear, tighten the clamps more tightly.
Lada Granta
A distinctive feature of replacing antifreeze on an 8-valve Grant is the mileage; the coolant is replaced more often than on a 16-valve car. And when replacing antifreeze on a Lada Granta 16 valve, you should pay attention to the location of the drain bolts.
On a vehicle with a 16-valve engine, access to the drain hole is blocked by the starter. In addition, the leaking liquid will inevitably get inside the starter. Therefore, when replacing antifreeze, it will be necessary to remove the starter; to do this, use a “13” key to unscrew the nut and disconnect the tip of the power wire. Then, using the same key, we disconnect the three bolts securing the starter itself to the engine. Now you can carefully remove the starter, trying to prevent dirt from getting inside the engine. After draining the antifreeze, install in the reverse order.
Lada Kalina
To access the drain bolt in cars, when replacing the antifreeze of the Lada Kalina 8 valve, you need to remove the ignition coil along with the bracket. To do this, you need to disconnect the battery and engine splash guard. Then, using the “15” key, unscrew the ignition coil bracket and carefully remove the coil with the bracket. Having gained access, unscrew the drain bolt and drain the liquid. After draining the antifreeze, install in the reverse order.
Antifreeze - how to change
Changing antifreeze begins with draining the old one. This is not always easy, for example, look on the Internet for a video of the process on a Scania truck, where truckers are trying to fix problems on the spot.
On a cold engine, remove the tank or radiator cap, insert an unnecessary container, and unscrew the drain plug. The liquid should be completely drained and the system should be cleaned several times (fill with water, turn on the engine for 10 minutes). To obtain the desired effect, it is better to add 20% antifreeze (10% concentrate) or a special substance to the water.
The car is turned off and the cooled mixture is removed. The last time is washed with water, do not turn off the car for 15 minutes, let it cool and drain again. To remove air, turn on the heating and the engine itself for about 10 minutes. Then add the mixture to the normal level, checking the amount after a few days.
Antifreeze: change or top up?
The additives stop working, the water evaporates, and periodic renewal is needed. If you add only distillate, there will not be enough substances to protect the system.
If the level is low, check the system for leaks. If none is found, it is worth topping up.
Compatibility of compositions of the same color is optional (see above). To choose the right coolant, you need to follow the car manufacturer's recommendations. Different liquids should not be mixed. The reason is that additives can neutralize each other and react. Such a substance will not protect/cool.
How to remove air from the cooling system of a Lada Granta
There are several effective ways to bleed air from the system.
Purge using a pump
Method No. 1
- We move the stove heater lever to the “Maximum” position (car interior). Be sure to follow basic safety measures and place wheel chocks under the rear wheels.
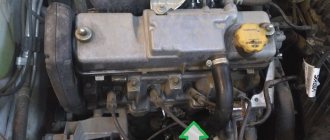
- Unscrew the valve cover, having first removed the decorative trim.
- Using a screwdriver, loosen the clamp on the throttle body fitting and remove the rubber pipe..
- Unscrew the cap on the expansion tank
- Through a gauze bandage, blow air through your mouth in the direction of the expansion tank.
It is important not to overdo it, as you can start a new portion of air again
Method No. 2
- We warm up the car to 40 - 45°, turn off the engine.
- Unscrew the throttle clamp and remove the hose.
- If liquid leaks out of the hose, put it back on, otherwise wait until the air comes out.
- We assemble the structure in reverse order.
One time is not always enough to remove air. We repeat the procedure as necessary.
Method No. 3
- We drive the front wheels of the car onto a hill so that the highest point in the cooling system is the “plug”.
- We twist the cap on the expansion tank and the cap on the radiator.
- We start the engine, it runs at idle speed.
- We warm up the car to an operating temperature of 40 - 45°.
- As soon as the antifreeze level begins to decrease, we replenish the missing amount.
- We repeat the procedure until the maximum amount of plug comes out.
- Screw the lids on.
An air lock in the system can not only reduce the efficiency of the stove heater, but also negatively affect the operation of the engine as a whole. After the blockage is cleared, systematically inspect the equipment.
How to change antifreeze on Grant 8 valves?
The coolant level must be checked before each ride. We check the fluid level on a cold engine.
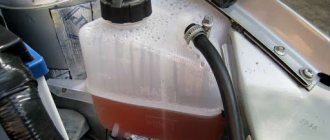
The expansion tank has maximum and minimum level marks.
When the engine has cooled, the fluid level should be slightly above the maximum.
If the level is below the minimum mark, then add fluid to the expansion tank.
Unscrew the expansion tank cap and add fluid
If the engine is hot, do not immediately remove the expansion tank cap.
You need to wait until the engine cools down a little, and then unscrew the plug a quarter turn, releasing the pressure in the cooling system.
It is recommended to replace the fluid in the cooling system after 75 thousand km of vehicle mileage.
But if the fluid is very dirty, you need to replace the fluid and flush the cooling system with water.
Coolant replacement
We prepare the car for the job.
We install the car on a lift or inspection hole.
We move the handle of the air temperature regulator in the heating system control unit to the red sector of the scale.
For work you will need: a container for draining the coolant, preferably a basin, new coolant, rags, a 13mm wrench or a 13mm socket with a wrench.
To drain the coolant, remove the middle mudguard (article - How to remove the shields and fender liners of the Lada Granta).
Place a container to drain the liquid and unscrew the plastic drain plug in the radiator
Drain the coolant
There is a rubber sealing ring installed on the radiator cap
In order for the liquid to flow out of the system faster, open the plug on the expansion tank.
After this, drain the coolant from the engine block.
Using a 13 mm wrench or socket, unscrew the drain plug, placing a container for draining
Draining the liquid from the engine block jacket
After this, it is advisable to flush the system with water.
We tighten the drain plugs on the radiator and engine block.
The engine drain plug has a tapered thread, so you need to tighten the plug until the rotation resistance increases sharply.
We fill the cooling system with liquid through the expansion tank.
We start the engine and, as the coolant level in the expansion tank drops, bring it to normal and tighten the tank cap.
We check the operation of the cooling system.
While the engine is warming up, the lower radiator hose should be cold for a while and then quickly warm up.
This indicates that the thermostat valve has activated and the liquid has begun to circulate in a large circle.
We wait until the engine cooling fan comes on.
In the cold season, you can use the gas pedal to increase engine speed to quickly warm up the engine.
In the cabin, we check the operation of the interior heater. Check the fluid level in the expansion tank.
Cleaning the Cooling System
Experts recommend cleaning the system after each replacement. When you change antifreeze to antifreeze, or vice versa, switch from antifreeze to antifreeze, be sure to clean the system. What you may need for this:
- Plastic funnel and hose.
- A packet of regular citric acid.
- Distilled water (15 liters for Priora).
- A brush, sized to fit into the neck of a 5-liter bottle.
Please note that if the coolant is not cloudy, then you can only get by with distilled water. Otherwise, be sure to add citric acid
A good working fluid begins to lose color over time, that is, it becomes discolored, and a contaminated fluid always becomes cloudy.
Cleaning of the LADA Priora cooling system should be carried out after removing the air lock. Let water flow through the system through the open pipe. Using a brush, you can clean the expansion barrel separately. After this procedure, damage to the tank body is clearly visible. After cleaning the system is complete, you can add antifreeze.
What is antifreeze?
Antifreeze is a liquid for the engine cooling system. Cars could also run on water in the cooling system, as they once did. But water, unfortunately, is inferior to antifreeze in all chemical properties: freezing and boiling points, resistance to scale formation and corrosion in the cooling system. Water cannot perform all the protective functions that antifreeze performs. Antifreeze usually contains dihydric alcohol - ethylene glycol, water and anti-corrosion, anti-foaming and stabilizing additives (inhibitors).
What color and how much antifreeze should I use?
One of the main questions of car owners is: how many liters of antifreeze should I fill? According to the official technical documentation for Russian-made Lada Priora cars, the required volume of antifreeze is 7.84 liters. For full operation of the power unit, you can fill 6 liters each; this option is suitable for the winter period. However, it is best not to deviate from the regulations and fill in the required amount of liquid so that no problems arise.
Each antifreeze is divided into classifications, and it can be distinguished even by color if there is no label, for example. So, in our country, red antifreeze is predominantly poured - the so-called carboxylate
Regardless of the type, it is important to know how many liters of antifreeze to fill and follow this rule
How much fluid to pour into the system
When servicing a car, you need to know what kind of antifreeze to pour into the Granta, and how much working fluid should be in the cooling system circuit. The standard volume is 7.84 liters. For maintenance, two 4-liter coolant cans will be sufficient. Too little or too much antifreeze can have serious consequences. If there is not enough coolant in the line, this will negatively affect the cooling efficiency of the engine. The engine will heat up faster, and the temperature gauge on the dashboard may rise above the center position and even reach the red zone. If, on the contrary, there is more antifreeze in the system than indicated in the technical documentation for the car, this will lead to an increase in pressure in the circuit. Excess coolant will be released through the expansion tank plug, polluting the engine compartment. Also, due to increased pressure, breakdown of sealing gaskets or rupture of rubber cooling pipes may occur.
How to replace antifreeze in Lada Granta
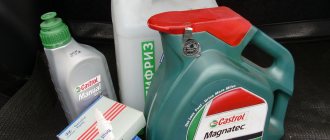
The factory recommends changing the coolant every 75,000 mileage, and my mileage is already approaching 100,000, so I decided to do this operation. I bought Sintec antifreeze (2 packs), water (2 packs), and flushing agent (Felix RUR 95).
Armed with a search, I started looking for any records and didn’t find a damn thing (((The problem with replacement was the following: unscrew the drain plug (it’s simply not realistic to get there from above). I tried to create a topic on this problem, but there were no sensible answers. In the end I gave up for everything and decided to ask the Bosch service how much this procedure will cost, I quote the verbatim dialogue: - Hello, how much does it cost to replace the coolant in a Grant 8kl with air conditioning? - Hello. The work to replace the coolant on a Lada Granta 8 valve - 552 RUR Telephone to make an appointment... We will be glad to see you at Bosch First - does this include flushing? - the cost of flushing work is 10,000 RUB - i.e. replacement is 552 RUB, and flushing is 10,000 RUB? - absolutely correct...
After this dialogue, I realized that I’m not going there anymore). I went to the “garage” service, all the work with washing cost 600 rubles (400+200). To drain the coolant from the cylinder block, we had to unscrew the starter (cable box), and to drain the coolant from the radiator, we removed the lower pipe from the radiator on the driver’s side (we didn’t even get to the drain plug from the bottom, the condenser is in the way).
Instructions for replacing antifreeze on Lada
First of all, you need to purchase the necessary consumables. To replace antifreeze on a Lada Grant, as well as to replace antifreeze on a Lada Kalina, 10 liters of refrigerant is enough. To replace the Lada Largus antifreeze you will need 7-8 liters. The brand of antifreeze (antifreeze) is usually indicated by the manufacturer on the expansion tank or in the service book. It is advisable to change the brand of coolant only when flushing the cooling system, since manufacturers add various impurities that can precipitate when stirred. Thus, the cooling system will quickly become clogged, the pump may fail, and the car will begin to overheat.
After purchasing the necessary coolant, we drive the car onto an overpass and let it cool, since the operating temperature of the engine reaches 80-90 degrees and any interaction with it will lead to burns. After making sure that the engine has cooled down, remove the expansion tank and radiator caps and inspect them. The rubber seals should not be dry, as these covers must fit tightly.
Instructions for replacing Lada antifreeze:
- Remove the crankcase protection to gain access to the engine. Substituting a bucket, unscrew the drain bolt, which is located at the bottom of the engine block. On domestic cars, you will need a key “13” for this;
- After all the liquid has escaped, tighten the bolt and begin to drain the liquid from the radiator;
- On vehicles without air conditioning, there is a special drain plug in the radiator. If it is installed on your car, you need to loosen the clamp, remove the lower hose from the radiator fitting and install it back after draining;
- After the liquid has been drained, use a Phillips screwdriver to loosen the clamp on the throttle body heating hose (the highest point of the car's cooling system). After loosening, disconnect the hose from the fitting;
- Now pour coolant into the expansion tank until liquid begins to flow from the disconnected hose;
- After this, quickly attach the hose back, carefully tighten the clamp and add fluid to the required level (the “max” mark on the tank).
Now you can start the car and check all the places where the fluid was drained. If tightened correctly, there should be no leaks, but if they appear, tighten the clamps more tightly.
Lada Granta
A distinctive feature of replacing antifreeze on an 8-valve Grant is the mileage; the coolant is replaced more often than on a 16-valve car. And when replacing antifreeze on a Lada Granta 16 valve, you should pay attention to the location of the drain bolts.
On a vehicle with a 16-valve engine, access to the drain hole is blocked by the starter. In addition, the leaking liquid will inevitably get inside the starter. Therefore, when replacing antifreeze, it will be necessary to remove the starter; to do this, use a “13” key to unscrew the nut and disconnect the tip of the power wire. Then, using the same key, we disconnect the three bolts securing the starter itself to the engine. Now you can carefully remove the starter, trying to prevent dirt from getting inside the engine. After draining the antifreeze, install in the reverse order.
Recommendations for the selection of parts and components
The range is represented by domestic manufacturers, originals and high-quality analogues. The final choice is up to the owner of the technical device.
Service center technicians strongly recommend purchasing original parts. The service life and manufacturing quality of factory components are an order of magnitude higher than their analogues.
Before purchasing, carefully check the spare part catalog numbers with the actual data in the instruction manual. If necessary, get free consultations from service station specialists.
Lately it has become popular to order parts for subsequent installation directly in workshops. There are many advantages of this choice: prompt delivery, professional installation, quality guarantee.
What antifreeze should I use for my car?
Every car owner needs to know that they should only use the fluid that the car manufacturer offers. Therefore, if a car owner is interested in what to add to the cooling system, it is necessary to look at the reference literature, in particular, the car’s operating manual. In the manual you can find information about the use of certain brands of coolers. If we are talking about topping up, then you can only use the antifreeze that was used before. Ignoring this recommendation may result in damage to the vehicle's cooling system.
Important: antifreezes are classified according to certain brands. The corresponding marking is applied to the packaging container. The color of the coolant, contrary to popular belief, is not the main selection criterion.
The following types of coolant can be used for Hyundai Solaris:
The first composition from the listed list refers to hybrid substances. The second group (G-12) is represented by carbosilicate liquids, and the third - by the most modern compositions.
Important: in cases where it is necessary to add more than 1/3 of the total volume of the cooler, experts recommend completely replacing the antifreeze.
Thus, in the Hyundai Solaris, as well as in other car models, only certain types of coolant can be mixed. G-11 antifreeze must be mixed with G-11 and so on. At the same time, some types of coolants can be mixed. For example, G12+ can be poured into the cooling system if it uses G11 antifreeze. In other cases, mixing cooling compounds is prohibited. The same applies to mixing antifreeze and antifreeze. These two substances differ significantly in technical characteristics.
If a car owner buys antifreeze at a retail outlet, then you need to know that the compounds can be sold in the form of a concentrate and liquids ready for filling. The concentrate composition must not be poured into the coolant system. This substance must be diluted in accordance with the manufacturer's instructions. Typically, such information is printed directly on the packaging. If there is no information, it is recommended to check with the seller for details.
The Hyundai Solaris manufacturer recommends using antifreeze made on the basis of ethylene glycol. This composition is ideal for aluminum radiators.
How to change coolant
You will need: remove the crankcase protection (if necessary), a 13 mm spanner, a screwdriver, a clean wiping cloth, an empty container, and new antifreeze. Before draining the antifreeze from the Granta, you should first wait until the engine cools down, then:
- Remove the cap from the expansion tank.
- Place an empty container under the engine and remove the drain plug on the cylinder block.
- For VAZ-11183, VAZ-21116 and VAZ-11186 engines, to access the drain plug, you may have to remove the ignition coil along with the bracket.
- Wait until the antifreeze has completely drained.
- Place a container under the engine radiator and remove the drain plug on the radiator.
- Wait until the coolant has completely drained from the cooling system.
- Screw in the drain plug on the radiator, replacing the rubber O-ring if necessary.
- Tighten the plug on the cylinder block.
We pour new antifreeze into the Granta cooling system until its level reaches 25-30mm. below the “MAX” mark on the wall of the expansion tank. Then tighten the tank cap. Start the engine and let it warm up to operating temperature (before turning on the fan). Then turn off the engine and, if necessary, add fluid to the “MAX” mark. Check the fluid level after a few days. After replacing the antifreeze, monitor the coolant temperature in the instrument cluster.
If the overheating indicator lights up (No. 7) and the radiator fan does not turn on, turn on the heater (stove) and check what kind of air is coming from the air ducts. If the air is hot, there may be a malfunction in the fan operating system; if it is cold, it means that an air lock has formed in the cooling system.
Checking the radiator for leaks
The diagnostic process is not at all complicated; we carry it out ourselves, and if we don’t have free time, we visit a service station to get the work done professionally.