The situation is not the best when the brakes fail at a speed of 110 km/h, or the pedal suddenly responds sluggishly to an emergency braking order. This should not be allowed at all; it is better to resolve the issue of how to replace brake hoses on a VAZ 2114 in a timely manner and keep the condition of the vehicle under control. No one wants to become involved in a dangerous situation because of a small detail that, out of ignorance, was overlooked and became unusable at the most crucial moment.
VAZ 2114
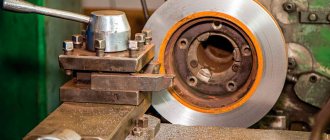
Replacing front brake hoses 2115
Bleeding the brake system of a VAZ 2114 This is how the question of how to change the brake hose of a VAZ 21099 is solved. The task is not an easy one, but how do you cope in your garage when you plan to implement the grandiose process of how to replace the brake hose of a VAZ 2114. And if in your rich If you have some practical advice in your arsenal of experience, please share them in the comments with our readers. You understand that the question of how to replace brake hoses on a VAZ 21099 arises with enviable frequency.
Necessary tools and spare parts
Replacing a faulty tube is possible with a minimum set of tools. Repairs to the “four” are often carried out by car owners, so having detailed replacement instructions won’t hurt. Carrying out work to replace a damaged tube is possible if you have the following tools:
- Keys for “10” and “15”;
- Wheelbrace wrench for wheel removal;
- Rags and containers for draining liquid.
The process of removing the old hose can be complicated by souring of the connection point. In this case, you should prepare WD-40 or a similar lubricant to treat the soured compounds. The VAZ 2114 brake hoses are quite durable, but if they are installed incorrectly, there is a risk of abrasion on the car body or wheel. When installing, you need to securely fasten the part in a special mount. In addition to replacement, during the diagnostic process of the system, you should check the condition of the discs, pads and the fluid itself.
Service life of brake hoses
The replacement of brake hoses is regulated differently by each manufacturer, on average it is 3-5 years or approximately 100 thousand km. However, all this is individual, hoses can fail earlier or later, it all depends on the operating conditions and the quality of the brake hoses themselves. From time to time you should carry out a visual inspection of the hoses, and the entire vehicle as a whole, this is the only way you can avoid troubles on the road.
The appearance of microcracks in rubber hoses or metal tubes is a reason to immediately replace the brake hose or part of the damaged line. Damage to the tightness of the line manifests itself in different ways, but one thing will always remain the same - the absence of brakes, that is, when you press the pedal, it will fail, and the car will not stop. Damage to the hose can also be detected by a wet trail after a long period of parking.
In my article today, I will tell you how to replace brake hoses on a VAZ 2115 at home.
- New brake hose(s);
- Special wrench for removing brake pipes with a double clamp “9x11”;
- Set of keys (8, 10 15);
- Adjustable wrench;
- Jack;
- Liquid WD-40.
Replacing the front brake hose of VAZ 2106, VAZ 2107, VAZ 2109, VAZ 2110, VAZ 2114, VAZ 2115
The braking system is a system that the driver must pay special attention to, since the operation of its elements directly affects the safety of the vehicle. To study the design and help in servicing the brake system, the website has a section called - Brake system design , in which you can disassemble this system into its component parts in more detail.
As for this article, it is devoted to a topic called - How to replace brake hoses of a VAZ 2106, VAZ 2107, VAZ 2109, VAZ 2110, VAZ 2114, VAZ 2115, Lada Kalina, VAZ 2170 with your own hands.
Many motorists believe that replacing brake hoses does not deserve a separate topic, since it is not at all difficult, but for novice motorists, I think this article will be useful.
After all, you will agree that no matter what job a person takes on, there will always be nuances that would be better to learn from advice than from your own bitter experience.
I would highlight several basic questions that a beginner should pay attention to when replacing brake hoses on a VAZ 2106, VAZ 2107, VAZ 2109, VAZ 2110, VAZ 2114, VAZ 2115, Lada Kalina, VAZ 2170:
- Which brake hose manufacturer is best?
- What tools are needed to replace brake hoses?
- Consistently work on replacing brake hoses.
We will try to consider all these questions in this article. In order to make your work easier, just find on the Internet the answer to the question - how to replace the brake hose on a VAZ 2106, VAZ 2107, VAZ 2109, VAZ 2110, VAZ 2114, VAZ 2115, Lada Kalina, VAZ 2170.
So, let's start studying information on how to replace the front brake hoses of a VAZ 2106, VAZ 2107, VAZ 2109, VAZ 2110, VAZ 2114, VAZ 2115, Lada Kalina, VAZ 2170.
Tools for replacing brake hose:
- Open-end and ring wrenches for 8, 14, 15.
- Socket wrench 8.
- Special split key and crimp key for 10.
- Hammer.
- Metal brush.
- Don't forget to get WD-40 fluid (it currently costs about 80 hryvnia, but you will need it in the future).
- Transparent bottle for easy brake bleeding.
- It is better to carry out work on replacing brake hoses with a partner.
How to change a brake hose
As a rule, the brake system of any car must be in working condition at all times . To prevent cracking and breaking of rubber brake hoses, it is necessary to periodically lubricate them with silicone grease.
Note! If there is even the slightest suspicion of a defect, such elements must be replaced immediately, since the safety of both the driver and passengers will depend on this.
To carry out repairs, it is recommended to buy or acquire:
- a size 8 or 10 wrench, which is used to remove brake pipes;
- wheel wrench;
- wrench size 17 and 14;
- transparent vinyl tube;
- sealing copper washers;
- well-penetrating lubricant;
- a container for draining the “old” brake fluid;
- new fluid, it is recommended to pay attention to the DOT-4 class.
Service life of brake hoses
The replacement of brake hoses is regulated differently by each manufacturer, on average it is 3-5 years or approximately 100 thousand km. However, all this is individual, hoses can fail earlier or later, it all depends on the operating conditions and the quality of the brake hoses themselves. From time to time you should carry out a visual inspection of the hoses, and the entire vehicle as a whole, this is the only way you can avoid troubles on the road.
The appearance of microcracks in rubber hoses or metal tubes is a reason to immediately replace the brake hose or part of the damaged line. Damage to the tightness of the line manifests itself in different ways, but one thing will always remain the same - the absence of brakes, that is, when you press the pedal, it will fail, and the car will not stop. Damage to the hose can also be detected by a wet trail after a long period of parking.
In my article today, I will tell you how to replace brake hoses on a VAZ 2115 at home.
To work you need to prepare:
- New brake hose(s);
- Special wrench for removing brake pipes with a double clamp “9x11”;
- Set of keys (8, 10 15);
- Adjustable wrench;
- Jack;
- Liquid WD-40.
Lada 2114 Snow Queen Logbook 20 Replacing front brake hoses and brake fluid
Good day everyone, I decided to start servicing the brakes. First of all, I have long wanted to replace the brake fluid, since the car is already 5 years old, and something tells me that it has never been changed, although the replacement interval is 45,000 km or three years of operation . All this is due to the high hygroscopicity (absorption of water) of brake fluid. Water is bad for brakes because it has a lower boiling point than brake fluid. When you press the brake pedal, water boils and air bubbles are released, which reduce the force of the brakes. A sign that the brake fluid needs to be changed is a change in its color.
Dark brake fluid
In my case it turned dark brown.
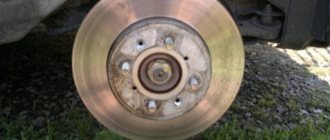
But before replacing the brake fluid, I checked the entire brake system and decided to replace the front brake hoses, since the one on the left was all cracked. And they definitely need to be replaced every 5 years or 125,000 km.
Old hoses
BRT hoses were purchased to replace the old ones. Brake fluid ROSDOT Dot 4 plus, two copper washers, a special brake wrench and a 15 wrench.
Brake and hoses
Wrench and washers
To remove the hose, you must remove the wheel. Then remove the hose from the bracket on the rack. And we treat the connection points of the hose with WD-40. Then, holding the upper tip of the hose with a 15mm wrench, use a special wrench to unscrew the brake pipe fitting.
a special wrench is located on the brake pipe fitting
To prevent brake fluid from leaking, we put a protective cap on the fitting from the brake bleeder fitting.
cap on the fitting
Using a 15 wrench, unscrew the lower tip of the hose.
lower hose end
The hose is connected to the brake caliper through a copper ring that cannot be reused.
That's it, the hose is dismantled, reassemble in the reverse order, avoiding twisting the hose, this can be determined by the colored stripe on its body. The hose on the other side is changed in the same way. It is best to change them in pairs.
After installation, it is necessary to bleed the brake system.
And in my case, replacing the brake fluid. For this you will need a large syringe, a transparent tube, and new brake fluid.
bleeding the rear left wheel.
First of all, disconnect the connector from the brake fluid level sensor. Then we take out the old brake fluid with a syringe, leaving a little less than half the barrel so that no air gets in and fill the new one to the brim. Then we clean the dirt from the REAR RIGHT WHEEL bleeder fitting, remove the rubber cap, put on the tube, lower the other end into a container with partially filled fluid. Then the assistant presses the brake pedal several times and, after the last press, holds the pedal in the down position. We unscrew the bleeder fitting half a turn until liquid begins to flow out of the fitting. As soon as the liquid stops flowing, tighten the fitting. After this, the assistant presses the pedal again and we repeat the steps written earlier. We pump until new, lighter brake fluid comes out. Next, bleed the FRONT LEFT BRAKE CYLINDER. Then bleed the second brake circuit: REAR LEFT THEN FRONT RIGHT WHEEL
Work procedure
Rear brake pipes VAZ 2109
Before you take action, you need to prepare first. During the preparatory work, it is necessary to clean the surface of the fitting tubes from contamination. You also need to apply a special compound to all threaded connections, this will make it much easier to unscrew the nuts. In addition, you need to prepare a wrench, spare brake fluid for topping up, a small container to drain the remaining fluid from the system and a suitable vinyl tube. For convenient repairs, it is recommended to install the machine either on an overpass or on a pit for inspection:
- First, use a Phillips screwdriver to unscrew two self-tapping screws that secure the tube to the body of the vase.
- Using a suitable wrench, unscrew the 2 fittings through which the tubes are attached to the hose with the regulator.
- The tube is removed.
- After all necessary work has been carried out, the tubes are installed in the opposite order to dismantling.
- Add brake fluid.
- The quality of repaired brakes is checked.
On newer VAZ models, the tubes are first unscrewed from the main cylinder and brake hose, only after that the holes are plugged. In this case, you will have to unscrew the 3 fastening nuts and remove the plastic covering. Next, dismantle the metal plates and disconnect the necessary tubes from the clamps; if they are damaged, they will need to be replaced.
Replace the rear brake pipe of a VAZ 2109
Signs of air penetration into the system are considered to be increased travel and softened sagging of the brake pedal when pressed. It is necessary to follow a certain sequence of bleeding the brakes:
- rear right;
- front left;
- rear left;
- front right.
In addition to changing the brake line, the brake hose may also need to be replaced.
What causes brake lines to become sour?
In the initial state, the nut has an anti-corrosion coating, but the tightening torque is such that its integrity is broken and direct metal-to-metal contact is formed. In order to reduce the cost of construction, both mating parts are made of iron alloys, which are easily subject to corrosion when in contact with oxygen and moisture.
In addition to the external influence of substances aggressive to iron, internal factors can also play a role. This is the ingress of decomposition products of brake fluid components and galvanic effects due to the combination of various metals in one contact.
The result is always the same - corrosion products accumulate between the turns of the thread, which have a significant volume and push the thread apart with great force. It becomes impossible to unscrew it using conventional methods.
On the subject: How to remove rust and how to remove bugs from a car body
In addition to souring of the thread, sticking of the brake pipe to the union nut also occurs. If the tube needs to be replaced, then this does not play any role, but when you try to preserve the original part, difficulties begin. Even when the nut begins to rotate, turning the tube together with it does not allow making even one full turn.
How to repair brake pipes
This process requires the car enthusiast to have extensive locksmith skills and the ability to use special tools. Repairs are carried out in cases where it is not possible to replace the damaged line; it involves saving money on the purchase of a new pipe system and extends the service life of the old one.
To carry out repairs you must:
1. Unscrew the damaged tube from the cylinder or brake caliper.
2. After disconnecting, it is necessary to cut off the damaged area using a pipe cutter.
3. Clamp the tube 50 millimeters from the edge of the cut and chamfer the edge of the tube using a drill.
4. Remove all that remains of the chips and insert a fitting intended for connecting the tube to the brake operating mechanism into the cut area.
5. Insert the end of the tube into the special equipment and flare it. The main line that has undergone repairs must be purged with compressed air. And only after this is it installed with a working mechanism or another pipeline system using an adapter.
As for the length of the tube, this parameter depends on the car model. On some cars, the brake pipes have a reserve that allows you to shorten the pipe and reconnect it to the working mechanism. The metal from which the brake tube is made is flexible, so there should not be any difficulties with its position.
Design and principle of operation of brake pipes
The car is braked by pressing the brake pedal. The pedal lever acts on a vacuum or any other booster, which creates the necessary pressure on the brake fluid. The liquid compresses and goes into a zone where this pressure is minimal. It enters the brake pipes, through which it is directed to the working parts of the brake system. The fluid puts pressure on the brake pads, causing them to compress. When you release pressure on the brake pedal, the pressure in the booster decreases, and the spring drive of the brake pads unclenches them and sends the fluid back to the booster (the area of least pressure).
The passage of liquid is carried out through tubes made of metal. The tubes extend from the vacuum booster and are laid under the car to the working parts of the brake system. The joints of the tubes are made in the form of threaded connections, which makes it possible to achieve maximum reliability when creating high pressure in the system.
To increase the reliability of the braking system, the pipes are connected diagonally, which allows the brakes to be used if one of the lines fails. So, for example, from the vacuum booster, one tube connects the working part of the brakes of the front left and rear right wheels, and the second tube directs the brake fluid to the front right and rear left wheels. At the junction of all four pipes, a special pressure regulator is installed, which filters out excess pressure from the system so that it does not cause a breakthrough in the lines.
When control sensors indicate a breakdown of the brake system
- The “breakdown” symbol appears on the control panel if there is a low level of brake fluid in the reservoir, then you need to plan to bleed the system and decide how to replace the brake hoses on a VAZ 2114 yourself or with the help of a specialist.
- There is also a sign on the panel that the parking brake is engaged. It must be turned off at the moment you start moving, otherwise damage cannot be avoided, and then all the problems will follow each other, and a situation will arise with a solution to the question of how to replace brake hoses on a VAZ 2114.
Thus, vigilance and vigilance again are the main things that the driver must remember when entering the garage and while driving along the route every day and every second. It’s better to sit down and figure out how to replace brake hoses on a VAZ 2114 than to experience stress at speed when the brake pedal simply falls under your foot and the car does not stop on demand.
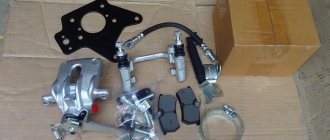
Required Tools
In order to replace the brake cylinder you will need the following tools:
- wheel wrench;
- jack;
- WD-40;
- socket wrench 10;
- a device for unscrewing fittings if necessary;
- metal brush;
- rags;
- pliers;
- a screwdriver or pin for tensioning the springs.
Before starting all types of work, be sure to provide a place for laying out all spare parts; when removing them, it is advisable to remember the sequence and methods of removing them. This will make the reverse process much easier. In addition, before such a procedure, it is advisable to stock up on a set of brake pads, because they still need to be changed every year depending on the intensity of driving. And besides, they don't cost that much. So, having everything listed in our arsenal, let's get to work.
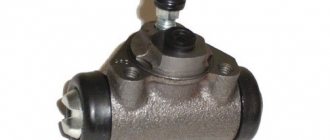
REAR BRAKE CYLINDER
The working rear brake cylinder on a VAZ is a device in which two pistons, under pressure created by the liquid, push the rear pads apart. The pads are pressed against the drums and braking occurs.
The rear brake cylinder for 2114 (ZTC) can be of different manufactures. In Russia there are quite a lot of enterprises specializing in the production of spare parts for cars. The original parts are produced by AvtoVAZ; many spare parts for VAZ cars are produced in Samara. But there are also products from other companies (including foreign ones):
- Ate, Germany;
- Samco, Italy;
- Lucas;
- Fenox;
- AP Lockheed;
- "Basalt";
- "Craft".
ZTC Kraft
Among all the listed companies, according to customer reviews, the products of ATE have proven themselves the best. Among Russian brands you can about
Depending on the manufacturer and region of sale, the price of a cylinder on average ranges from 250 to 700 rubles (as of 2105). There is no difference between the VAZ 2114 and VAZ 2115 models; the parts are completely interchangeable with each other.
On a fully assembled car, it is not visible where the rear brake cylinder is located; it is located inside the rear drum. But you can understand where it is by looking at the brake pipe that goes to the cylinder.
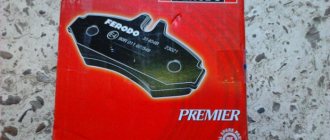
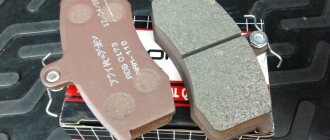
What brake hoses should I buy and what spare parts should I buy to replace the brake hoses?
Brake hoses have proven themselves well , they are of good quality and a little expensive. If you want to save a little, you can buy brake hoses produced by DAAZ , which are also of good quality.
You should also buy copper washers 1.5 mm thick, brake fluid, which is necessary for bleeding the brake system. I recommend buying brake fluid DOT 4 400 grams.
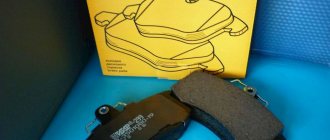
Which brake hoses should you choose?
In addition to the factory version, there are other analogue parts. Many people are engaged in the production of spare parts for the 4 and offer a set of flexible front hoses for 400 rubles . Part number – 1368 .
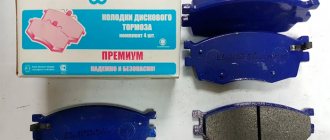
They are not much different from the handset, but due to the low price (the factory version costs about 500 rubles ) they are in demand among owners of “fours”. Strength is due to the reinforced layer and high-quality rubber covering the base of the tube. All parts intended for installation in the brake system undergo special quality control, so tubes from most manufacturers are equally good in terms of strength. Another option - reinforced brake hoses "AST" is not available in all stores, but is quite in demand due to the high strength of the product.
The price for the product is slightly higher than the factory version - about 650-700 rubles . The strength of the “AST” model is very high, so you can safely consider this analogue for purchase.
Do-it-yourself replacement of brake hoses on a VAZ 2115
A properly functioning brake system is the key to your safety! I talked about this a long time ago, in one of my previous articles. Today I am no less confident in this, and I want to talk about brake hoses, or more precisely, about how to replace them on a VAZ 2115.
Only regular maintenance and monitoring of all components of the brake system can provide confidence that the brakes will not fail at the most inopportune moment. One of the most important components of the brake system (BS) is the line through which the brake fluid (FL) is delivered to the brake cylinder and calipers. A leak in one of the hoses can lead to a malfunction of the vehicle, as a result of which the fuel fluid will leak out, and you will simply find yourself without brakes.
Service life of brake hoses
The replacement of brake hoses is regulated differently by each manufacturer, on average it is 3-5 years or approximately 100 thousand km. However, all this is individual, hoses can fail earlier or later, it all depends on the operating conditions and the quality of the brake hoses themselves. From time to time you should carry out a visual inspection of the hoses, and the entire vehicle as a whole, this is the only way you can avoid troubles on the road.