Opinion of a car owner named Alvise: The design is a little catchy
Category: Detailed car maintenance guide
Vehicle characteristics: The vehicle dimensions are as follows: body length - 3555, width - 1100, height - 1496 mm. The wheelbase is 2305 mm. Ground clearance 165 mm. The car is equipped with a hybrid power unit. The 2-cylinder engine is equipped with a system that provides engine power output. There are 4 valves per cylinder. The diameter of one cylinder is 71 mm, the piston stroke is 78 mm. The engine crankshaft accelerates to 3000 rpm. Maximum torque is maintained up to 5000 rpm.
Posted by admin: at the request of Rosarioa
Original name: VAZ 2112 qo'llari bilan orqa qanoti almashtirish
Release date: June 30, 2022
Laughter in the topic: I’m standing at the entrance, a guy comes up: - Will there be a cigarette? I gave him a cigarette. - What about lighters? I give him a lighter. He jokingly said: - Go ahead and have some chewing gum. I take out the “Dirol” record from my purse with the words: “I am a sorceress, and you wasted all three wishes so stupidly...
VAZ 2110 rear right fender
If the rear right wing of a 2110 VAZ car is damaged, it will either have to be replaced or repaired. The second option is, of course, cheaper, but it is more difficult to implement. Still, on a VAZ 2110, the rear right wing can be repaired without any problems if you know certain secrets, which will be discussed in this article.
Painting the rear wing of a VAZ
Rear fender painting
If the car breaks down for any reason, it needs repairs. At the same time, if it is scratched, then it needs to be painted.
After the repair, the wing will have to be painted in any case.
So, this must be done according to the following algorithm:
First, you need to highlight the damaged parts with a marker so that you can pay the most attention to them during the painting process; Then - primer. It is necessary so that the paint adheres better to the car; The next step is to apply the first layer of base paint. Note: you need to spray the paint in a thin layer, so the sprayer must be held approximately 20 cm from the wing
Note: you need to spray the paint in a thin layer, so the sprayer must be held approximately 20 cm from the wing.
- Leave for 5-7 minutes to dry.
- Next is the second layer of paint.
- Let it dry slightly again.
- Apply a third layer.
Note: You need to wait about 20 minutes before applying the polish. At the same time, if dust has slightly settled on the surface of the wing, it must be removed with a sticky cloth.
Now you can start applying the varnish. The first layer is applied.
Note: Don't try to create a glossy finish with the first coat. This may cause the remaining varnish to bleed.
Leave for 7-10 minutes to allow the varnish to dry slightly.
Note: after this you can check for tack (if it sticks a little, but does not rub off, then you can start applying another layer).
- Second coat of varnish. Leave to dry thoroughly.
- Wipe with a damp cloth.
- Polish the vases.
Photos and videos found on the Internet will help you replace, repair, or paint the rear fender yourself. Any instructions will help you do any work quickly and efficiently, although you need to try a lot.
But the price of “home” repairs is noticeably lower than in a car service.
- Home
- Auto garage
- Replacing the Rear Wing of a VAZ 2112 with Your Own Hands
2110 VAZ: rear right wing, repair and replacement
VAZ 2110 rear right fender
If the car has a 2110 vase rear right fender, it will either be modified or repaired. The second option is, of course, cheaper, but it is more difficult to implement. All the same, on a VAZ 2110, the rear right wing can be repaired without problems if you know certain secrets that will be discussed in this article.
Final painting of the wing on the VAZ-2106 model
Before giving the replaced element the required color, all irregularities and dents are carefully puttied, after which the border areas that should not be touched by paint are covered with newsprint or masking tape.
An important stage of the restoration work will also be wet priming of the surface of the replaced wing using a special paint gun, on which putty was previously applied. This will allow the enamel to dry faster and cover the wing perfectly evenly. We wait 10-15 minutes and apply the required paint with progressive movements, which should dry within two to three days.
As a result of the measures taken, the new wing on the VAZ-2106 model will become an indispensable and ideally suitable element of the body, which will perfectly withstand aggressive mechanical or chemical influences, delighting the car owner with its durability and quality.
Replacement
Left front fender VAZ 2110
So, to replace the front (or rear) wing of a VAZ 2110 you need to:
- Raise the hood and loosen the bolts on the wheel.
- Raise the car on a jack and unscrew the wheel.
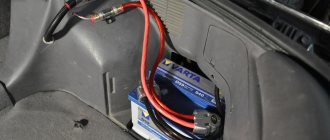
- Release the negative terminal of the battery.
- After this, you can begin to remove the wing itself. You need to unscrew all the bolts that hold it in place.
Front left fender VAZ 2110
Unscrew the mudguard fastenings and the fastening of the wing itself.
Left front wing of VAZ 2110
- After this, you need to use a new sealant to attach the whole wing in place of the old one.
- Now you should install the headlight of the VAZ back and screw in all the bolts that were previously unscrewed.
Preparatory activities
So, before you begin the main work of dismantling the wing, you should remove the bolts that secure the driver's door to the body, which will allow access to the required element. To do this, use an impact screwdriver and a hammer to unscrew the fasteners, and drill out the rusted parts with an electric drill.
In addition, before removing the wing, use a regular Phillips screwdriver or suitable tools to unscrew all the fasteners that hold the headlights. Also, using bolt wrenches, the front bumper fastenings are dismantled, and then all the listed parts of the vehicle are carefully removed. As a result, access to the wing will be completely free, after which you can proceed directly to dismantling the element.
Installing the rear wing on a VAZ 2110 in the garage
Wing repair
The cost of replacing the rear left or right wing is, on average, 3200–3300 rubles. You can do everything yourself, you just need to act carefully and have the necessary equipment on hand. So, if there is a defect on the rear wing, it is easy to repair it in this way:
- Raise the car on a jack.
- Squeeze out the affected element.
- Apply a tool with a flat but sharp end to the back of the dent on the fender. Using a heavy hammer to hit the flat part of the bit, smooth out the imperfection step by step.
- Do not hit the rear fender too hard - you risk stretching the iron, resulting in its deformation and an increase in area.
- Knock out the edges sequentially, as if walking along one line.
- Straighten the outside of the dent using a flat object.
Required tools and materials
Before removing the front wing on a VAZ 2110, it is necessary to carry out preparatory work and prepare tools. During the factory assembly of the body, the wings were welded to the cross members and struts at points. If a non-original wing is being removed, you should check how the part is installed. If there are welding points, they must be drilled out and then cut out. Tools for work:
- chisel with a sharp and wide edge;
- semi-automatic welding;
- key for 8 and 13;
- Phillips and flat screwdriver;
- grinder and circles for stripping metal;
- sandpaper R-80;
- automotive primer;
- end cutters;
- putty, rubber spatula;
- auto enamel;
- anticorrosive based on bitumen or rubber-bitumen.
Before dismantling the part, it is necessary to prepare the car:
- Place the Lada on a flat surface with the handbrake.
- Drain the fuel as welding is involved in the repair.
- Disconnect or remove the battery.
Mounted body parts, sidelights, etc. are dismantled during the work. If you need to replace the original part after an accident, it is recommended to buy a replica from the manufacturer and take measurements. In half of the cases, spare parts from the manufacturer require additional adjustment.
When the wing of a VAZ 2110 requires replacement
- The wings of the VAZ 2110 are susceptible to corrosion, as a result of which they rust and collapse. Mainly due to the fact that it is this part of the car that is exposed to moisture and other aggressive environmental factors, such as reagents and salt, which are sprinkled on roads during icy conditions.
In these cases, the need to change the wing becomes obvious. To perform this procedure you will need the following tool:
- wrench with 8 and 13 mm head;
- extension cord and ratchet;
- flat and Phillips screwdriver;
- new left wing of VAZ 2110.
By the way, the price from the VAZ manufacturer for the original front left fender with article number 21100840301500 or the front right fender with article number 21100840301400 will be about 1,550 rubles. The rear left fender with article number 21100840401500 or the rear right fender with article number 21100840401400 costs about 3080 rubles.
The average cost is indicated for spring 2022 in Moscow and the region.
How to change the rear wing (instructions)
Replacing a rear wing is a rather labor-intensive process, but if you have the necessary tools, you can do it by following the instructions:
- We empty the trunk of unnecessary and flammable items, as well as the trunk mat.
- Unscrew and remove the bumper.
- We remove the headlights.
- We dismantle the fuel tank.
- Using a thin chisel, gently press out the rear wing, but try not to damage the car body.
- We drill out the rivets at the junction of the wing and the transverse frame.
- We remove the rear wing.
- Using wire cutters and a chisel, we get rid of the strips of metal that remain on the wing.
- We straighten and polish the edges of the wing.
- Prime with reactive primer.
- Prime with regular primer.
- We clean the welding points down to metal.
- We attach the new wing by welding.
- We paint the new wing in the body color.
Remove the front bumper and, if present, the wheel arch liner.
If the rear wing arch begins to rot
Rear right wing for VAZ 2110
Iron very quickly undergoes corrosion, which, as it grows, can harm the entire car. It is advisable to start repairs when the rust has not yet seeped into the solon, as the consequences will be much worse. The arch of the front or rear wing is most often affected by this problem. To fix this problem you need to do the following:
- Disconnect the ground so that any welding work can be carried out without difficulty.
- The damaged part must be cut off, and the remaining parts must be cleaned properly.
- To seal the resulting hole, you need to attach a patch on the “wrong” side. This must be done by welding.
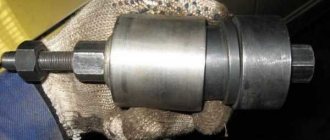
Replacing a water pump on a VAZ 21124 engine, replacing a UAZ 3151 stove fan
Socket and open-end wrenches for 8 and 10
Double-sided screwdriver
The front wing on the VAZ 2110 and 2112 is attached to 8 turnkey screws for 8. This particular car did not have wing fenders. If your car has them, then you will have to remove it, and preferably remove it completely - it will be more convenient.
Front left fender VAZ 2110
Let's start from the bottom. As you can see in the photo below, a plastic threshold is attached to the fender with a self-tapping screw; we can remove it completely, or we can only unscrew it from the front fender and lower it down (it is quite elastic).
On most front-wheel drive cars of the VAZ family, the front fenders are attached to the body not by welding, but by bolts, and this also applies to our VAZ 2110-2112 cars. So, if replacement is necessary, everything is done quite simply and without unnecessary problems. To do this, you just need to have at hand the minimum tool that will be given below:
- Flathead and Phillips screwdrivers
- Screwdriver shortened
- Head for 8
- Ratchet with extension
After that, using a long screwdriver, unscrew the end screws securing the fender liner, and using a short screwdriver, unscrew the internal screws in the arch. Then remove the fender liner.
Next, open the hood of the car and unscrew the 4 bolts securing the front fender from above, as shown in the photo below more clearly:
Another bolt is located in the front part of the wing, but it becomes accessible only after removing the bumper or moving its edge to the side:
So, two more bolts are located on the inside of the wing:
The last place where you still need to disconnect this body part is the lower rear part, which is located at the very beginning of the threshold:
When all this has been dealt with, it is necessary to carefully remove the wing from the VAZ 2110-2112 without any extra effort, since nothing else prevents its dismantling.
If replacement is necessary, we send the new wing for painting and ultimately install everything in the reverse order. The price of a new such part produced by VAZ is about 1,400 rubles.
As you know, on the VAZ 2110 the right front fender not only performs an aesthetic function, but also serves as protection. Often this part of the car body is subjected to mechanical or other impacts that negatively affect the surface or the wing as a whole. In such cases, the front right wing of the VAZ 2110 is subject to replacement or repair, which can be easily carried out on your own.
Replacing the wing of a VAZ 2114: how to prepare the car and what tools are needed
Before removing the wing of the VAZ 2114, you should prepare the car and collect the necessary tools.
The car needs to be driven into a technical pit/overpass, and if this is not possible, jacked up on the side from which you are going to change the wing.
The car should be securely fixed in this position.
After this, you can remove the wheel and all parts that may interfere with the process, namely:
- front bumper;
- facing linings;
- wheel arch liners;
- thresholds.
Before removing the bumper, be sure to disconnect the contacts of the fog lights. To avoid damaging the car’s electronics, remove the “-” terminal on the battery.
Of the tools that you will need to quickly replace the front fender, you will need the following:
- Set of wrenches.
- Set of spanners.
- Extension.
- Phillips screwdriver.
- Pliers.
- Knife.
It should be noted that in the process of replacing a wing, not all of the above tools may be needed. It will be enough for an experienced master to have only a few of them on hand. However, if this is your first time deciding to remove the wing yourself, then it is better to prepare the entire kit so that during the work you will not be distracted by searching for the missing tools.
Installation of a new front wing on the VAZ-2106 model
Before installing a new body element, it is imperative to coat it with an anti-corrosion compound, which will prevent subsequent wear of the product.
Particular attention should also be paid to fitting the wing in order to avoid large gaps or mismatches at the seams.
We try to carefully and reliably weld the wing in the area where it connects to the driver's sill, since this is where the greatest load will be placed on the part being repaired.
We “grab” the element by electric welding at the joint points, if necessary, hammering it tightly to the body with a hammer. We try to carefully and reliably weld the wing in the area where it connects to the driver's sill, since this is where the greatest load will be placed on the part being repaired.
Subsequently, all welding seams are cleaned, and the resulting microscopic cavities are coated with a special sealing compound, which eliminates the possibility of water penetrating into the interior or engine compartment of the car.
Body features of the “tens”
The VAZ 2110 or simply “ten” is equipped with a load-bearing structure body. This is a 4-door front-wheel drive sedan that has adopted some features from its predecessor, the VAZ 21099.
Note. This does not mean at all that the “ten” does not have individual traits. On the contrary, like any creation of the VAZ automobile industry, the model is distinguished by a set of characteristics unique to it.
In fact, the VAZ 2110 was predicted as a modification of the G8 back in 1983. Later, this base was used for the manufacture and production of a completely new car. In the meantime, the designers decided to modify the VAZ 2108 into 21099, leaving the idea of creating a VAZ 2110 for the future.
Note. According to rumors, the work at that time to create the “ten” required major changes in the design and structure of the body, which inevitably led to higher prices. At that time, AvtoVAZ was not yet ready for this.
The “ten” entered mass production only in 1991. The production of the new sedan, which, unlike its relatives, does not, oddly enough, have its own name, was continued at VAZ in 1995. Three years later, they started producing a station wagon.
Note. The VAZ 2110 at that time was the only model whose body was sold in three ways.
By 1996, the VAZ 2110 was losing its popularity, which can be explained by significant progress in the global automotive industry. A modern and progressive car, once technologically advanced, represented by the VAZ 2110, ceases to be such and loses its attractiveness. Although, on the other hand, this would not have been said at that time about the sedan, which still sells well to this day.
It was in 1996 that the “ten” began to be mass-produced in a sedan body type. The designers modernized a number of body elements and introduced various innovations. For example, one of the innovations is the introduction of gas stops into the hood of a car.
The VAZ 2110 was considered an expensive car at that time. And this is not surprising, because the engineers of the domestic automobile industry tried to modernize this car as best as possible. They even included the possibility of installing an air conditioner in the cabin. The trunk turned out to be a sight to behold – large and roomy.
True, the sedan could not compete with the station wagon in terms of luggage compartment capacity, but the same cannot be said regarding ease of use. So, due to an unsuccessful design, the hinges on the station wagon took up a considerable part of the useful volume of the trunk. In addition, the inconvenience of loading things into the trunk of a station wagon was added by the overly inflated wheel niches.
In the sedan, on the contrary, the trunk is well designed. The space for the spare tire stands out especially clearly. The wheel rim can be placed here upside down, which allows you to compactly load various things and tools into yet another free space.
As for the next modification of the “ten” called VAZ Premier, it is an exact copy of the VAZ 2110, only with an elongated body. The production of this model implied the use of an original set of body parts. They do not fit the sedan body. In addition, when designing the Premier body, engineers took care of giving it additional rigidity.
The floor was primarily reinforced. The suspension has been modernized and is more rigid than the sedan's. The total weight of the car has increased by 65 kg. As for painting, it was carried out in the same way as on the VAZ 2110 sedan.
We hope that the information provided in the article will help in your specific situation. If you will be checking the geometry and restoring it yourself, we recommend that you carefully study the photos and videos.
- Absolutely legal (Article 12.2);
- Hides from photo and video recording;
- Suitable for all cars;
- Works through the cigarette lighter connector;
- Does not cause interference to radios and cell phones.
How to remove rust from a fender
To remove rust stains from car fenders you will need:
- sandblaster or sander;
- anti-corrosion primer;
- degreaser;
- rust converter;
- putty;
- gloves.
Restoring the fenders begins with a thorough washing of the car. After this, the car is driven to a remote area so that when the sandblaster works, sand does not scatter throughout the garage and surrounding buildings.
Sandblasting machine
Removing corrosion with a sandblaster is a gentle way to remove plaque. The mechanism will quickly and without damaging the paintwork clean the wing, reaching hard-to-reach places. A jet of sand under pressure is directed at the rust-affected area and gently removes the damaged metal with the help of grains of sand.
Sanding machine
A sander will help you quickly get rid of corrosion on the wings of your car. This tool has a rotating disk that will carefully remove unsightly plaque from parts. You should work with the machine carefully, without pressing hard on the iron, sliding along the bottom of the wing and its entire surface. If done correctly there will be no damage.
Manually
In the absence of power tools, corrosion from car fenders is removed manually with a metal brush or special sandpaper. With sufficient experience, an abrasive disc is used. The method is time-consuming but economical. In addition, the brush allows you to reach the most difficult to reach places.
Chemically
Another repair option without replacing the arches is to remove them using special chemicals. A rust converter works great. It must be applied to the affected areas using a spray can or brush. Next, you should wait a while for the composition to be absorbed into the metal, then rinse with clean water and allow the surface to dry.
How to remove the wing
First, let's find out how to remove the wing from a VAZ 2110 car. Let's get started:
First of all, you will need to remove the side turn signal, but first disconnect the battery;
Note. Removing the bumper involves removing a special fastening on the right side of the VAZ 2110 car.
We take out the side turn signal, moving it to the front of the car and removing it from the special hole;
Note. The turn signal housing should also be removed and the lamp socket with the lamp should be moved towards the front.
- We find the bolt at the bottom that secures the buffer on the right side;
- We loosen the nuts that secure the crankcase protection with the bumper of the VAZ 2110 (there should be 5 of them);
- Remove the radiator trim;
- Loosen the front buffer bolts.
Note. The front buffer bolts (there are two of them) are loosened in order to easily move the buffer in the desired direction, thereby gaining access to the nut that secures the front wing mount.
- Unscrew this bolt;
- Then pull out the headlight from this side of the car;
- After this, grab the wheel arch liner and remove it;
- Now you need to unscrew the screws that secure the wing to the body (we are talking about the upper fastenings, which are turned out with a 10 key);
- We do the same with other screws that secure the wing to the body.
Note. During the work, you need to use not only one key, but also a screwdriver with a wide blade, as well as a second key with the same number.
The wing can be easily removed once there is nothing to hold it in place.
As for installing a new or repaired wing, the whole process is similar to removal. All stages of work should be done in reverse order.
Note. During installation, the wing should be carefully adjusted to other parts of the body
This is very important and requires special care.
When installing a new wing, it is also important to observe the following points:
- Install, as stated, in the reverse order of removal;
- Clean surfaces on the car body;
- Install new insulating gaskets between the body and the upper part of the fender, as well as between the A-pillar and the rear part of the fender.
Note. If such gaskets are not available and finding them is a problem, it is recommended to use mastic, which fits perfectly on the surface of the body and seals the cracks.
- The wing must be aligned due to the enlarged holes, doing this in accordance with the gaps and protrusions of the remaining body panels of the VAZ 2110;
- Be sure to coat the wing with an anti-corrosion compound after installation.
Front fender replacement
A complete step-by-step replacement of the right wing on a VAZ 2110 involves performing the following actions:
- We arm ourselves with the necessary keys (10, 13);
- The front facing linings are dismantled;
- The front fender liners are also removed;
- It will now be necessary to disconnect the side fastenings of the buffer trim;
- The side turn signal on the right side is dismantled;
- Now you need to get to the bolt that secures the headlight trim and unscrew it;
- We also remove the turn signal apron;
- We find the bolts securing the right fender to the body;
- We turn them inside out.
Note. There should be four bolts securing the wing to the body. This is the front bolt, the bolt that secures the fender to the sill and two bolts that secure the fender to the strut.
- Now you need to unscrew the bolt located on the engine compartment side (it secures the wing to the cooling radiator frame);
- Then we unscrew the three bolts that secure the wing to the mudguard;
- The time has come to free the wing from the factory mastic.
Note. The front fender should be removed from the factory mastic very carefully so as not to deform the thin sheet.
We remove the wing.
Installation proceeds in the reverse order of removal. In order for the process of replacing the right front wing of a VAZ 2110 to go without errors, it is recommended to watch high-quality video or photo materials. It will also be useful to use other step-by-step instructions during the work process, listen to the advice of professionals, etc.
Sources
- https://aleksandrchernov.ru/zamena-perednego-kryla-vaz-2110-svoimi-rukami/
- https://remont-vaz2110.ru/snyatie-i-ustanovka-perednego-kryla/
- https://masteravaza.ru/kuzovnye-raboty/krylya/vaz-2110-pravoe-perednee-krylo-644
Body repair, replacement of the front wing of VAZ 2110, 2111, 2112 - text description
The car body is constantly exposed to corrosion and various types of damage. Dents appear on it. The front wings are especially vulnerable. For small dents, you can repair the body yourself and replace the front fender on VAZ 2110, 2111 and 2112.
To carry out the repair we will need pliers and a straightening hammer. You can straighten the wing without removing it. After straightening, we paint the surface. To do this, degrease the surface and clean it to a metallic shine.
Then we apply putty with fiberglass, sand it down and apply the last layer of putty. Then apply the last three layers of primer on top and let it dry for about 2 hours. Next we spray paint.
If the front fender is severely deformed, it will need to be removed and a new fender installed. it's done like this:
Replacing the front fender will require some effort and effort from you, and, in addition, accuracy. Firstly, such work should be carried out on a lift. You can carry out the replacement by installing the front part of the body on a reliable support, but do not forget about ensuring reliable support for the rear wheels.
First of all, you will have to remove the front wheel from the replacement side. After this, gradually release all the fastenings of the wing and protection from the body, bumper, and radiator grille. Don't forget to disconnect and remove the turn signal. It will be more convenient if you don’t take risks and completely remove the bumper. To do this, do not forget to release its mount on the other side of the car. Remove the fender protection mounts and the fender to body mounts.
Before installing a new wing, be sure to inspect its surface on both sides. Also carefully check that the fender guard is not damaged. All nuts and bolts, especially self-tapping screws, must have intact threads. The presence of traces of rust or any damage to the threads on the fasteners precludes their reuse. The best solution in this regard would be to pre-purchase new bolts, nuts, and washers.
The mounting holes and fasteners themselves must be thoroughly cleaned, and protective compounds should be applied to them to prevent water from entering these places where the metal is especially sensitive to corrosion.
Do not forget that it is better to return all parts to their places after careful inspection and cleaning.
Remove the side turn signal (see Lighting and light signaling).
Remove the front bumper of the VAZ 2110 (see Removing the front bumper).
We remove the headlight.
Remove the wheel arch liner (see Removing the front wheel arch liner).
Using a 10mm wrench, unscrew the four upper self-tapping screws securing the wing to the body...
. and the front (bottom) self-tapping screw securing the wing to the bracket.
Use a 10mm head to unscrew the rear (bottom) self-tapping screw.
. and two self-tapping screws for fastening to the front pillar of the VAZ 2112 (under the wing).
Are there any differences between the bottom of 2110, 2111 and 2112
The wheelbase size for all cars in the generation is the same and is 2492 mm, while the cars have different lengths, heights and number of doors, depending on the model:
- Sedan (2110); dimensions 4265x1680x1420 mm.
- Coupe (21123); 4193x1680x1435 mm.
- Hatchback (2112); 4170x1680x1435 mm.
- Station wagon (2111); 4285x1680x1480 mm.
The body layout of each configuration has design differences, but these differences do not affect the central bottom. The bottom of the VAZ 2110 has average prices of 3,000 rubles. and is suitable for installation on the entire line. The part is made of ferrous or rolled metal, without protective galvanization, and therefore always needs to be treated with anti-corrosion agents.
Repair process
VAZ 2112 rear right fender
- Raise the car on a jack.
- Press out the wing.
- You need to level the surface using a heavy tool (this could be a hammer). Take a nozzle with a sharp flat end and apply it to the other side of the dent. After this, hit the flat surface of the nozzle with a hammer. A slight leveling will be noticeable.
- The outside needs to be straightened with a flat object.
Note: it is better to straighten using an iron tool, since aluminum will not work. All actions must be performed quickly. However, you should not hit too hard. This can cause the metal to stretch, causing the wing to expand slightly.
- The edges need to be knocked out very carefully, along one line.
Partial replacement
Often the back panel is partially replaced. This avoids additional disassembly, for example, dismantling the rear window. It must be remembered that too long a joining seam is not desirable. It is better to choose a narrower place for the cut. It must be taken into account that the welding seam is invisible from the back of the rear wing.
Complete rear fender replacement
VAZ 2112 right rear fender
Replacing the wing arch if necessary
Arches wings vaz 2110
Before you begin the actual arch replacement procedure, you must first make all the calculations and take the necessary measurements. Taking measurements:
- first you need to assess the extent of damage;
- then, the new contour of the arch must be attached to the old one;
- after the damage to the old contour, circle and make the corresponding marks on the new one;
- after which it is necessary to analyze the obtained measurement data in detail and briefly outline the general scope of the upcoming work.
Dismantling
Before the practical opportunity to install a new arch presents itself, it is necessary to properly dismantle the old one:
First, the old arch is removed by cutting out the rotten part along a previously drawn line.
Algorithm for performing welding work:
- first, the center of the new arch is welded to the car body;
- then, it is necessary to visually align both ends of the new arch in order to maintain the proper degree of symmetry;
- after which you need to weld both ends of the wing arch directly to the car body;
- Next, welding must be done from the periphery to the center.
Removing the front wing on the VAZ-2106 model
Finding factory welds on the wing is a major task for any repairman (they are usually visible to the naked eye). In order not to bend the wing or other body elements when “sawing” the weld, you will need an electric drill with a suitable drill, usually 12. We gradually go through each seam with the tool, making small entry holes on the outside of the wing.
Using a grinder, we cut off the lower part of the wing under the driver's headlight, not forgetting to put a protective cover on it, which will save your eyes from harmful sparks and eliminate the possibility of hand injuries.
Next, take an electric chisel and remove the top part of the metal between the previously drilled entry holes. If all actions are performed correctly, the wing itself will begin to separate from the body, so removing it will not be difficult.
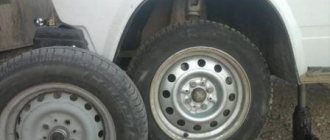
Do-it-yourself wheel alignment on a VAZ 2110
You can check and adjust the appropriate angles on the vehicle in the garage or on any flat, flat surface, for example, asphalt. Before starting, you should measure the tire pressure; its value must correspond to the norm:
- For 13 inch tires – 1.9 bar;
- For 14 – 2-2.1 bar.
You need to remove all heavy objects from the car and unload it. To work you will need a basic tool and several auxiliary items.
Equipment
To carry out the work you will need:
- Set of wrenches;
- Short building level;
- Roulette (3-5 m);
- Vernier calipers (can be replaced with a steel ruler);
- Chalk;
- Plumb line with cord;
- A special device is a ruler for checking alignment (you can make a homemade device from two tubes, one of which goes into the other).
To check the toe-in, it is recommended to use a pit (an overpass will also work).
Camber Angle Adjustment
The following numbers appear in the car owner's manual: 0 degrees ±30 minutes.
The adjustment process looks like this:
- With chalk, 2 lines are placed on the surface of the rim - at the top and bottom of the wheel.
- A string with a plumb line, attach (you can use a magnet) to the fender of the vehicle. Now you should measure the interval from the wheel to the lace in the area from the top and then from the bottom mark. The values should differ by no more than ±1 mm.
- Since the geometry of the wheels cannot be absolutely ideal, you should roll the car forward so that the lines (marks) move by 90. Now you should make two additional marks and take measurements again.
- Points 2,3 and 4 will have to be repeated for the second wheel.
- Next, you need to place the vehicle 180° compared to the previous position and repeat the measurements.
- Using a wheel wrench and a car jack, remove one of the wheels. Using a pair of 19mm wrenches, loosen the 2 bolts that hold the shock absorber strut bracket to the steering knuckle.
- Using a 19 key, move the steering knuckle the required distance inward or outward, moving the eccentric of the bolt head. This will allow you to change the camber angle.
- Then you should fasten the counter-bolts, put the wheel back in and rock the car, pressing 3-4 times on the corresponding front fender. Repeat angle measurements.
- Check measurements and make adjustments until an acceptable result is achieved.
On most domestic front-wheel drive cars (including the VAZ 2110), a camber of -1/+1 mm should be installed.
Adjusting the toe angle
Although this parameter is sometimes adjusted using a thread, a more accurate option is to use a special device (ruler). To begin with, we drive the car onto an overpass or pit, and set the steering wheel straight. Next you need to perform the following sequence of actions:
With chalk, draw two lines on the tires - on the inside and next to the rims. Using a ruler, set it so that its tips touch the lines. Other parts of the line should not touch anything other than the wheels. If you are using a factory measuring device, you need to look at the moving scale, align 0 with the pointer, and then fix it. When using a homemade ruler, you will have to perform all manipulations manually - that is, use a tape measure to measure the ruler each time and write down the values. Pull the vehicle forward to move it a few tens of centimeters; the ruler should move (if the ruler was made independently, you just need to take the measurements again). Check the value on the ruler scale. The distance between the wheels on the rear axle and the similar distance between the front wheels are not the same, although they should have equal values. Most likely, it will be necessary to adjust the length of the tie rods, plus or minus (make them longer or shorter). Using a 27mm wrench, loosen the tie rod locking nuts. Using a 24mm wrench, you can change the length of the tie rod (you should turn it exclusively by the clutch). Now you should set the factory scale so that it is possible to adjust the toe to 0, then slightly move the vehicle back. When the readings are -1/+1 millimeters, the installation is considered complete
It is very important to move the vehicle forward again and check the measurements. Particular attention should be paid to the steering wheel. If suddenly it turns out to be shifted to the side, it means that the length of the rods is set incorrectly, and some of them are currently displaced. To correct it, you will have to change the length (for example, increase) one (any) rod by a certain number of revolutions, and change the second (for example, reduce) by the same number of revolutions
If the steering wheel returns to its normal position, the problem is solved.
Removing the old wing
We make neat cuts along the cut line. At the same time, we try to avoid damage to the internal elements of the pillar and threshold. Next, we drill out all the welding points connecting the wing to other body elements. We begin careful dismantling. You may need a hair dryer to heat up the adhesive joints that hold the fender and mudguard in place.
After dismantling the old wing, it is necessary to adjust the new one. There are two ways to do this.
- Applying markings to each element followed by cutting.
- Simultaneous cutting of both joined parts.
Applying markings to each element followed by cutting
We apply markings to the rear wing and make cuts. We apply it to the surface of the body. The wing should slightly overlap the cut lines of the old wing. At the future joint we place marks on the new wing. We remove the wing and make cuts on the body. We reattach the wing, check the gaps, and, if necessary, make adjustments by processing the joints.
Simultaneous cutting of both joined parts
We install a new wing, while it overlaps the cut lines of the old wing. We set the gaps along the door and fix the wing with clamps. Approximately in the center of the floor lines, we cut two elements at once. In this case, we select a thin disk for cutting. When using this method, the joints are very smooth. The distance between the joined parts must correspond to the thickness of the metal being welded.