Removal
1. We prepare the car for operations (see “Preparing the car for maintenance and repair”).
2. Set the glass to the lower position.
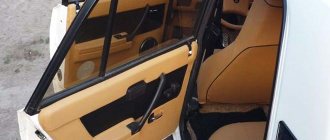
3. Remove the rear door trim in the same way as removing the front door (see “Front door trim - removal and installation”).
4. Remove the protective film of the door.
5. Using a Phillips screwdriver, unscrew the self-tapping screw securing the rear upper guide of the sliding window.
6. Remove the seal from the top of the door frame.
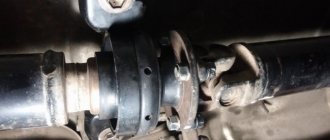
7. Using a 10 mm socket or socket wrench, unscrew bolt A and nut B securing the rear guide.
8. Remove the upper part of the guide from the fixed glass seal.
9. Tilting the upper part of the fixed glass forward, remove it.
10. Remove the seal from the fixed glass.
Attention! Before performing the following operation, it is recommended to note the position of the cable relative to the pressure plate.
11. Using a Phillips screwdriver, unscrew the two screws securing the cable pressure plate to the glass bracket.
12. Remove the plate and lower the glass all the way.
13. Remove the door trim and two chrome trims (see “Front door glass - removal and installation”).
14. Lifting the sliding glass with its bracket and tilting it inward, remove it from the door.
Scheme of organizing the change of the front door window regulator on the "seven"
- Design and technological nuances
- The first stage of replacing the front door window regulator on a VAZ 2107: removing the defective unit
- The final stage: installation of a new node
- For your information
- Briefly about the change procedure
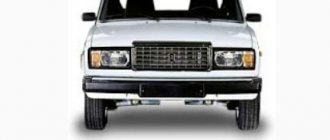
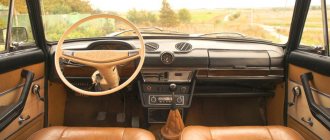
seven The concept of glazing the side windows of the front doors on the latest models of VAZ classics reflects the style of modern car design techniques. It was when designing the “Seven” that the engineers moved away from the previously widespread arrangement of glass in the front doors – triangle + rectangle.
Design and technological nuances
For owners of other Lada classics, replacing a window regulator on a VAZ 2107 may seem unnecessarily complicated. The cable is connected to the solid glass brackets in two places, which necessitated the use of another roller - here there are 4 of them: one tensioner and three guides.
The repair operation is quite feasible on your own if you have a minimum amount of tools:
- open-end wrenches for “8” and “10”;
- Phillips head screwdriver.
The first stage of replacing the front door window regulator on a VAZ 2107: removing the defective unit
The installation of a new glass movement mechanism is preceded by an operation to dismantle the worn window regulator. Before implementing it you should:
- unscrew the three screws securing the door handle;
- remove the door handle;
- remove the door trim.
glass Before removing the original window regulator, it is recommended to tie two branches of the cable with a small piece of wire in the immediate vicinity of it.
This move will not allow the cable to jump off the grooves in the drum, which makes it possible to reuse the mechanism. Dismantling of the structure is carried out in the following sequence:
- lower the glass until the cable fastening brackets to the glass brackets are accessible through the door's technological windows (within 1 turn of the window handle);
- completely unscrew one screw and loosen the second screw of the bracket securing the cable to the supporting bracket; remove the cable (do it alternately for one and the second bracket);
- raise the glass to its highest position and fix it using available means (in the process of replacing the front window regulator of a VAZ 2107, the following technique is most often used: insert a screwdriver into the hole on the inner door panel);
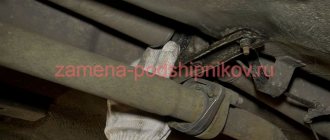
- loosen the tension roller mounting nut (located in the center at the bottom of the door) using a “10” wrench;
- remove the cable from the tensioner, guides of the lower (in the lower left corner) and two upper rollers;
- unscrew the three nuts securing the window lift mechanism relative to the door;
- unscrew the two nuts securing the guide groove and move it to the right;
- remove the window regulator and remove it from the door.
After removing the mechanism, you should check the ease of rotation of each roller.
The final stage: installation of a new node
lift A new glass lift must have a bracket that secures two branches of the cable.
Removing it until complete installation is strictly prohibited for the above-mentioned reason. In general, the concept of installing a new assembly unit looks like this:
- installation and fastening of the window regulator housing in the seat;
- wrapping the cable around the rollers;
- fixing the glass clips relative to the cable (fastening the cable with screws using two brackets);
- installation of the guide groove;
- cable tension;
- dismantling the bracket securing the cable branches;
- installation of upholstery and door handle.
The cable can be routed around the rollers in two ways - through the upper or lower rolling bearings. When passing through the lower roller, the upper cable coming out of the mechanism is directed through:
- lower left guide roller;
- upper left guide support;
- lower central tension roller;
- upper right guide element.
When replacing the front window regulator of a VAZ 2107, it is also important to move it through the upper roller, done in the reverse order. In this case, the lower cable is guided.
For your information
The cable is tensioned according to the following procedure:
- lower the window all the way;
- turn the mechanism handle all the way in the direction of lowering the glass;
- adjust the cable tension by moving the corresponding roller;
- tighten the roller mounting bolt.
You should prefer the optimal tension force of the cable drive: the cable should not be overtightened, but should not dangle.
After installing a new window regulator, a squeaking sound may occur. To eliminate it you need to:
- loosen and remove the cable from under the rollers;
- cross the upper and lower branches of the cable coming out of the lift drum;
- repeat the procedure for installing and tensioning the cable.
Briefly about the change procedure
A simplified process for replacing a defective window regulator in the front door of a VAZ 2107 looks like this:
- remove the door trim;
- disconnect the cable from the clips securing the glass;
- loosen and remove the cable from the rollers;
- dismantle the guide chute and the window lift mechanism;
- install the housing of the new glass lifting mechanism;
- thread the cable along the contour;
- fix the glass brackets relative to the cable;
- pull the cable;
- install door trim.
Purpose of the windshield and rear glass
Glass is a transparent shield that is mounted in front of the car and protects passengers from air flow while driving. Additionally, this element affects aerodynamics and the final drag coefficient.
Front and rear windows increase torsional rigidity and retain heat in the cabin.
A shield with several layers is called triplex and is installed in the front of the car. A transparent film is glued between the layers of the part, which firmly holds large particles in the event of an accident or a large object. The multi-layer shield ensures the safety of passengers and the driver, eliminating serious injuries from fragments.
The hardened part consists of one layer. It is used for side arrangement and rear shield. The temperature effect increases the strength of the part and prevents the formation of large fragments in the event of an accident. After hardening, high-quality parts are broken into small particles with rounded edges that are not capable of causing injury. You can strengthen the rear panel using a tint film, which will hold the fragments in case of complete cracking.
The evenness and transparency of the glass surface ensure the safety of the driver while driving, and models with protection from ultraviolet rays prevent the interior from quickly heating up in countries with hot climates.
What is required for the work
To replace a defective element on a VAZ 2022 with your own hands, you need to prepare the following tools:
- degreasing and cleaning agent;
- clean cloth;
- a cord with a cross-section of 4-5 millimeters and a length of at least 5 meters;
- assistant, since some operations are performed only by two people;
- new sealing rubber;
- molding.
You need to thoroughly wash and degrease the new product before starting work. This will prevent it from accidentally slipping out of your hands, and will also ensure a tight grip in the rubber groove.
All work should be carried out in a warm, windless place, observing safety precautions when using degreasing chemicals.
Causes of problems
- If the power button does not light up and the glass does not fog up, then most likely the control for turning on the heating relay has failed. In this case, you should check whether there is voltage on it.
- If the glass also does not defrost and the button does not light up, then, presumably, the control for turning on the heating relay is not working. The diagram will help you diagnose control voltage and ground, indicated on the relay as 85 and 86 and wires numbered 1, 2, 4, 9, fuse F7, power button.
- If the rear window heating does not work and the control light on the dashboard is on, then it is worth checking the power to the wires numbered 5, 19, 30, fuse F4 and whether the heating element is in working condition.
- If, when this function is turned on, the glass clears unevenly, it means that some of the threads carrying current have been damaged. In this case, the circuit is no longer needed. Below we will tell you how to solve this problem.
Dismantling the lobovukha
Replacing the windshield on a VAZ 2107 will require dismantling the interior decorative trims, as well as the rear-view mirror.
To dismantle a part from a VAZ:
- Wash the car at the car wash and drive it into a warm garage.
- Bend the wiper blades.
- Use a screwdriver to pry up the windshield lock, which is located in the lower frame.
- Remove the wedge molding around the entire perimeter of the glass.
- Gently press on the corners from the interior side to press out the shield, holding it from the outside.
- When dismantling, you need to press the seal with a screwdriver, squeezing it out.
- When removing, it is important to be careful and not to fumble when pulling the part out of the groove. Do not press on the shield as this may cause the part to crack and cause injury to your hands.
Unusable VAZ consumables should be placed on a soft cloth or rubber mat. This will prevent chips in the corners and the appearance of potholes that could cut your palms during subsequent transportation.
Roof noise insulation on a classic
In the process of soundproofing a car, the roof is often forgotten, but in vain. This huge surface contributes significantly to the overall noise that needs to be eliminated. If we talk about classic AvtoVAZ models, there are two types of ceilings - soft and hard. The labor intensity of soundproofing the roof of these cars directly depends on this, because the ceiling will have to be completely or partially removed. It’s easier with a soft ceiling - you just need to bend it at the edges, but a hard one may not bend that way. Then you will have to pull it out of the cabin, and for this you need to remove the front or rear window... The prospect is not pleasant, but the soundproofing of the roof on a classic is worth it!
Sound insulation of a roof with a soft ceiling
Everything is quite simple here. The soft ceiling is a piece of dermantine, which is stretched around the perimeter of the ceiling and is held on by metal hooks and brackets. The hooks are located under the seals of the front and rear windows, so in order to completely remove the ceiling, you need to remove these windows. However, the soft ceiling does not need to be removed - to soundproof the roof, it is enough to bend it at the edges.
Self-installation
Installing a windshield is not a difficult, but responsible process. Before starting work you need to do the following:
- Wash the surface of the frames and inspect for chips, rust, and abrasions.
- Degrease the surface.
- Place the cord in a new elastic band. The ends of the rope are located along the bottom edge in the place where the lock is located.
- Prepare a new part.
If pockets of corrosion are detected, clean the area with sandpaper, apply a primer and paint over it with enamel. The presence of rust in the contact area is unacceptable: this reduces the strength of the fastener, which is why water may enter the VAZ interior.
Before starting installation work, remove the side trims from the frames and the rear view mirror. This will make it easier to pull out the rope.
- Put on the rubber seal.
- Lay down the rope.
- Carefully attach the part to the frame.
- One person adjusts the position from the outside of the VAZ, and the second carefully pulls the rope into the interior. It's better to start from the bottom edge.
- When pulling out the rope, an assistant adjusts the part and presses slightly towards the seal.
After the seal is in place, the shield will take its position. The windshield frame on the VAZ 2107 is installed in the reverse order. This is where a flathead screwdriver with a large handle comes in handy.
When going around the bottom corners, be careful not to scratch the panel with the cord. After installing the seal on the glass, you can put the rear view glass and decorative trim on the pillars back in place.
To replace the windshield of a VAZ yourself, you will need one assistant, a minimum number of tools and 2-4 hours of free time.
Replacement of side glass
Replacing the front door glass will require removing the trim, handle and molding.
To carry out the work you will need the following tools:
- flathead and Phillips head screwdriver;
- wrench 8;
- clean cloth.
To remove the old glass and install new glass on the front and rear doors of the VAZ, you need to follow the steps sequentially:
- Remove the handle and trim.
- Unscrew the lift mounts using a Phillips screwdriver.
- Using a size 8 wrench, unscrew the nut and remove the front guide.
- Lower the glass down.
- Remove the molding from the top door trim.
- Carefully remove the glass.
Replacing the rear side glass is no different from the front. To reassemble, follow the steps in reverse order.
Article: 2101-5206060
Order code: 000868
- Buy with this product
- show more
Buy analogues
Passenger cars / VAZ / VAZ-21012 drawing
- » href=»/catalog/vaz-3/legkovye_avtomobili-30/vaz_2101-3/okna-20/#part410″>Seal edgingWind and rear window / Windows
- » href=»/catalog/vaz-3/legkovye_avtomobili-30/vaz_2101-3/okna-31/#part730″>Seal edgingWind and rear window / Windows
Passenger cars / VAZ / VAZ-21031 drawing
» href=»/catalog/vaz-3/legkovye_avtomobili-30/vaz_2103-106/okna-10/#part9094″>Seal edgingWind and rear window / Windows
Passenger cars / VAZ / VAZ-21051 drawing
» href=»/catalog/vaz-3/legkovye_avtomobili-30/vaz_2105-6/stekla-18/#part15852″>Seal edgingWind and rear window / Glass
Passenger cars / VAZ / VAZ-21071 drawing
» href=»/catalog/vaz-3/legkovye_avtomobili-30/vaz_2107-8/okna-12/#part22160″>Seal edgingWind and rear window / Windows
Passenger cars / VAZ / VAZ-21022 drawings
» href=»/catalog/vaz-3/legkovye_avtomobili-30/vaz_2102-4/okna-20/#part4894″>Seal edgingWind and rear window / Windows
» href=»/catalog/vaz-3/legkovye_avtomobili-30/vaz_2102-4/okna-31/#part5214″>Seal edgingWind and rear window / Windows
Rear window replacement
The rear window of the VAZ 2107 can be heated or without it. Structurally, the parts are the same, with the exception of contacts that are disconnected before removal. The sizes and shape are the same.
- Using a screwdriver, remove the locks that are installed in the lower corners.
- Remove the wedge cover.
- Press out the glass from the inside.
- Remove the old shield from the posts.
If the shield is firmly in place and is not squeezed out from the inside, you should use a screwdriver to knead the molding along the contour and repeat the dismantling again. Removal is done with an elastic band, this will protect your hands from damage.
Rear part installation:
- Clean and degrease the surface of the frames.
- Install new locks and seals on the glass.
- The rope is inserted along the contour of the elastic band and overlaps at the bottom.
- The glass is applied to the frame and pressed down.
- Carefully pull out the rope, which must be inserted into the rubber edging.
After installation, the locks are latched with a screwdriver and the molding is mounted. All elastic bands and retaining clips are changed completely: this will increase the strength of the fastening.
About light transmission standards for tinted glass
Nobody forbids tinting the windows of a VAZ 2107. However, if this is done without regard to the law, problems with traffic police officers are guaranteed for the car owner.
The higher the percentage of light transmission, the more transparent the tint film
From January 1 of this year, the Legislative Assembly intends to seriously increase fines for improper tinting of a car to 1,500 rubles. The requirements for glass for light transmission according to GOST 32565 2013 are as follows:
- there are no restrictions on light transmission for the rear and side windows of cars;
- the light transmission rate for the windshield is 70%;
- it is allowed to stick strips of colored film on the upper part of the windshield; their width can reach 14 cm;
- finally, the current GOST says nothing about so-called mirror tinting, and their use is not regulated in any way.
Types of glass
The following types are available for sale:
- classic, without darkening;
- with silk-screen printing;
- with spraying.
Factory spraying allows you not to glue the tint film on the rear and side windows, while protecting the interior from sunlight and improving the appearance of the car.
Silk-screen printing along the contour of the shield or in its upper part improves not only the appearance, but is also used as a visor from the bright sun. There are options on sale with images or inscriptions that are applied to the part using spraying.
The grille for the rear window is made of plastic and is attached to the rack using clamps or double-sided tape. The part transforms the car, but reduces visibility in the rear view mirror.
Transparent glass without chips or defects not only ensures an excellent appearance of the VAZ, but also affects the quality of viewing in bad weather conditions. Ease of replacement allows drivers to carry out the work themselves without visiting car repair shops.
Window regulators are an integral part of driving a car. The driver should be aware of the main malfunctions of this unit and how to fix them independently, and also know what to do if the glass jams, falls, or there is a need to remove/install the power window lift. Of practical interest is also the choice and independent installation of electric windows on the VAZ 2107.
Sequence of work
How to tint a car window so that the work goes smoothly and the result pleases you? Proceed according to the following instructions.
- Remove the rear window, this will provide you with convenience and quality work.
- Clean the work surface from dust and dirt by washing it with a special solution and wiping it dry with a lint-free cloth.
- Make sure that there is not a single speck of dust left on the surface of the glass.
- Cut the tint film according to your pre-measurements.
- Separate the layers of film using two pieces of tape glued at different levels.
- Apply the film to the canvas and adjust its position. To achieve ideal placement of the film sheet, you can use a soap solution.
- Now it's the turn of the rubber spatula. Tinting the rear window of a VAZ 2107 on your own will work perfectly if you move the spatula in one direction. Use a spatula until all air bubbles are out of the contact area between the glass and the film.
- Use a hair dryer to shape the film at the curves.
Percentage of light passing through film
Remember: the film is glued from top to bottom. It dries in about three days. During this entire time, the material must not be touched with hands, so place the car where no one can touch the glass, even by accident.
Tinting the rear window of a VAZ 2107 with your own hands will be much easier if you use a removable film instead of a regular film. This film adheres to the glass using static energy, does not impede the movement of the side windows, and can be removed and reapplied if necessary. It has significant advantages, because condensation does not accumulate under it. Removable tinting is also performed in conditions of perfect cleanliness.
Tinting the rear window of a VAZ 2107 on your own is not an easy procedure, but not extremely difficult either. With a minimum amount of knowledge and skills, and a good amount of patience, every car enthusiast can perform tinting without problems. Skillful hands, a bright mind and a good mood are the main components of high-quality work with any car!
Window lifter malfunctions and ways to eliminate them
The operation of the window lifter is configured and adjusted by the manufacturer, so you should interfere with it extremely carefully and carefully, otherwise the mechanism may jam, crackle and crackle.
From personal experience, I advise you to carefully study the device and read the detailed troubleshooting instructions before starting to independently repair the window lifter mechanism. Even though many of them seem quite possible to fix with a screwdriver and a wrench, in some cases it may be necessary to completely replace the window regulator.
Window lift creaking
At first glance, the creaking of the window regulator does not seem to be a serious malfunction, but you should pay attention to this signal, since this is the first sign that the mechanism is wearing out and may soon break. Methods to combat this symptom are extremely simple, accessible to everyone and do not take much time:
- lubricate the window lifter - lubricants from any manufacturer, widely available in car dealerships, are suitable for these purposes;
Window lifter jammed
The main reasons that the VAZ 2107 window lifter is jammed are as follows:
- failure of the welded joint connecting the cable bracket and the glass strip to which it is attached. In this case, you need to disconnect the window lift cable and weld the bracket;
- The cable is tangled or twisted inside the window lift mechanism. You can try simply removing and reinstalling the cable. In case of failure, the entire mechanism will have to be replaced;
- wear of the window lifter gears indicates a clear need to replace them.
Glass falls
It happens that the glass falls and does not stay up. The reason for this may lie in the weakening of the tension roller, which creates the proper tension in the cable. To fix the damage, it is necessary to restore this mount. Another cause of the malfunction may be that the end of the cable has come out of the fastener. Then you need to remove the window regulator and try to wind the cable again.
It’s easy to check whether you carried out the repairs properly: in good condition, the window lifter handle rotates freely and effortlessly, the glass rises easily, without getting stuck and without any extraneous sounds.
Repairing a VAZ 2107 window lifter: step-by-step instructions
Most window lifter breakdowns in a VAZ 2107 car are not difficult to fix. In most cases, regardless of the design and mechanism, it is the teeth of the rotating gear that break. To begin the repair, first remove the trim and card of the car door with all the elements placed on it. Then the window lifter itself is removed, after which the necessary work is carried out.
Removing the window lifter handle
One of the most common malfunctions is the breakage of the handle, which occurs on both front and rear window lifters due to careless use or simply over time.
Over several years of owning a VAZ 2107, we became convinced that if the handle breaks down, it is better to immediately change it, since repairing it only helps for a short time and is not economically feasible. The cost of the window lifter handle for the “seven” ranges from 20 to 80 rubles in different auto stores, so you can replace all four handles at the same time, choosing their appearance to suit your taste. You can even choose and install beautiful handles from other cars.
Replacing the handle is easy, it happens in the following order:
- Release the handle from the plastic retainer called the locking ring. For this purpose, using a flat-tipped screwdriver, the outer ring is moved away from the inner ring and then the retaining ring is removed.
- Remove and install a new one in its place.
Removing the window regulator
To remove the window lifter, you must perform the following steps in sequence:
- Lower the window all the way and remove the window lifter handle.
- Unscrew the bolts securing the door handle and remove it.
Installing a new mechanism
To replace the mechanical window lifter, you need to do the following:
- Lubricate the window lift cable.
Replacing the cable
It happens that the window lifter mechanism is working properly, but the cable is broken or twisted. Replacing it is easy, but you need to consider the following features:
- Before installation, be sure to generously coat the cable with lubricant;
- The lower branch of the cable is fed to the upper roller of the mechanism, and the upper branch is directed downwards. To prevent the branches from getting tangled, it is recommended to tie them with wire, which should be removed after the window lifter mechanism is finally secured and the necessary adjustment procedures are carried out;
- The VAZ-2107 window lifter has an upper hidden roller. On the first try, it is almost impossible to put the cable on it. Let's use a little trick - we twist a loop at the top of the cable and lead it to the place where this “invisible” roller is located. We move the loop alternately up and down and after several unsuccessful attempts it catches on the roller.
How to choose a tint film
Speaking about tinting a VAZ 2107, one cannot help but touch on the most important question: how to choose a tinting film? The main rule when choosing film is this: savings are unacceptable here.
Yes, there is a great temptation to buy cheap Chinese film. But the throughput of such film leaves much to be desired. When driving at dusk, the driver may no longer be able to distinguish obstacles located only fifteen meters from the car. And the service life of Chinese film is very short: a car owner will be very lucky if it lasts at least a couple of years. And when the driver finally decides to get rid of the cheap film, another unpleasant surprise awaits him: a dark layer of paint remaining on the glass. The fact is that on cheap tinting, the paint layer is usually mixed with the adhesive layer (it is precisely because of this feature that visibility deteriorates at dusk). After removing the film, the sticky paint simply remains on the glass and is not so easy to remove.
Expensive and high-quality tinting does not have this drawback, which is why you should pay attention to the products of the companies listed below
- Sun Control.
- Llumar.
- SunTek.
- Sun Gard.
Installation of electric windows on a VAZ 2107
The convenience of controlling the glass with a button, saving time and effort, increasing the attractiveness of the car interior without annoying handles - this is an incomplete list of the advantages of electric windows. Therefore, owners of “classic” cars, in particular VAZ 2107, install them on their car when replacing them.
Modern electric windows of the VAZ 2107 are characterized by increased reliability, the possibility of self-installation and allow you to control the door windows with a light press of a button. They work successfully in tandem with the alarm system, ensuring automatic closing of the windows when the car is armed.
Selecting the type of electric window lifter
There are two options for installing and connecting electric window kits:
- With the preservation of the factory standard mechanism and the additional installation of an electric motor. This is a simpler and cheaper method, but it increases the risk of failure of the entire system when the engine overheats.
- With installation of a separate set of equipment. Its cost is higher, but this method is more reliable in operation.
On the automotive goods market for the VAZ 2107 there are sets of electric window lifters from different manufacturers, the most popular of which are “GRANAT” and “FORWARD” rack-and-pinion type. The window lifter rack is a housing in which the glass movement device is located - a toothed chain drive. A stationary electric motor is already attached to the rack, driving the entire mechanism to work.
The set of electric windows offered by the seller includes:
- installation instructions;
- two electric windows;
- wiring harness;
- two switches;
- decorative plugs for holes left over from mechanical window lifters.
How to install a power window on a VAZ 2107
Installing electric windows is quite difficult, but possible. It is more convenient to carry out work in a garage or closed box.
You will need a set of window lifters, wrenches, screwdrivers, pliers, bolts and nuts of different sizes, glass clamps, wires and fuses . During the installation process, malfunctions may be identified, the elimination of which will require the purchase of additional spare parts. Before installation, be sure to read the instructions .
To connect power windows, you need to determine the place where you will get the power from. In the VAZ 2107, this is most conveniently done from the cigarette lighter . If this option is not suitable, then the electrical wiring will have to be done from the battery.
An important step after installing the power window mechanism itself is to install control buttons for raising and lowering the glass. In the VAZ 2107 car, of course, there were no places for such buttons, so you can choose the location that is convenient for you yourself. Please note that the further you place the buttons from the door, the longer the wires will be needed. Therefore, it is more convenient to place them on the inside door handle.
The procedure for installing electric windows on a VAZ 2107 is as follows:
- Disconnect the vehicle battery terminals to avoid the possibility of shorting the wiring.
- Lift the glass up, securing it with tape so that it does not fall when the mechanical window lifter mounts are removed.
- Remove the factory window regulator.
Video: installing electric windows on a VAZ 2107
So, we examined the design, types and main malfunctions of VAZ 2107 window lifters. The factory provides for the design of manual window lifters, cable or rack and pinion. The most common malfunctions of such window lifters are twisting or breaking of the cable, wear of the gears, loosening of the tension roller, which leads to squeaks, jamming, and glass falling. You can fix most breakdowns yourself, most often by reinstalling the cable or replacing the entire mechanism. To increase the comfort of driving the VAZ 2107, you can install electric windows, and thanks to the step-by-step instructions provided, you can do this yourself.
Windshield improvement
As you know, in VAZ 2107 cars the manufacturer did not provide such a function as a heated windshield. There is only its airflow, which allows you to remove the effect of “foggy glass”. If you want to improve your car, then you can become the owner of a heated windshield. This athermal glass can be installed independently without any problems, since all the necessary components are included with it.
This type of glass is ideal for the VAZ 2107, so a snowy, frosty morning will no longer be able to ruin your mood. Of course, heated glass is quite expensive compared to its simple counterpart. But you definitely won’t regret this windshield improvement.