Fog lights are designed to generate a flat and wide stream of light directed above the road surface. This direction of the light beam allows minimizing illumination of the volume of fog in thickness and improves visibility from the driver’s seat. Failure to follow the rules and wiring diagram for fog lights when installing them yourself can lead to accidents.
Requirements for installing fog lights
It is permissible to locate fog lamps directly in the headlights.
The rules for installing headlights are regulated by two regulations:
- GOST 8769-75 or SEV standard 4122-83;
- state standard of the Russian Federation GOST R 41.48-2004, corresponding to UNECE Rules No. 48.
Location of fog lights on a car
The general requirements are as follows:
- The installation location is located at a distance of no more than 400 mm from the side surface of the vehicle body. The distance is measured between the side plane and the outside of the headlight.
- It is permissible to install only two fog lights. The standards separately stipulate the mandatory installation of fog lights on tourist buses, as well as on vehicles operated on mountain roads.
- The lower edge of the fog lighting device is located at a distance of at least 250 mm from the road surface.
- Fog lights should have a horizontal viewing angle ranging from +15º to -10º, and a vertical viewing angle from +45º to -10º. It is unacceptable to block the headlights with vehicle parts within the specified angles.
- Fog lights must be connected in parallel with side lights.
- The lenses of the fog lamps must produce a beam of light located below the flow given by the low beam lamps.
- It is acceptable to use transparent filters or selective yellow color. It is unacceptable to use glass of different colors on the same car.
The standards do not have special requirements for installing fog lights on a car, so the owner can install the kit himself.
Principles of classification
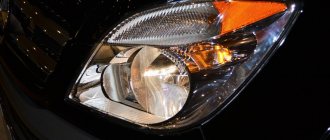
PTF is characterized by a directional and long-range luminous flux. Taking into account quality and class, experts distinguish the following types of fog lights:
- square;
- round;
- double;
- for external installation.
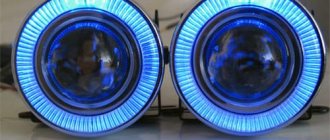
On the second generation Kalina you can install halogen or xenon lamps. The latter type of optics has the following advantages:
- good brightness;
- long service life.
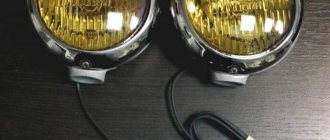
Experts recommend installing 2 fog lights from the German manufacturer OSRAM on the Lada Kalina. Optics of any color illuminate the road equally. Russian products are marked with the “E22” mark. Fog lights marked “02” meet all international requirements. There is a certain optics marking system:
- “C” - separate low beam device;
- “R” — high beam optics;
- “H” - headlight with halogen lamp;
- “PL” - a lamp with a diffuser made of optical plastic;
- “S” is a glass headlamp.
When choosing a fog lamp, experts recommend giving preference to optics with a sealed and durable housing and thick plastic. Glass headlights can quickly fail. You can install 2 aerodynamic fog lights with reliable fastening on Kalina.
It is better to install dismountable PTFs on the car. In such optics, you can replace glass or a burnt out lamp.
What will you need to install fog lights?
To install fog lights yourself, a minimum set of tools is required. The car owner must have knowledge and skills in working with electrical wiring, since the safe operation of the car as a whole depends on the correct installation.
- color electrical diagram of the car;
- nippers or side cutters;
- wire cleaning knife;
- terminal crimping pliers (terminal block);
- soldering iron
Set of materials required for installation:
- a set of fog lights suitable for installation in standard holes in the bumper or universal ones that are mounted on the surface of the bumper;
- stranded copper wire with a cross-section of 1.5-2 mm² with insulation capable of operating at low temperatures and resistant to gasoline and oil vapors;
- relay for turning on (standard headlight turn-on relays from front-wheel drive VAZ models are usually used);
- remote housing for installing a blade fuse;
- 30 A blade fuse;
- a control key that matches the interior design (preferably with a backlight);
- connectors and terminals for connecting wires to circuit elements;
- heat shrink tube of suitable diameter;
- electrical tape on a polyethylene or fabric basis;
- plastic ties;
- automotive corrugated hose for laying wires.
Set of fog lights for Ford Focus 3
Installation of electrical components
More technically complex is the operation of installing and integrating electrical components into standard wiring.
To successfully complete the work, the owner must solve the following tasks:
- Correctly connect the PTF to the fuse block;
- Install a button for activating fog lights in the car interior.
If you use the wiring and the attached electrical diagram from the PTF kit, the connection will be reduced to:
- Installing a fuse in the block;
- A relay responsible for the operation of the power button is also installed there;
- Connecting the fog lights themselves and the standard electrical wiring into a single electrical network;
- Outputting control of their work to a button.
Installing the PTF button
The button for turning on Kalina's fog lights can be installed at the request of the car owner:
- On the tunnel between the seats;
- On the instrument panel for Kalina equipment without air conditioning (installed instead of the air conditioning button);
- In the external lighting control unit.
The most difficult option for connecting a button will be connecting it to an existing one in the ICC. To do this, you will have to cut into the wiring harness and isolate the connection. (see also the article Wiring VAZ 2114: differences from its predecessor)
Less difficult to install would be options with connecting and outputting a button near the cigarette lighter on the tunnel, or with installing a button in a socket on the instrument panel provided for turning on the air conditioner (in versions without it).
Connection diagram
For installation, two connection schemes for fog lights are possible:
When connected in parallel, the positive wire goes to each headlight from the relay contact. Power to the relay is supplied through a fuse link with a rating of 15 A, which is enough for most models of fog lights. It is advisable to place the fuse as close to the battery terminal as possible.
The +12V signal voltage should appear only when the ignition is active. This measure prevents the headlights from working when the engine is off. If desired, you can automatically ignite the headlights after turning on the ignition. To do this, the signal wire is connected to the battery charging indicator lamp installed in the instrument cluster. The button must be on.
Parallel connection
Serial connection reduces current consumption and lamp brightness. A similar scheme is used to use fog lights instead of standard headlights.
Serial connection
Connecting additional headlights via a relay is demonstrated in the video tutorial from the “AUTO ELECTRICAL — Steel Horse” channel.
Step-by-step dismantling instructions
To dismantle the front bumper with your own hands, you must first unscrew the fasteners. They are located under the radiator grille. Then unscrew the fasteners (from the wheel arches), with which the bumper is fixed. The side panels of the latest design are brought out from under the wheel arches. The next step is to dismantle the bumper.
To remove the plugs, use a flat-head screwdriver. The foglights are screwed on with self-tapping screws. For 1 headlight you will need 3 fasteners. The seal located under the clutch pedal is pushed out. The wires from the optics are pulled out. For this purpose, metal wire is used. The wiring from the PTF is connected to the main wiring.
Since PTF consumes 110 W, the connection diagram for such optics requires the installation of a relay. The control button is mounted on the dashboard. Power supply to the optics is made using the pink wire located in the fuse box. The current strength of the fuse used to connect the fog lamp should be 15A.
After drawing up the diagram, it is recommended to independently check the correctness of the connections. Then connect the power supply terminal. The button installed on the dashboard turns on. If the above work is done correctly, then the headlights work normally. To obtain “cold” lighting, xenon is inserted into the PTF. The next step is to install the bumper and re-check the correct operation of the chain.
Video
The wiring diagram for installing fog lights is shown in a video filmed for the “Car Lover” channel.
If your profession involves frequent car trips, or you simply like to travel, then you probably know that without good optics it is quite difficult to guarantee driving safety. At this point, even the shortest trip should not be undertaken without good anti-fog equipment. Such optics are now installed on almost every car as standard.
How to install a set of fog lights with your own hands (diagram)
To save time on dismantling the bumper, we will show you how to replace it without removing it.
- When installing the right headlight, turn the steering wheel as far as possible in this direction - this increases the working space.
- Remove the front mudguard.
Turn the steering wheel to the right and remove the shield
- From the inside, we open the latches that secure the old PTF or plugs.
- We remove the plug.
- We fix the new headlight from the inside with 3 self-tapping screws.
Attach the headlight to 3 self-tapping screws from the inside
- Installing a new frame. To do this, press it firmly against the bumper until it clicks.
- We do the same with the left headlight.
This completes the installation of the optics. Now we connect the headlights using the pre-purchased installation kit.
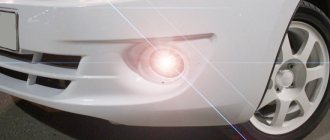
What are fog lights for?
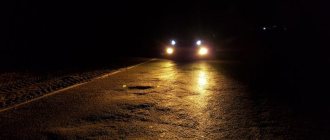
Before telling you about the features of installing these elements, a few words about the importance they are for the car. The main function of fog lights is to provide light. The quality and range of illumination of the roadway depend on this characteristic. If the fog lights are well configured, they are capable of illuminating up to 10 meters of asphalt in front of them, which is quite enough for safe driving at a speed of 50-60 kilometers per hour. Moreover, it doesn’t matter what weather you’re driving in - with a cloudless sky or with thick fog - this optics always copes with its function. So how do you install it in a car?
Nuances of connecting PTF on Kalina
The connection process is a little more complicated than installing equipment and requires care when working. We recommend immediately laying all the wires from the engine compartment into the Lada's interior in a high-quality manner so that they do not interfere or get underfoot.
- We connect the harness to the right and left fog lights and secure the ground wire to the body.
- We connect the positive wire to the battery.
- Next, we pull the harness into the cabin through a standard hole in the left wing of the car.
- When the harness is pulled into the cabin, you will need to remove the ashtray by unscrewing 4 small bolts.
We extend the harness into the cabin and remove the ashtray
- Through the resulting space from the inside we push out the plugs for the buttons on the front instrument panel.
- Pull out the airflow control knobs.
Pull out the blower control knobs
- Move aside the panel trim, push out the cover of the air conditioner switch button and install the PTF switch in its place.
We mount the PTF power button in place of the plug
- We connect the wires with the connectors that come with the installation kit.
We connect the wires using connectors
- We connect two long wires to the front panel mounting block.
- We connect the harness from the button to the mounting side and push it into the cabin as far as possible.
Pull out the mounting block
- Now we have 2 wires in one place that come from the button, and 3 wires from under the hood.
- We connect the wires, fuses and relays as shown in the diagram.
We connect the wires using the connection diagram
- We check the operation of the optics and, if the circuit is connected correctly, isolate the connections and install the mounting block in place.
- We assemble the panel elements in the reverse order.
Novaya Lada: How to remove a torpedo on a Kalina? step-by-step instruction
Second installation option
It will be much easier for car owners whose bumper already has space for mounting fog lights. Then you don't need to buy any fuses. All that is required is a pair of new fog lights and up to 100 centimeters of wire (in reserve).
This algorithm for installing PTFs is suitable not only for foreign cars, but also for all domestic cars on which the manufacturer has provided a mounting location for the optics. For example, on VAZ 2110 and 2114 cars, connecting foglights in this way takes no more than 20-40 minutes (and this despite the fact that the car owner has no experience installing such equipment on a vehicle).
Light adjustment
When the headlights are installed, you need to adjust their direction and brightness. Lada Kalina of the second generation is installed on a flat surface (5 m from the wall). Then one headlight is covered with cardboard. When rotating the adjustment screw, monitor the boundary of the outgoing light flux (below 0.5 m from the light level of the main headlights).
To make precise adjustments, use a regloscope.
The principle of its operation is that counter optics with a photocell are installed in front of the light source. In this case, its optical axis should be parallel to the longitudinal axis of Kalina. The use of a mirror orientation system allows for precise adjustment of the headlights. In the absence of proper experience in using a regoscope, diagnostics of fog lights should be performed by a specialist.
A photoelectric device is used to measure the luminous intensity of the optics. Multifunctional regloscopes allow for detailed analysis of light distribution. A similar technique is used at service stations.
tweet
back How to choose an armrest for Kalina
Next Advantages and disadvantages of installing a spoiler on Kalina station wagon
Tagschoice, foglight, installation, headlight
What requirements must PTFs meet?
Finally, we note what rules modern fog lights must meet:
- In order to illuminate the road surface well, this type of optics must have a clear beam boundary at the top. Thus, the light in the headlights is scattered slightly above the horizontal plane.
- If the car manufacturer has not provided space for PTF fasteners, do not install them above the headlights under any circumstances. Try to place them as close to the roadway as possible. The lower this optics is, the better it will “break” the foggy barrier in front of you. But don’t forget about the car’s ground clearance. If the headlight is located at a distance of 10 centimeters from the asphalt, then during rainy weather it will constantly get wet, and water that gets inside the reflector will linger there for several weeks. And throughout this period the glass will be cloudy, and the quality of lighting will deteriorate significantly. On cars like the VAZ “classic”, the optimal solution to the problem is to install the PTF under the steel bumper. This way you will “kill two birds with one stone.” Firstly, at such a distance from the road the headlight will never get wet, and secondly, it looks very attractive and does not disfigure the appearance of the car. But where there is no point in installing PTF at all is on the roof (owners of SUVs often do this). The benefit from such illumination is zero, but such a technique will be fully blinding.
- If this is not factory optics, it is advisable to purchase it with special plugs. This way you will significantly increase the service life of your headlights and ensure their high safety when driving on rough terrain. And the cap protects the fog lights all year round at any time of the day.
- During operation, it is important to prevent clouding or fogging of the optics glass. To prevent this, you should regularly treat their surface with special polishes (at least once every 2-3 months).
Installation methods and types of PTF
For the Lada Kalina model, different types of fog lighting devices are applicable. Headlights can be:
- double and rounded;
- square, recessed and oval;
- suitable for outdoor installation.
Not all devices from this list are equally suitable for installation in the model we are considering. The thoughtfulness of the purchase should be in the foreground here, so that the owner of the LADA Kalina does not have to frantically redo the standard fastenings in the future.
To avoid such an unpleasant moment, we recommend taking a closer look at the options and manufacturers below:
- "Bosch". An eminent German manufacturer, whose products, in particular PTF, boast high-quality optics and a long-range collected beam of light. Only available as a complete set.
- Option from . It is a kind of analogue of the above-mentioned German products, but the price is much more favorable than its competitor. The quality indicators of these PTFs are far from ideal.
- "ProSport" fog lights of Chinese origin. This manufacturer is also based on the supply of spare parts for Russian models.
- Products "Kirzhach". These PTFs have lens-shaped glass, which provides a bright beam with an enviable range.
Note that the fog lamp options indicated here are equally suitable for installation on LADA Kalina and do not require additional manipulations to fit them into standard places.
The entire list of manipulations in this case will be reduced to removing the “original” plugs and installing new fog lights in the seats.
How to adjust the light output
After installing new headlights or removing the front bumper, the car owner needs to adjust the light output.
The luminous flux for each headlight is set separately
The fact is that fog lights have a completely different principle of illuminating the road surface:
- PTFs have a clear upper boundary (cut);
- This is due to the physical properties of fog.
The best solution to the problem would be to visit service stations that have special adjustment stands designed for any car model. But if this is not possible, or the fog light on Kalina was replaced and removed from its original location, then you can do this operation yourself.
The algorithm will be as follows:
- Place the car 3 meters from a blank wall (residential building, garage);
- Check the tire pressure and bring it to factory settings;
- Using chalk and a ruler, mark two vertical lines on the wall opposite each wheel;
- Measure the distance from the ground to your car's headlights. This will be the parameter – h;
- Draw a horizontal line on the wall at the calculated height;
- Turn on the fog lights and cover one of them with a cloth or newspaper;
- Use the adjusting screw to set the luminous flux;
- Repeat the operation for the other headlight.
That's it, the work is finished, and the best part is that the price of the work is minimal.