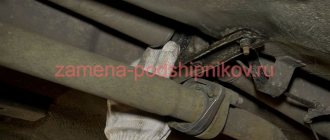
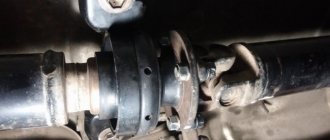
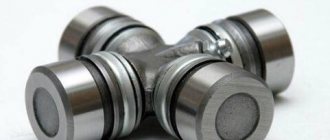
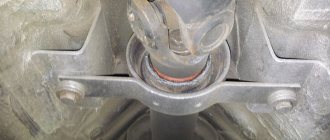
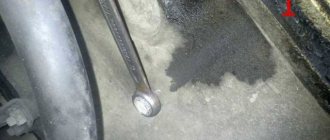
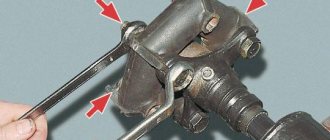
the other day a bearing began to hum, I drove like I was on a tram, I got tired of it, and I thought I was in business for half a day, but it’s not that simple, I lifted the car to one side, I decided to first unscrew the elastic coupling from the gearbox, but everything was very inconvenient (the muffler was in the way), It didn’t work out to unscrew part of the cardan right away, I couldn’t get to it with a wrench, then after unscrewing the coupling, the bolts can’t be pulled out; they rest against the box and you can’t tug at the cardan. Next, remove the bearing from the body, then remove the handbrake cable, and I suffered for a long time, pulling off the clutch, I remembered all the gods, and then knocked out the crosspiece , I did everything for the first time, in the end, when I knocked it out, I lost all the bearings (as I knew that I would have to buy a crosspiece), I pulled out a small part of the cardan
With the bearing then everything is simple, mark the fang as it stands in relation to the cardan
this fang
and we begin to knock it out, I couldn’t knock it out for a long time, I sprayed all sorts of liquids for about an hour, then I gathered my strength, took an older hammer and hit it on my finger, and the fang came off, then everything just knocked off the bearing,
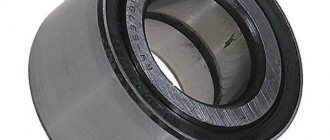
It's replaced by a new beautiful one, I wonder if it's lubricated?
as you can see the old one is without lubrication and the new one is completely dry,
it should be
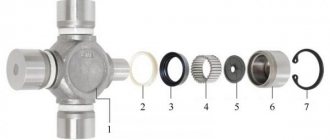
and a crosspiece with a grease fitting, I really liked the Phenox in terms of the crosspiece, everything was lubricated + there was also grease in the box
Signs of a faulty VAZ 2107 suspension bearing and how to check the driveshaft yourself
The first signs of malfunction and wear of the VAZ 2107 (PP) suspension bearing are vibration and knocking of the cardan when the car begins to move. After accelerating the car, the knocking gradually disappears, turning into vibration and noise. If there were no problems with balancing the axle before, but knocking suddenly appeared, then it is necessary to immediately diagnose the PP.
Diagnosis is performed in the following order:
- Place the car on an overpass, lift or pit;
- Locate the driveshaft under the car;
- Check the play of the PP by moving the part by hand in the axial direction - free movement is not allowed;
- Rotate the cardan and listen to how the bearing works - vibration, rolling, grinding, knocking are not allowed;
- Inspect the product body, including the tightness of the bearing seals - lubricant leakage is not allowed;
- Make sure that the outboard bearing and bracket are not loose;
- The presented videos show how the VAZ 2101-2107 suspension bearing (injector) hums, as well as how to determine if the intermediate support is faulty.
Video: “How an outboard bearing hums”
Video: “How to check the universal joint support”
Replacing the gearbox bearing
First, to carry out the replacement, the gearbox is removed. Next, you will need to completely or partially disassemble the box. To remove the box basket, you must first disconnect the negative wire of the car's electrical system and disconnect the speedometer sensor. In any case, you will have to disconnect the exhaust pipe (“pants”) of the exhaust gas system. Next, the wizard performs the operations described below.
The box is well cleaned of dirt, its body is checked for defects. The bearing on the shaft is secured with additional retaining rings. The master carefully pries out and unclenches the rings using a flat screwdriver. Among the list of special auto repair tools there is also tweezers for removing retaining rings. Next, you need to pry off the bearing with a screwdriver, while the shaft moves forward. A thin pry bar is inserted between the bearing and the box and the mechanic begins the operation of removing the gearbox input shaft bearing. The bearing is pressed in and needs to be knocked out - with precise, careful and, at the same time, strong blows. In this case, the shaft must rotate. This entire operation is performed by a master with the help of an assistant and can take quite a lot of time, usually up to 30 minutes. Also, the workshop can use a special puller for such cases.
Before replacing the old input shaft bearing, it must be carefully prepared. Preparation involves thorough lubrication. To press the bearing in, you can use a pipe of a suitable diameter or special tools. The worker drives the part into its proper place with precise, uniform and neat blows. After the technician makes sure that the bearing is seated properly (the shaft should rotate lightly and smoothly), the box is assembled in the reverse order and installed back on the car.
The bearing does not always need to be changed; sometimes you can simply lubricate it well. A gearbox is a vehicle component that operates constantly. That is, the smear on the bearing “burns” quite intensely. The reason for the “disappearance” of the lubricant, according to many car owners, is also the synthetic oil poured into the gearbox - it is this that “corrodes” and “washes” the lubricant out of the bearing.
There is no need to rush into purchasing this part (as with purchasing any parts). Its price is low, VAZ bearings cost about 300-500 rubles (you can find them cheaper in advertisements) and that is why purchasing can be difficult. Current traders and manufacturers prefer to sell cheap parts as “repair kits”. The most important thing is what was mentioned at the beginning of the article - the only sign of complete destruction of the bearing is jamming and knocking. If a “whistle” is heard, then most likely it will be enough for you to simply lubricate the part.
Suspended bearing for the VAZ 2107 propeller shaft: dimensions, prices, how to choose, which one to buy
The design of the intermediate support for the propeller shaft VAZ 2101 - VAZ 2107 consists of a closed-type, lubricated, single-row radial ball bearing, which is located inside a housing made of metal and rubber. The ball bearing is secured with a retaining ring. The PCB body has fasteners in the form of a bracket with holes.
Ball bearing marking:
- according to GOST 6-180605;
- according to ISO 62305.2RS;
- Factory (serial or catalog) number of the VAZ 2107 suspension support: 2105-2202078.
It is important to know:
Inspect the old suspension assembly to make sure the ball bearing is working properly. You may not need to replace the support and it will be enough to just change only the bearing, but more often the assembly is changed, and experts also recommend it.
The VAZ 2107 suspension bearing for replacement, the prices of which are presented in the table , is selected based on the recommendations of experienced auto mechanics and service station workers.
Below is a list of preferred manufacturers to purchase parts from. To the question “How much does a suspension bearing for a VAZ 2107 cost?” This table will answer in detail. Pay attention to the photographs of the original repair kits presented in the list.
Cost table for suspension bearing VAZ 2107
| No. | Brand | Catalog number (article) | Price 2022, rub. | Equipment | |||
| Retaining ring | Bearing 6-180605 | Bolts | Instructions | ||||
| 1 | VBF (VPK) Russia Analogue | 2105-2202078 | 580 | + | + | + | + |
| 2 | AvtoVAZ Russia Original | 2105-2202078-82 | 400 | + | + | + | + |
| 3 | Rosteco Russia Analogue | 20072 | 400 | + | + | + | + |
| 4 | SEVI Russia Analogue | 3103 | 420 | + | + | + | + |
Outboard Bearing Size Chart 6-180605 (62305.2RS)
| Characteristic | Unit | Value according to GOST (TU) |
| Inner diameter, d | mm | 25 |
| Outer diameter, D | mm | 62 |
| Nominal height, B | mm | 24 |
| Radius of mounting chamfers, r | mm (min) | 2,0 |
| Dynamic load capacity | kH | 22,5 |
| Static load capacity | kH | 11,4 |
| Nominal speed | rpm | 7500 |
| Radial clearance | mm | 0,01-0,024 |
| Steel type | — | SHH-15 |
| Lubricant type | — | S17 (Litol-24) |
| Hardness of steel and rollers | H.R.C. | 61-65 |
| Contact angle | hail | — |
| Torque | kN*M | — |
| Ring roughness | Ra | 0.32 |
| Number of balls | PC. | 7 |
| Ball diameter | mm | 11,509 |
| Weight | G. | 325 |
What is a gearbox bearing?
Gearbox bearing (gearbox bearing) is a part of the gearbox of automotive equipment; a rolling bearing of one design or another, acting as supports for gearbox shafts and gears.
In a gearbox, depending on its type, number of gears, method of transmitting torque between elements and design, from 4 to 12 or more bearings of various types can be used. Bearings solve several problems:
- Performing support functions for all or only individual shafts (in most cases - two supports for all shafts, in some boxes there are simpler or more complex schemes - one support for the primary shaft, three supports for the secondary shaft, etc.);
- Acting as a support for gears mounted on the secondary shaft (in gearboxes with synchronized gears and gears freely rotating on the secondary shaft);
- Reduced friction forces in the bearings of shafts and gears (reduced torque losses in the transmission, reduced heating of its parts).
The use of bearings ensures the correct installation of the moving components of the gearbox and greatly reduces the friction forces arising between these parts. The operation of the gearbox, its ability to normally transmit and change torque, and generally ensure vehicle controllability, depend on the condition and characteristics of the bearings. Therefore, worn and faulty bearings must be replaced, and in order to make the right choice of these parts, it is necessary to understand their design, types and applicability.
Replacing the front wheel hub bearing
We replace the bearing when it fails. There are two ways to replace a bearing. The first is by removing the steering knuckle assembly, the second is without removing it from the car. The work is shown on the right wheel bearing. The left wheel hub bearing is replaced in the same way. We carry out the work on an inspection ditch or overpass. We remove the wheel.
Using a screwdriver, remove the protective cap from the hub. We install the wheel and tighten the two bolts that secure it. We lower the car onto its wheels.
Use a beard to straighten the collar of the hub bearing nut, which has been dented in two places. Apply the parking brake, engage first gear and place chocks under the wheels.
Use a 30mm socket to loosen the hub bearing nut. The nut is tightened with a large torque, so the head and driver must be strong enough to transmit the necessary force. We hang up the front part of the car (namely both front wheels, because otherwise the anti-roll bar interferes with dismantling, pushing the suspension elements up). We remove the wheel. Unscrew the hub bearing nut completely...
...and remove the puck. Remove the front wheel brake disc (see “Removing the front wheel brake disc”). Disconnect the right wheel drive from the hub (see “Removing the front wheel drives”). In order not to disturb the wheel alignment angles, you can replace the bearing without removing the steering knuckle. To do this, connect the ball joint to the knuckle...
...and compress the hub by striking it through a soft metal drift. You can also compress the hub using the front wheel brake disc.
We pass M12×1.25 mm bolts about 130 mm long through two diametrically opposite holes in the disk and screw them into the holes of the hub to a depth equal to its thickness. By sharply hitting the bolt heads with a disk, we compress the hub. If it was not possible to remove the hub in this way, remove the steering knuckle. To do this, unscrew the nuts of the bolts securing the shock absorber strut to the steering knuckle, remove the bolts (see “Removing the shock absorber strut and disassembling it”). Disconnect the ball joint and remove the steering knuckle.
We install the steering knuckle on the jaws of the vice and press the hub out of the knuckle through a mandrel or head of a suitable diameter, applying force to the end of the hub.
We remove the hub from the fist. In this case, the outer part of the inner ring of the bearing remains on the hub.
Remove the mud ring from the hub.
We insert a blunt chisel between the ends of the inner ring of the bearing and the hub and, striking the chisel with a hammer, move the inner ring.
Use a puller to compress the inner ring of the bearing.
Using circlip pliers, remove the circlip.
Use a cup puller to press the bearing out of the steering knuckle...
...and take it out with the puller. Remove the bearing from the puller. Clean and lubricate the inner surface of the steering knuckle. Using a needle file, we clean out the nicks from the chisel on the hub. We press the new bearing into the steering knuckle, applying force to the outer ring of the bearing. We install a retaining ring in the groove of the steering knuckle socket. When pressing the hub, we use the puller washer to rest on the inner ring of the bearing. We carry out further assembly in the reverse order, tighten the bearing nut to the prescribed torque (see “Appendices”) and be sure to lock it by jamming the collar. If the bearing was replaced with the steering knuckle removed, then it is necessary to check and adjust the wheel alignment angles at a service station.
Summarize
Now we can safely state that the replacement process is complete. As it turned out, the work did not cause any difficulties, but it did require stocking up on some special tools. Buy bearings for LADA Granta cars that are of only high quality and from trusted manufacturers in order to have confidence in your safety on the road.
A wheel bearing malfunction is a common failure during the operation of a technical device. The reason for premature wear is poor-quality road surface and aggressive driving style.
Front wheel bearing
Replacing a wheel bearing is done independently, without special equipment, experience, or skills. Subject to the availability of spare parts, the replacement process will take no more than an hour, without the cost of car service.
Diagnostics
In order to identify faults in the crosspiece, appropriate diagnostics are carried out. To do this, the following type of operations is carried out:
- the car is driven into a viewing hole;
- we grasp the driveshaft with one hand, and with the other we hold the flange of the drive gear, which is located near the gearbox;
- holding the connection tightly, we try to turn or twist the parts in different directions.
Attention: If you can turn it even an iota, then there is play in the connections and, accordingly, the crosspiece has a defect. It is clear that there is no point in delaying repairs and, as happens with a sick person, the car should be urgently put in order. If everything is done on time, you will only have to change the cross
Otherwise, this can lead to more expensive repairs, which include replacing the outboard bearing.
If everything is done on time, you will only have to change the cross. Otherwise, this can lead to more expensive repairs, which include replacing the outboard bearing.
Recommendations from professionals for repairing CV joints
In this subsection, we invite you to familiarize yourself with practical advice from professional craftsmen:
- If it is necessary to change the hinge, perform a complete replacement. The only exception may be the reinstallation of anthers and other small parts from this category. In addition to lubricants in the CV joint, you need to change all the clamps and, with a certain degree of perfectionism, monitor cleanliness during assembly;
- A hammer and a wooden stand are perfect for installing the CV joint in place. Carry out installation work carefully - movements should be smooth and not forceful. In other words, you place a wooden attachment against the part and knock until everything falls into place. If you do not use a “gasket”, there is a high probability of damage to the part, which will become unusable;
- Once the CV joint is installed, install the boot. First, use pliers to clamp the clamp onto the shaft. Equalize the pressure in the part - use a screwdriver to hook the edge of the boot and unscrew it. Now clamp the clamp from the outside. A plastic plug is placed at the end of the shaft.
All other steps are performed in reverse order, as during disassembly.
As a result, performing repair work when it is necessary to replace the VAZ 2109 CV joint may seem labor-intensive. If you have enough free time, try to figure it out yourself. Otherwise, it is better to turn to professional craftsmen. Any service station will replace your CV joint or boot in a short period of time, because this is a fairly common problem on any car.
Sources
- https://mylada.net/remont/zamena-granaty-na-vaz-2114.html
- https://mylada.net/remont/zamena-granaty-na-vaz-2110.html
- https://ladaautos.ru/vaz-2109/kak-zamenit-shrus-na-vaz-2109.html
Some more useful tips on how to make a successful repair
- protect the bottom of the car from large cobblestones, stones, and crushed stone flying at speed into the driveshaft;
- use the correct lubricant CV joint - 4, FIOL - 2u, paint the cardan. Corrosion protection will allow you to maintain alignment longer;
- check accessible connections and protective brackets more often, tighten connections;
- do not be lazy to check the gaps in the hinges and adjust them in a timely manner;
- Inspecting the coupling quarterly for cracks in the rubber or defects will allow you to replace it, otherwise the entire driveline may fail, and this will be more expensive.
- Regularly lubricate the VAZ 2107 driveline.
— try not to pollute the car too much, do not allow water to get into the middle of the unit;
— if the lubricant has dried out or is missing altogether, apply it in sufficient quantities;
— do not disturb the balancing in the cardan shaft;
- carefully monitor the expiration date;
- make sure that the fasteners do not loosen;
- do not replace parts with low-quality fakes.
Spare parts
As for parts and spare parts for the VAZ-2107, it is better to buy a new outboard bearing (propeller shaft support) than a factory-made one.
All this is because there are a lot of low-quality products on sale now, and buying a factory suspension bearing from a VAZ will help avoid getting a pig in a poke. To get a factory part, you just need to contact the sellers who sell goods from the manufacturer. Finding such a person is not difficult, you just need to try. In order for the part to function well in the future on your VAZ-2107, when purchasing the selected outboard bearing, you should check its movement, that is, the movement of the outboard bearing must be smooth with elastic adjacent rubber. Rotating the outboard bearing from its hooks is a bad sign, and it is better not to take such a part. Otherwise, the cost of your negligence will result in unpleasant noise in the cabin of the VAZ-2107.
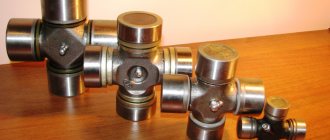
In the case when a replacement is necessary, but you do not have experience in such matters, you should take care of purchasing one cross with an outboard bearing already present. The purchase will be made with the intention that when a replacement is made, one crosspiece will need to be removed and it may be damaged.
If you don’t have to replace the entire propeller shaft support, for example, because only the outboard bearing was broken, and it’s a pity to throw away the rubber, then only the bearing is bought and replaced.
To do this you will need:
⦁ remove the support ring;
⦁ knock out the old bearing;
⦁ carefully hammer in a new one.
And it is advisable to purchase retaining rings, since old ones are often deformed or even broken. In addition, it makes sense to buy bolts, nuts, etc., the old ones may already be “licked”. Replacing parts will be much more convenient in a viewing hole or overpass, and for convenience, one of the rear wheels should be jacked up.
So, to begin with:
⦁ it is necessary to unscrew the cardan shaft. Using a 13mm wrench, remove the bearing mount that secures it to the transverse support (a pair of bolts);
⦁ now unscrew the nuts with which it is attached to the shank.
To further avoid vibration of the cardan and its beating on your VAZ-2107, it is best to place marks on all joints of the cardan before removal. And assembling according to your marks will save you from such unpleasant moments. A chisel can be useful when placing marks.
⦁ it is more convenient to remove all available retaining rings using round pliers with a bend;
⦁ knock out the cup of the cross with a hammer;
⦁ turning over the cardan shaft, take out the cup;
⦁ knock out the next cup and the remaining ones;
⦁ we clean all the recesses and everything else from dirt and rust.
⦁ it is necessary to remove two bowls on both sides of the cross;
⦁ the crosspiece must be placed in the eyes;
⦁ put on the cup, to do this you should move everything to one side;
⦁ Next, you should push the cup until a groove for the retaining ring appears;
⦁ install the retaining ring;
⦁ now, having turned the cardan over, you need to direct the cross towards the cup, put it on, also until the groove appears;
⦁ install the retaining ring.
Assembling the second part may be a little more difficult:
⦁ after removing the crosspiece, it is necessary to insert the splined end of the cardan shaft into the flange of the elastic coupling;
⦁ using a 27 wrench from the opposite end, unscrew the fastening of the fork to the front shaft;
⦁ it is necessary to tighten the hinge fork using a puller;
⦁ remove the suspension bearing from the shaft.
When removing the bearing, you can simply try to knock it down.
This is where the replacement for the VAZ-2107 ends, but the assembly is done directly in the reverse order.
How to properly lubricate the cardan?
We'll tell you about proper lubrication of the driveshaft without removing parts from the car.
First, as usual, we put the VAZ 2107 on the inspection hole, tighten the handbrake, put the gearshift lever in the “neutral gear” position, manually remove dirt and dust from the cardan drive, then check how tight all the available bolts and nuts are and tighten what "dangling"
- You can insert a screwdriver and wiggle it, this way you can determine the play in the hinge bearings. In this case, the part will have to be removed from the car, as described above, and the crosspiece replaced or the O-rings replaced.
- In addition, we grasp the front shaft firmly with one hand and rotate (pump), inspecting the coupling: is there any angular play?
- To lubricate the driveshaft splines, you need to take an 11 mm wrench, unscrew the plug on the coupling flange and take an oiler in which you can supply oil under pressure. Then, using a syringe, squeeze the grease (CV joint - 4, Fiol - 2u) into the splined joint until it “comes out” from under the oil seal, then put the plug in place.
These simple tips will allow you to keep the VAZ 2107 transmission in good condition for a long time, without having to repair the driveshaft.
Seller's comment
Special conditions: • Discount for purchases on credit up to RUB 15,000. • Discount for CASCO insurance up to 20,000 rubles. • Discount for trade-in up to 15,000 rubles. • Maximum discount of 50,000 rubles.
ID-1594/№44 The car is in excellent condition. Timely service. Careful operation. The salon is clean, well-groomed, and smoke-free. Pre-sale preparation and technical diagnostics have been carried out, no additional investments are required!
Call, or better yet, come right now! We are glad to see you! Become part of our large family of regular customers! UNIQUE OFFER FOR ALL CARS. When you return your car under the Trade-in program, an additional discount of up to 50 thousand rubles * According to our expert assessment, the mileage of this car is not confirmed.
The AUTO-FULL car dealership invites you to pick up your new used car!
Opening hours: Every day from 9-20.
Advantages of our car dealership: - Convenient free parking for our clients. — There are always more than 100 used cars on sale — Cozy customer area. Children's corner with photo studio. — Upon receipt of the warehouse, all cars undergo a thorough check and pre-sale preparation at 103 points. — Guarantee of legal purity for each car. — Applying for a loan within an hour using 2 documents. More than 10 partner banks. — Free test drive before purchase. — At your request, our manager will send you additional photos and videos in any convenient way. — Profitable exchange of your car using the TRADE-IN system. — Purchase of any cars, incl. pledged by any bank in the Russian Federation.
Unlike the front, it has undergone virtually no changes. Here, just like on the first Soviet G8s, a semi-independent beam is used. It is attached to the body on hinges (fortunately, there are no “crabs” in the design). A helical spring with constant stiffness is used as an elastic element. To dampen vibrations and prevent swinging, two shock absorbers are used.
- High reliability. The design does not have additional levers, which, in addition, can bend when falling into a large hole.
- Energy intensity. The Lada Granta absorbs all bumps perfectly, especially if oil shock absorbers are installed at the rear.
- Cheap maintenance. Due to its simple design, this pendant can be rebuilt even with your own hands. And the cost of new rubber-metal elements is unlikely to empty the pockets of even the most stingy car owner.
The main difference between the “Grant” suspension is the wheel alignment angles.
Lada Granta: wiring diagram for rear wiring harness devices
The rear part of the car wiring is responsible for the equipment of the stern and sides of the car. all additional equipment is connected exclusively through this part of the highways:
- 1/2 – contact group for the dashboard;
- 3/4 – direction indicators;
- 5 – handbrake indicator;
- 6 – rear window heating contact;
- 7 – interior lamp;
- 8 – indicator of the driver’s seat belt position;
- 9 – cargo compartment illumination lamp;
- 10 – fuel pump drive;
- 11/15 – aft dimensions for the left and right sides;
- 12 – trunk lid lock drive;
- 13 – button for turning on the interior lamp;
- 14 – additional stop chain;
- 16-19 – door terminal blocks for the rear left, rear right, front left and front right doors;
- 20 – airbag control drive;
- 21 – contact group of license plate lights;
- 22 – on the dashboard;
- 23/24 – rear speed indicator sensors;
- 25/26 – seat belt pretensioners;
- 27 – group of dashboard contacts.
P O P U L A R N O E:
Antiradar circuit.
Converting the valve from a washing machine to 12 volt DC power supply
Electric valves are required to automatically control various hydraulic systems. Finished products are quite expensive. Let's look for a cheaper solution.
Recently, amendments to the traffic rules were introduced in Russia, one of which is: driving during the day with low beam headlights, fog lights or daytime running lights on. Now you need to drive with lights on during the day. Driving with low beams or fog lights on additionally creates a load on the generator, reduces the service life of the lamps, and also increases fuel consumption (more than 0.5 liters per 100 km). Therefore, it is better to drive during the day with the running lights turned on, the light-emitting element of which is LEDs, which consume much less power than incandescent lamps. You can buy DRLs, or you can make them yourself from scrap materials.
Gearbox (Gearbox) for Lada Granta 2190
(the starter is attached to 3 studs)
Order by phone
To avoid bank commissions or cash on delivery fees, pay for your order with a bank card, using Yandex.Money, QIWI wallet or WebMoney. Your savings will be from 3% to 5%.
- Description
- Reviews (0)
- Payment and delivery
Buy the auto spare part “Gearbox (Gearbox) for LADA Granta 2190 (the starter is attached to 3 studs) with delivery throughout Russia and the CIS countries.”
Standard 5-speed gearbox.
.
Gearbox warranty is 180 days.
After assembly, all gearboxes are tested at a specialized stand to check for defects and acceptable noise levels.
Weight: 32.7 kg
