The vacuum booster of the VAZ 2107 brake system is considered a reliable unit, since it rarely fails. The first problems with the element occur after 150–200 thousand kilometers. If a malfunction is detected, the problem can be solved in two ways - complete replacement or repair of the unit. Having studied the design and principle of operation of the amplifier, the skilled owner of the “seven” can implement both options independently.
- Design and principle of operation of VUT
Video: how a vacuum brake booster works
- Video: how to check the vacuum brake booster on the “seven”
- Video: replacing the VAZ 2107 vacuum booster with your own hands
- Video: how to change the VUT diaphragm on a “classic”
What does it consist of
- Frame
- Membrane (diaphragm)
- Fitting for air bleed from the chamber
- Bypass and atmospheric valve
- Air filter
- Pedal pusher and master cylinder piston rod
The body consists of two parts, separated by a rubber membrane or diaphragm. The first part is located closer to the main cylinder - the vacuum chamber. In it, from the intake manifold or carburetor through a hose and a fitting with a check valve, a vacuum (vacuum) is created.
The second is atmospheric, it has a connection with the outside air. This separation is necessary for it to perform its main task - to assist the driver when braking, to reduce the force on the pedal when pressed.
The diaphragm divides the body into two chambers. It is made of rubber to always remain elastic. It is not allowed to break it. In this case, the efficiency of the vacuum seal decreases and problems arise during engine operation; more on this below.
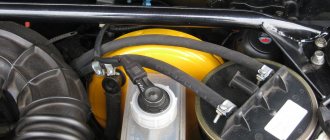
The fitting connects the housing cavity with vacuum to the engine intake manifold in the injection “sevens”, or the carburetor body under the throttle valves using a flexible hose. It is equipped with a check valve. This protects the vacuum booster from exhaust gases entering it. This can happen when the engine intake valves are not completely closed. Exhaust gases “break through” into the intake manifold through the hose and can damage the membrane.
The second function of the valve is to allow emergency braking in the event of an engine stop. It will close, maintaining a vacuum in the chamber. This will be enough for one or two clicks.
The air filter is located on the pedal assembly side. It prevents the penetration of dust and debris from the environment into the cavity of the amplifier.
There are two separate rods in the body. The first is connected to the brake pedal in the cabin, the second is connected to the pistons of the master brake cylinder. If the driver keeps his foot on the brake but does not apply pressure, there is no impact on the master cylinder. This is necessary so that the brakes do not activate and wear on the brake pads does not increase. We'll talk about how it works below.
Brake force animation
A modern car is in most cases equipped with two intermediate systems that work as converters of pressure on the brake pedal into the force of pressing the pads against the discs: hydraulic and vacuum. The fluid circuit performs several functions simultaneously.
Its heart is the brake master cylinder (MBC), whose tasks include:
- Creating high braking force on the calipers by multiplying the pressure on the pedals and transferring it to the place of application.
- Reducing frictional wear of moving parts by replacing mechanical components with hydraulic ones.
- Distribution of braking force between the front and rear wheels.
- Providing design flexibility by creating work circuits that are independent from each other. This reduces the likelihood of brake failure.
- Providing technical simplicity compared to mechanical solutions.
- Simplify maintenance.
How does it work
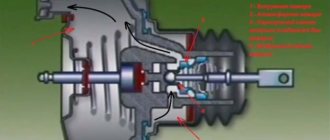
The principle of operation of the vacuum brake booster on the VAZ 2107 can be divided into three stages, each of which we will consider in detail.
The brake pedal is not pressed (initial state)
In this position, with the engine running, a vacuum is created in the vacuum chamber. The bypass valve is open, the atmospheric valve is closed. Through the bypass in both chambers of the vacuum amplifier, the pressure (vacuum) is equalized. Therefore, there is no impact on the diaphragm, or the master cylinder rod. The vehicle's brakes are not engaged.
If there is a pressure difference between the cavities of the vacuum body, then on the side where it is higher, it will press on the membrane, which in turn will press on the brake cylinder piston pusher. This impact will be minimal, but it will be enough for the brake pads to “bite” the brake mechanisms. The driver will not feel the slowdown, but the wear on the pads will increase.
Click on the picture to enlarge it
Press the brake pedal and release it
In this position, the pusher connected to the pedal assembly begins to move. Its movement closes the bypass valve and opens the air valve. Through it, air enters the air chamber from the atmosphere through the filter. An area with atmospheric pressure is created in it.
Since there are different pressures on both sides of the membrane - vacuum on one side, atmospheric pressure on the other, it begins to “press” on the membrane. It bends as the pusher moves towards the GTZ, thereby minimizing the driver’s effort that he must expend to push the brake pedal. The rod pushes the piston of the brake cylinder, the brake mechanisms of the wheels are activated and the car slows down.
Click on the picture to enlarge it
The driver releases the pedal. The force acting on the vacuum booster pusher stops. Under the action of the return spring, the brake cylinder rod returns to its original position. When both rods return, the atmospheric valve closes and the bypass valve opens. The pressure on different sides of the diaphragm is equalized (vacuum here and there) and it takes its initial position.
Click on the picture to enlarge it
Pedal lightly pressed
There are cases when a car owner keeps his foot on the brake pedal, but does not press it. This happens when he is preparing to brake, leading ahead to an obstacle or hole in the road, or simply putting it “just in case”, ready. This situation often happens to beginners who are tense behind the wheel. Fearing an accident, they keep their foot on the clutch, which leads to its breakdown, or press the brake.
As mentioned above, when you press the pedal, the pistons in the master brake cylinder begin to work, which means the pads “bite” the discs. Even a small force can trigger the system. The driver will not notice it, but the pads will be worn out by constant contact with the brake disc.
To avoid increased wear, the pedal has a free play that can be adjusted. In addition, the vacuum chamber has a rubber rod buffer that connects it to the pusher piston.
If the foot rests on the pedal, but does not press it, then due to the weight of the foot and shoe, free play is selected and the brakes are not applied. If the idle speed is not set correctly, then when you put your foot on the brake, the rod will begin to press down on the master cylinder piston. To prevent this from happening, a buffer is used. The pusher piston rests against it, on the other side it is supported by the “elasticity” of the brake fluid and return springs. To overcome this resistance, you need to push the pedal harder; the weight of your leg is not enough for this.
Click on the picture to enlarge it
Video of how a vacuum valve works in a car (without translation):
Brake master cylinder
The master cylinder is connected to the booster. This element is a housing to which the supply and return pipelines from the fluid reservoir are connected, and 3 pipelines leading to the brake mechanisms exit. There is one pipeline leading to the front brake mechanisms, and only one to the rear, leading to the regulator.
Inside this housing there are pistons that push the liquid into the pipelines. One of them is connected to the amplifier diaphragm rod. These are the main elements of the drive. The detailed design of the brake master cylinder is shown above.
Related link:
Homemade pre-heater for a VAZ car engine
Malfunctions
The main malfunction is the lack of vacuum, there is no vacuum where it should be, that is, in the vacuum chamber.
How does this manifest itself?
The brakes in the car have become “wooden”; to operate, you need to put a lot of force on the pedal. This is the same as pressing the brakes with the engine off. The reason for this is air leaks.
In addition, on carburetor “sevens”, when you press the brake pedal, there is a noticeable drop in engine speed at idle. When you release it, the speed returns to normal readings. Because due to the leakage of the amplifier elements, “extra” air enters the carburetor, resulting in a lean fuel mixture. In injection cars, this may not be observed, since the amount of air and gasoline is controlled by a computer.
Suction points
- A hose connecting the vacuum chamber to the intake manifold or carburetor.
In addition to the negative impact on the operation of the brake booster, additional air in the intake manifold or carburetor from a hose affects the quality of engine idle speed and its overall performance;
- Torn rubber membrane inside the housing. The two chambers communicate with each other, the pressure in them is equalized. No vacuum - no help;
- Bypass valve malfunction.
When you press the brake in the cabin, you can hear a distinct sound of air being sucked through the pusher in the amplifier chamber. At the same time, the vacuum brake booster of the VAZ 2107 “hisses”. This happens if the valve has not closed, but the atmospheric one has already opened, and a “hissing” can be heard through it in the cabin. On the contrary, when you release the pedal, you can hear a distinct hissing sound in the cabin. In this case, the atmospheric valve did not close, but the bypass valve was open.
- The check valve of the amplifier pipe is jammed.
This happens rarely, but if it is closed, then a vacuum will not be created in the chamber, which means do not expect help from the mechanism.
Types of maintenance work
Despite the fact that the system is not so complicated structurally, it requires periodic maintenance, including:
- Checking the fluid level in the system;
- Checking the degree of wear of friction clutches, pads, discs, drums;
- Bleeding the system to remove air;
- Checking the condition of the handbrake cables;
- Adjustment of cable tension;
- Adjusting the rear brake adjuster;
Before each trip, you must always check how much brake fluid is in the VAZ-2107 system. An insufficient amount of it can lead to the fact that the efficiency of the system can be significantly reduced due to air getting inside the pipelines. In addition, a decrease in level may indicate damage to pipelines and fluid leakage.
The elements of the mechanism should be checked every few months, this is especially true for the pads, since they wear out quite intensively. If necessary, worn elements are replaced.
If air gets inside the drive of the working system, pumping is performed, as a result of which the air is expelled from the system.
Loosening the tension of the parking brake cables can lead to its failure, so you need to periodically monitor it and, if necessary, restore the tension.
How to check on a car
Method 1
With the engine off, press the brake pedal several times. With each press you will feel an increase in the force applied to the pedal. On the fifth press, fix your foot on the brake in the pressed position. We start the engine, it should fall a little. The force with which you press should decrease and the leg will “sag” a little.
If this happens, then everything is fine, the amplifier is working. Because with each press the vacuum in the chamber decreases, you have to press the pedal harder to push it completely. Having started the engine, air is sucked out of the chamber by the intake manifold through a hose, a vacuum is formed, the vacuum unit begins to work, and feels relief when the pedal is held down. Under the influence of the efforts of the leg, it “fails”.
Method 2
We started the engine, let it run for a minute and turned it off. We hit the brakes. If at the first press it, as it should, easily “falls” all the way, and with subsequent presses it becomes more and more difficult to push it all the way, then the amplifier is working.
Having turned off the internal combustion engine, the check valve closes, maintaining a vacuum in the amplifier chamber. The first time you press it, it engages the diaphragm and you press the pedal with ease. With subsequent presses, the pressure in the chambers is equalized, you need to make more efforts to “drown” the pedal all the way.
Method 3
With the engine running, press the brake. Keep the pedal pressed and turn off the engine. Without removing your foot, you will feel that the pedal begins to resist your pressing more and more every minute, which means that there is an air intake, the vacuum seal is not working properly.
In this case, it is not the tightness of the mechanism elements that equalizes the pressure in the chambers, and since there is no source of vacuum, the engine does not work, the system tries to push the rod to its original position. You feel an increase in pressure on your leg. To keep the pedal in the fully depressed position, you need to press harder on it.
Video on how to independently check the vacuum booster on a Lada:
After such checks, you need to remove the part from the car and replace it with a new one. How to do this - read below.
History of appearance
The automobile industry began to gain momentum at the end of the 19th century. At the dawn of the evolution of self-running crews, little attention was paid to brakes - they were simply not needed. The friction in the transmissions was so great that the vehicles slowed down sufficiently in the absence of traction. However, the power and weight of engines grew, and already at the beginning of the 20th century, many devices designed to stop vehicles were patented.
Some innovations of that period were ahead of their time. For example, four years after the appearance of Karl Benz's car, British engineer Frederick Lanchester patented a disc brake. It took several decades for this invention to become widely accepted.
The first use of air for braking was demonstrated on its model by the Chicago manufacturer Tincher. Pressure was generated by a small pump and could be used for braking, inflating tires, or sounding a horn. The 1928 Pierce-Arrow was the pioneer of vehicles equipped with a modern vacuum brake booster.
However, despite their effectiveness, until the mid-20th century, such systems were offered by automakers only as an option. The fact is that to operate the drum brakes, the force of the foot on the pedal was sufficient. It was only with the spread of a more efficient method of braking using a disc-pad pair that servos became standard equipment. The main dates in the history of the modern vacuum pump can be considered:
- 1920s - Several inventors work on actuators for aviation using vacuum in the intake manifold.
- 1927 - Belgian engineer Albert Devandre invented a vacuum brake servo.
- 1928 - the first production car with VUT.
- Second half of the 20th century - the system becomes commonplace for production models.
Source
Replacement for VAZ 2106-07
For this we need:
- Socket wrench or socket "13"
- Screwdriver
How to replace a vacuum booster on a classic
1. We climb into the cabin and disconnect the pin lock that connects the brake pedal to the amplifier
2. Pull out the pin, freeing the VUT pusher from the pedal assembly
3. Using a socket or wrench, unscrew the nuts securing the vacuum unit to the wall of the engine compartment
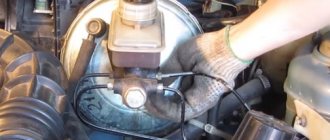
4. Go under the hood and unscrew the two nuts of the brake master cylinder (MBC) from the vacuum booster housing
5. Carefully bend the brake cylinder away from the booster so as not to damage the brake system pipes. We check the seat of the GTZ to the VUT; if it is stained with brake fluid, it is advisable to replace the cylinder or repair it, eliminating leaks of the end seal. Otherwise, the diaphragm of the new vacuum seal will lose its elasticity from contact with the brake fluid and will break.
6. Remove the mechanism from the wall of the engine shield
Installation is carried out in reverse order. Don’t forget to adjust the stem offset (it should be 1.05-1.25 mm) and the free play of the pedal. Before installing a new part, you need to check it before purchasing. Let's talk about how to do this now.
Video of self-replacement of the vacuum brake booster on a classic:
Vacuum booster device
1 — tip mounting flange; 2 - amplifier housing; 3—rod; 4 - cover; 5 - piston; 6 — amplifier mounting bolt; 7 - spacer ring; 8 — valve spring support cup; 9 - valve; 10 — valve support cup; 11 — return spring support cup; 12 — protective cap; 13 — holder of the protective cap; 14 — pusher; 15 — air filter; 16 — valve return spring; 17 — valve spring; 18 — housing cover seal; 19 — retaining ring of the seal; 20 - thrust plate; 21 - buffer; 22 — valve body; 23 - diaphragm; 24 — valve body return spring; 25 — rod seal; 26 — master cylinder mounting bolt; 27 — rod seal cage; 28 — adjusting bolt; 29 — hose tip; 30 - valve; A - vacuum cavity; B - channel connecting the vacuum cavity with the internal cavity of the valve; C - channel connecting the internal cavity of the valve with the atmospheric cavity; E - atmospheric cavity
If moving the brake light switch fails to eliminate incomplete release of the brake mechanisms, then disconnect the brake master cylinder from the vacuum booster and check the protrusion of the adjusting bolt 28 relative to the mounting plane of the master cylinder flange (size 1.25-0.2 mm). This size can be set by holding the end of rod 3 with a special wrench and tightening or unscrewing bolt 28 with another wrench.
Sources
- https://provaz07.ru/tormoza/menyaem-vakuumnyj-usilitel-tormozov-vaz-2107.html
- https://semerkavaz.ru/raznoe/kak-zamenit-vakuumnyjj-usilitel-vaz-2107/
- https://ovaze.ru/78-regulirovka-privoda-tormoza.html
- https://www.drive2.ru/l/541383308794135342/
[collapse]
How to check when purchasing
Before purchasing a new spare part, its quality can be assessed visually - there should be no obvious damage to the elements: body, boots, casings, protruding parts of the pusher and rod. If it is sold with a fitting and a check valve, then we check it for leaks (valve). To do this, you need to blow into the fitting from the hose connection side; if air does not come out on the other side, then the valve is working. You can also use a rubber bulb - squeeze the air out of it, insert it into the fitting on the vacuum connection side; if the bulb remains compressed, the valve holds.
In the same way we check the mechanism itself. For this you will need a soap solution and compressed air. We carry out this test in a garage environment, so after purchasing an amplifier, be sure to take a receipt from the store so that you can return it if it is found to be faulty.
In the garage we wash the place where the two halves of the mechanism are rolled, the boots, the cuffs, all the places where there may be air leaks. We take out the fitting. We direct compressed air from the compressor into the resulting hole and observe. Where bubbles appear, the seal is broken, the vacuum amplifier is defective.
It is important that you cannot insert a compressor hose into the hole from the fitting; the pressure in it is high; it can damage the membrane and other elements of the mechanism. This process is clearly visible in the video below.


