There are a large number of different types of car repair or tuning work that require first removing the bumper protection from the car. Although different models of different vehicles have some differences in the mounting of this part, the basic principle of operation will be approximately the same. In this review we will try to answer the question regarding how to remove the bumper, front and rear.
Removing the front bumper
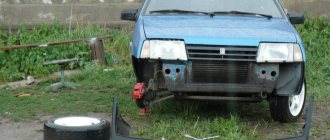
Novice motorists often have a question about how to remove the front bumper. Before you begin to dismantle the front protection, the car must be placed on a flat surface in a well-lit place. The ideal option is the ability to carry out all manipulations over the inspection hole. The car owner gets freer access to all hidden fastenings. Next, we begin the disassembly itself.
The bulk of the bumpers are made of plastic and attached using various bolts or pistons. The first task for the vehicle owner will be to find these fasteners.
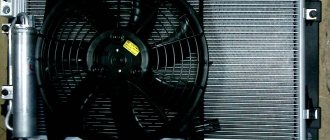
- Open the hood and find protective plastic covers. They are located under the radiator. We remove the casing that protects and covers the existing screws and clamps. We put the protective casing aside - it will need to be put back in place after all the manipulations are completed.
- Find the middle screw and loosen it slightly. Then we begin to loosen the remaining bolts one by one, going from the center to the edges of the bumper. We do the same thing, but completely removing the bolts and carefully folding them. Typically there are about 12 fasteners to remove. If you have to dismantle the part from an old passenger car, you will also need to unscrew the four bolts attaching the bumper to the car frame.
- Carefully remove the headlights and fog lights, if any, after disconnecting all the wires. If there are headlight washers, then disconnect the hoses from the nozzles and seal them as tightly as possible.
- We detach each of the decorative trims individually. Unscrew the number holder.
- We inspect the places where the part joins the wings of the car. We find the fasteners and remove them. We take the bumper by the edges and carefully pull it out from under the other parts. Designers often use slight “overlapping” of parts to increase the rigidity of the structure, and our careless actions can lead to damage to some of them.
- The only method of fastening is now only clamps. There are usually four clamps. We find them. Here it would be very good to call an assistant who will support one side of the element while you remove the other. There are two types of clamps - hook and snap. If there are hooked fasteners, it will be enough to lift the bumper a little and then pull it towards you. If the fasteners are made in the form of latches, then they will need to be pressed out using a screwdriver.
- Now carefully pull the bumper towards you. If you suddenly feel resistance, double-check that you have disconnected all the fasteners and wires.
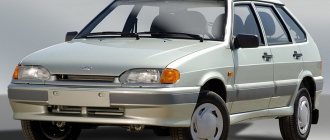
Removing and replacing the old bumper with a new one. How to remove the bumper on a VAZ 2114
In order to begin the removal process, you need to acquire a whole range of auxiliary tools.
Among them:
- Screwdrivers.
- Lift.
- Phillips screwdriver.
- Socket wrench 10 by 8. Alternatively, you can use an open-end wrench.
- Head with a 13 mm collar.
Additional Information. Replacing a VAZ 2114 bumper is a simple procedure. In order to complete it, it may take 60 minutes, but if a person does not understand anything about replacing body parts, then he will have to spend much more time. In any case, the car enthusiast will save on the services of specialists from service centers. It is recommended to carry out this procedure on your own, since not every master is responsible enough to replace body elements.
Removing the rear bumper
Removing the rear bumper is also quite easy. Before starting work, you need to gain access to the fasteners. The easiest way to do this is in a sedan car. You just need to remove the carpet from the trunk, and access is open. Things are somewhat more complicated with a “station wagon”; in this case, sometimes you have to remove the entire rear trim, and remove the side trim from its mounts and move it to the side. Next, you can begin removing the bumper fasteners.
- We find the fixing bolts, insert a socket wrench with a 5-6 cm extension and unscrew all the fasteners one by one.
- We disconnect the clamps connecting the rear bumper and fender liners, which are located on both sides. Usually these are self-tapping bolts.
- We press on the element until it separates from the brackets located on the body, and carefully remove it, while lifting it.
The process of removing both elements is not labor-intensive, and even a beginner can do it. Now the protection element can be replaced with a new one, or the planned work can be carried out and the dismantled bumpers can be installed in their original places. The installation of these protective elements must be carried out carefully and slowly, otherwise you risk damaging the wings.
If you are an inexperienced motorist and are afraid of doing something wrong, you can always enlist the help of more experienced friends. Everything is not as complicated as it seems at first glance.
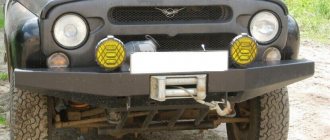
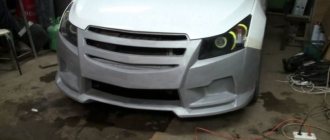
Features of installing tuning elements
Since most body kits significantly increase the mass of parts, the fasteners must be of the highest quality. You cannot use the cheapest materials for expensive tuning bumpers with a skirt.
The best way out is to contact a specialized service center. Experienced employees will be able to securely fasten the body kits, guaranteeing a long service life of the products.
After installing non-standard parts, you should check the rigidity of the fixation after some time. The peculiarity of tuning elements is that they are not always made of reliable materials. Therefore, the attachment points become loose.
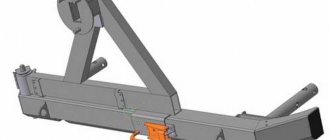
Installation example:
Thus, following simple step-by-step instructions, you can not only remove and install bumpers if necessary, but also repair fasteners.
Did you manage to solve your problem using the recommendations from the article?
Yes!
46.39%
No. More answers required. I'll ask in the comments now.
38.56%
Partially. There are still questions. I'll write in the comments now.
15.05%
Voted: 804
What to do if fasteners are broken
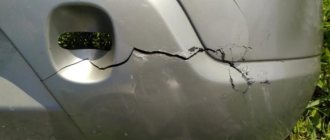
Modern bumpers are equipped with parts made of plastic; they are the ones that most often break during various repair work, as well as in accidents. In the case where the fastening elements are broken, it is absolutely not necessary to buy a new damper; it is enough to repair them yourself.
When you have purchased new plastic latches, all you need to do is install them on the dismantled bumper. To do this, you first need to install a new ear of such a fastening. This element must be glued to the surface of the damper, then secured with self-tapping screws and then checked for reliability of the entire connection. In addition, fastening the shock-absorbing device latch on the inner surface can also be done using rivets.
This is interesting: Maintenance of Hyundai Solaris - maintenance regulations, list of works, cost, part numbers
In the same case, when you could not find a suitable set of new latches, you will have to resort to handicraft production of such parts. Such a move is justified only in rare cases, since it is associated with a violation of the integrity of the damper, which can lead, in the future, to its rapid destruction. From a technical point of view, such a repair consists of cutting a rectangle of the required size from a sheet of metal. A hole is drilled in it for the mounting bolts that will now hold the bumper.
This is a barbaric method, so it is better to try to select standard fasteners in the kit. Such mounts do not have to be produced for a specific model; installation of suitable products from other cars is quite acceptable. This procedure ends with the installation of the bumpers in their original places.
Despite the fact that the car bumper mounts are made of fragile plastic, if they are properly dismantled and installed, they can be prevented from being damaged. In the same case, when this does happen, you can easily install new ones in their place. Thus, this element of the body structure will be restored and can serve you for a long time.
Differences in styles
The basic design has changed over the years. The old ones were a chrome-plated metal structure that was equal to the width of the car. They were installed on the front of the frame using four bolts that went through and were screwed into flanges welded to the frame.
The new components are made of flexible plastic (polycarbonate, polypropylene, fiberglass or polyurethane), painted to match the color of the car and mounted with shock-absorbing foam, which is applied to the structure itself. In most cases, the part that needs to be replaced is the flexible plastic. However, if the structure is damaged, replacement must be carried out completely.
Classification of fasteners
The bumper is the first protective element of the body. But it protects the structure of the car only conditionally. Manufacturers mainly install plastic parts. They are light in weight and can be removed and returned easily and quickly. There is one drawback - the plastic breaks at the slightest impact. The only thing that remains for manufacturers is to ensure reliable fixation of the part.
Bumpers can be installed in a variety of ways. As a rule, the fastening consists of separate elements and special slots for snapping into the grooves. Fastening pistons are widely used in cars of foreign brands.
Brackets
This sample most reliably fixes the product on the car body. Each manufacturer makes bumper mounting brackets according to its own unique design. They look like small elongated parts. The distinctive characteristics of the products are strength and durability. The elements can last for many years without breaking down even in conditions of poor-quality road surfaces. However, they also suffer in road accidents.
Brackets have been used by manufacturers of various car brands for a long time. This type of fasteners is most widespread in Europe, Russia and the USA.
Latches
Trying to minimize the cost of manufacturing vehicles, companies switched to a simpler type of fastener - latches. They are made from the same sheet of plastic as the bumper. The principle of quick-release fastening is that the part, thanks to the presence of special slots, is inserted into the grooves.
Advantages:
- No need to connect to the bumper.
- In case of serious damage, the entire structure is completely changed.
- Installation and dismantling is carried out in a matter of minutes.
Flaws:
- Fragility. The locking latches can break if one or more wheels fall into a large hole.
- Over time, the slots in the plastic wear out and the fastening weakens.
- Most motorists damage the latches during dismantling.
When purchasing a used car, be sure to pay attention to the specified bumper mounting parts. If the design of the machine specifically provides for latches, then with a high probability they have already been altered several times by the owner.
Self-tapping screws
The simplest and most cost-effective mounting option. It is used mainly on domestically produced cars. Screws are also used to secure bumpers on used foreign cars.
The method allows you to solve the problem of broken fasteners quickly and for a long time. However, this fastener has a huge disadvantage - it destroys the structure of the bumper. This applies not only to self-tapping screws, but also to factory fasteners. When using vehicles, a backlash is formed at the fixation points, which increases over time. Often the screws are unscrewed randomly, so owners have to constantly check the tightness of the fasteners.
This is interesting: Rating of the best models of lamps for fog lights
Bolts
Among experienced drivers, a bolt and nut is considered the best type of bumper fastening. Its effectiveness lies in its ease of maintenance. This type of fastening can be unscrewed at any time, the bumper can be removed and mounted back.
Another advantage is that the connection securely fixes the bumper for a long time.
Among the disadvantages, it should be noted that in some car models it is difficult to get to the bolts and nuts at the same time.
Replacing plastic components
For new cars, most often the replacement will only affect plastic. Depending on the design of the car, it may only be on the structure itself or extend to the top of the radiator grille. The plastic is held in place with fasteners around the entire perimeter.
It would be a good idea to paint it before replacing it. This is much easier to do than doing similar work on a car.
In the video, the front bumper is being replaced on a LADA Priora:
Removing the old bumper
There are two types of fasteners used to attach components to the frame:
- standard Phillips head screws (easily removed with a screwdriver);
- fastener in the form of a plastic rivet (there is a button in the middle that can be removed using a small flat-head screwdriver).
Fasteners are located throughout the component, in the wheel well, under the vehicle, and on the top of the unit. To replace the front bumper, you need to remove the upper mounts, which are located under the hood. To replace the rear bumper, you need to remove the plastic trim and trim to find where the mount runs through the body of the car along the rear edge of the trunk.
Fasteners in wheel wells can be hidden by the wheels themselves. In most cases, the design covers the wheels, but in some types of cars the wheels themselves or mud flaps may cover the heads of the fasteners. In this case, you need to move the plastic to the side to gain access to the fastener. If electrical connectors are screwed to the component, they must be disconnected and unscrewed with a screwdriver.
Once all fasteners have been removed, the old component can be removed. Start working near the wheels.
Removing the rear bumper
The video shows how to remove the rear bumper on a LADA Priora:
- Open the trunk of the car. Remove all screws on the interior plastic trim that covers the device.
- Remove the bolts that secure the rear structure to the trunk.
- Unscrew the bolts inside the structure.
- Unscrew the bolts securing the structure from the inside of the rear wheel well through the holes.
- Use a screwdriver to remove the plastic rivets along the bottom of the rear bumper.
- Squat behind the car and pull on the frame.
special instructions
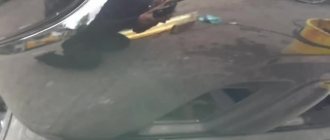
Not every time a front bumper needs to be repaired, there is a need to replace it. Of course, over time, it loses its original appearance and looks rather poor. However, it does not at all follow from this that it is necessary to urgently disconnect the fastening of the front bumper of the Hyundai Creta.
A significant part of the repair and restoration work aimed at correcting minor defects is carried out without removing the bumper from its place. This means small scratches, chips and other small things.
However, even in this case, dismantling can be done only if the damage site is accessible. In this case, the defect can be corrected using such simple materials as:
- metal grid;
- primer;
- putty;
- sandpaper;
- rags.
If it is impossible to get to the place of damage or more complex work is required to correct the defect, then this is an unambiguous signal that the bumper needs to be dismantled and replaced.
We examine the extent of repair
Replacing the front bumper, as well as the rear, requires purchasing one. But before that, it would be a good idea to determine what exactly is needed. Assuming that the plastic is simply damaged when the entire component needs to be replaced, the purchase will only guarantee disappointment once the time comes to carry out the replacement.
The video shows how to replace a bumper on a Nissan Qashqai:
To examine the extent of the damage, you need to lie on your back under the front with a flashlight. If the car is too low to the ground, raise it with jacks and properly support the car for inspection.
The purpose of this inspection is to determine the extent of the damage, in particular to identify all damaged parts. Examine if there are concavities back on one side or the other, or if there is damage to other components. If you are unsure, compare the front bumper to its mirror image on the other side of the vehicle. In order to replace the element yourself, you will need:
- tool skills;
- flashlight;
- lubricant;
- wrench;
- new bumper.