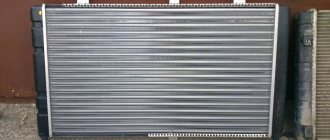
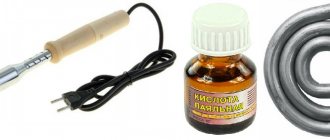
When the owner of a Lada Kalina notices an antifreeze leak from the cooling circuit in the radiator area, immediate dismantling of this unit will be required in order to determine the causes of the malfunction. A fairly common option for eliminating leaks is to add a special sealant to the system. This is a simple method that does not imply the need to dismantle the radiator, is ineffective and can harm many components. Also, repairing the product will not be an effective measure, since it is not possible to restore the full functionality of an aluminum radiator in most situations. This is confirmed by the specialists of specialized services. As a result, the most effective action will be to replace the cooling radiator. We will tell you further about how to remove it correctly and how to change the radiator.
When to change the radiator
Regardless of location, design and intended purpose, radiators should be replaced when a leak is detected. Some types of coolers can be repaired. At the same time, specialists plug the damaged areas, which makes it possible to continue to operate the device. The disadvantage of the restoration procedure is a noticeable decrease in the efficiency of the part. The machine overheats faster and does not maintain operating temperature well.
Cases of decreased trafficability of highways are considered separately. When using low-quality antifreeze, sediment and scale may form. When sludge completely clogs the tubes, the part must be decarbonized or replaced.
Diagnosis and troubleshooting
The easiest way to resolve the issue is regarding the cabin filter. For the first time, thorough blowing of the element will be enough, but then it is better to replace it. The real problem is a leaking radiator or a broken fan; an expensive replacement of the unit cannot be avoided. An equally high price will have to be paid for a new control unit.
It will be somewhat cheaper to install a new temperature sensor, gearmotor or resistor for the Kalina heater. Moreover, the malfunction still needs to be correctly diagnosed, which can be quite difficult. A burnt resistor is easily identified - the fan only runs at maximum speed.
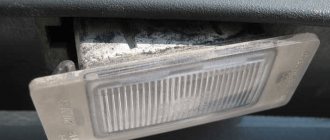
It is more difficult to check the sensor hidden in the lighting shade. Symptom of a malfunction - a hot or cold stream flows from one or more grilles, regardless of the position of the regulator handle.
It is more difficult to detect how well the mechanical heater regulator is functioning. To do this, you need to get to it by disassembling part of the front panel. In the same way, the proper operation of the air dampers is determined.
To carry out diagnostics, it is better to start searching for problems with the most accessible elements, and only then start disassembling.
Replacing the radiator Lada Kalina 1st generation
The repair procedure is as follows.
- Prepare the required materials: a Phillips screwdriver, 10-mm sockets and open-end wrenches, a container for draining the waste,
- The car is thoroughly washed and left in the inspection pit to cool the power plant. When performing repairs, care must be taken - even small debris should not enter the cooling system.
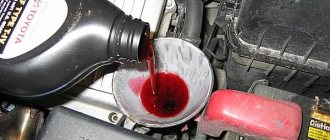
- After the car has cooled, drain the waste into a previously prepared canister. Initially, the cover of the radiator and radiator opens, then the drain opens and the liquid flows on its own to where it is directed.
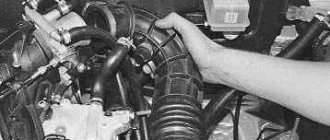
- Loosen the clamp securing the upper pipe and remove it. The lower hose is unscrewed in the same way.
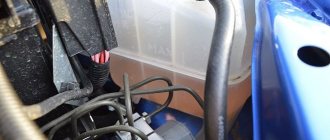
- Next, you will need to release the seal of the expansion tank and radiator. Using pliers, loosen the plastic clamp and pull the thin hose off the tube flange.
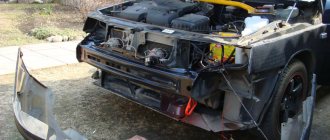
- The next step is to remove the radiator itself. Using wrench No. 10, unscrew the two screws securing the part to the car body.
- Tilt the radiator approximately 10-15 cm towards the engine and pull it up. After this, the part should easily separate from the machine.
- If plastic fasteners are stuck at the bottom of the device, they need to be removed and moved to the body brackets.
When installing it back, there is no need to replace the lower cross member of the Lada Kalina radiator frame - the part is put back in place in the reverse order. But for convenience, the operation can be performed.
Fundamentally, replacing the radiator of a 2nd generation Lada Kalina is practically no different from the procedure performed on a car of the first modification. The main difference is only the need to first remove the plastic engine cover.
How to eliminate airiness
When the radiator is removed and there is no coolant, the Kalina's cooling system can be modified. The fact is that in the VAZ-1118 it suffers from one unpleasant “disease” - airing and overheating, which is associated with a mistake by the car’s developers. Methods by which modernization is usually carried out:
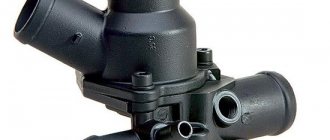
- Replacing the thermostat. Instead of the standard one, which has 5 holes, a new element with 6 holes is installed.
- A coolant filter is added to the design.
- A faucet is installed on the Kalina stove.
The methods listed are not very effective, so experienced car enthusiasts use a more radical modification of the cooling system with the addition of a steam exhaust tube.
The scheme is as follows: a tee is cut into the pipe going to the expansion tank, which is connected with a separate hose to the fitting on the throttle valve block. The second tee is placed on the return line from the stove and is also connected to the expansion tank.
The procedure for replacing an engine cooling radiator is not particularly difficult and, if you have time, can be easily done with your own hands. What you cannot do yourself is to solder the aluminum honeycombs of the unit, and not every service station will undertake this.
tweet
back Selecting covers for Kalina
Next How to adjust the clutch on Kalina yourself
Tags: replacement, radiator, repair
Replacing a heating system radiator
The planned replacement of the stove radiator on the Lada Kalina is carried out as follows.
- Allow the car to cool and drain the antifreeze from the cooling system. To do this, unscrew the plugs of the head radiator and expansion tank. Next, remove the drain plug and allow the liquid to drain into a pre-positioned container.
- Disconnect the transmission rods from the module itself.
- Having moved into the car interior, it is recommended to remove the front seats - this is not necessary, but will increase the ease of repair.
- Next, remove the gearshift lever along with the panel and drive. Also remove the fasteners.
- The next step is to remove the center console trim using a Phillips screwdriver.
- Next comes the removal of the gear lever housing.
- Remove the opened radiator from the pipes and fasteners and remove it from the car.
- Reassembling the unit is performed in reverse order.
Selection of spare parts
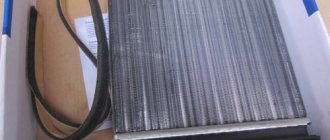
The choice of a stove radiator should be approached carefully, since changing it is quite inconvenient. The majority of motorists choose an original part that is available for sale. But few people know that there are several analogues.
Let's consider the heater radiator options for Kalina, their catalog numbers:
- 1118-8101060 is the article number of the original catalog number of the heater radiator for Kalina. It fits perfectly and does not require any modifications. Average
Replacing the radiator insert on models with air conditioning
Replacing the air conditioner radiator on Lada Kalina
The sequence of actions is as follows
- Remove the car bumper.
- Pour the antifreeze into a container prepared in advance.
- Disconnect the radiator fan terminals.
- Remove the pressure pipes and plug them to prevent dirt from entering.
- Press out the plastic fasteners of the cooling system and remove the air conditioner radiator from the car.
Installation of a new element is carried out in the reverse order.
If it is necessary to install a new element, the plastic line plugs are removed only immediately before installing it on the machine.
Installation of the LADA Kalina 1 stove without air conditioning
Let’s start with the fact that my car has air conditioning, and I really don’t like “collective farm”. Therefore, I searched on the Internet for ways to replace the heater radiator without bleeding the refrigerant or cutting out the heater body, but I never found a complete description.
And guess what? There is an exit! But for this you will have to tinker. I recommend purchasing the “LADA Kalina Repair Manual” or downloading it on the Internet here - link.
We find out in advance what kind of antifreeze is in the car (in mine - Sintec G12, 10 liters - about 1000 rubles). The SOD requires 7.84 liters. We buy a stove radiator (DAAZ, approximately 1000 rubles).
Let's get started. Nothing complicated, you just need to do a few things:
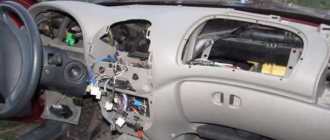
Turn on the ignition - windshield wipers up - turn off the ignition. The wipers stop in the up position.2. We remove the right frill, the casing, take out the cabin filter, unscrew the four screws securing the filter receiving housing.3. Disconnect the wire from the negative terminal of the battery.4. Remove the engine protection (you need a hole).4. Drain the coolant from the heater radiator.5. Drain the coolant from the cooling radiator.6. Unscrew the heater radiator bracket under the hood. People then shorten the pin on this bracket.7. Remove the front seats.8. Remove the lining of the handbrake and the floor tunnel.9. We remove the tidy and the beard.10. Remove the steering column cover.11. Remove the steering column switches. I recommend marking the position of the switches on the steering shaft with a marker before removing them.12. Remove the facings of the front pillars of the body.13. Remove the instrument panel trim.14. Remove the side deflectors.15. Remove the panel (dashboard).16. Remove the gas pedal.17. We remove all the plastic air ducts of the stove.18. We halve the heater fan and dryer housing horizontally. The body of the stove and the dryer are connected with special brackets, in my opinion, 5 pieces on each body. This gives us free movement of the central body of the stove (in the photo). Such difficulties are only due to the air conditioner dehumidifier inside its housing. This prevents the entire panel assembly from moving.
READ Replacing Brake Discs Daewoo Nexia
Unscrew the instrument panel amplifier fasteners (beam) from the sides. 20. Unscrew the steering column fasteners and lower it to the floor. In my case, lowering the steering column to the floor was prevented by the non-disconnecting wire from the signaling system; an assistant had to hold the steering column.21. We move the instrument panel amplifier (beam), twist and turn the central body of the stove.21. We take out the heater radiator.22. We replace the heater radiator and reassemble everything in the reverse order.
Life hack: I glued each self-tapping screw and bolt from plastic parts to the place where it was unscrewed or nearby with masking paper tape. Then he won’t get lost and it will be clear where his rightful place is.
Kalina air heater is considered one of the best in terms of heat performance in the VAZ family, but is far from the most reliable in operation. Problems begin almost at the car dealership, as many motorists say. But most of the problems are completely solvable, and often even without the involvement of car service specialists.
An important step is removing the knot
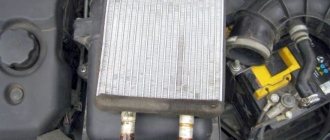
The cooling radiator and related components are unscrewed using the following tools:
To dismantle the radiator, you must first remove the engine cooling fan, having first disconnected the power connector from it. The fan is attached to the radiator with 4 bolts. The bolts are unscrewed with a 10 mm socket wrench, after which the fan is removed through the top.
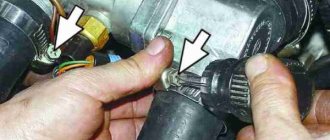
The next step is to remove the rubber pipes from the radiator: upper, lower and coming from the expansion tank. The pipe clamps are loosened using pliers or a screwdriver. Next, use the same key to unscrew the 2 nuts securing the unit. The cooler can now be tilted towards the engine and pulled out.
When working with an air conditioned Kalina, you will have to deal with an additional cooling device attached to the main radiator. To separate them, you need to unscrew 4 bolts with a star key.
When removing the radiator, pay attention to the lower support pads; they can be removed along with the unit or remain in the body holes. It is better to remove the pillows to examine them for functionality. The same applies to rubber-metal bushings installed on the cooler body. If necessary, these parts must also be replaced.
A radiator malfunction can be localized by plugging its large pipes, immersing it in a container of water and supplying air at a pressure of no higher than 1 bar through a small fitting. If there are many places where air breaks through, then the unit is replaced with a new one.
If you have 1-2 small fistulas, try to negotiate a repair at a service station; you should not undertake this yourself. The design of the aluminum radiator is such that careless movements can easily cause even more damage.
The new cooler is installed together with the cushions in place and screwed with nuts. Further assembly is carried out in the reverse order, and attention should be paid to the condition of the rubber pipes and clamps. It might be better to replace them too.
The system is filled with antifreeze until it flows from the small pipe going to the throttle valve.
Carrying out preparatory work
Any repair of the cooling system of a Lada Kalina car is accompanied by its partial or complete emptying. To dismantle the radiator, you will have to drain all the coolant. First you need to place the car on a level surface.
Armed with a 10 mm open-end wrench, you need to remove the metal mudguard installed under the engine. Do not ignore this operation, otherwise, when emptying, some of the antifreeze from the engine cooling system will flow past your container.
The antifreeze is drained after the Kalina engine has cooled, otherwise there is a risk of getting burns to the skin of your hands. Operations are carried out in the following sequence:
- Remove the air filter.
- To get to the drain plug of the cylinder block water jacket, remove the ignition coil, having first disconnected the high-voltage wires from it and the negative terminal from the battery. The coil is unscrewed with a 5 mm hexagon.
- Place a container under the neck, use a spanner wrench (13 mm) to unscrew the plug on the block, and drain the liquid from it.
- Wait until the engine cooling system is completely empty by moving a container under the radiator and unscrewing the drain plug on it. Do not forget to unscrew the cap of the expansion tank.
At the end of the procedure, the drain plug of the power unit can be returned to its place and tightened with a wrench with little force. Then you should use a screwdriver to loosen the clamp and remove the pipe from the air damper heating unit; when filling antifreeze, air will escape through it.